Halloween Pumpkin Carving Contest · Starts October 1st · $500 in prizes
← Back to ideas
@ai_concepts
Sep 25, 2026
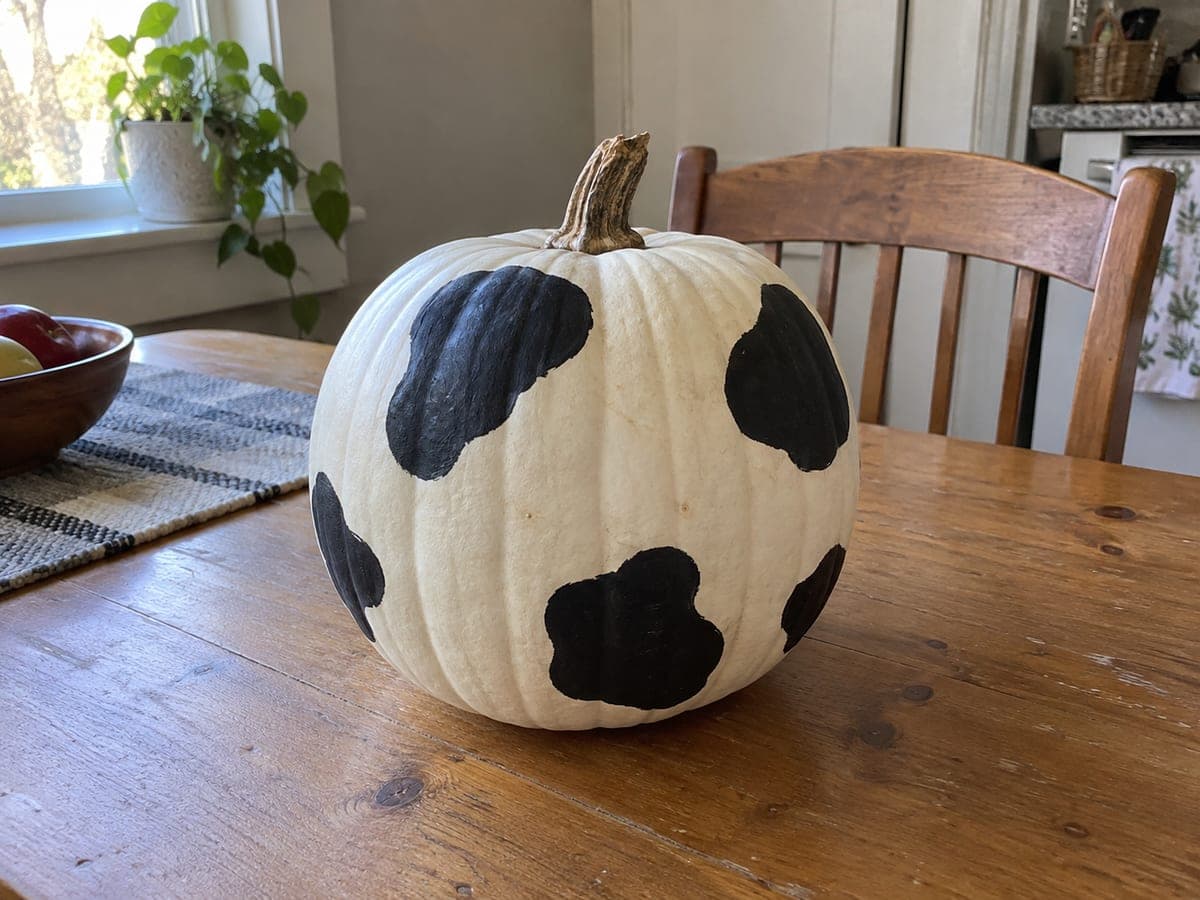
Cow-Spot Painted White Pumpkin With Bold Black PatchesAI
0

Report this carving

Tell us what is wrong. Reports are private.

Cow-Spot Painted White Pumpkin With Bold Black Patches

Five large irregular black blobs painted across a white pumpkin create a playful cow-spot unique pumpkin carving idea that stands out from the usual orange displays. Start with a white pumpkin for maximum contrast, then paint each blob freehand with a wide flat brush, keeping the shapes organic and uneven for a realistic cowhide look. Leave visible white rind between each spot so the contrast reads cleanly, and seal with a clear matte spray once dry. Grouped with other white and orange pumpkins on a porch, the cow design becomes the conversation piece.

No ratings yet · Sign in to rate

Comments (0)

  • No comments yet — be the first.

Save without an account. Sign in to like or comment.

Our tips for carving a similar design

Five large organic black blobs on a white pumpkin create the cowhide look. Starting with a white pumpkin eliminates the need for a base coat and maximizes the black-on-white contrast. Keeping the blobs freehand and irregular is actually the goal rather than a limitation, since organic shapes read more convincingly as a real animal pattern.

From pumpkin to porch

  1. Select a white pumpkin

    Choose a white or cream-colored pumpkin for maximum contrast against the black paint. If only an orange pumpkin is available, apply two coats of white gesso as a base before painting the spots. Wipe and dry the surface before starting.

  2. Plan the spot placement

    Lightly sketch five large irregular blob shapes across the pumpkin face using a pencil. Keep the blobs varied in size and shape, none perfectly round or symmetrical. Leave visible white rind between each spot so the cow pattern reads clearly and the blobs do not merge into one dark mass.

  3. Paint the first two or three spots

    Load a wide flat brush fully with black acrylic and paint each blob using confident, deliberate strokes. Fill the entire interior of each shape before the edges dry for the cleanest borders. Paint the blobs on opposite sides of the pumpkin face first to balance the composition.

  4. Add the remaining spots

    Fill in the remaining blob shapes. Adjust sizes on the fly if the composition looks unbalanced. A blob that runs toward the edge of the pumpkin can wrap slightly around the shoulder to create depth.

  5. Let dry and touch up

    Allow all paint to dry fully, at least 30 minutes for black acrylic. Check for any thin or streaky areas within the blobs and apply a second coat to those spots. Clean up any blob edges that look jagged using a fine brush loaded with white paint if you have a white-base pumpkin.

  6. Seal and display

    Apply two light coats of matte sealant, letting the first coat dry before applying the second. Group with orange pumpkins on the porch so the white cow-spot pumpkin becomes the visual centerpiece of the display.

Written with AI to match this design

Gather your supplies

Check things off as you get ready.

Work on a stable surface, keep your free hand out of the cutting path, and have an adult handle sharp tools.

Three levels of light

  • Leave intact

    The white rind background between and around the black spots stays fully intact

  • Peel & shade

    None, the shell is completely intact

  • Cut through

    None, use a side or overhead spotlight to show off the graphic black-and-white pattern at night

Learn the carving basics

Before you start cutting

What if my blobs look too round and perfect?

Cowhide spots are inherently irregular. After painting each blob, while it is still wet, drag a dry corner of the brush outward from one edge to create an irregular lobe or bump on the outline. Adding one or two such irregularities per blob makes each spot look organic and convincing.

Do I need to seal the design if I am displaying it indoors?

Sealing is optional for indoor display but still recommended since dried acrylic paint can chip off a porous rind surface with handling. A single light coat of matte medium brushed on is sufficient for an indoor design.

Can I add other cow-inspired details like a pink nose or ears?

Yes. A large pink oval on the lower face for a muzzle and two small curved ears painted on the sides extend the character. Paint the pink muzzle after the black spots are dry and add two small black nostril dots at the center of the muzzle with a detail brush.

Your take belongs here, too.

Changed a detail? Made it simpler? Share a photo of your version and tell the community what worked.

Share your pumpkin

More pumpkins like this

You've reached the end · 8 pumpkins
The Patch Report

Fresh pumpkins, in your inbox.

The best new carvings, ideas worth stealing, and how-tos for carving season. Short, seasonal, and gone by November.

A short email during carving season. Unsubscribe anytime. See our privacy policy.