Halloween Pumpkin Carving Contest · Starts October 1st · $500 in prizes
← Back to ideas
@ai_concepts
Sep 25, 2026
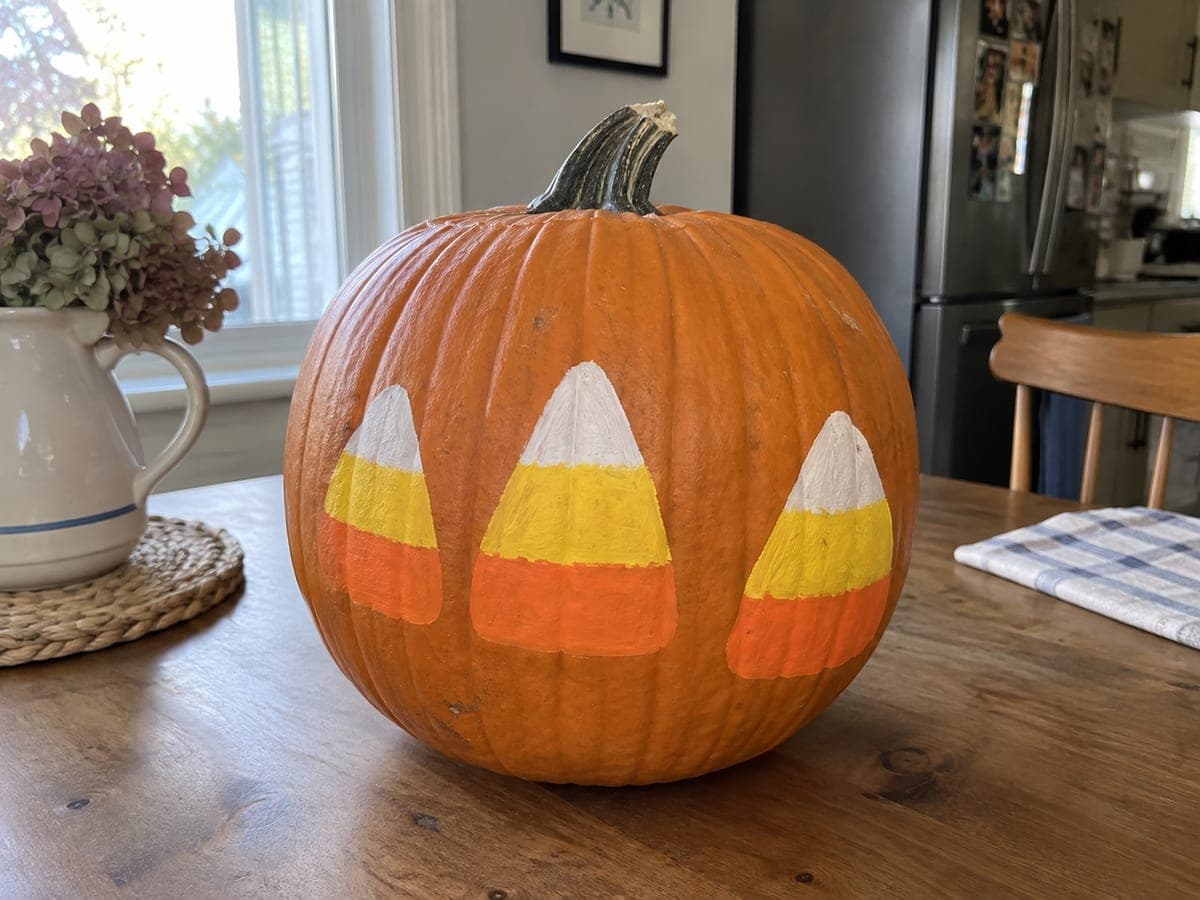
Painted Creative Pumpkin Design With Bold Flat ShapesAI
0

Report this carving

Tell us what is wrong. Reports are private.

Painted Creative Pumpkin Design With Bold Flat Shapes

Broad flat shapes in a limited palette make this creative no-carve pumpkin carving idea achievable for any skill level without touching a carving knife. Load a wide flat brush fully with each color and lay the shapes down in deliberate strokes, working from the largest background shapes to the smaller foreground details so colors do not muddy. Allow each layer to dry before adding the next to keep edges crisp. A single coat of outdoor matte sealer once everything is dry protects the design through the end of October.

No ratings yet · Sign in to rate

Comments (0)

  • No comments yet — be the first.

Save without an account. Sign in to like or comment.

Our tips for carving a similar design

Large flat shapes in two or three colors are applied in layers from background to foreground. Fully loading the brush before each stroke and working from the largest shapes to the smallest keeps colors clean and edges crisp. A matte sealant coat protects the finished design through the end of October.

From pumpkin to porch

  1. Clean and prime if needed

    Wipe the pumpkin clean and dry it thoroughly. If the background color of the design differs strongly from the orange rind, apply one thin coat of gesso or white primer to the area that will be painted and let it dry fully before sketching.

  2. Sketch the shapes

    Use a soft pencil to lightly outline the large background shapes first. Keep lines minimal since they will be covered by paint. Work from the biggest shape to the smallest so that the composition is locked in before detail shapes are positioned.

  3. Paint the largest background shapes

    Load a wide flat brush fully with the background color and fill in the largest shapes using deliberate strokes that all go the same direction. Work quickly while the paint is wet to avoid visible lap marks between strokes.

  4. Add foreground shapes

    Once the background layer is dry, paint the foreground shapes over it. Using a fresh brush and freshly loaded paint for each color prevents muddying. Allow each color layer to dry before adding the next.

  5. Add any small detail shapes

    Use a round detail brush for any small shapes or line details in the design. Keep the limited palette consistent throughout and resist adding more colors than originally planned, since additional colors can make a flat-shape design look busy.

  6. Seal and display

    Once all paint is fully dry, apply two coats of outdoor matte sealant, letting the first dry before applying the second. Display in a well-lit location where the flat bold shapes read clearly from a distance.

Written with AI to match this design

Gather your supplies

Check things off as you get ready.

Work on a stable surface, keep your free hand out of the cutting path, and have an adult handle sharp tools.

Three levels of light

  • Leave intact

    Unpainted rind areas stay as the natural orange background

  • Peel & shade

    None, the shell is completely intact

  • Cut through

    None, position a side or overhead spotlight near the pumpkin for nighttime visibility

Learn the carving basics

Before you start cutting

How do I keep the edges of my flat shapes crisp?

Apply painter tape along the straight edges of any shape that requires a perfectly clean line. For curved edges, paint as close to the pencil outline as possible with a detail brush before flood-filling the shape interior with a wide brush. A second paint coat over any fuzzy edges after drying also sharpens them significantly.

What color combinations work best for a bold flat-shape design?

High-contrast two-color combinations read most powerfully from a distance: black on white, white on orange, or black on yellow. Adding a single accent color for small foreground details, such as red on a black-and-white design, gives depth without sacrificing the bold graphic quality.

Can I use house paint or spray paint instead of acrylic?

Matte latex house paint works well and covers orange rind more easily than most craft acrylics. Spray paint adheres to rind but is harder to control for precise shapes without masking. Gloss finishes of any type tend to look artificial on a pumpkin surface and are best avoided.

Your take belongs here, too.

Changed a detail? Made it simpler? Share a photo of your version and tell the community what worked.

Share your pumpkin

More pumpkins like this

You've reached the end · 8 pumpkins
The Patch Report

Fresh pumpkins, in your inbox.

The best new carvings, ideas worth stealing, and how-tos for carving season. Short, seasonal, and gone by November.

A short email during carving season. Unsubscribe anytime. See our privacy policy.