Similar to This
View all stencils →About this stencil
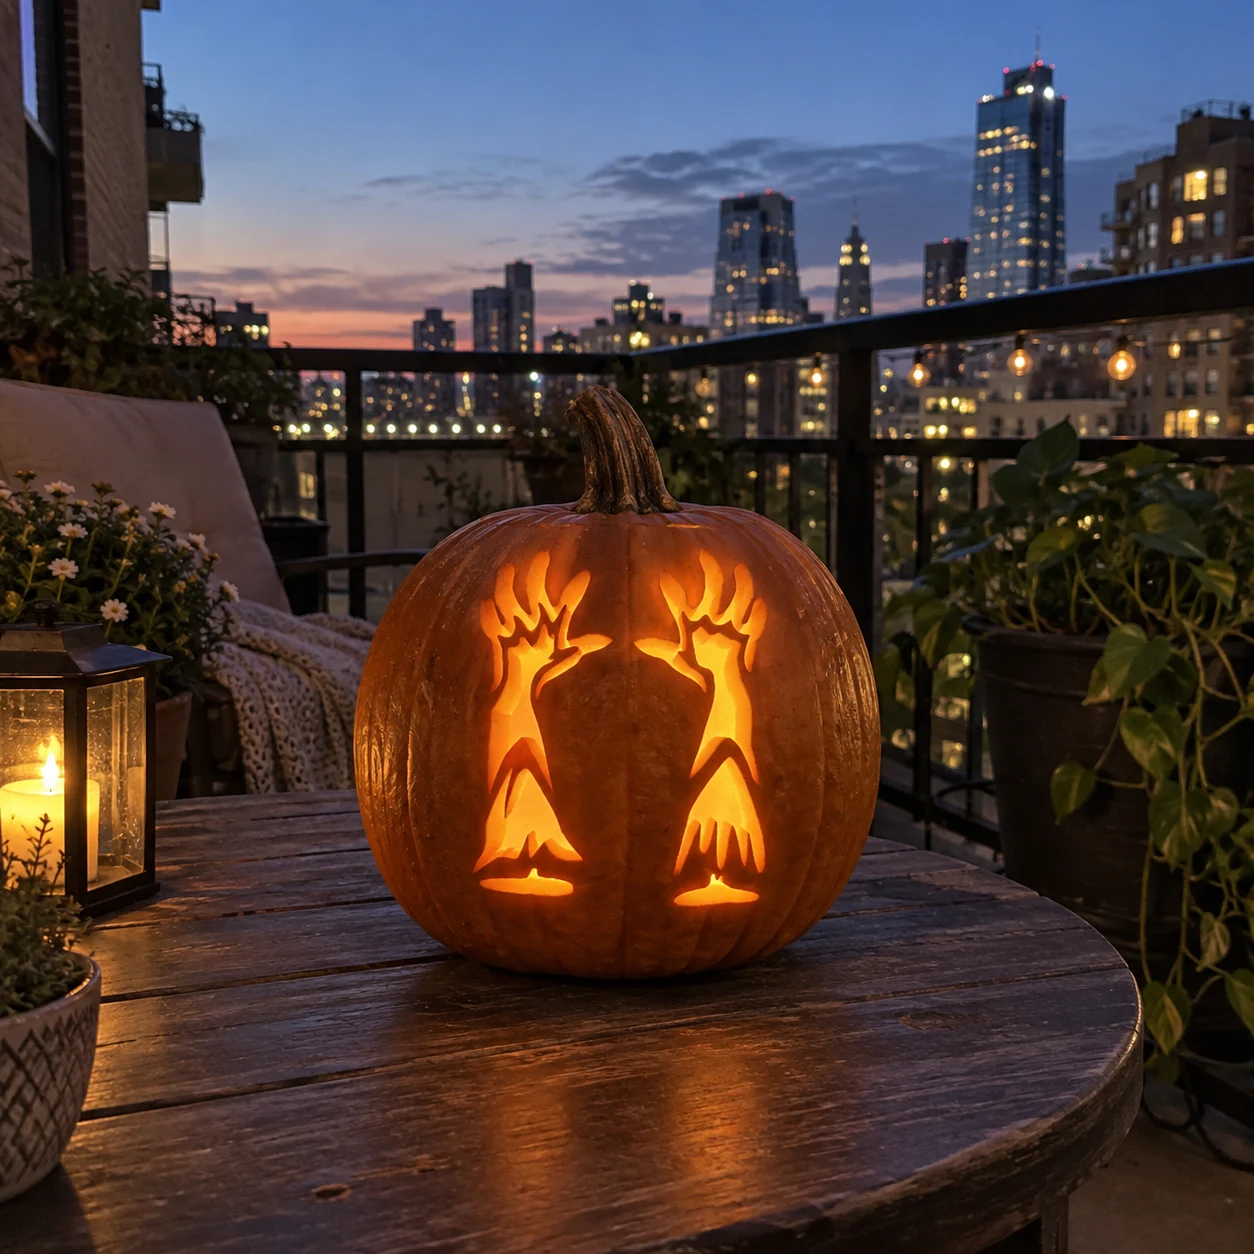
Two zombie arms thrust upward side by side on this zombie pumpkin stencil, each one emerging from a ragged torn sleeve at the base, with elongated bony fingers splayed wide and dripping flesh hanging from the wrists. The arms are the solid orange wall while the space around them is pierced away, so the pair of grasping hands glows against a dark background. The skinny finger tips are the most vulnerable pieces, so keep a finger pressed gently on each tip from the outside as you cut around it to prevent the thin point from breaking off. This design is rated Advanced and takes most carvers around 150 minutes from trace to glow. Multi-layer cuts with skin-peel shading. Plan your cuts first.
Pumpkin size guide
- 🎃 Small (5–7") — print at 80%
- 🎃 Medium (7–10") — print at 100% (recommended)
- 🎃 Large (11–13") — print at 130%
- 🎃 Giant (14"+) — print at 150% on tabloid paper
Frequently asked questions
Can I resize this stencil?▾
Yes. The PDF is vector so it scales cleanly. Print at 100% for a 7–10 inch pumpkin, 130% for 11–13 inch, or 150% for a giant. Use your printer's "Fit to page" or "Custom scale" setting.
What kind of paper works best?▾
Standard 20 lb letter or A4 printer paper is fine. Heavier paper is harder to bend around the pumpkin curve. If your printer supports it, set the quality to 'best' so the lines are crisp.
How long will the carved pumpkin last?▾
Usually 5–10 days. Coat all cut surfaces with petroleum jelly and store the pumpkin somewhere cool overnight. Avoid direct sun. Battery tea lights produce no heat and double the lifespan.
Can I sell pumpkins carved with this stencil?▾
Yes, the carved pumpkin you make is yours. The license covers personal and small-scale commercial carving (selling carved pumpkins, photographing them, posting on social). You may not resell the PDF file itself.
What if my printer doesn't print the whole stencil?▾
Set 'Page scaling' to 'Fit' in the print dialog and uncheck 'Auto-rotate'. If it still cuts off, the design includes 0.25" of safe-area margin so a small crop won't ruin it.
How to carve this stencil
- 1Print it
Download the PDF and print at 100% scale on letter or A4 paper.
- 2Prep the pumpkin
Cut the lid at an angle, scoop the guts, thin the wall to ~1 inch.
- 3Tape it on
Snip darts in the paper so it lies flat against the curve.
- 4Transfer the design
Poke along every line — about one dot every 1/8 inch.
- 5Carve it
Connect the dots with short straight cuts. Center first, work outward.
- 6Light it up
Drop in a battery tea light and you're done.
Tools you'll need
For a advanced carve like this you'll want a linoleum cutter set, x-acto knife, peel tool, and pin transfer wheel. Here's the kit we reach for — start with whatever you already own.

Elmchee Pumpkin Carving Kit
13-piece kit with carrying case
Saws for the larger cutouts, plus a scoop for hollowing. Covers both jobs in one kit.
View on Amazon ↗
Speedball 4131 Lino Cutter Set
Handle + 5 interchangeable cutters
Interchangeable cutters for peeling and shading the face. Useful for the finer details.
View on Amazon ↗
Homemory LED Tea Lights
24-pack of battery-operated lights
Battery-operated, flickering lights for a candle-like glow inside your finished pumpkin.
View on Amazon ↗
Community Pumpkin Carving Ideas
Carving ideas that use stencils like this one.
Related stencils
Carvers who liked this one also downloaded these.
- Advanced
Rising Zombies Pumpkin Stencil
Two zombie figures rising from the ground face inward in this hard pumpkin stencil, their ragged arms reaching upward and their tattered lower bodies emerging from earth at the base of a tall oval negative space. The zombies read as solid orange silhouettes flanking a large central open oval, so the lit jack-o-lantern glows through that oval while the outstretched zombie arms and rotting fingers stand out in relief. Carve the finger details at the top of each arm before cutting the large central oval, as the fingers are the most fragile elements and benefit from the extra pumpkin mass still in place.
- Expert / Pro
Zombies Pumpkin Stencil
The word "ZOMBIES" in dripping, horror-font letters anchors this stencil, with a row of grasping undead arms and hands rising above the text from a pool of slime below. All the negative space around the letters and arms is cut away, leaving the drip shapes and reaching fingers glowing against the pumpkin flesh. The thin drip strands between letters are the most fragile part of this carving, so cut each letter interior first and leave the connecting drips until the very end.
- Beginner-friendly
Zombie Hand Pumpkin Stencil
A zombie hand clawing upward from the ground is the subject of this beginner zombie pumpkin stencil. The fingers are spread wide and elongated, separated by narrow solid bridges of pumpkin that keep each digit distinct when lit. A ragged cuff at the wrist and a puddle-like base anchor the composition at the bottom. The carved areas glow dramatically against the uncut pumpkin surface, suggesting a corpse emerging from the earth. Leave the slender bridges between the fingers for last so the hand shape stays supported while you remove the larger flanking areas.
- Expert / Pro
Zombie with Skull Pumpkin Stencil
A tall zombie figure stands upright inside a large oval frame in this expert-level pumpkin stencil, one arm raised and holding a dripping severed skull. The body is rendered as a jagged silhouette of tattered flesh and clawed feet set against the solid oval background, while the skull dangling from the raised hand adds a second, smaller focal point within the composition. Because the zombie's body is a narrow silhouette surrounded by the large pierced oval, cut the oval background first and leave the figure's connection points at the base until last to keep the thin leg and claw details from breaking free prematurely.
- Expert / Pro
Zombie with Chainsaw Pumpkin Stencil
A ragged zombie grips a chain-saw overhead while bursting through a set of vertical window bars on this expert zombie pumpkin stencil, its tattered body and grimacing face rendered in a detailed silhouette-plus-bridge style. The three vertical bar strips are the primary structural elements holding the upper and lower halves of the design together; do not cut them. Work from the outer edges of the figure inward, and carve the zombie's small face detail islands before removing the large surrounding body void.
- Advanced
Zombie Arm Pumpkin Stencil
A single decayed zombie arm reaches upward from the ground in this pumpkin stencil, the skeletal hand and bony fingers clawing into empty space while the forearm and sleeve taper to a ragged ground line at the base. The design is mostly one large connected negative-space cut with thin solid bridges defining the sleeve folds and individual finger bones. Cut the individual finger separations before releasing the large arm opening so the fingertips stay supported until the end.