Pumpkin carving templates
572 free printable stencils. Download, print, trace, carve.
254 results · Page 3 of 8
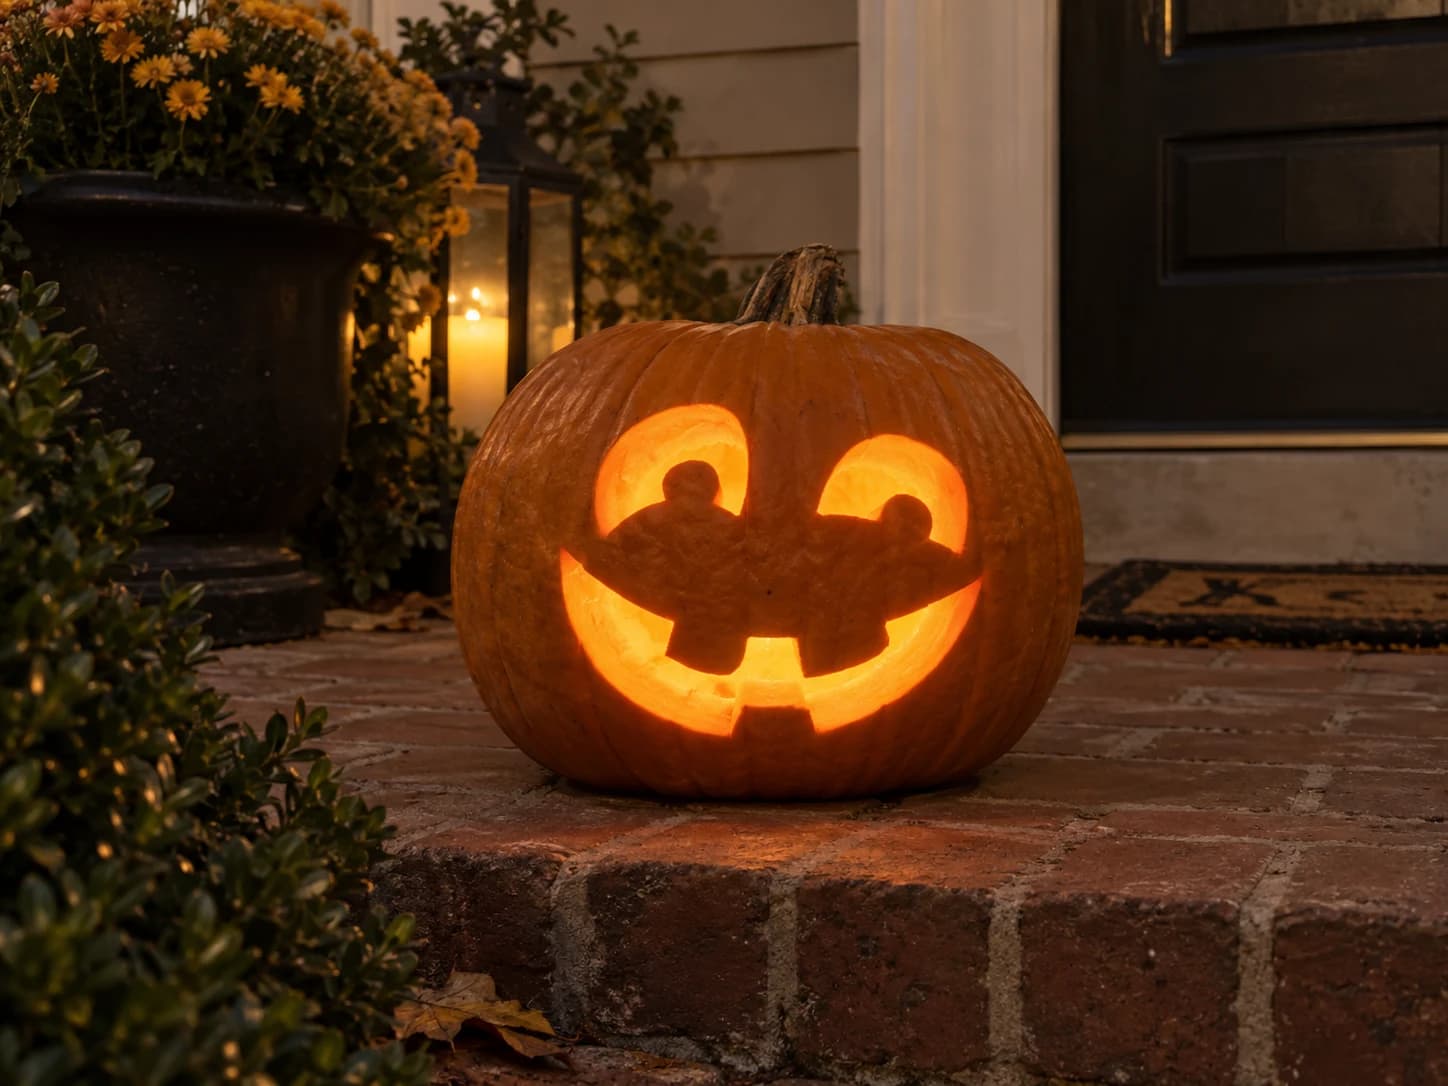
Friendly Jack-o-Lantern Pumpkin Stencil
Two rounded horseshoe-arch eyes, each with a small bump notched from the bottom to suggest eyebrows, and a broad curved mouth split by two square bottom teeth define this easy pumpkin stencil. The asymmetry between the left eye (fuller arch) and the right eye (slightly smaller, offset notch) gives the face a winking or quizzical personality. All cut-outs are generous and smooth, making this a good pumpkin stencil for carvers who want a friendly face without tiny fiddly pieces. Leave the two small inner-eye notches for last so the arch stays rigid while you cut the mouth.
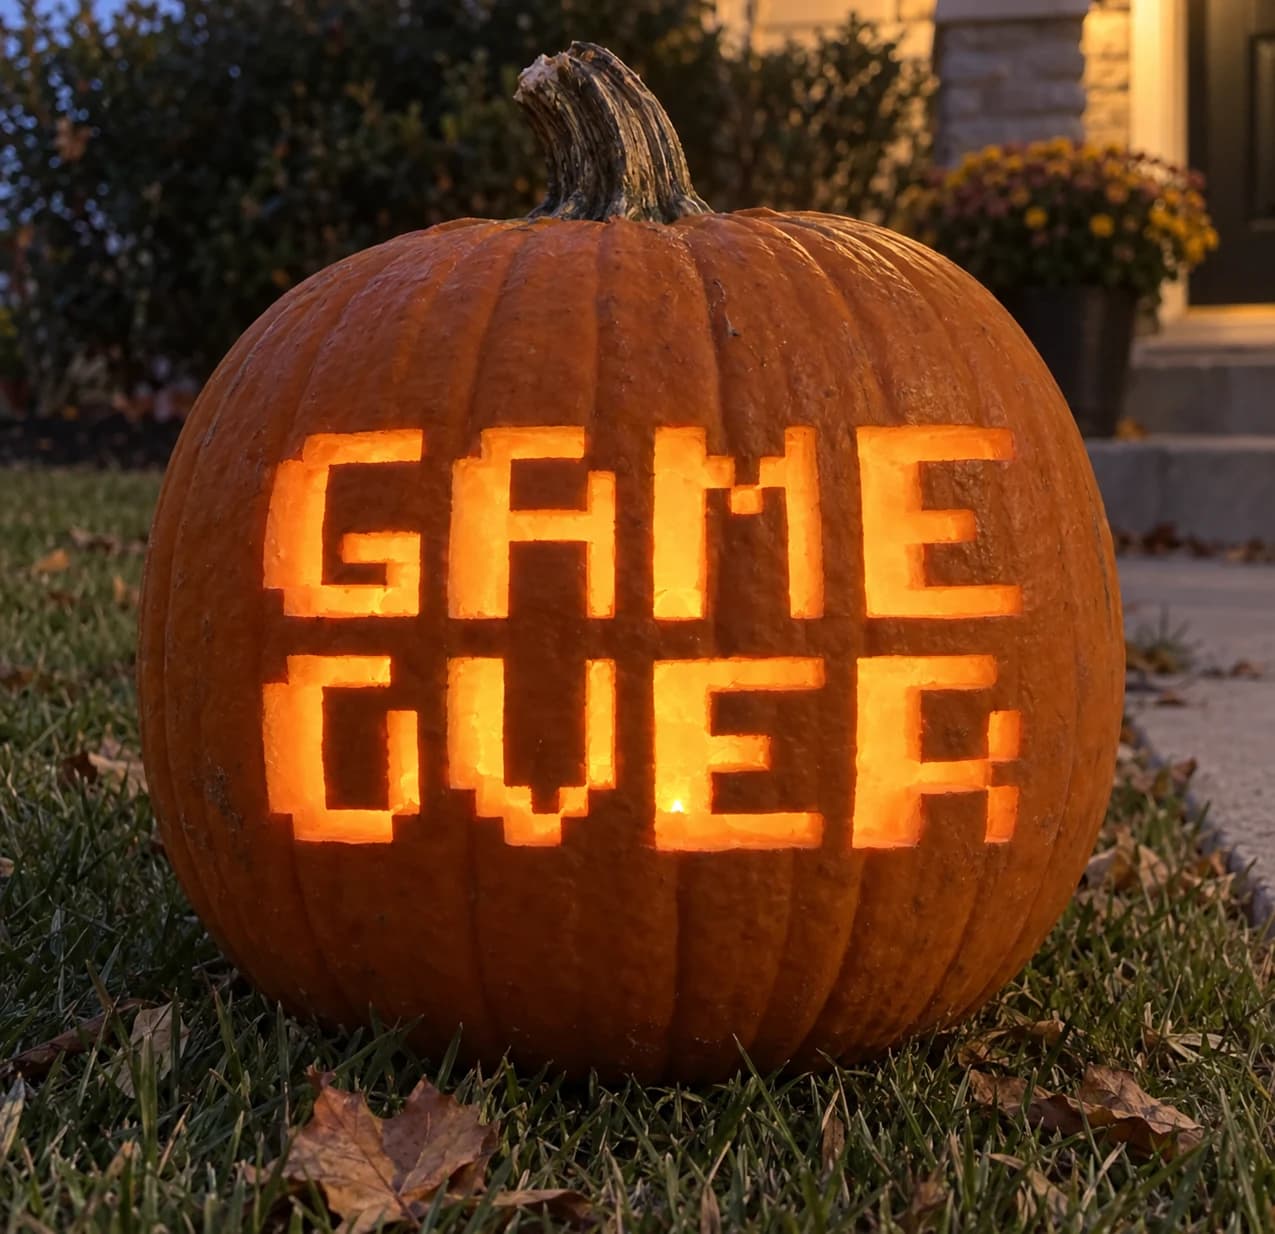
Game Over Pumpkin Stencil
"GAME OVER" fills this easy pumpkin stencil in two stacked rows of chunky 8-bit pixel font lettering, each character built from squared-off rectangular blocks with notched corners that read unmistakably as retro video game text. Every letter interior is cut through, and the negative space between characters is narrow but distinct. The squared notches at the corners of each letter are the trickiest spots to keep clean; use the tip of a narrow blade to score those inside corners before opening the main letter body.
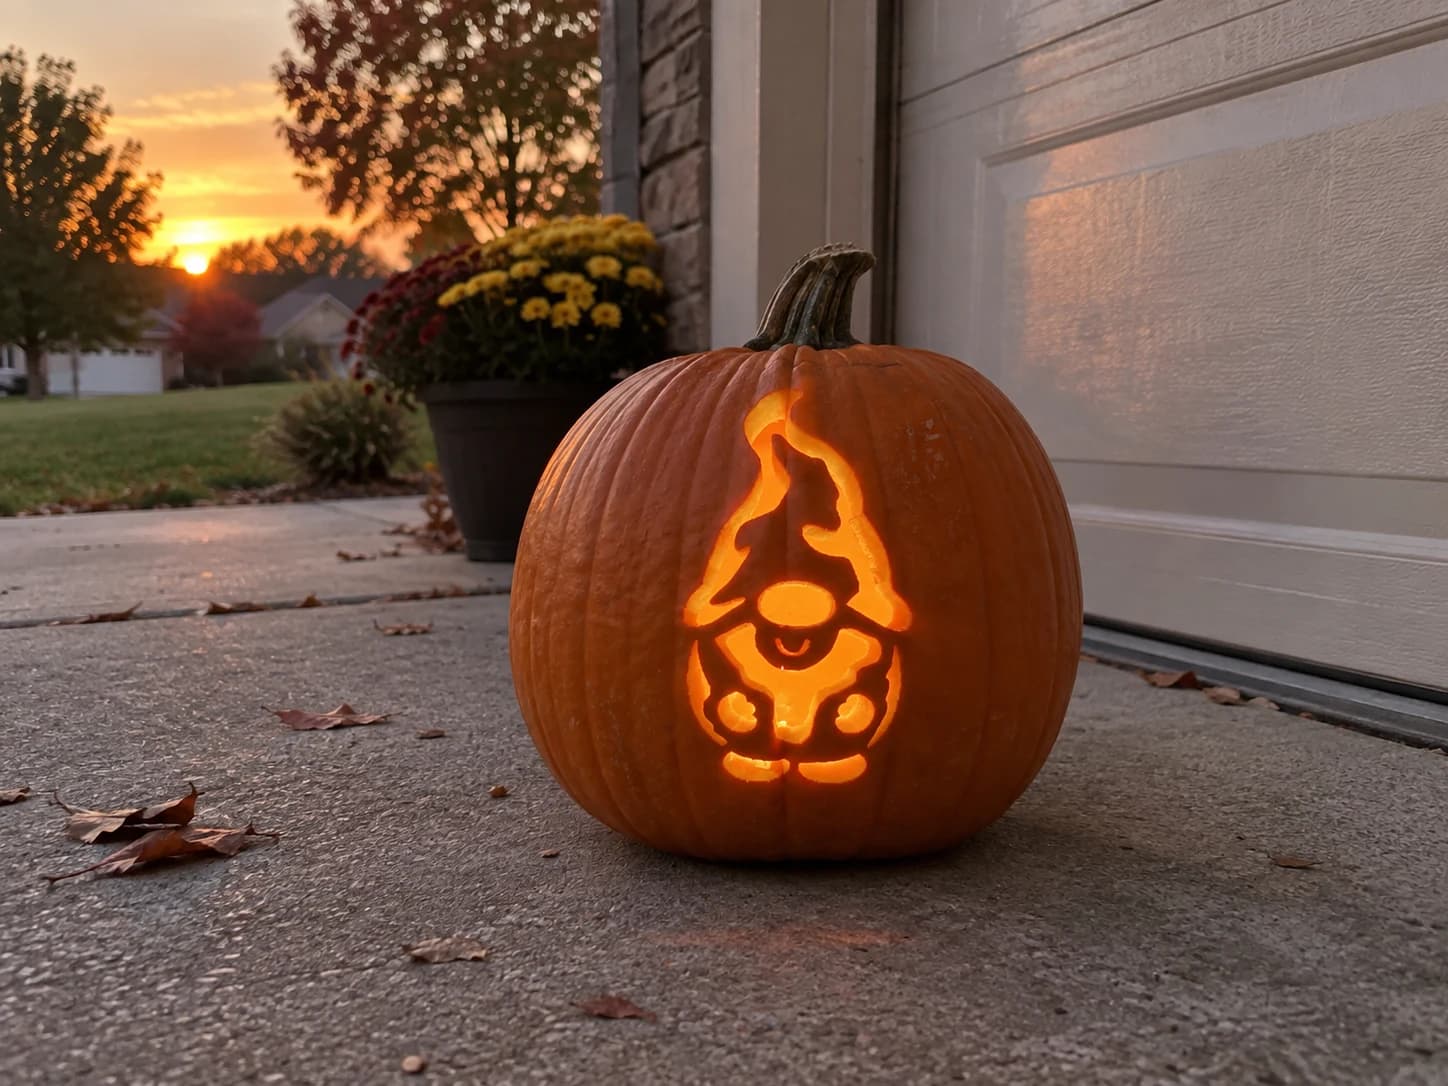
Garden Gnome Pumpkin Stencil
A garden gnome with a tall floppy pointed hat, round rosy cheeks, and a tiny curved smile stands front-facing in this easy pumpkin stencil. The hat brim curls at its tip, the face is framed by a bushy beard rendered as rounded overlapping lobes, and small feet peek out at the base. Cut-through openings define the hat interior, the beard lobes, and the body, while the face circle, hat brim, and outer silhouette stay solid. The small smile curve and cheek details are the most delicate pieces, cut them before opening the large beard sections below.
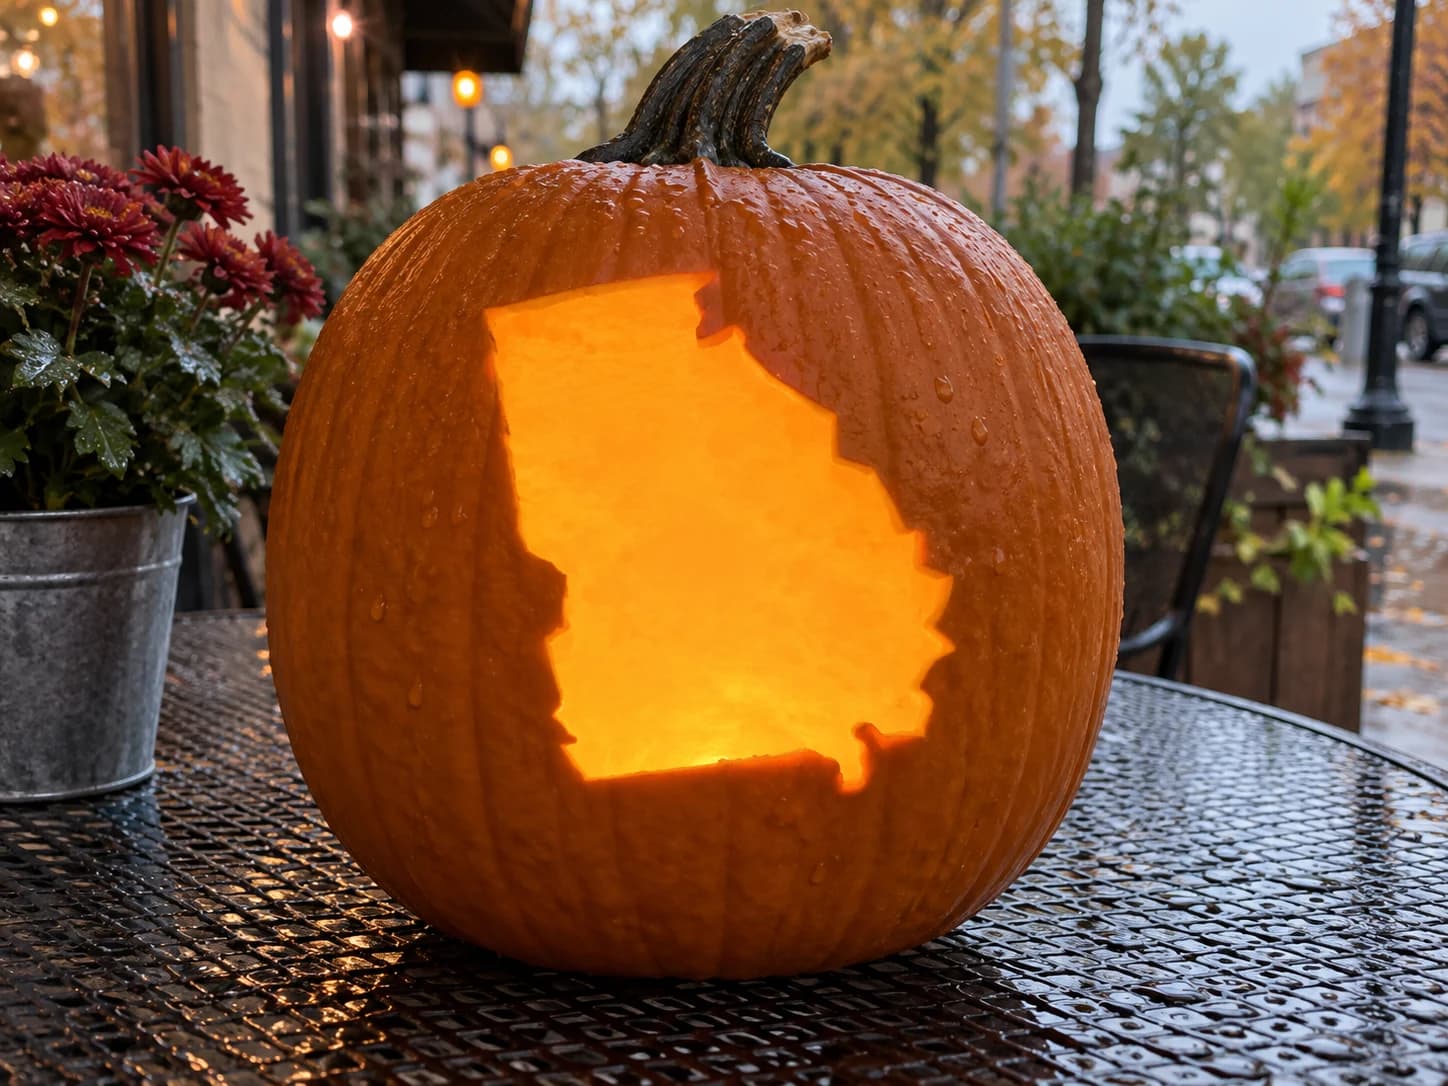
Georgia Pumpkin Stencil
The outline silhouette of the state of Georgia fills this easy pumpkin stencil as a single solid cut-through shape, with its distinctive roughly rectangular form, slightly notched upper-left corner, and irregular eastern and southern coastline edges. When carved, the entire state shape is removed as one piece, leaving a glowing Georgia silhouette in the jack-o-lantern. Score the outer border slowly and follow the subtle coastal indentations closely on the right side to keep the shape recognizable, especially the small southeastern projection at the bottom.
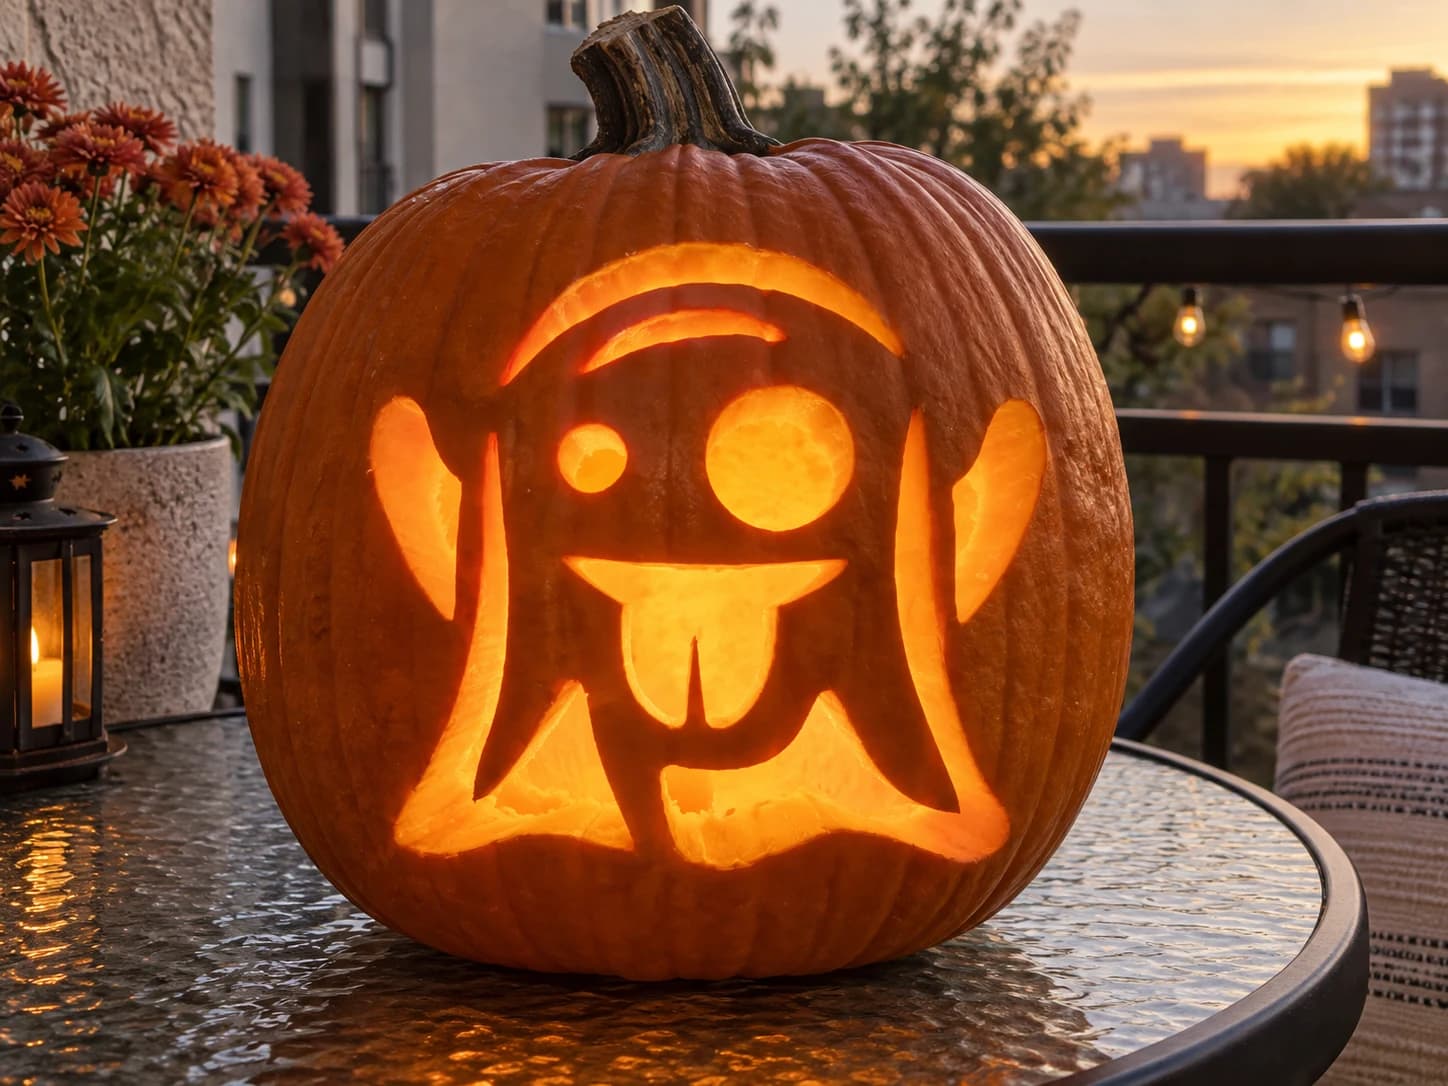
Ghost Emoji Pumpkin Stencil
The ghost emoji comes to life in this beginner pumpkin stencil: a wide-eyed ghost body with one large circular eye and one smaller dot eye, a gap-toothed open mouth with a dangling tongue, two draping arms with pointed tips on each side, and a looping curved tail below. A raised brow arc sits above the eyes. The ghost body outline remains solid while the eyes, brow, mouth, tongue, and tail gaps are cut through. Cut the small eye dot and brow arc first, then the tooth gaps in the mouth before opening the larger arm-side cutouts.
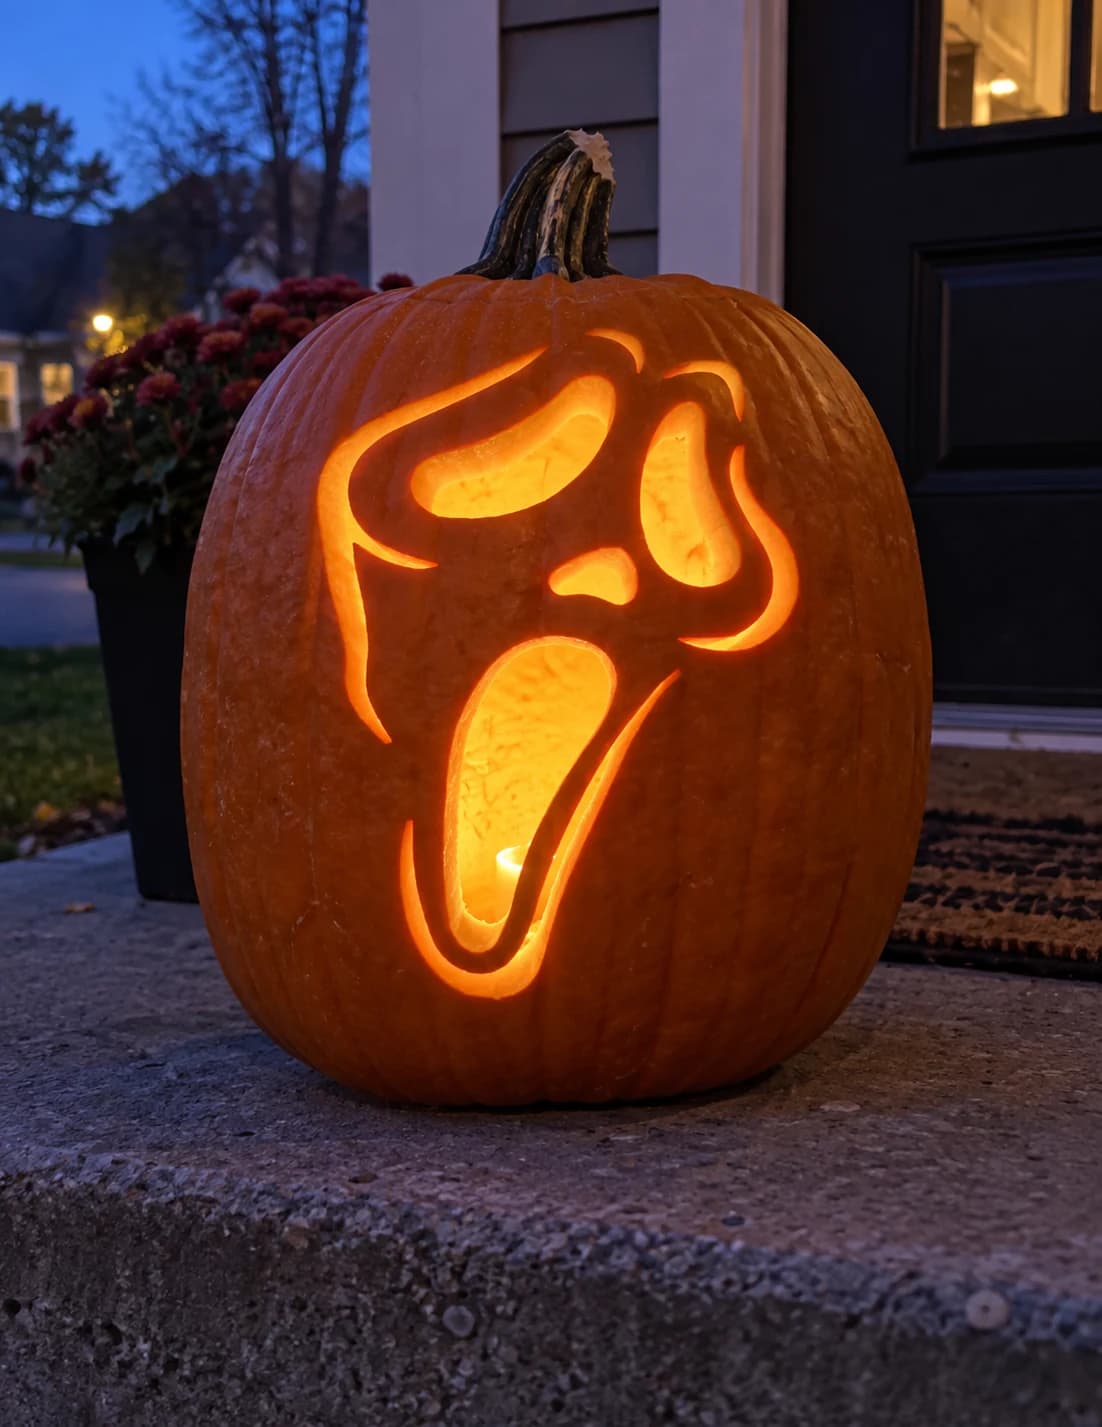
Ghost Mask Pumpkin Stencil
A ghost-faced horror-movie mask is the subject of this easy pumpkin stencil: an elongated oval skull shape with two large teardrop eye cutouts, a small oval nose hole, and a wide gaping mouth that tapers to a pointed chin. Flowing tendrils extend from the lower sides of the mask. The three facial openings glow as three distinct shapes, and the flowing lower extensions give the mask a draping, spectral quality when lit. Cut the narrow nose piece first since it sits between the two large eye openings and is the most vulnerable to tearing.
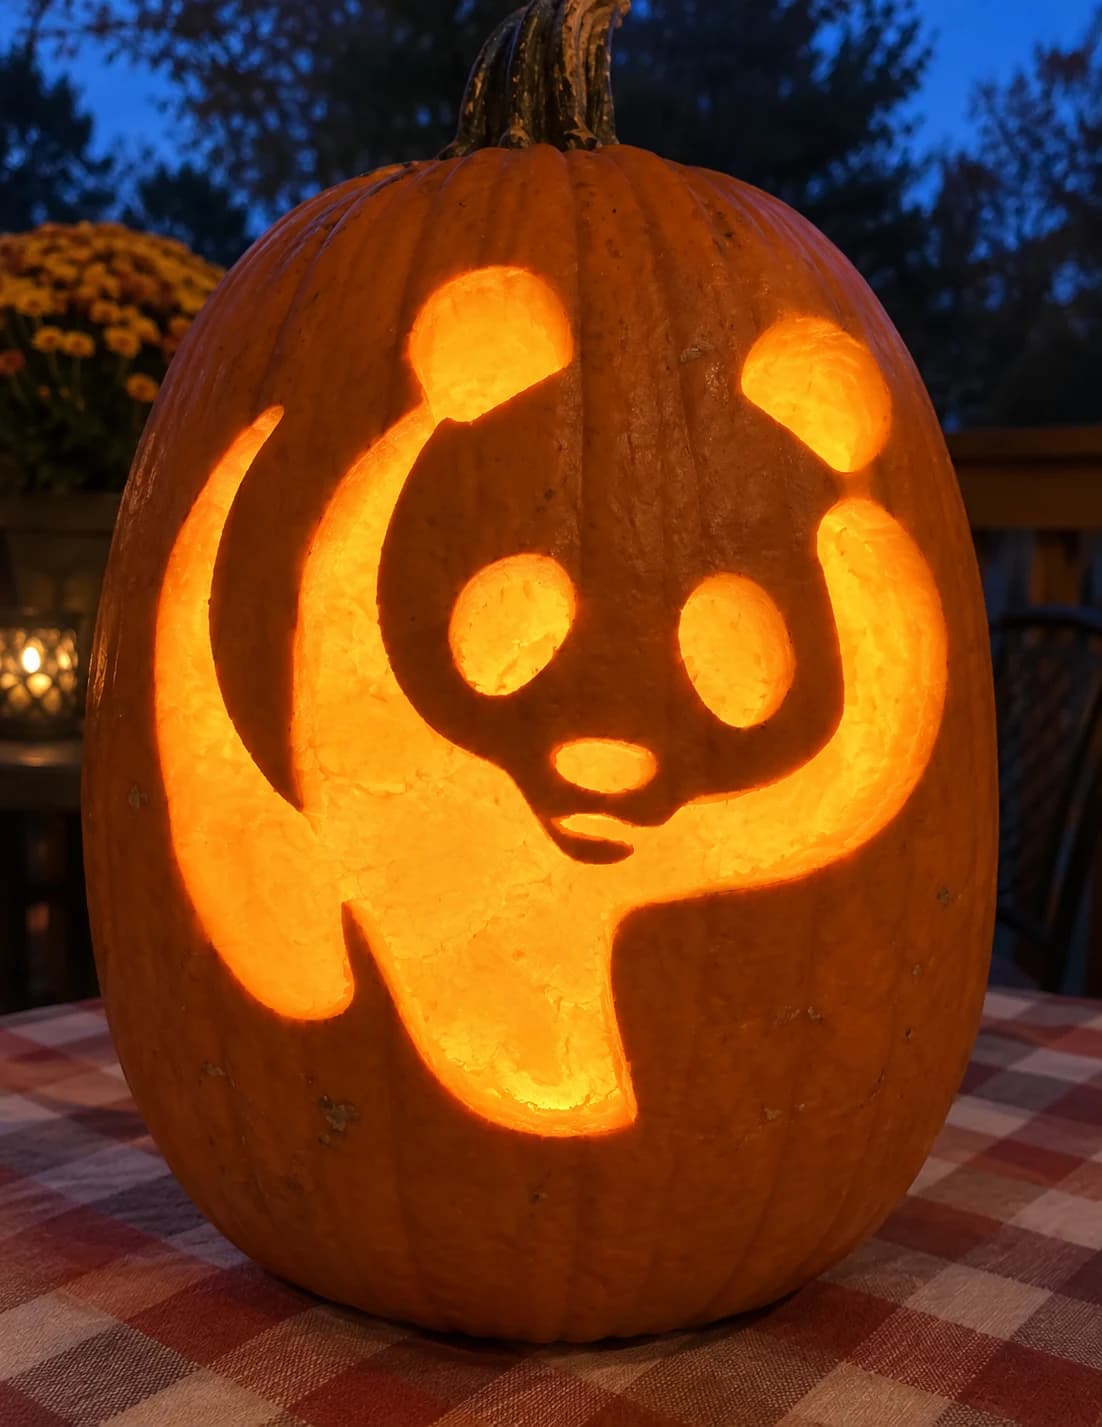
Giant Panda Pumpkin Stencil
A giant panda sits upright in this easy pumpkin stencil, its chunky arms raised wide, rounded ears perched on top, and oval eye patches, a small nose, and a belly spot forming the face and body markings. The large body shape, the eye patches, and the surrounding negative space are cut through in layers, while the connecting bridges between ears and head and between arms and body stay solid. Carve the smaller eye patch ovals before the large outer body cut to avoid the face area shifting while you work the perimeter.
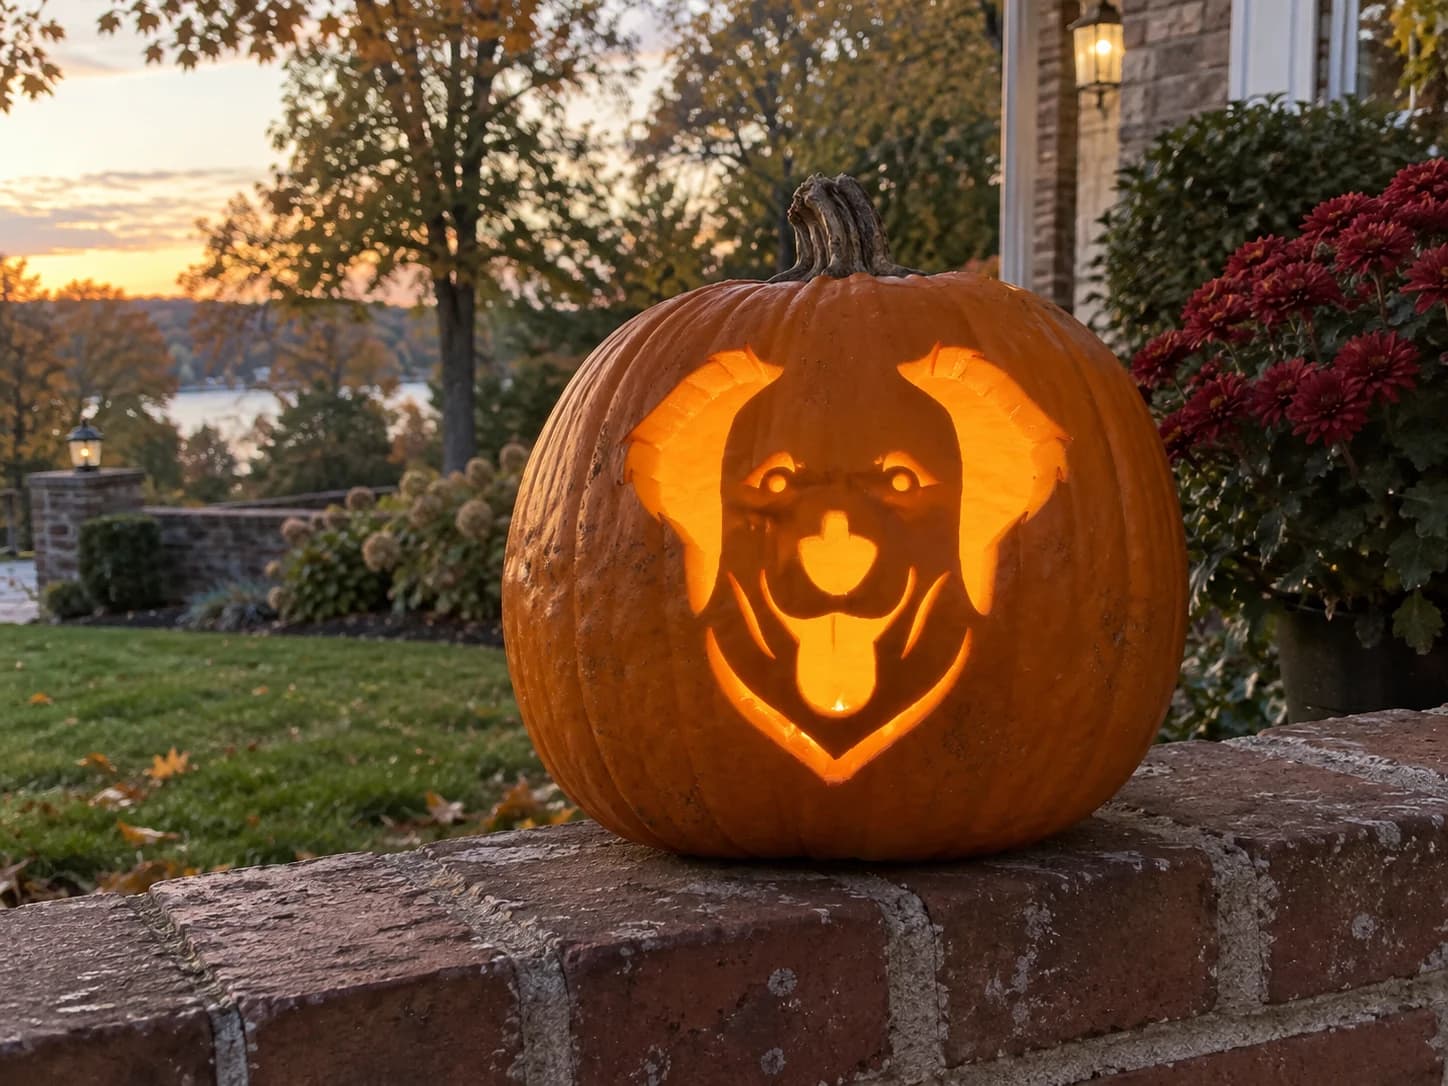
Golden Retriever Pumpkin Stencil
A golden retriever's face looks straight out from this easy pumpkin stencil: wide floppy ears, a broad forehead, round eyes with small arched brows above them, a large nose, and a happy open mouth with tongue showing are all carved as pierce-throughs. The ears are the largest cut areas and frame the face with an even glow. When the pumpkin is lit, the dog's expression reads as warm and friendly. Carve the small eyebrow arches before removing the large ear sections, since the brows are thin and easy to lose once the nearby wall flexes.
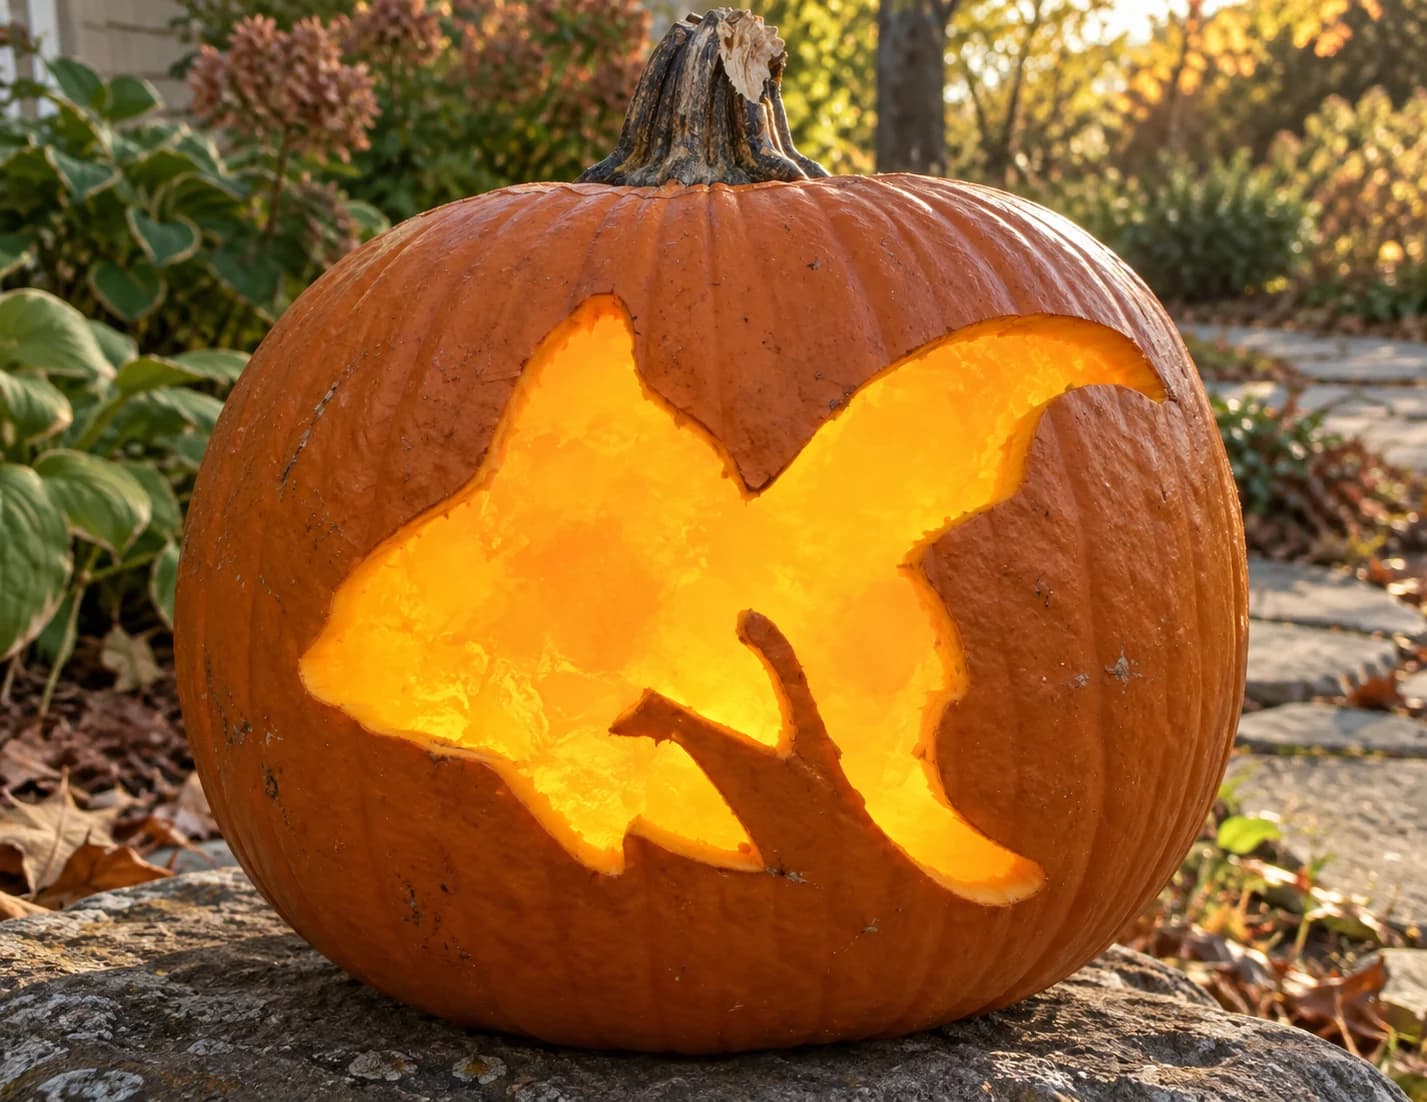
Goldfish Pumpkin Stencil
A plump goldfish shown in profile swims to the right: a rounded body, a large flowing tail fin swept back dramatically, a smaller dorsal fin on top, and a single pectoral fin near the belly. A small negative-space teardrop inside the body suggests the gill line. The whole fish is a single connected cut-out, so the lit pumpkin casts one glowing fish silhouette against the dark wall. Keep the narrow pectoral fin intact as long as possible and cut it free only after the main body is removed.
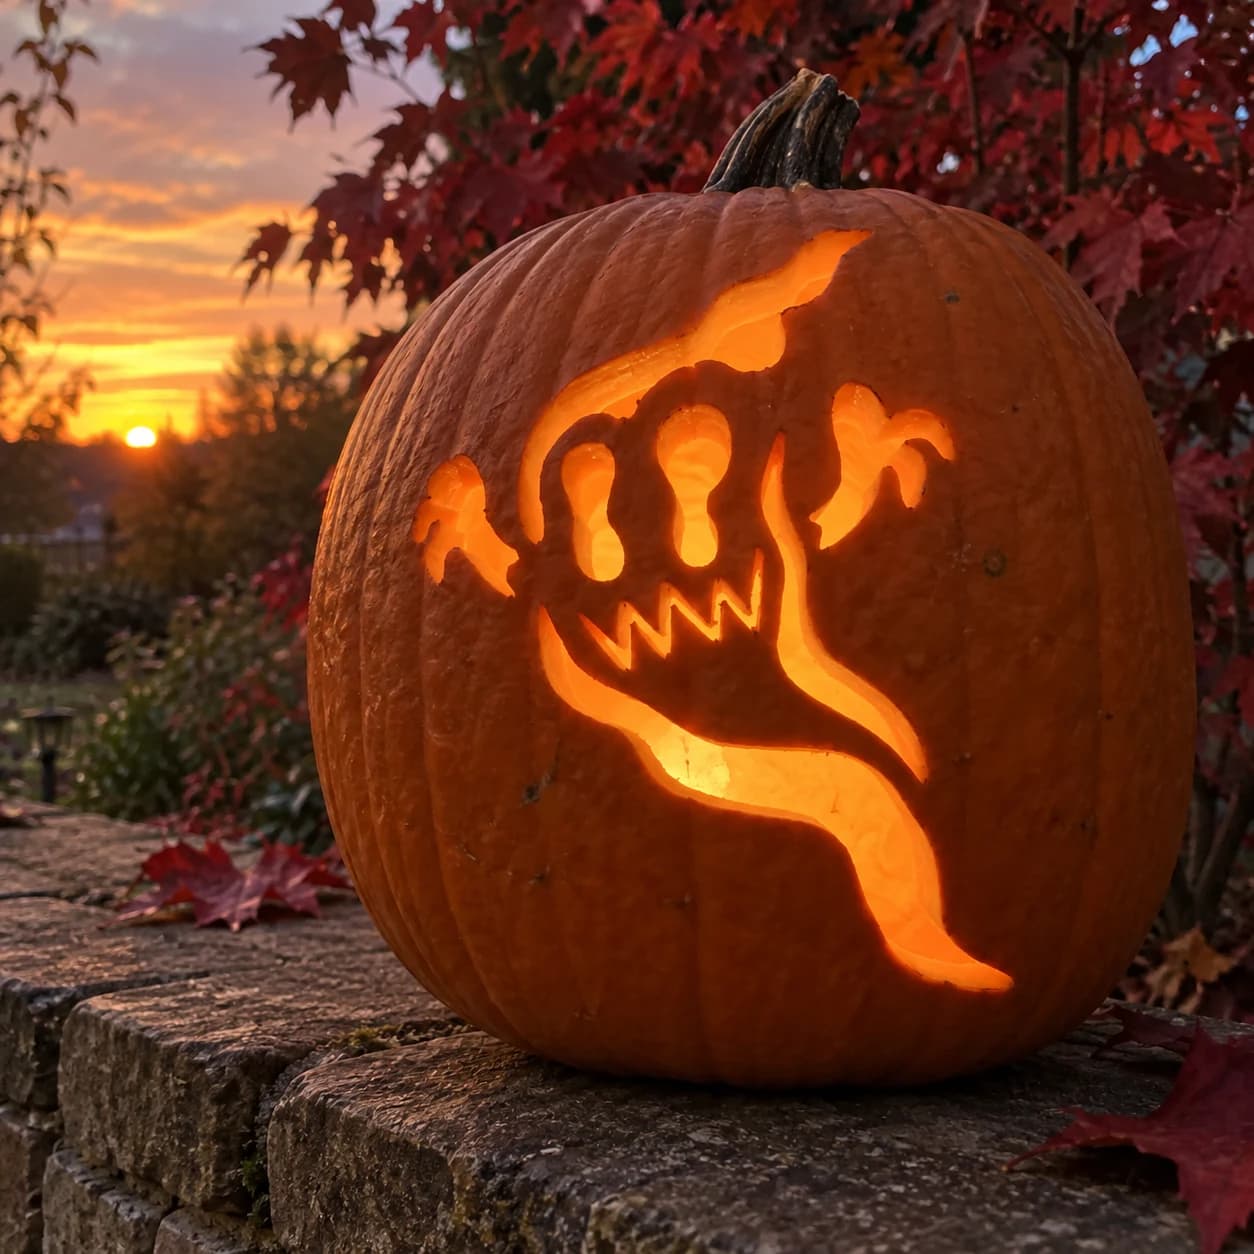
Grinning Ghost Pumpkin Stencil
A cartoonish ghost with a jagged, wide-open grin full of pointed teeth flies across this easy pumpkin stencil. Wild claw-like hands reach out from the sides, and a wisp of tail curls below. The ghost body and the negative spaces inside the grin are both cut through, while the pointed teeth are left as solid pumpkin wall. When lit, the teeth appear as dark orange spikes floating in the glowing mouth. Carve the jagged mouth points with slow, deliberate strokes rather than trying to follow the zigzag in one continuous cut.
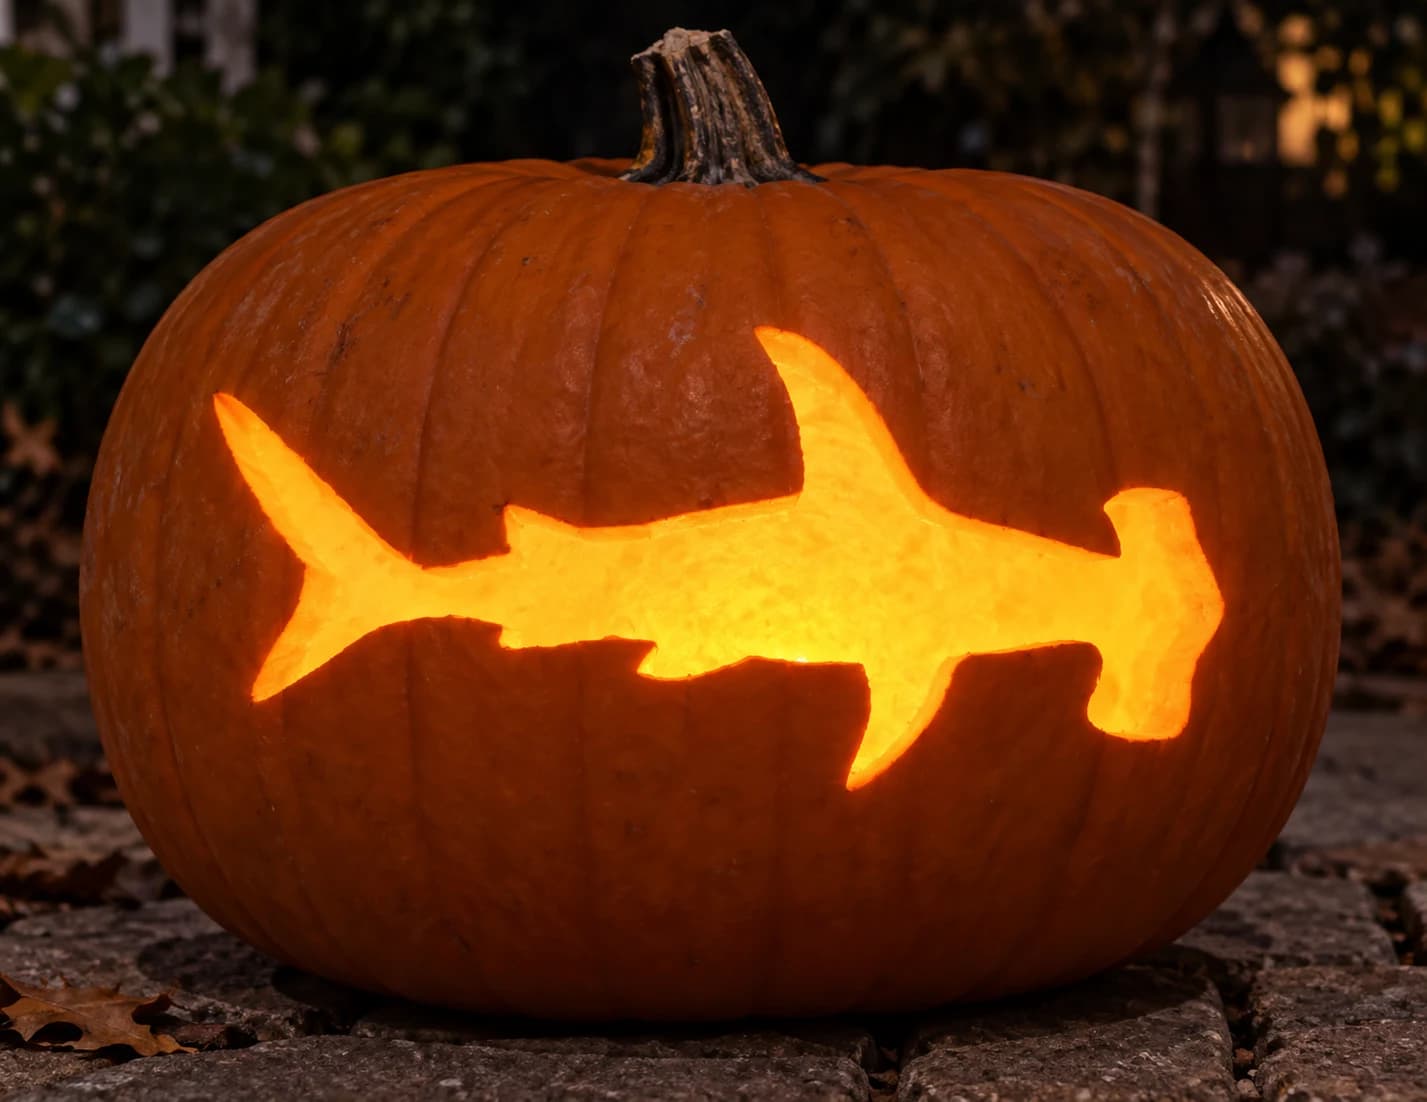
Hammerhead Shark Pumpkin Stencil
A hammerhead shark cruises horizontally across this pumpkin stencil, its body a wide flat silhouette with a tall dorsal fin, swept pectoral fins, and the distinctive wide rectangular head that gives the species its name. The entire shark body is one single large open cut-out, so the finished jack-o-lantern glows with a full bright shark shape against the dark pumpkin skin. Position the stencil so the shark's tail end and dorsal fin tip stay at least one inch from the pumpkin's edge, which keeps enough wall intact to stop the broad head from drooping under its own weight.
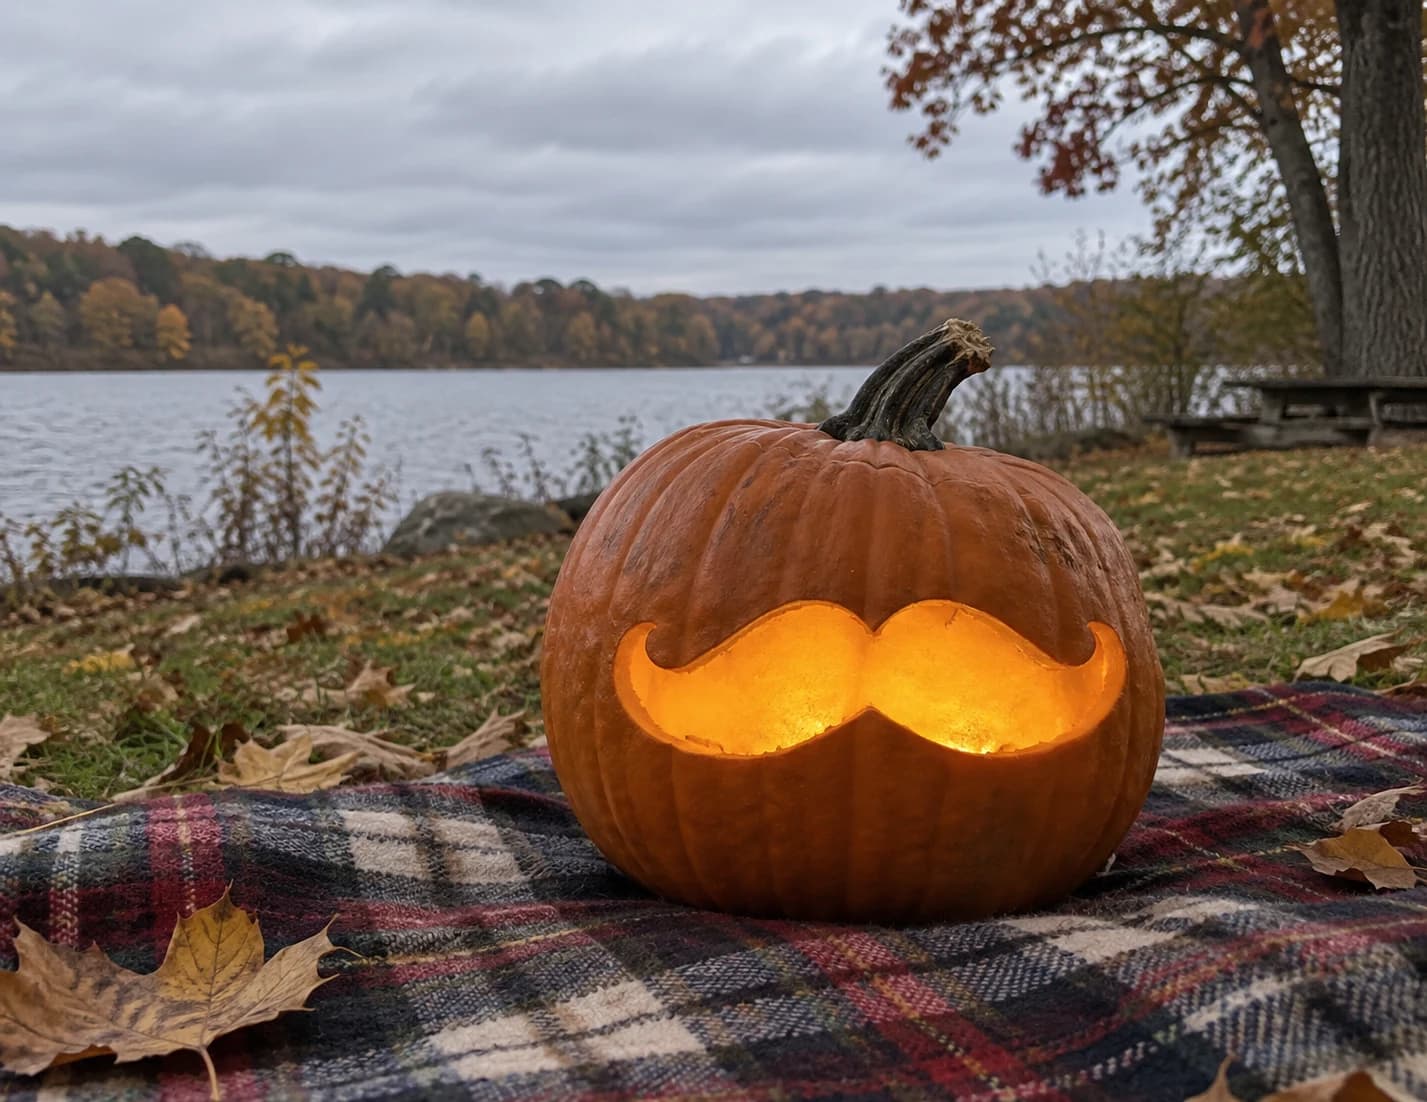
Handlebar Mustache Pumpkin Stencil
A wide, curling handlebar mustache is the sole design element of this introductory pumpkin stencil, carved as a single large open shape that sweeps across the pumpkin face. The ends curl upward and outward in tight spirals, while the center dips in a gentle U. The entire mustache is pierced through as one connected opening, so the glow reads as a bold, immediately legible silhouette. Because the cut is one continuous piece, score the center dip first and work outward toward each curled tip to keep the shape from shifting as material is removed.
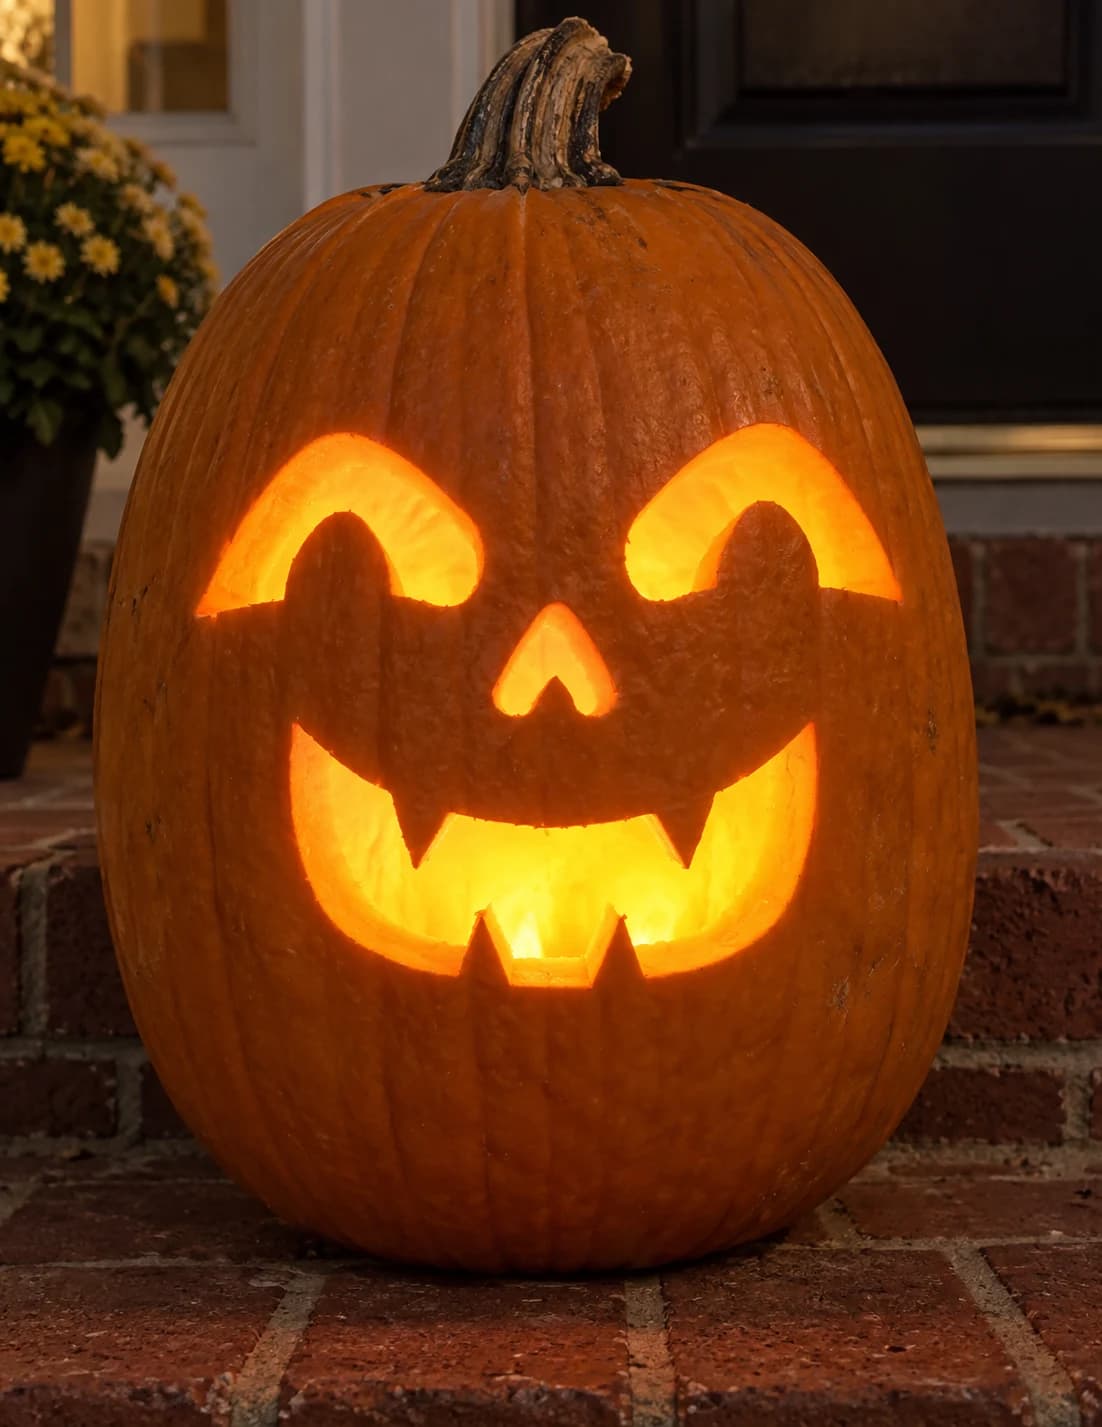
Happy Vampire Pumpkin Stencil
A cheerful jack-o-lantern face with vampire character fills this beginner-friendly pumpkin stencil: two large arching eye openings each cradle a small solid half-moon pupil, a small heart-shaped nose cutout sits in the center, and a wide grinning mouth shows two prominent pointed fangs flanked by rows of square teeth. Each feature is a distinct pierced-through shape separated by solid pumpkin bridges. Start with the heart-shaped nose and the small pupil islands inside each eye before opening the bigger eye arches, so those internal solid pieces stay anchored while you work.
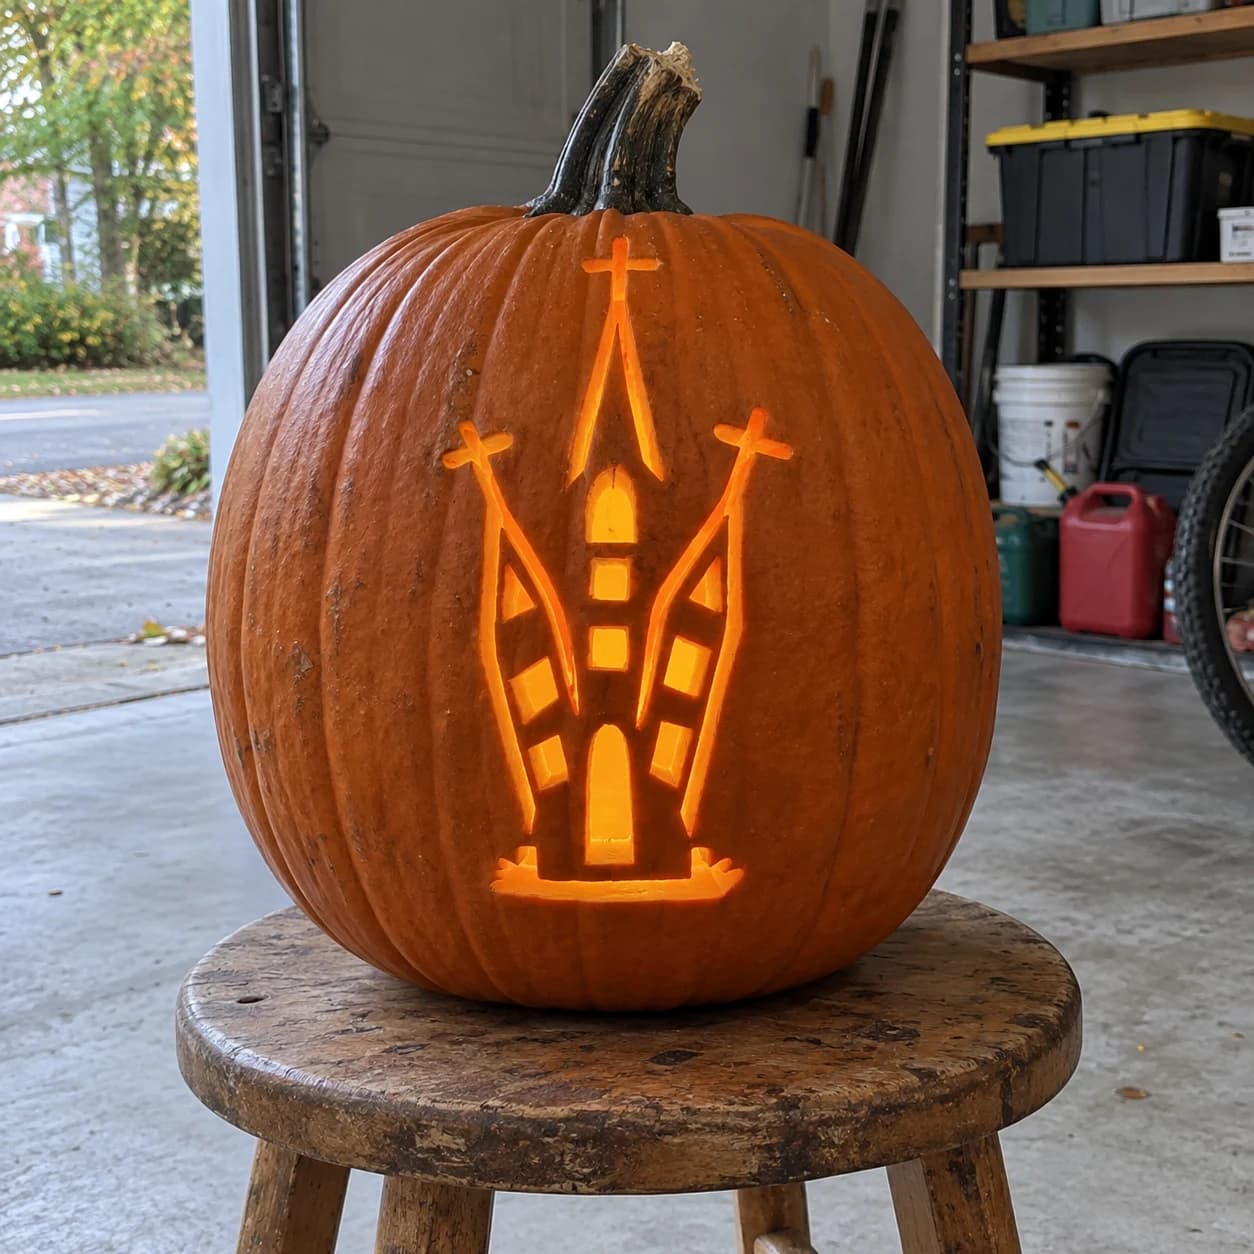
Haunted Church Pumpkin Stencil
A tall, narrow haunted church or castle rises in this pumpkin stencil, with a central spire topped by a cross, two flanking branch-like towers each capped with crosses, arched windows, and square window panels scattered across the facade. The entire structure is cut out as a series of interconnected shapes against the solid pumpkin face. Carve the small window squares and the tiny cross tops first, working top to bottom, so the tall thin towers stay structurally sound until the end.
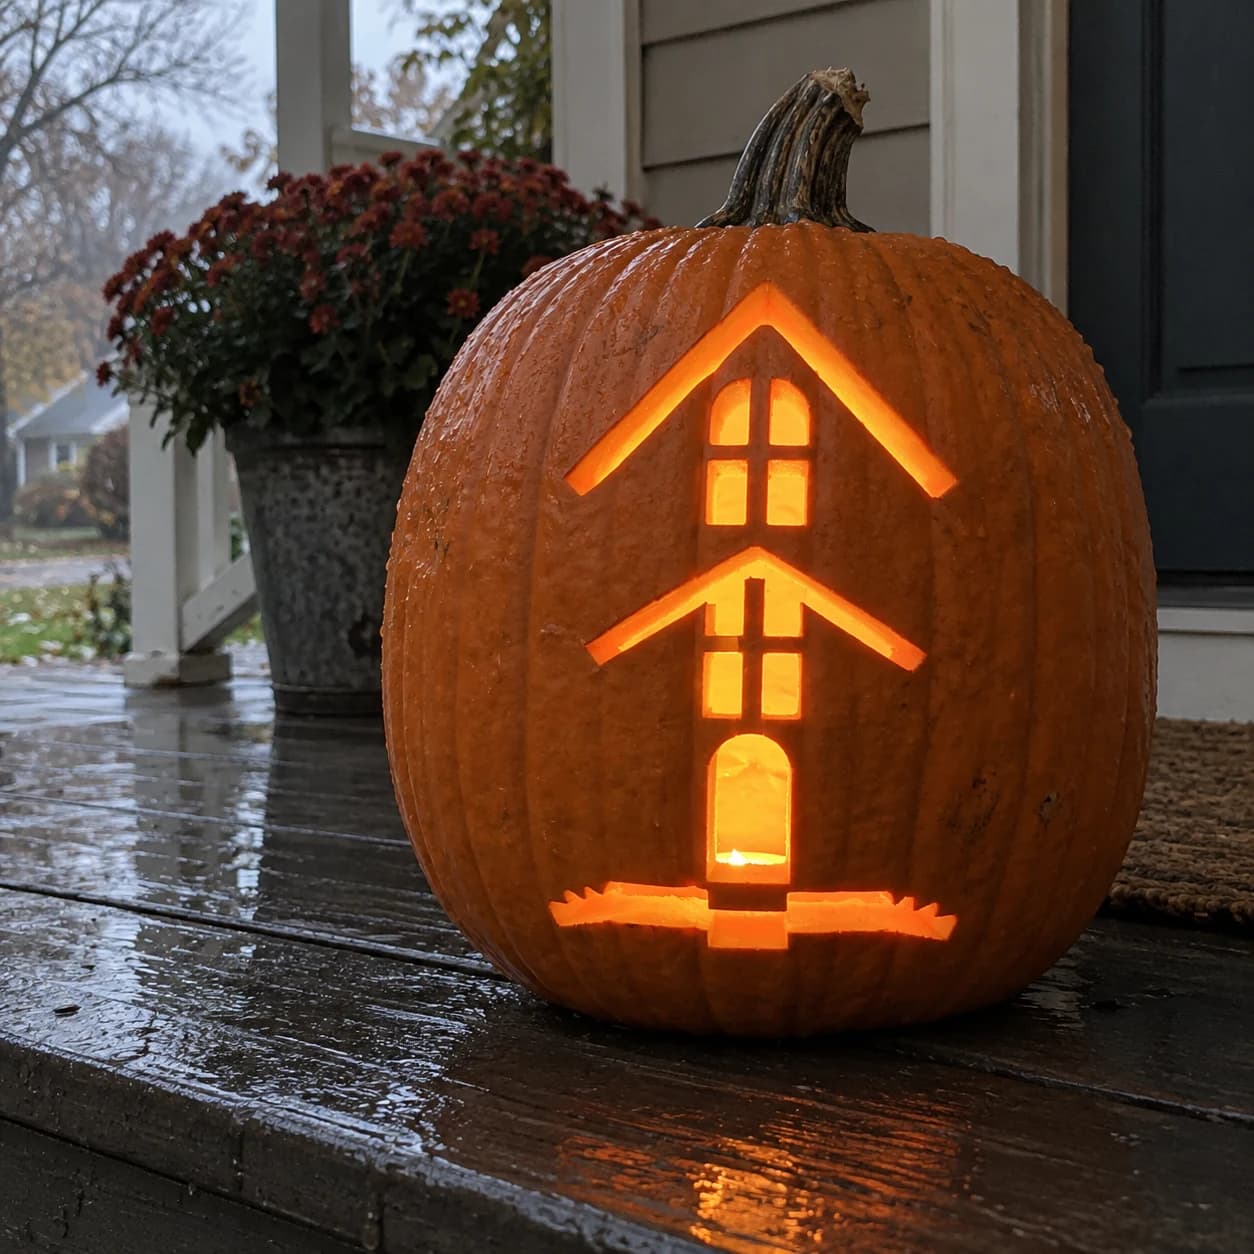
Haunted House Pumpkin Stencil
Two stacked haunted house facades make up this easy pumpkin stencil: an upper story with a steep peaked roofline and a tall arched window topped by a smaller rectangular pane, then a lower story with its own peaked roof, a grid window, and a rounded arch doorway, all sitting on a narrow uneven ground strip. The cut sections are the rooflines, windows, door, and ground strip, while solid pumpkin bridges between them keep the tiers separate. Cut the smallest window panes first so the surrounding structure stays rigid while the larger roofline panels are removed.
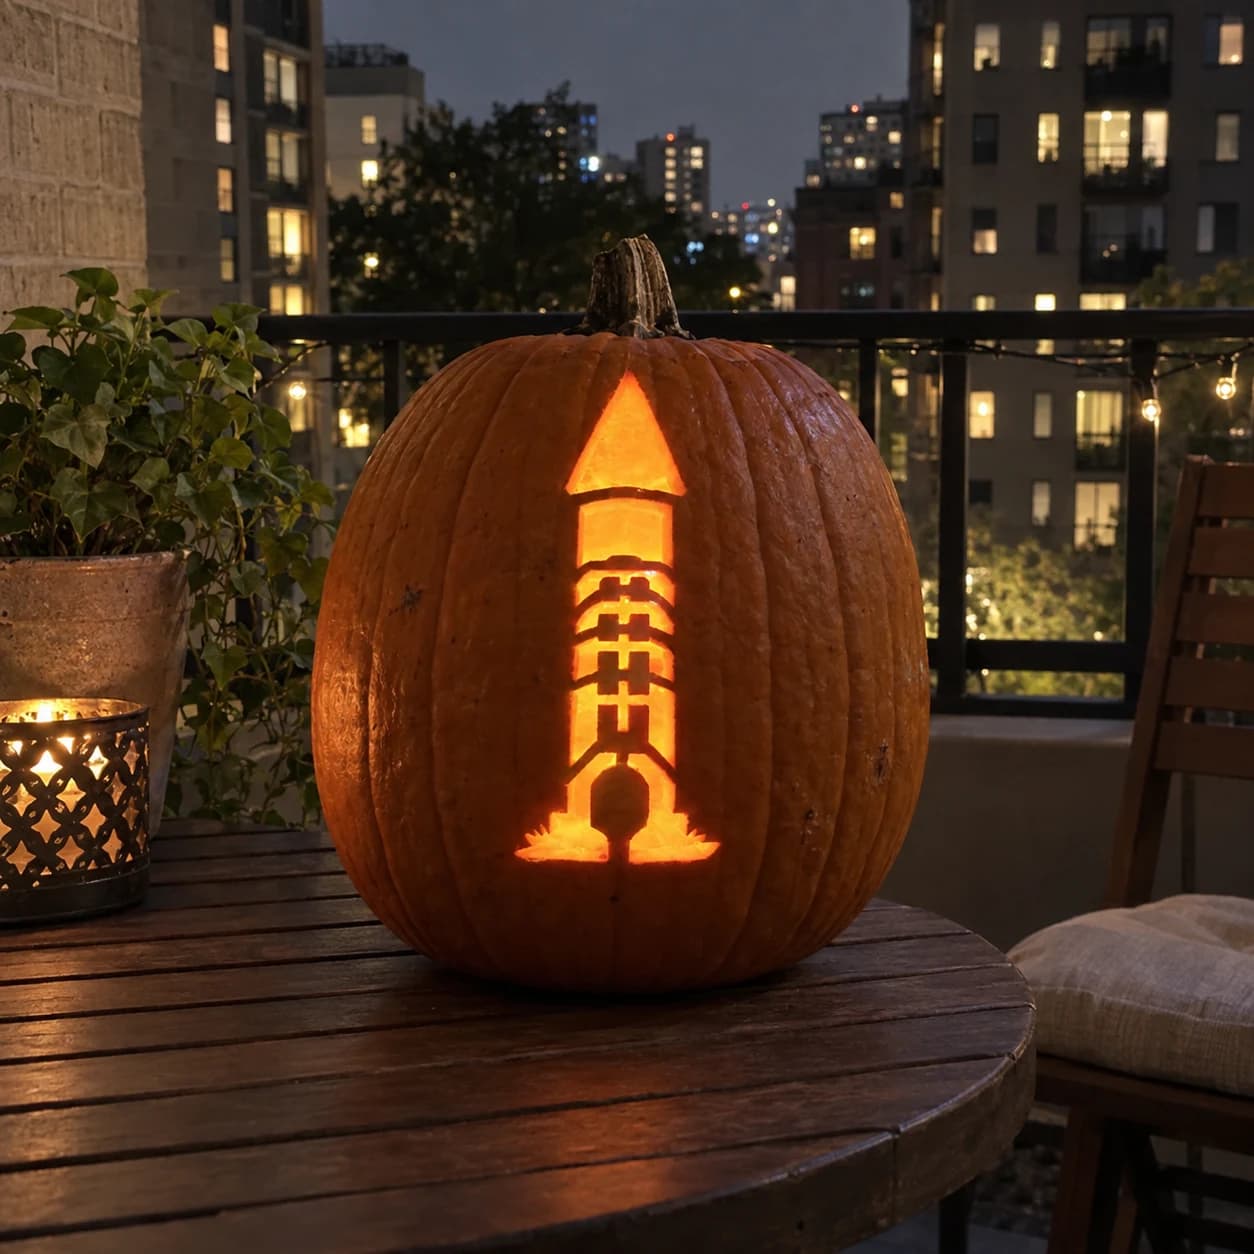
Haunted Mansion Pumpkin Stencil
A tall narrow haunted mansion rises up this pumpkin stencil as a stacked tower: a pointed triangular roof at the top, a rectangular belfry below, then three descending tiers of arched window pairs that grow progressively wider, finishing with a rounded arched doorway and grass tufts at the base. All windows and the door arch are cut through, leaving orange wall between each tier as structural separators. Cut the door arch at the bottom first to relieve pumpkin tension, then work upward tier by tier so the cuts above don't flex the completed windows below.
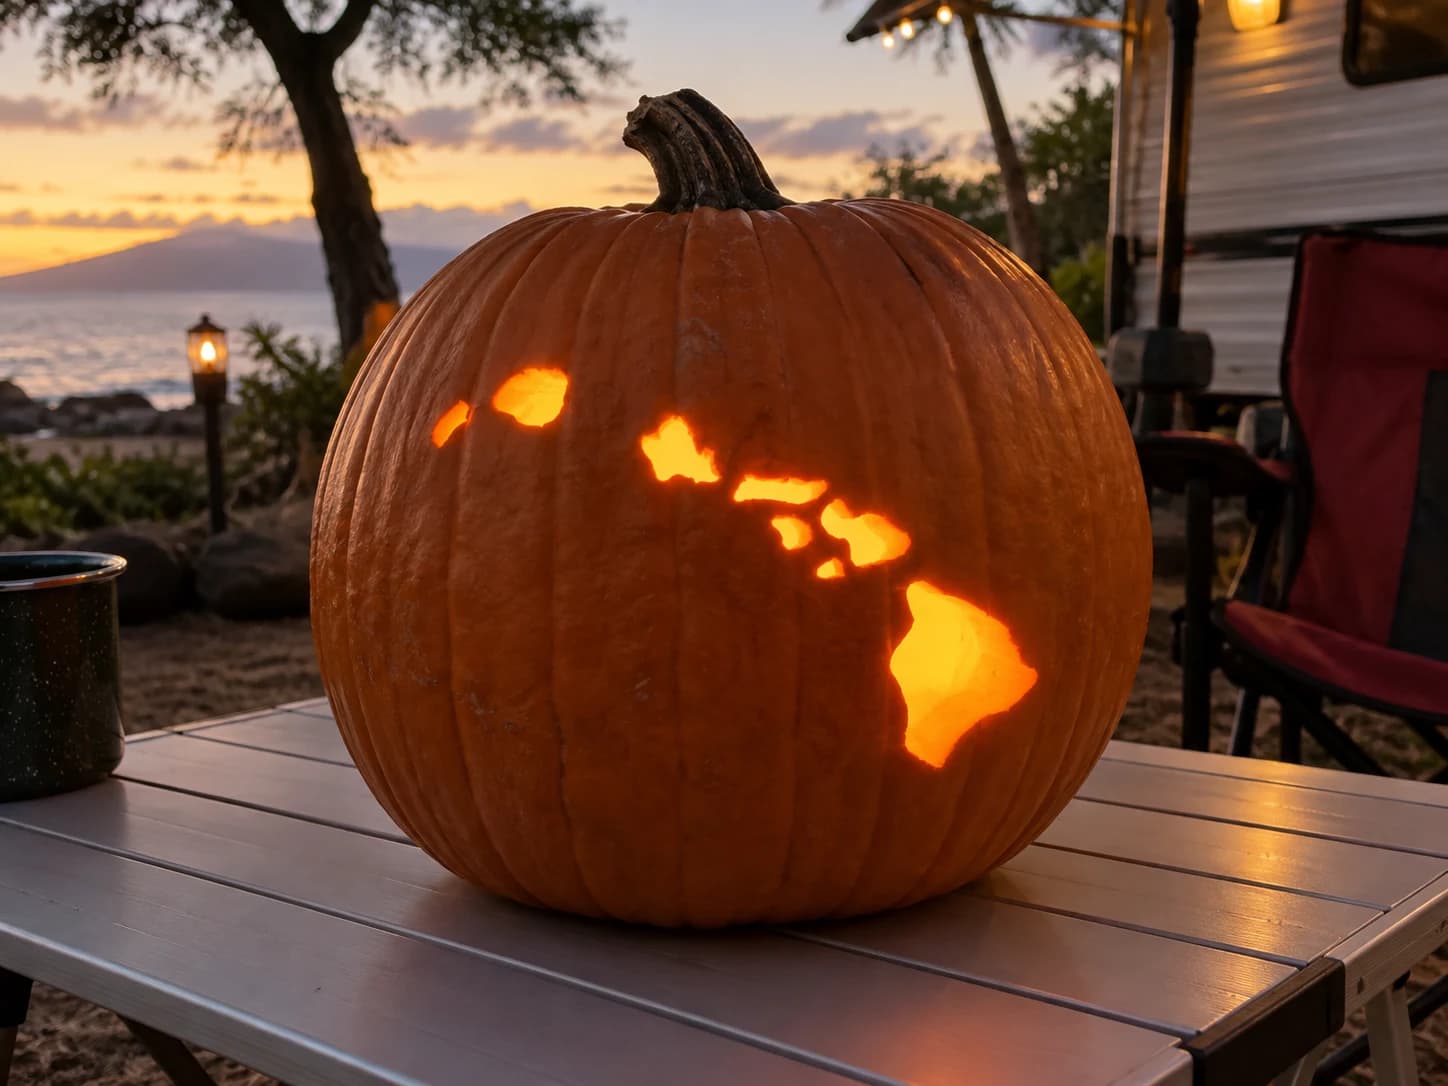
Hawaii Pumpkin Stencil
The Hawaiian island chain appears as a scatter of eight organic island shapes across this pumpkin stencil, ranging from the tiny northwestern islets at upper left down to the large triangular mass of the Big Island at lower right, all correctly spaced in their northwest-to-southeast arc. Each island is an individual pierced-through cutout, so the lit jack-o-lantern glows with the archipelago floating in a dark pumpkin sky. Cut the three smallest islets at the upper left first before carving the larger islands, so the thin walls between the close-spaced upper shapes stay intact while you work toward the spacious lower portion.
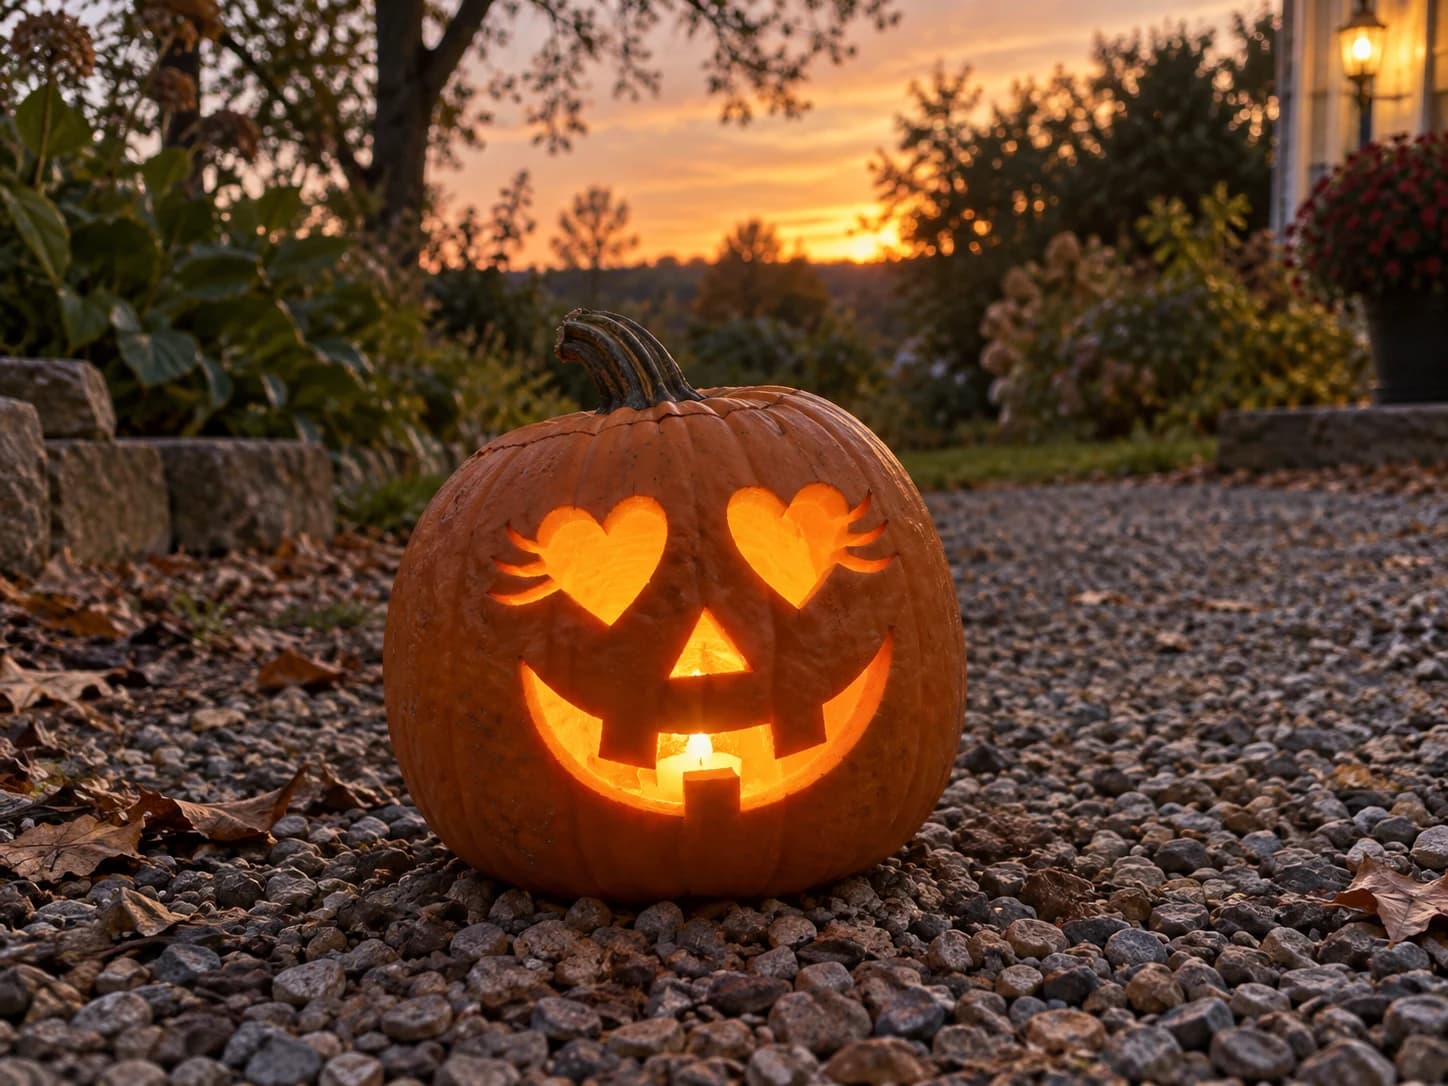
Heart Eyes Jack-o-Lantern Pumpkin Stencil
A classic jack-o-lantern face gets a romantic twist: two heart-shaped cutouts replace the usual triangle eyes, each framed by three curling eyelash strokes, above a wide crescent grin with three rectangular tooth gaps. The design is beginner-level with large, easy-to-cut openings and gentle curves throughout. Cut each heart eye from the inner point downward and around the lobes rather than starting at the curved top, which helps you keep the heart shape symmetrical on the pumpkin's curved surface.
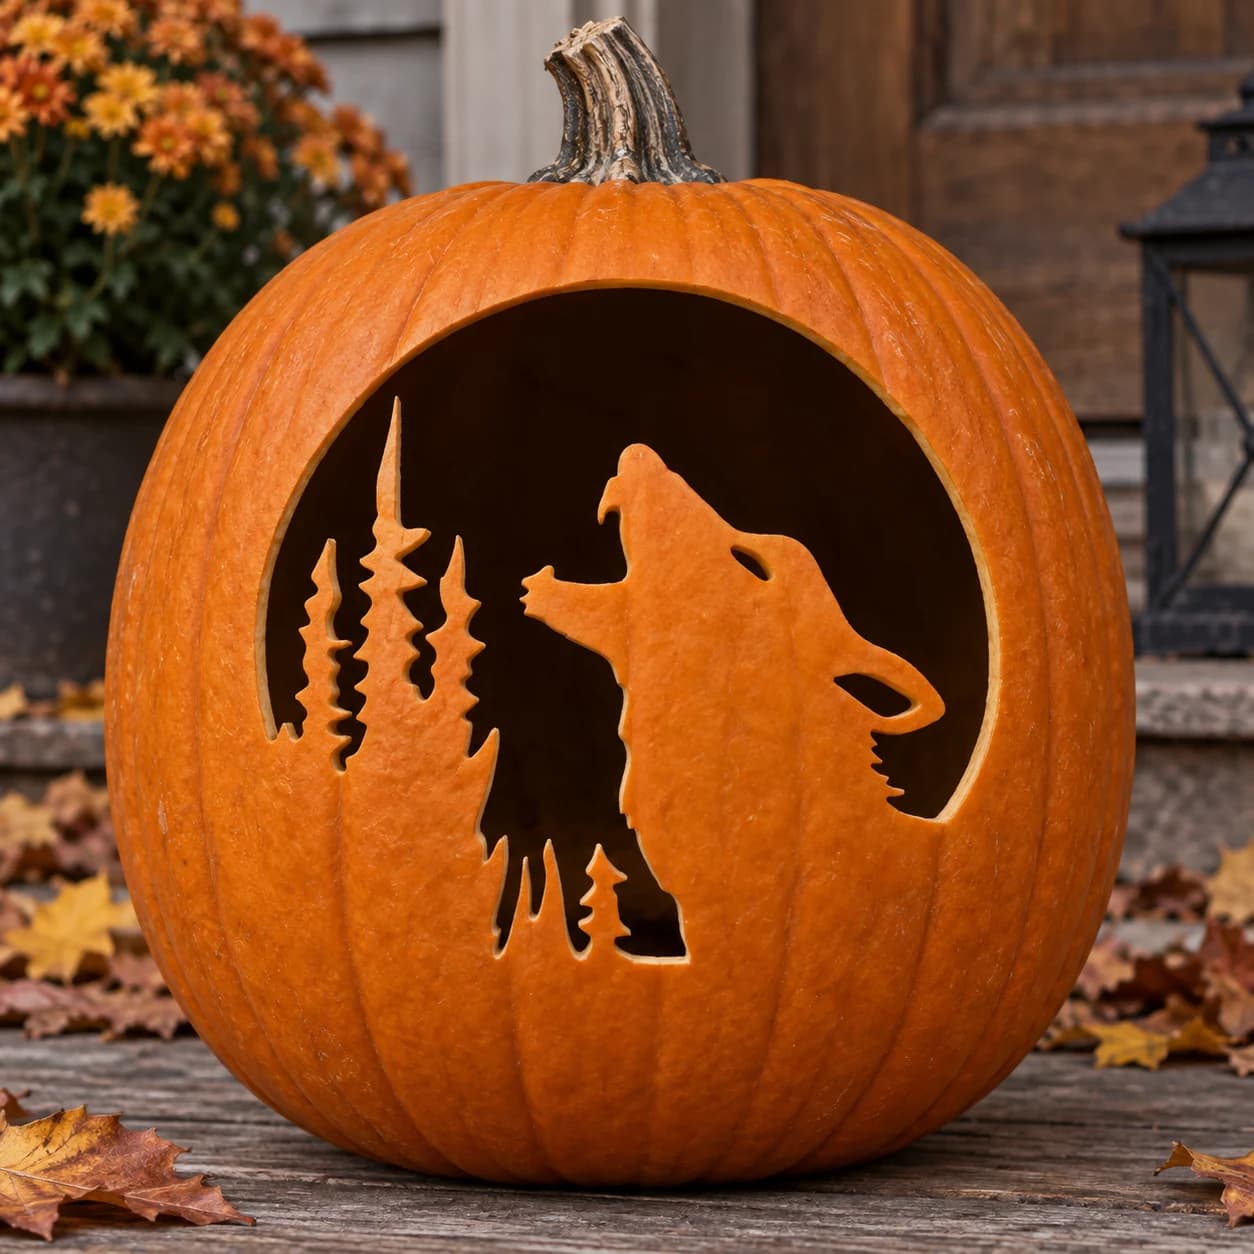
Howling Wolf Moon Pumpkin Stencil
A wolf howling at a large crescent-shaped moon fills this hard pumpkin stencil, with a trio of jagged pine trees to the left and the wolf's body set as a solid orange silhouette inside the open pierced moon arc. The moon itself is the glowing background that frames the wolf and trees, while the animal and pines remain as uncut pumpkin skin. When carving the pine tree segments, cut each zigzag branch notch one at a time using a small detail blade, since the tight repeated angles along the tree edges are easy to over-cut and merge into a single straight line.
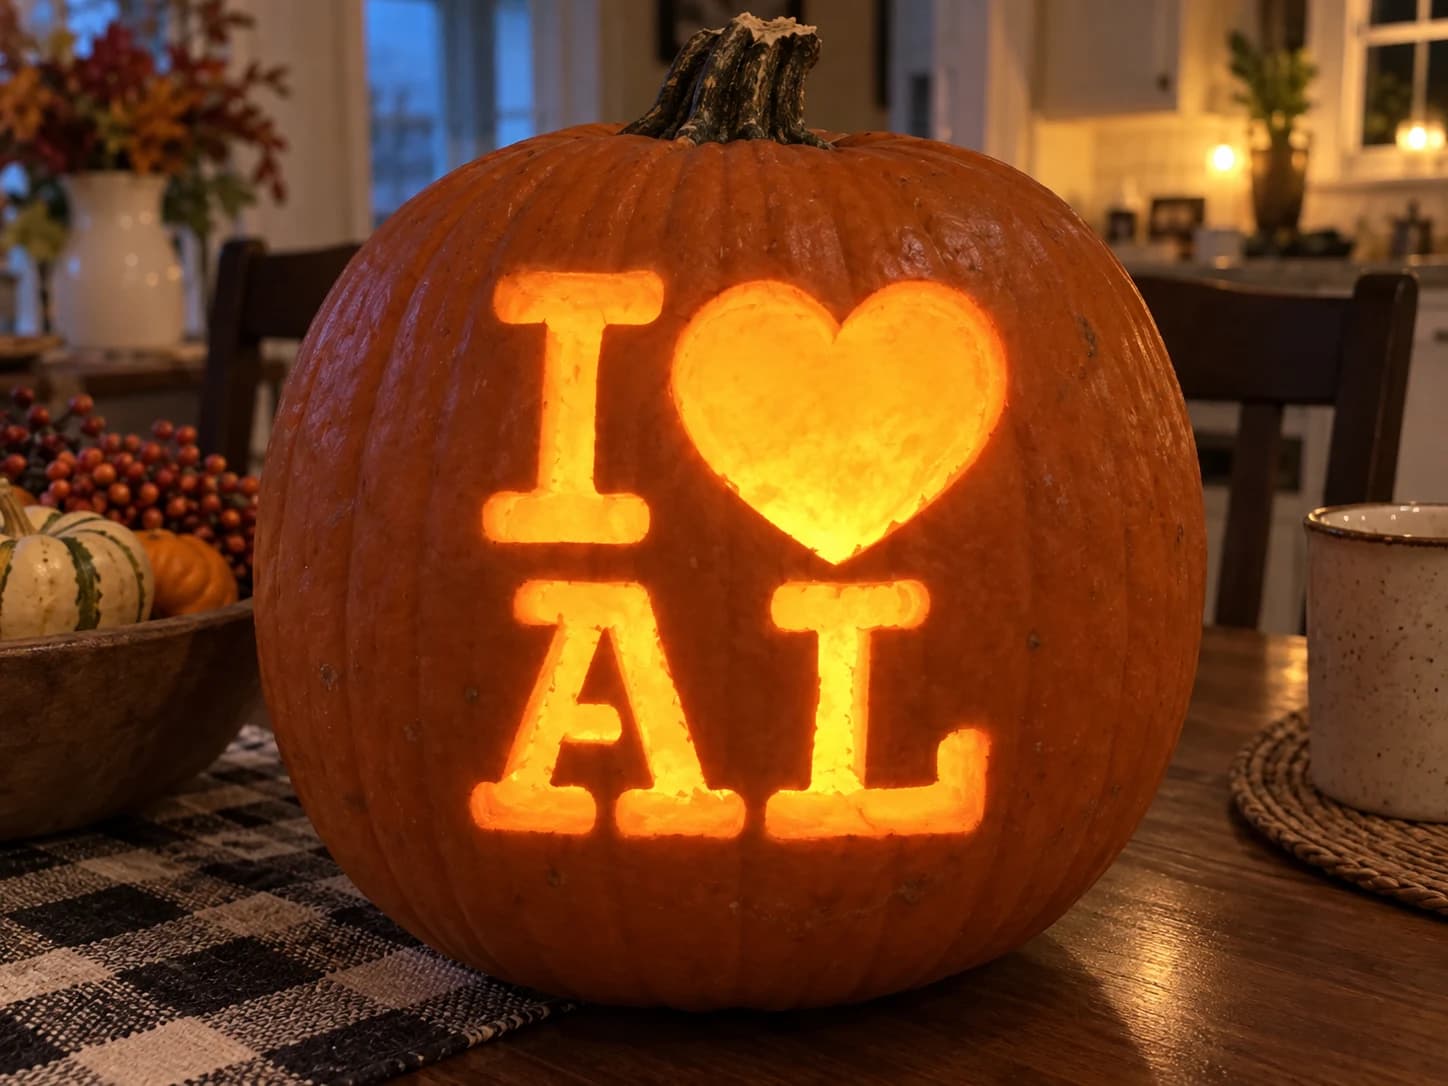
I Love Alabama Pumpkin Stencil
This Alabama pumpkin stencil spells out the classic "I Love" message using a bold block letter I, a large solid heart, and the two-letter state abbreviation AL set in rounded block type. All four shapes are cut through as separate open pieces, so the finished jack-o-lantern shows glowing letters and a bright heart on an orange field. Because the A has a triangular counter at its center, cut around that interior triangle carefully so it stays in place as a solid island that keeps the letter readable.
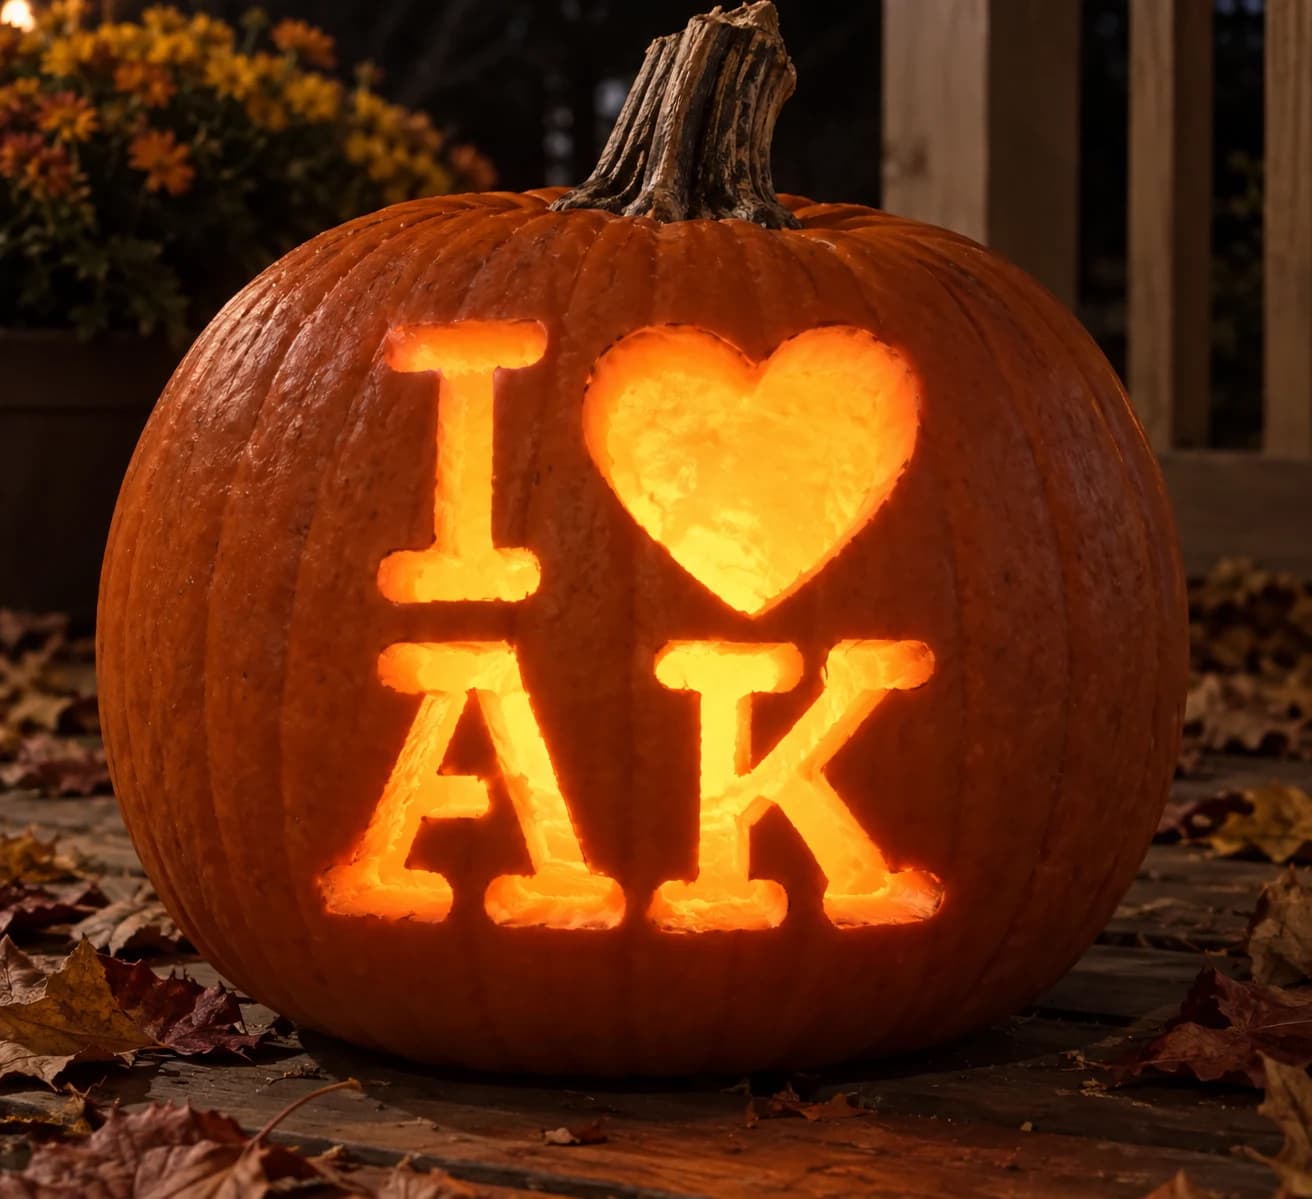
I Love Alaska Pumpkin Stencil
The Alaska state-pride stencil arranges a block letter I, a solid heart, and the bold two-letter abbreviation AK across the pumpkin face in the familiar "I Love" grid format. Each element is a separate pierced shape: the I, the heart, the A (with its internal triangular counter retained as a solid island), and the K. Lit from inside, all four shapes glow simultaneously as bright cutouts. Before cutting the A, score the small triangular counter at its center first so you can remove it cleanly without bumping the outer letter legs.
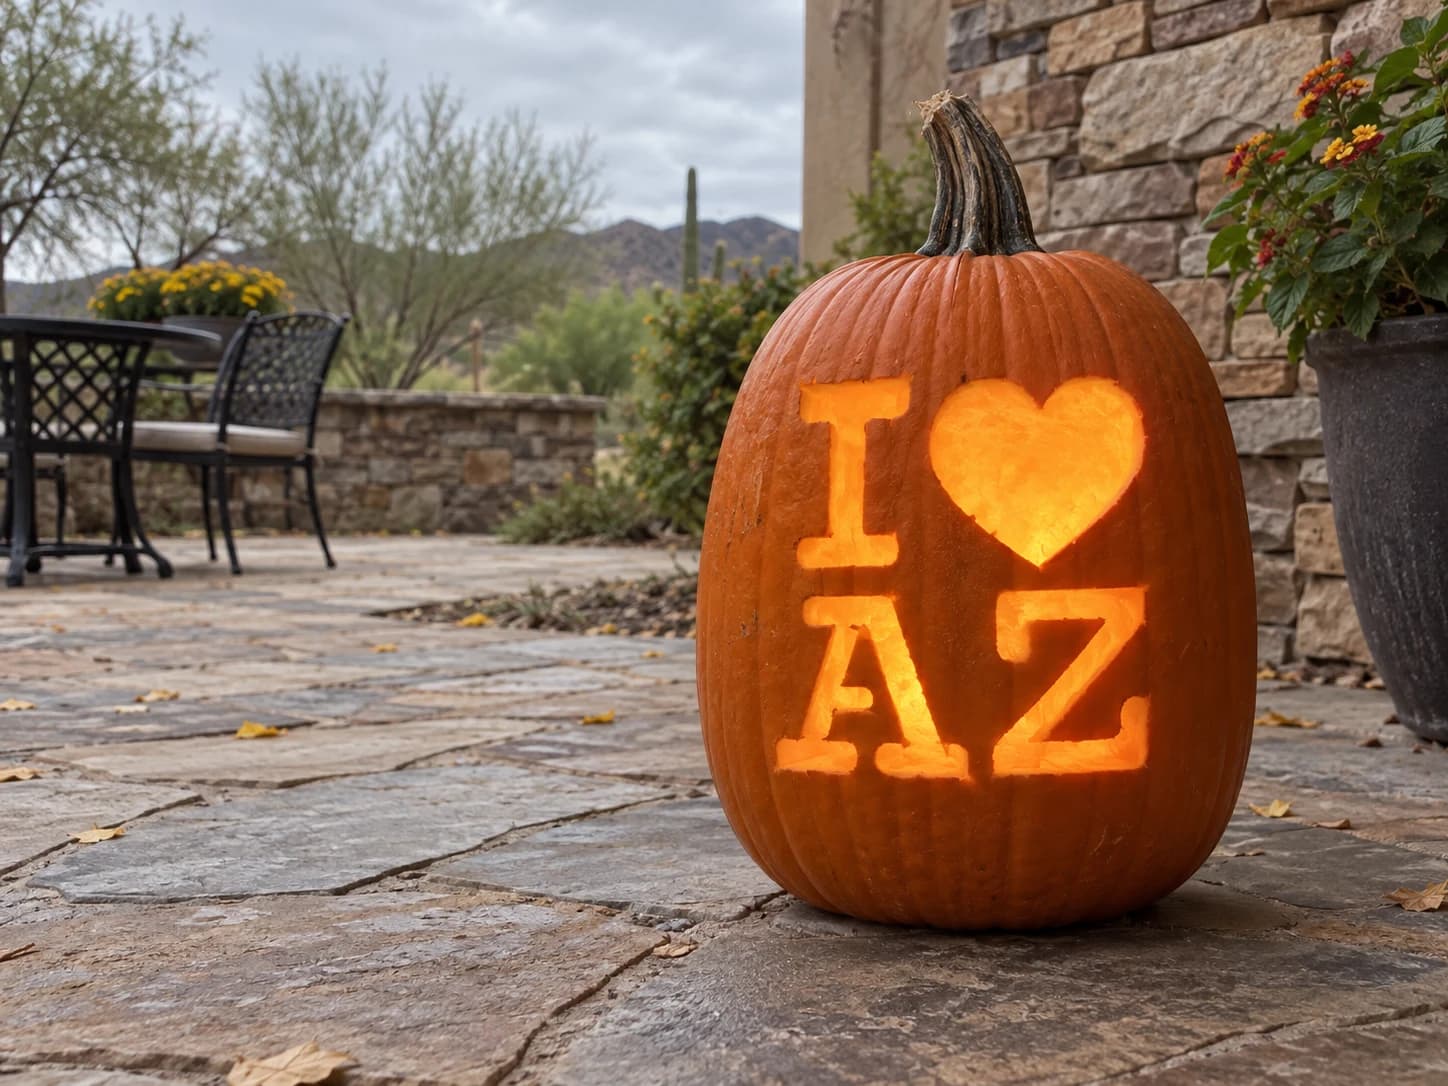
I Love Arizona Pumpkin Stencil
This Arizona pumpkin stencil follows the same bold "I Love" grid layout: block letter I, large solid heart, and the state abbreviation AZ in chunky rounded letters. The Z's diagonal stroke makes it distinctive among state stencils, and the lack of interior counters means all four shapes cut cleanly as open silhouettes with no floating islands to worry about. Keep the gap between the bottom of the heart and the top of the A narrow enough to leave an unbroken pumpkin bridge between the two rows of letters.
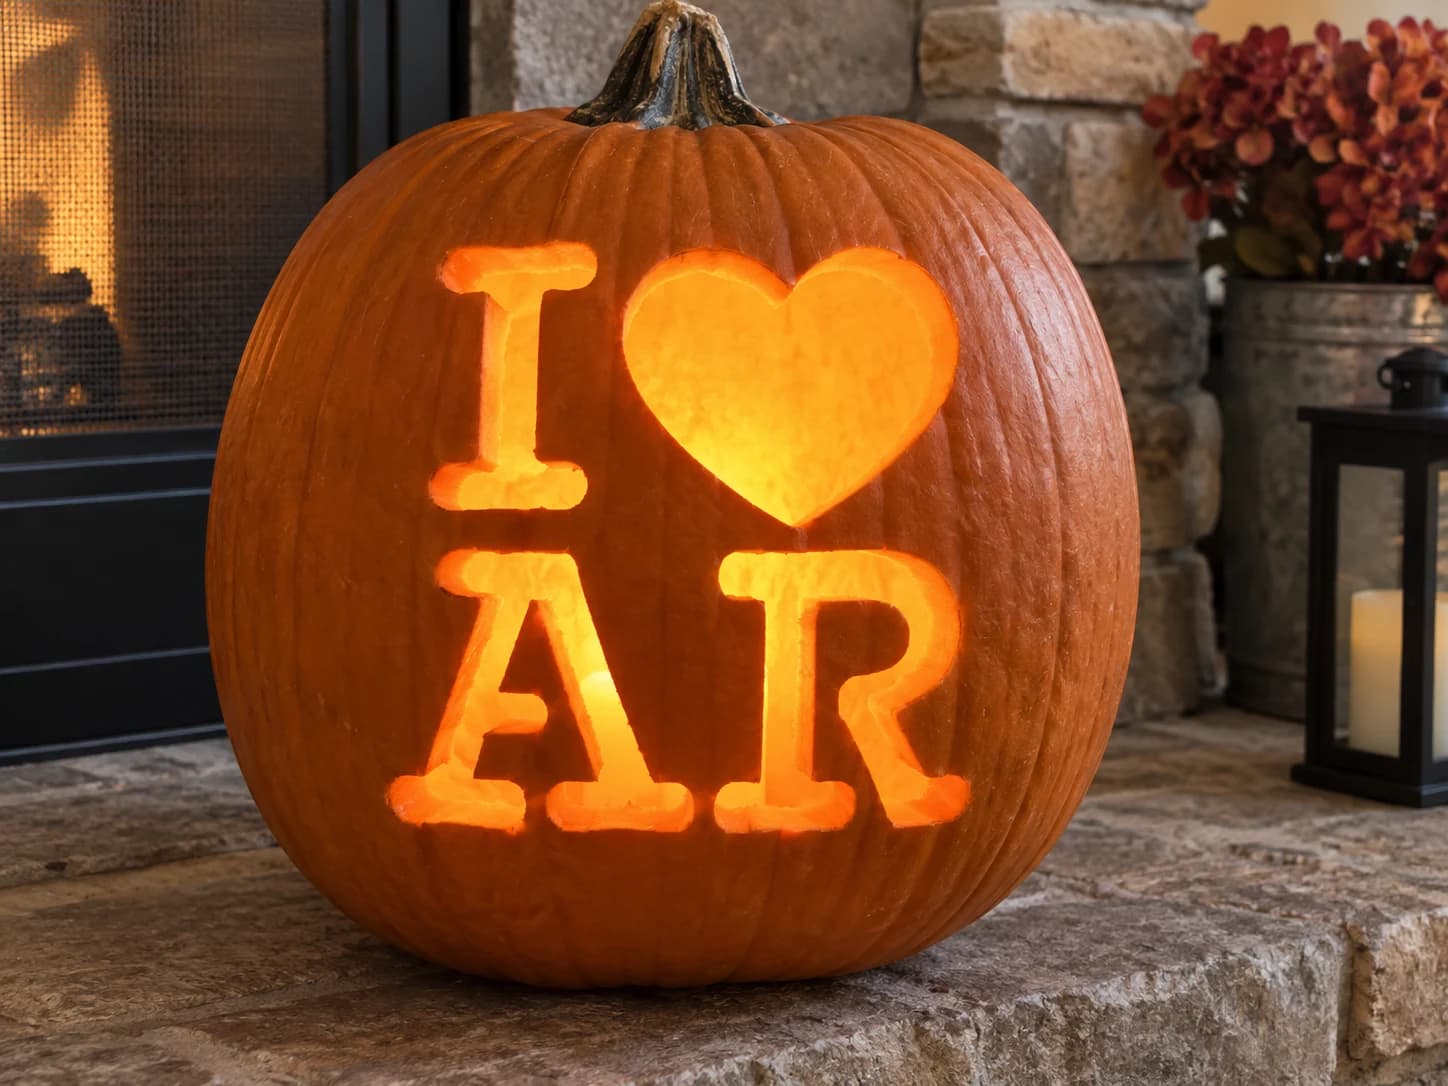
I Love Arkansas Pumpkin Stencil
The Arkansas stencil uses the standard "I Love" pumpkin layout: a block I, a full heart, and the two-letter abbreviation AR in rounded type. Both letters are open silhouettes with no interior counters, making this a clean, beginner-friendly carve with four distinct glowing shapes. The R's open leg curves slightly inward, so trace it with a pin tool before cutting to confirm the exact endpoint of that stroke before committing the blade.
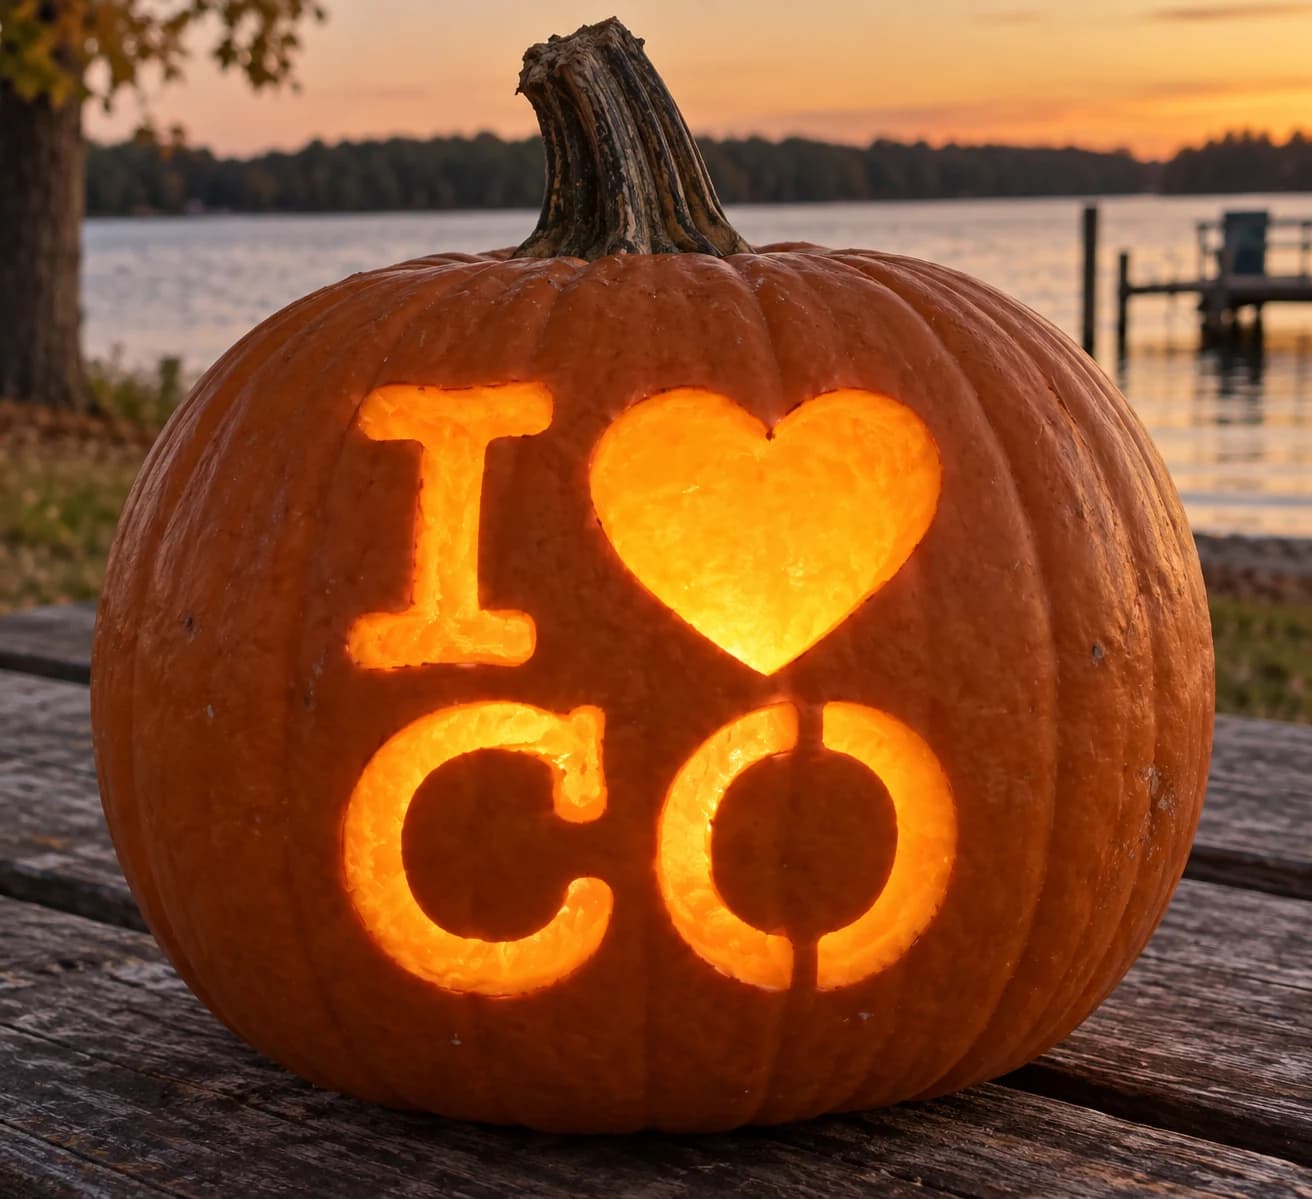
I Love Colorado Pumpkin Stencil
Colorado's state-pride stencil follows the familiar "I Love" grid with a block I, a large heart, and the abbreviation CO. The O presents the key carving challenge: it requires an interior oval counter to remain as a solid island inside the letter, or the O collapses to a plain hole. On the carved pumpkin the O's counter glows as a bright orange oval surrounded by a dark ring, giving the letter its shape. Cut the outer O first, then switch to a fine blade to cut the inner oval, leaving that center disk attached to nothing, it will hold in place by friction until gently pushed out.
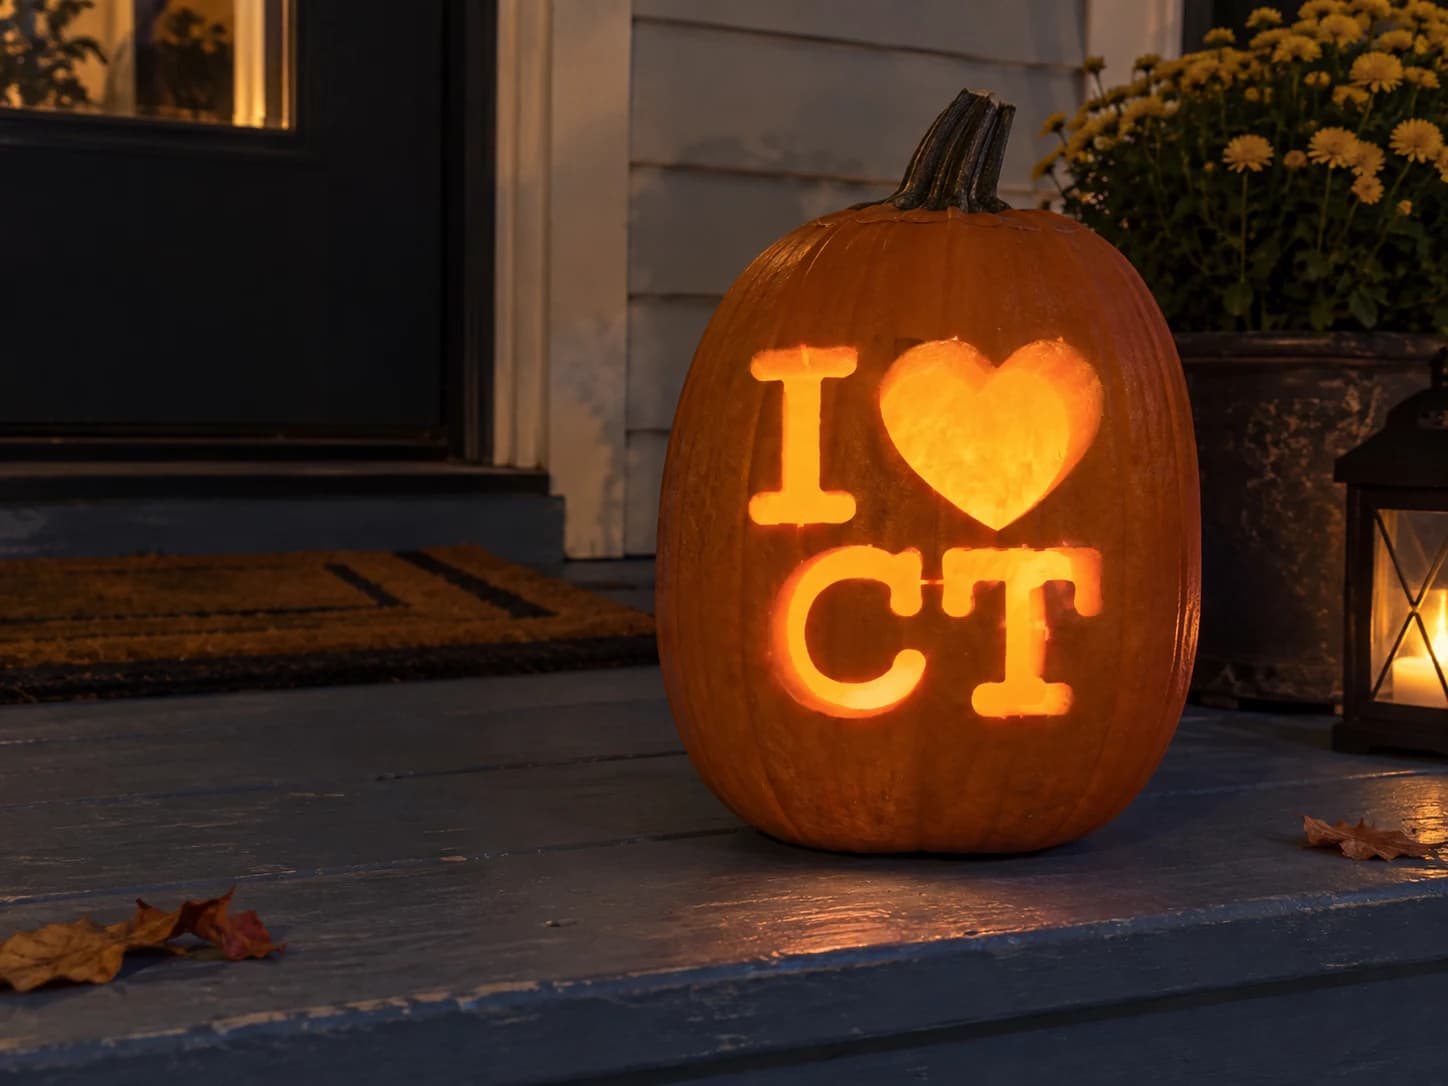
I Love Connecticut Pumpkin Stencil
Connecticut's "I Love CT" stencil is built from a block I, a solid heart, and the letters CT in bold rounded type. The C is a simple open arc with no counter, and the T has a wide crossbar and a straight stem, both cut as one continuous open silhouette. All four shapes pierce cleanly with no floating islands, making this one of the simpler state stencils in the series. Keep the horizontal bridge between the top row and the bottom CT row at least a half-inch thick to support the finished carving.
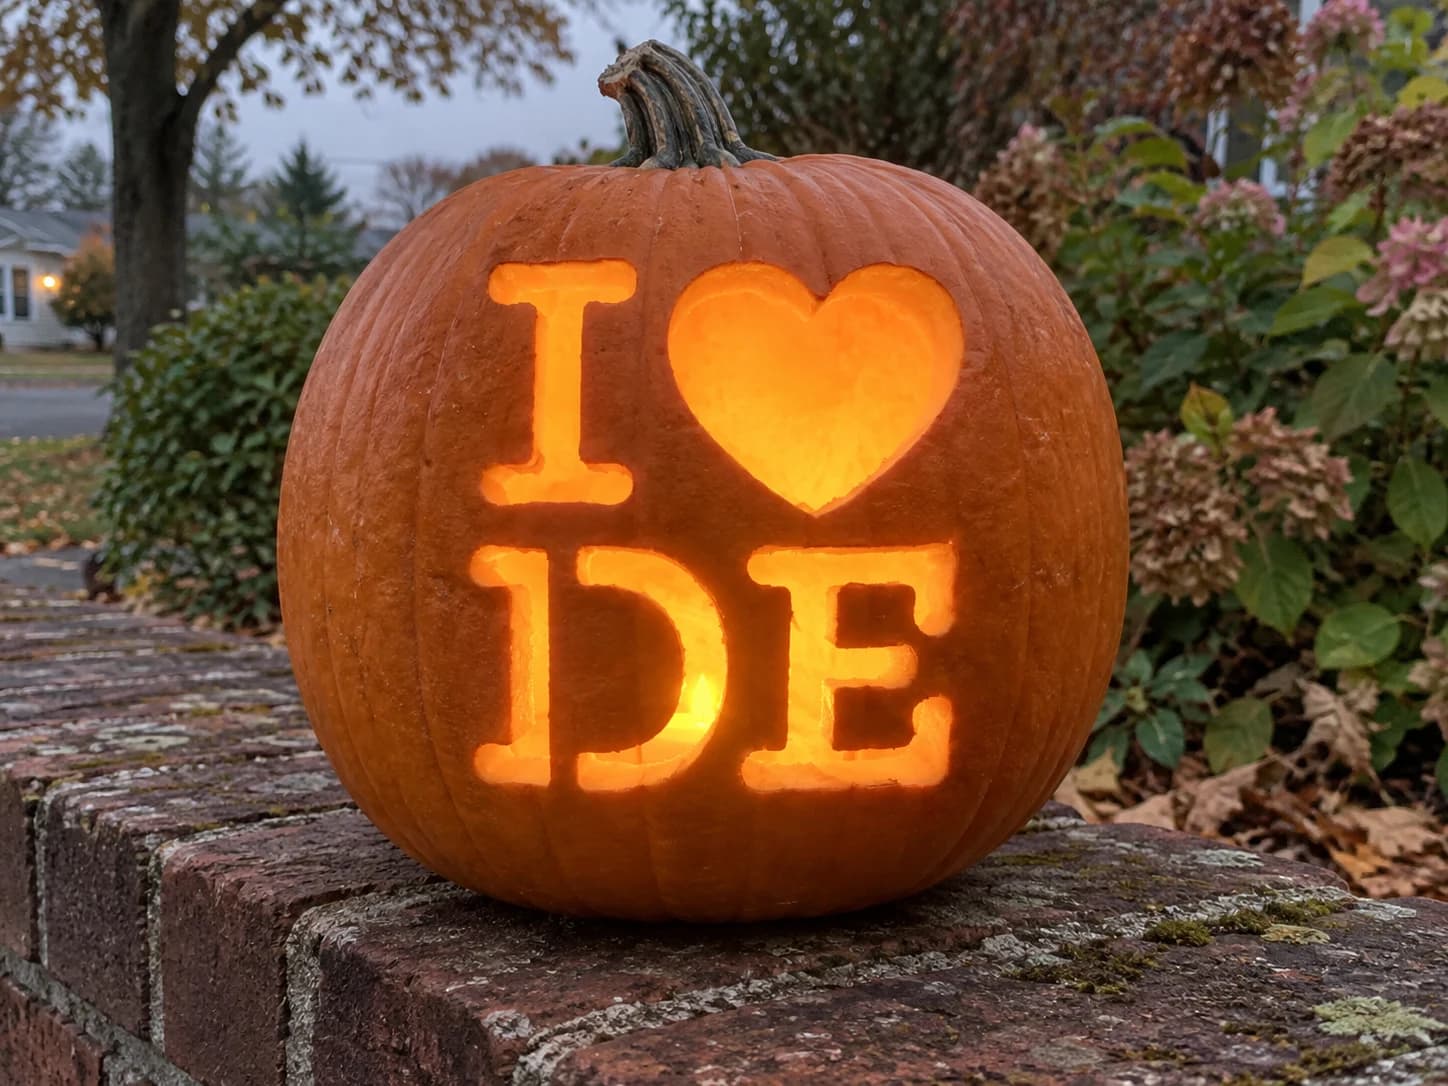
I Love Delaware Pumpkin Stencil
Delaware's stencil displays the four-element "I Love DE" grid: block I, heart, and the letters D and E in squared slab-serif type. The D has a large open interior that cuts away as a single rounded rectangle, while the E has three horizontal teeth that remain as solid bridges within its rectangular frame. Those E teeth are the most structurally delicate part of this carve; cut the three open slots between them with short controlled strokes moving away from the center tooth to avoid widening a gap.
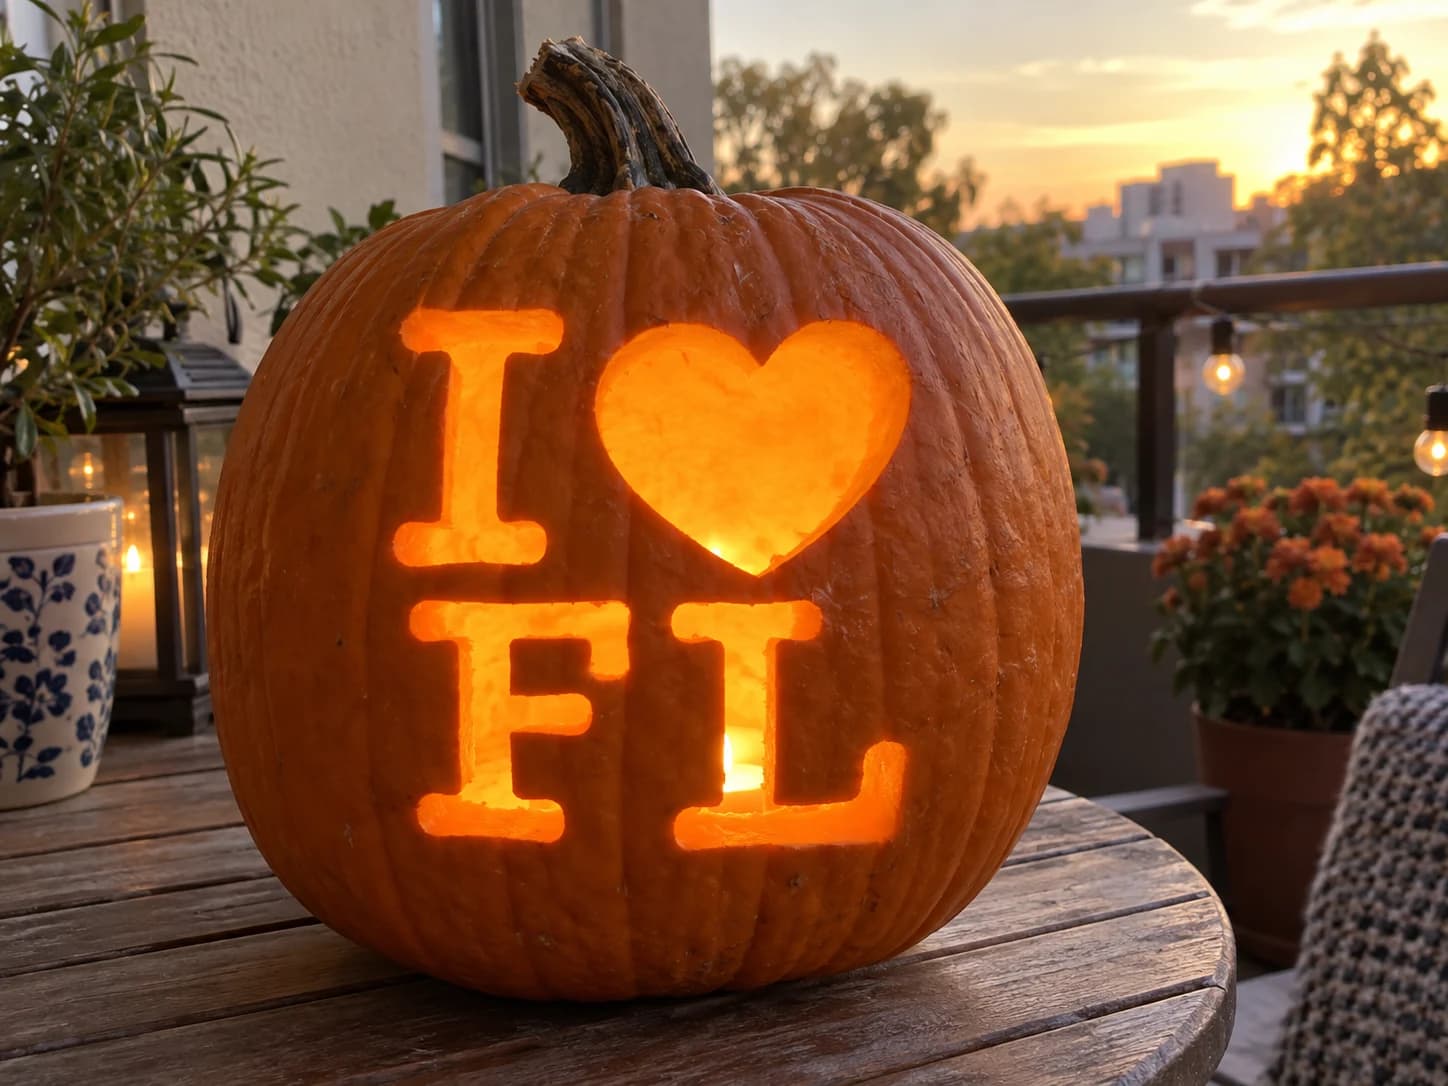
I Love Florida Pumpkin Stencil
Florida's "I Love FL" pumpkin stencil sets a rounded block I and heart on the top row, with a wide F and a tall L below in the same chunky typeface used throughout the state series. The F has two open horizontal slots forming its crossbars, while the L is a simple open L-shape with no counters, making both letters straightforward to cut. Place your first cut on the F's upper slot, then the lower slot, before moving to the L and the top-row shapes, so the most structurally complex letter is handled while the pumpkin wall is still fully intact.
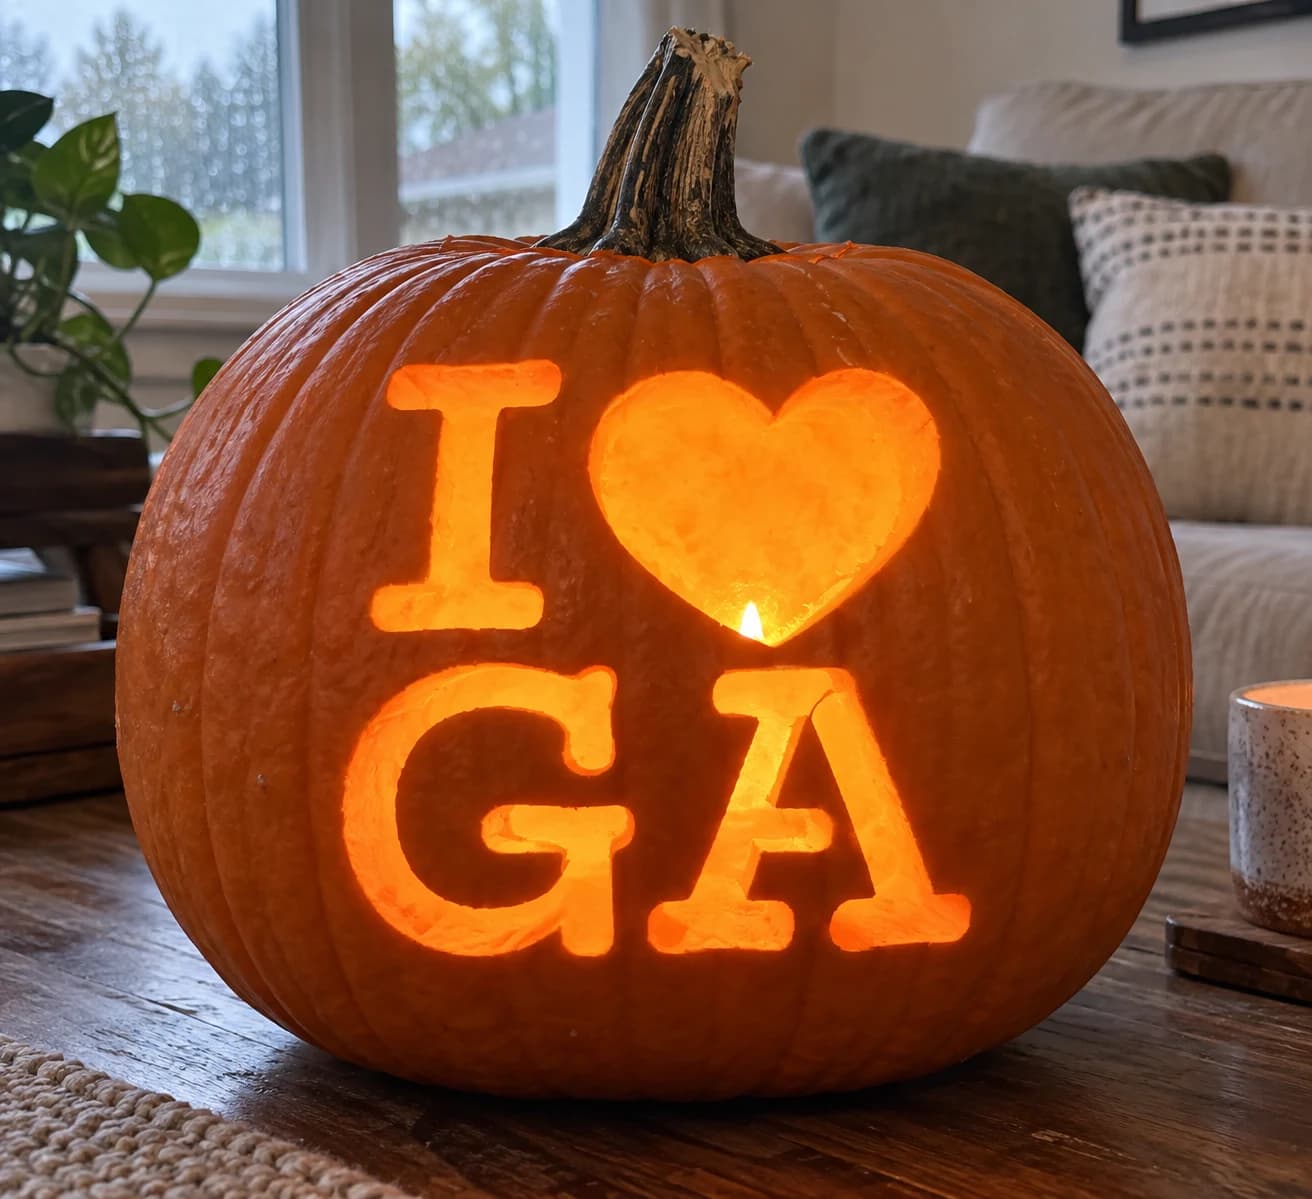
I Love Georgia Pumpkin Stencil
Georgia's state stencil arranges the "I Love GA" message in a two-row grid: the I and heart sit on top, and the large letters G and A fill the bottom row. The G is a wide open C-shape with a short horizontal bar extending inward from its right side, and the A has the familiar triangular interior counter. Cut the G's inner bar from the opening side inward rather than pushing through from the back, and retain the A's triangle counter as a solid island by cutting around it in two separate arcs.
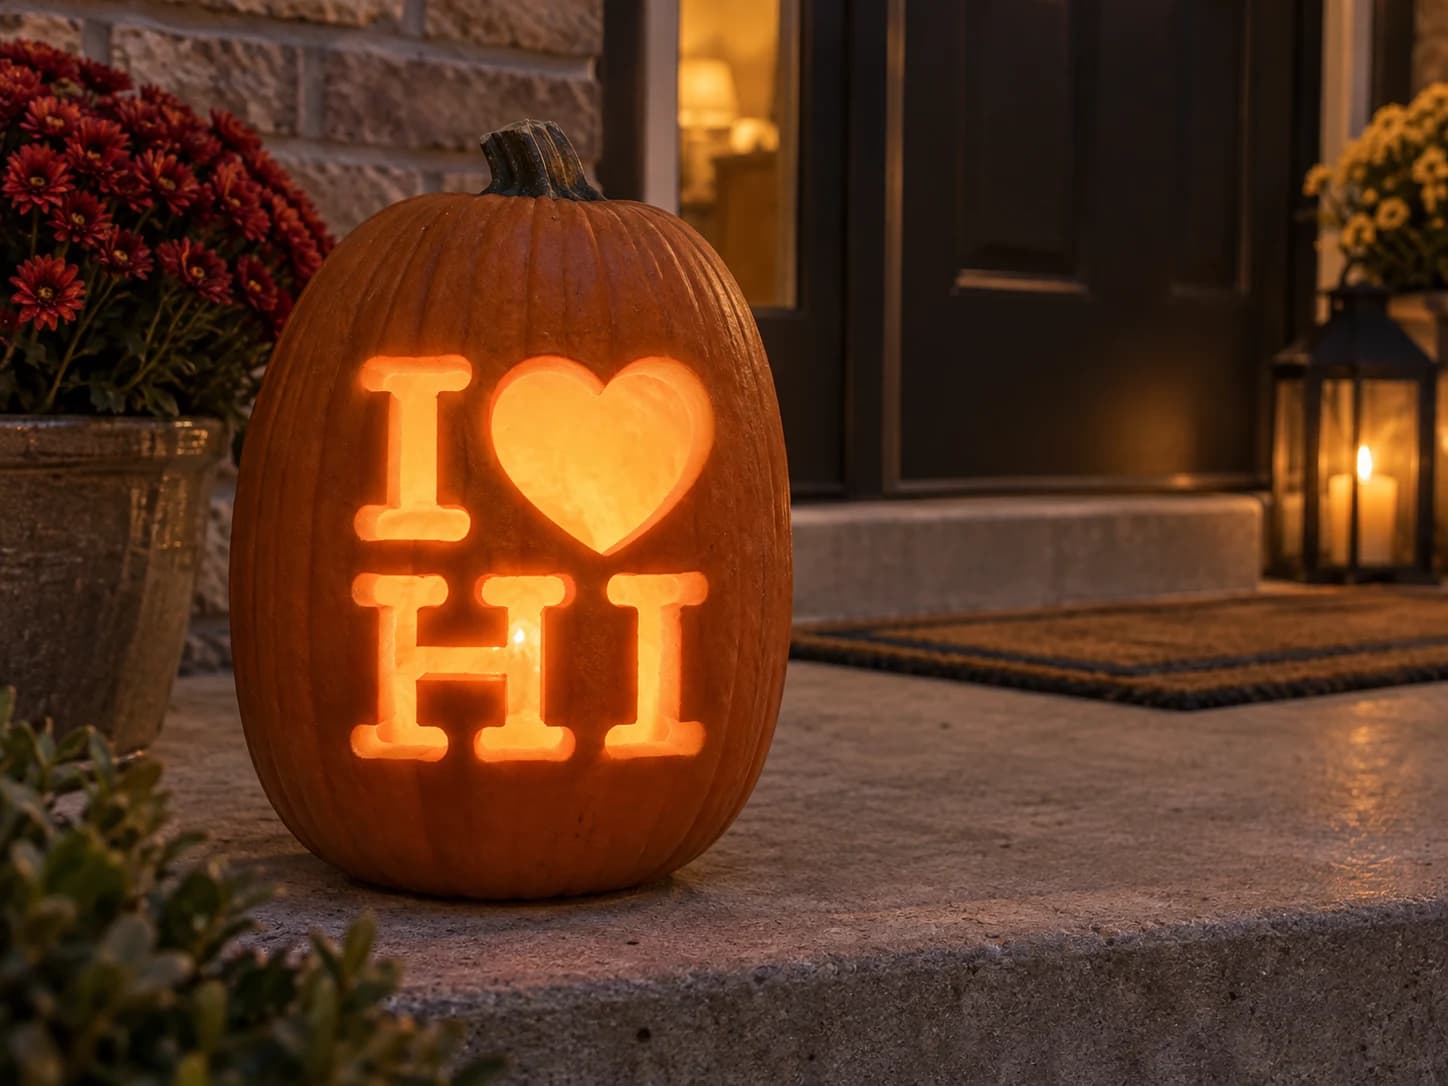
I Love Hawaii Pumpkin Stencil
Hawaii's "I Love HI" pumpkin stencil puts the block I and heart on the top row, with the letters H and I below in a rounded slab typeface. The H is a wide open shape with two vertical slots and a crossbar counter between them; the counter must stay solid or the letter reads as two separate rectangles. The second I below mirrors the top-row I. Cut the H's three openings carefully, leaving the crossbar bridge at exactly the height shown on the stencil so the letter stays legible when lit.
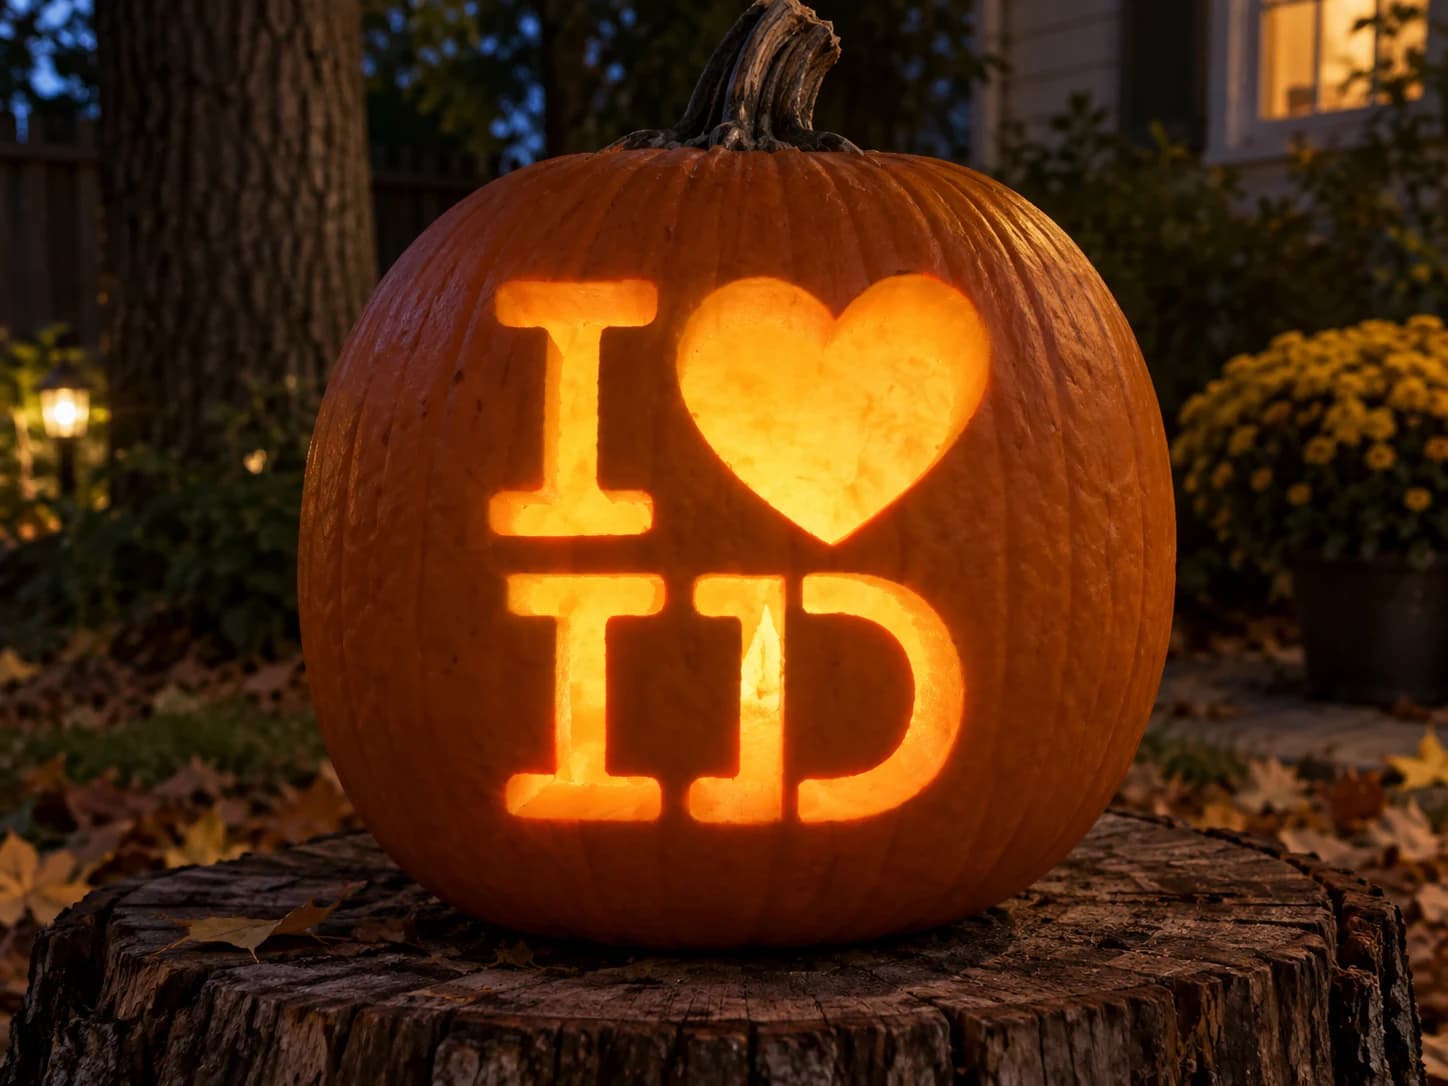
I Love Idaho Pumpkin Stencil
Idaho's "I Love ID" stencil follows the familiar two-row grid with a block I and heart on top, and the letters I and D below. The lower I is a simple open rectangle, while the D is a large rounded-rectangle counter that needs its curved interior removed as one piece. Because the D's inner oval is large, make a relief cut at the top before removing to avoid the pumpkin wall flexing and cracking as the piece comes free.
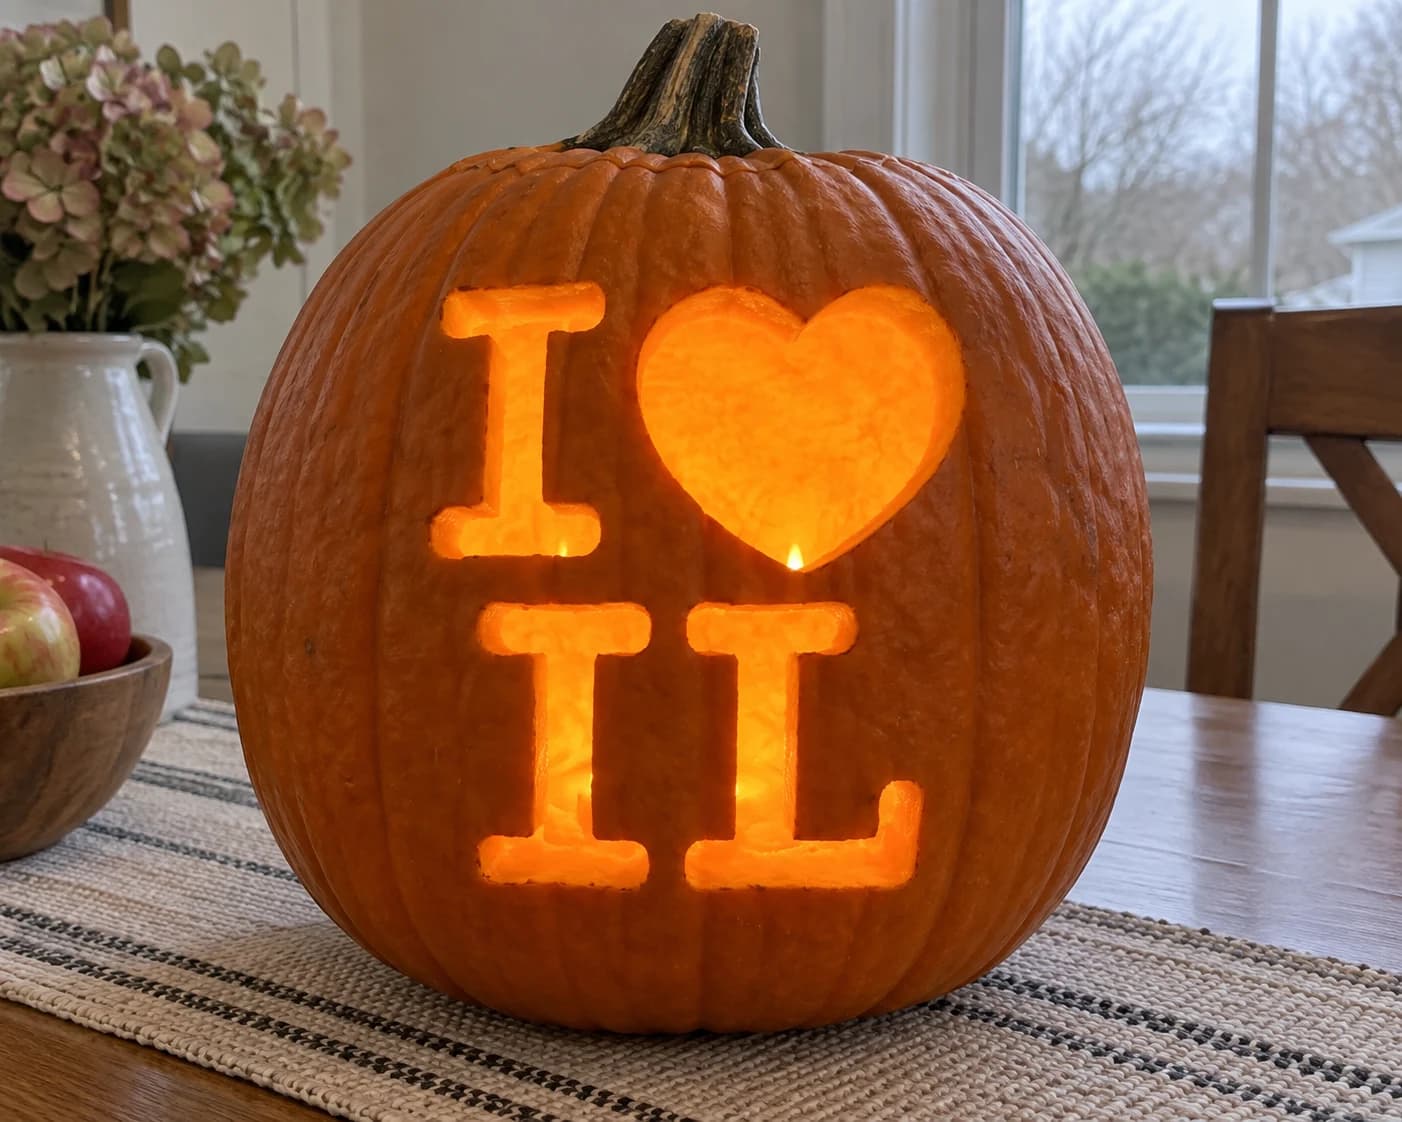
I Love Illinois Pumpkin Stencil
Illinois' "I Love IL" stencil places the block I and heart on the top row, then the letters I and L below in matching rounded type. Both letters are open silhouettes with no interior counters, making the bottom row a pair of the cleanest cuts in the state series. The visual interest comes from the different proportions: the lower I is wider and taller than the top-row I, while the L's horizontal foot extends well to the right. Cut the L's foot last, working from the corner outward, to prevent the thin pumpkin strip at the foot from flexing loose too early.
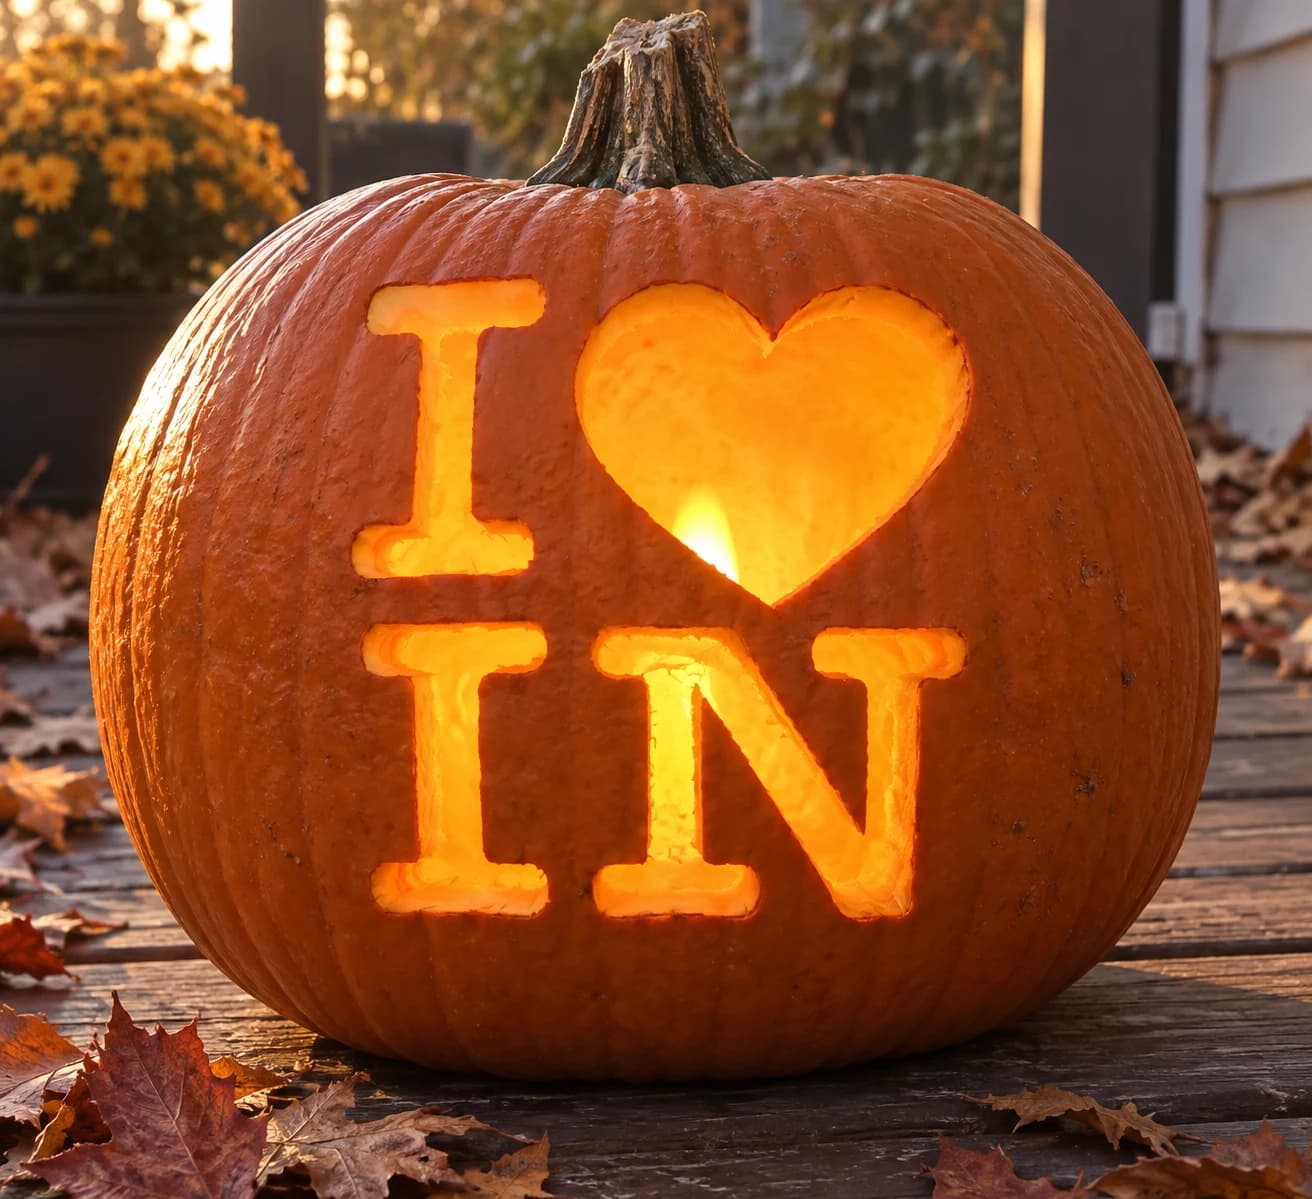
I Love Indiana Pumpkin Stencil
Indiana's "I Love IN" stencil uses the standard two-row grid with block I and heart above, and the letters I and N below in chunky rounded type. The N's two diagonal strokes create a triangular interior space that is left solid rather than cut, so the letter reads as a heavy outline with a solid fill. The carved pumpkin shows the N as a bright outline shape with orange glow around its perimeter and a solid center. Cut the N's two vertical legs first, then the diagonal interior, keeping each stroke short and deliberate to follow the letter's angle accurately.
I Love Iowa Pumpkin Stencil
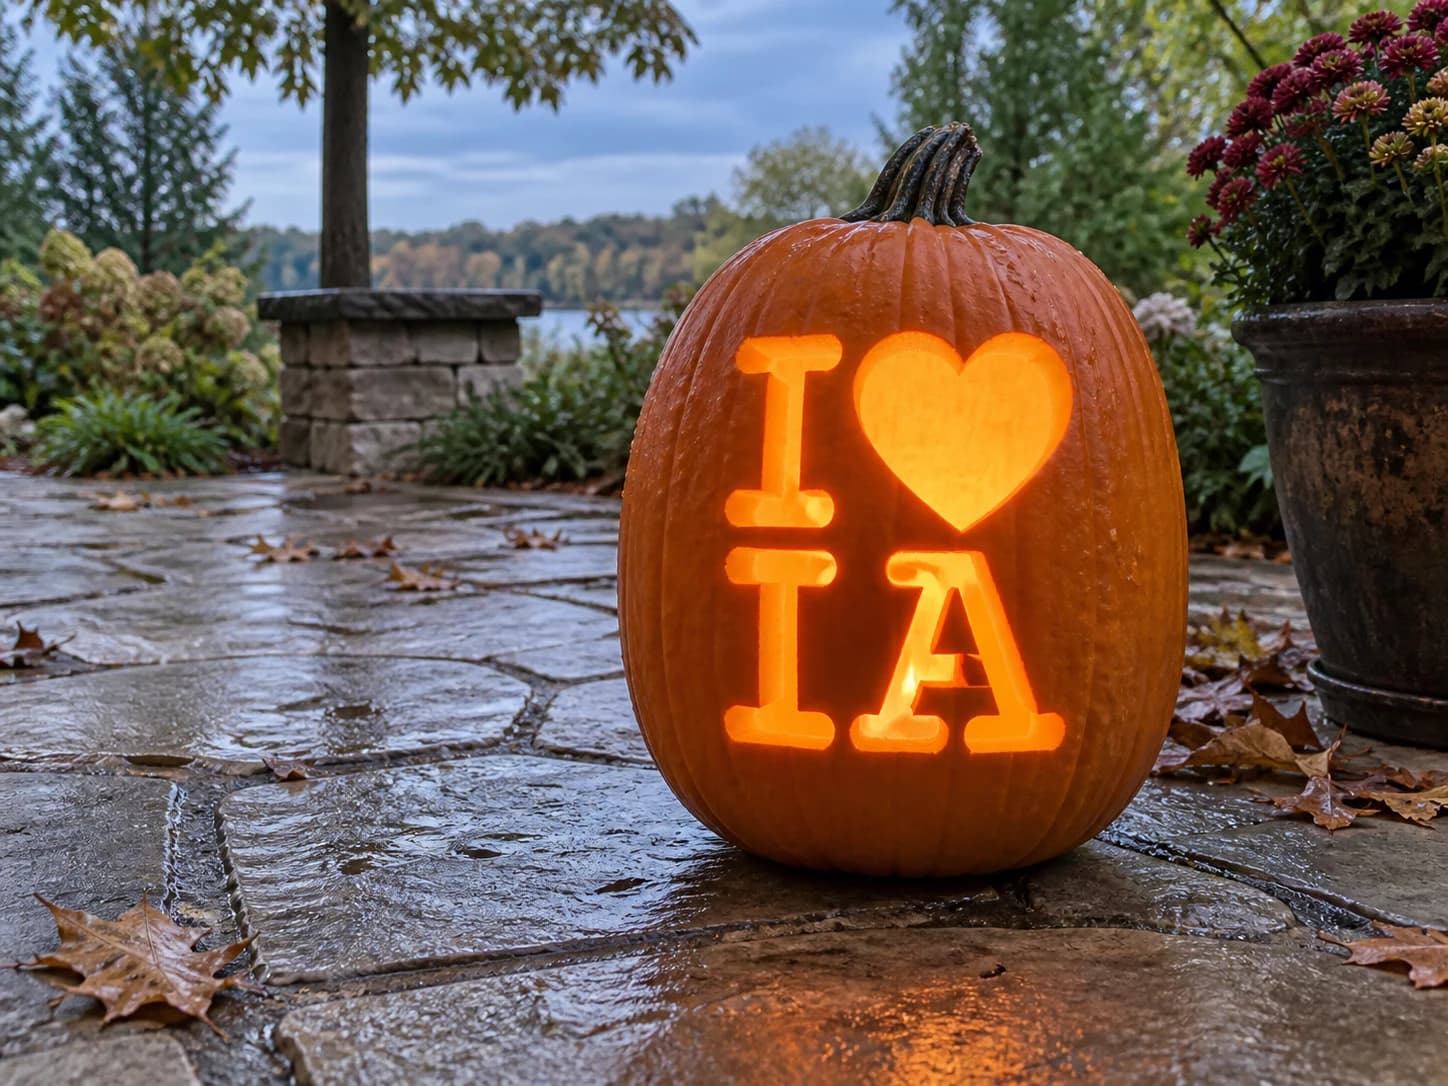
Iowa's "I Love IA" stencil arranges the block I and heart on the top row, with the letters I and A below in the same rounded slab typeface. The A carries the familiar triangular interior counter that keeps the letter recognizable; the I beside it is a plain open rectangle. Because the A counter sits close to the lower edge of the letter, cut the outer A shape fully before addressing the counter, so the surrounding wall is already stable when you remove the small triangle.
I Love Kansas Pumpkin Stencil
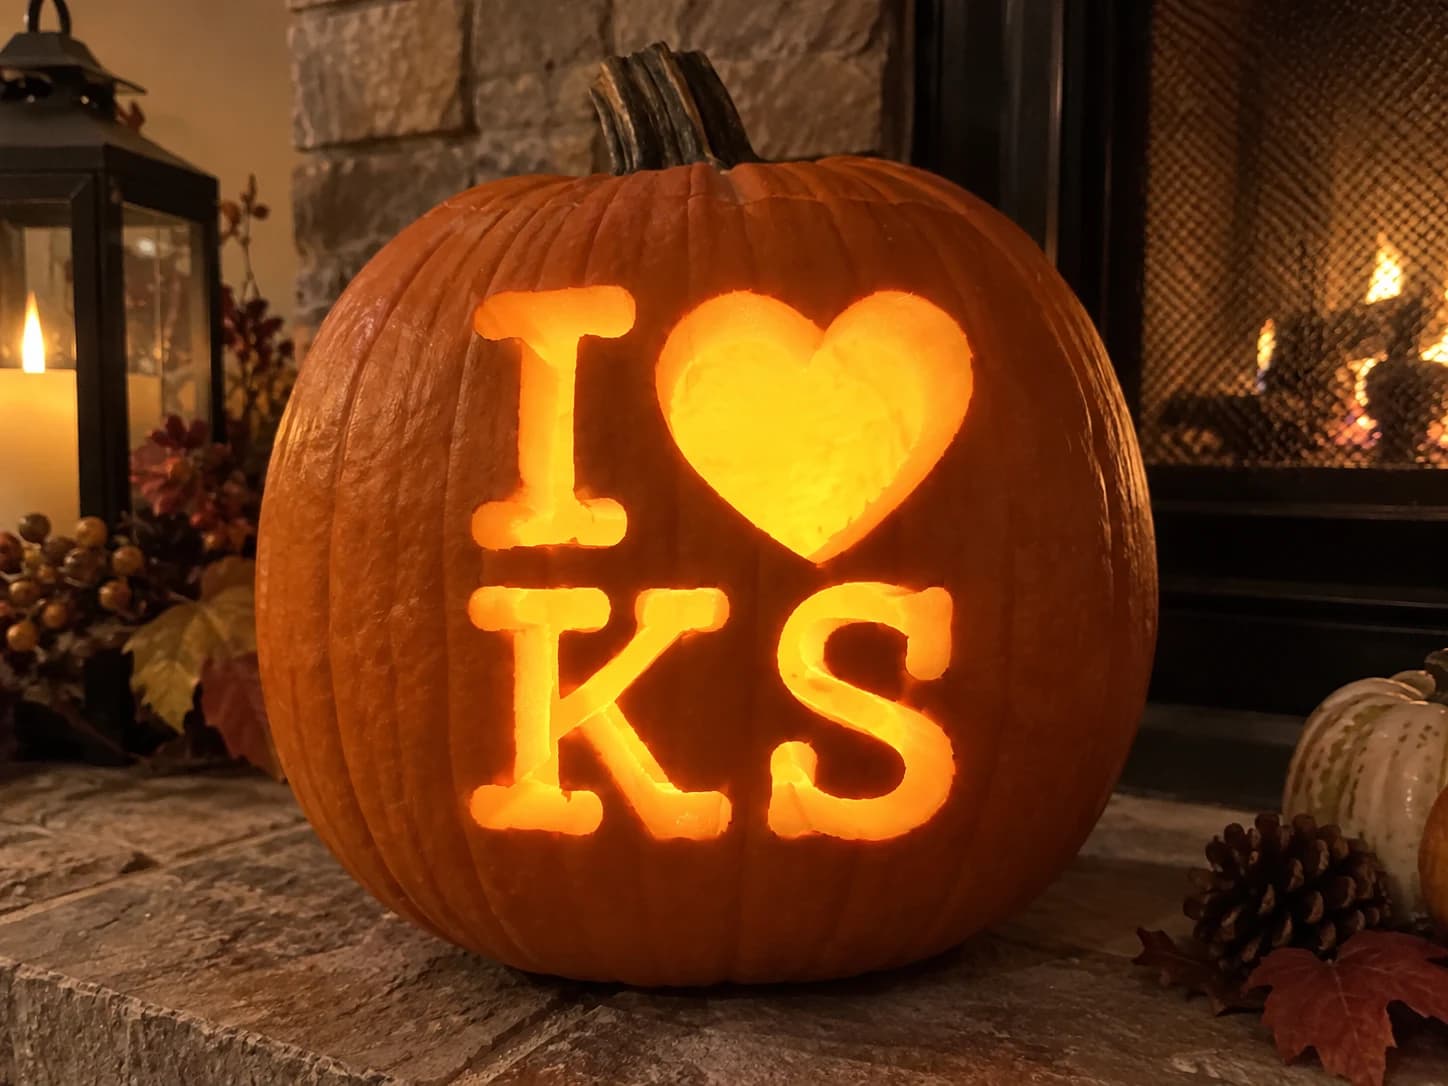
Kansas' "I Love KS" stencil puts the bold block I and heart on top, with the letters K and S filling the lower row in chunky rounded type. The S has no interior counter and its two open curves create an interesting top-and-bottom glow when lit, while the K's diagonal arm and leg leave a large open central area. Cut the K's arm first from the spine outward, then the leg from the spine downward, to avoid a meeting-cut problem at the central junction point.
I Love Kentucky Pumpkin Stencil
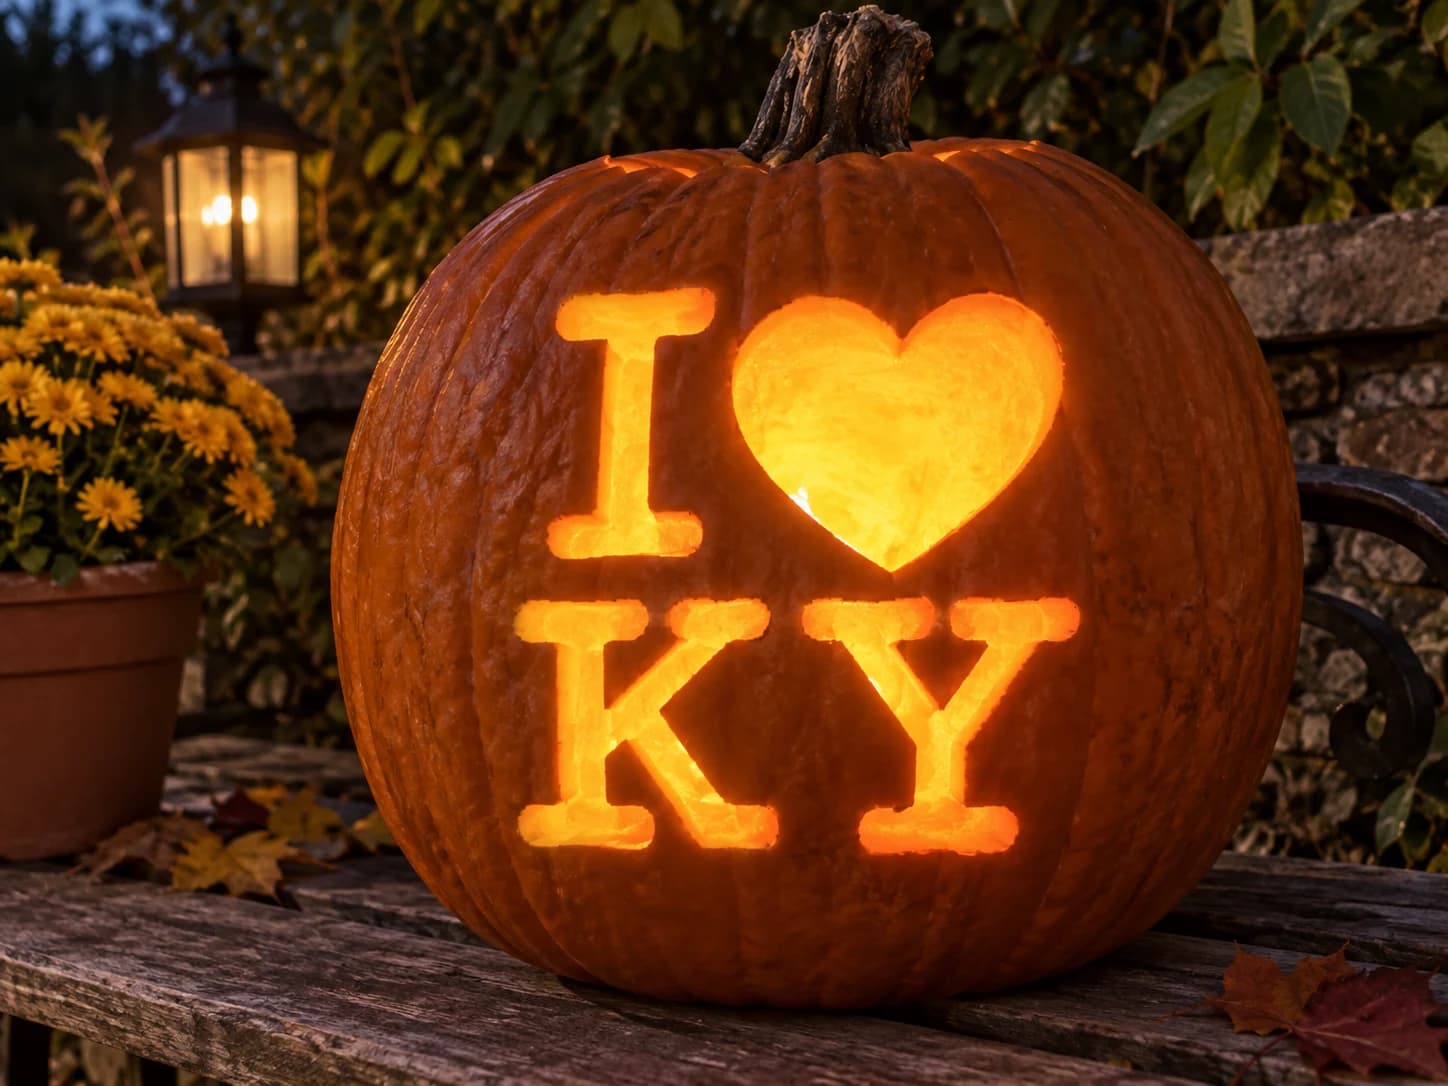
Kentucky's "I Love KY" stencil uses the two-row grid with block I and heart above, and the letters K and Y below in rounded block type. The Y's upper two diagonal arms and straight lower stem form a clean open silhouette with no counters, while the K mirrors the structure described for the Kansas stencil. When lit, both bottom letters glow as bright filled shapes. For the Y, make the two upper arm cuts first, meeting at the center junction, then cut straight down the stem to complete the shape cleanly.
I Love Louisiana Pumpkin Stencil
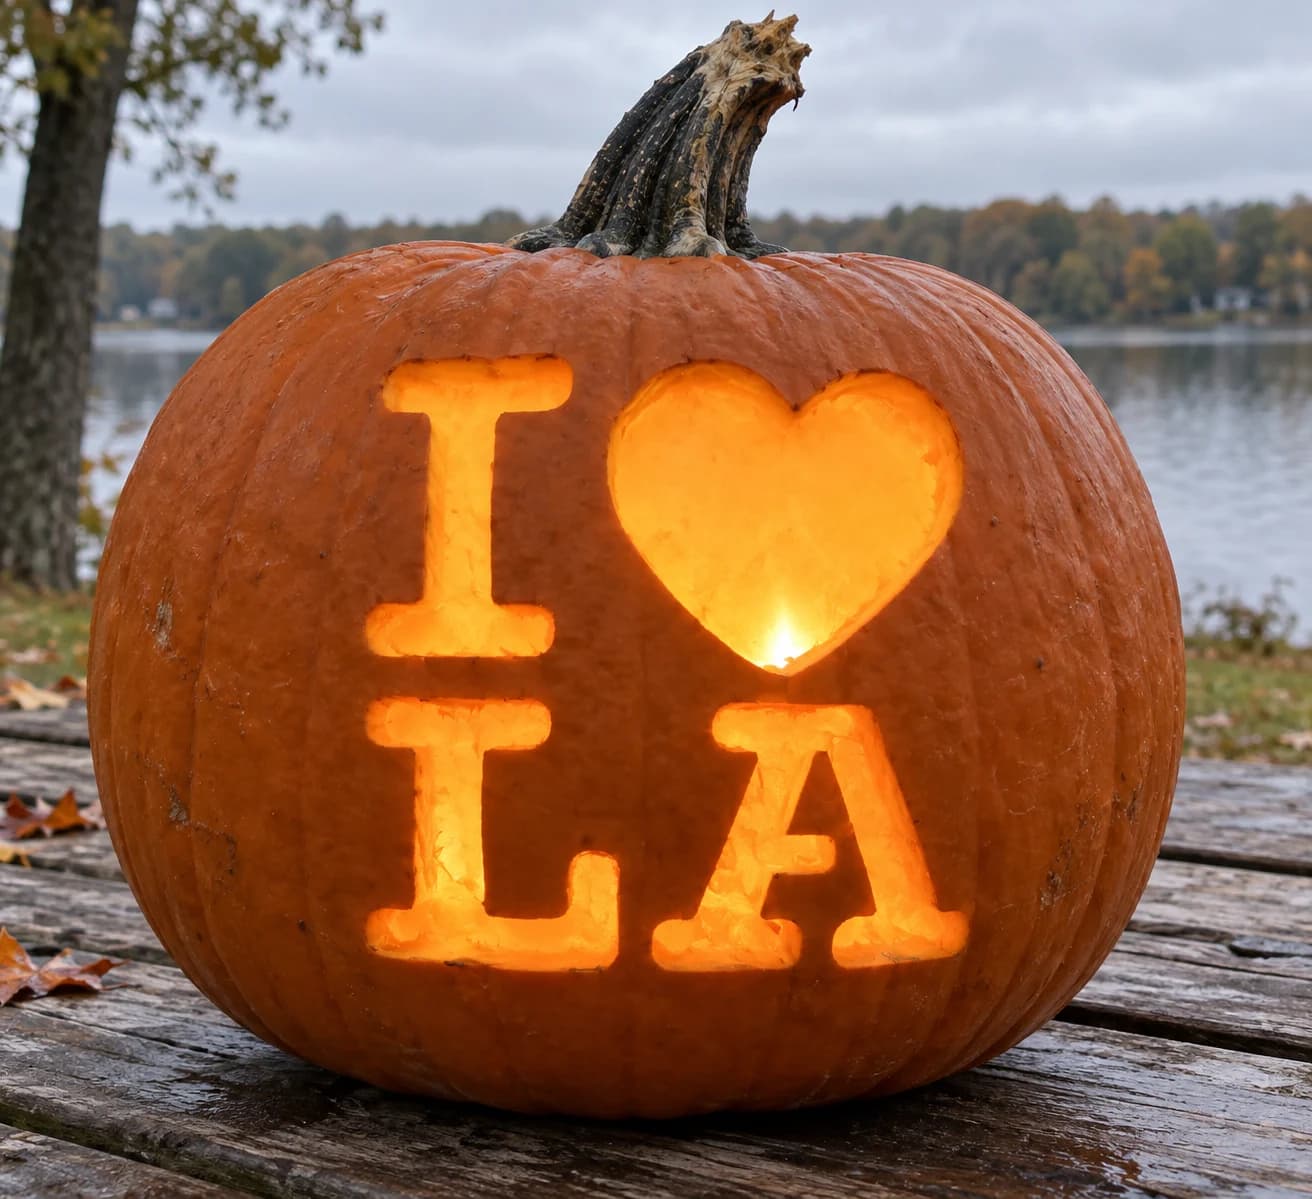
Louisiana's "I Love LA" stencil pairs the block I and heart on the top row with the letters L and A below in the same rounded slab typeface used throughout the state series. The A again has its triangular interior counter, and the L is a simple open shape. One distinction visible in the line art: the L is noticeably wider than most other single-letter shapes in the series, giving the bottom row a slightly lopsided but bold visual weight. Cut the A's outer shape first, then carefully remove the interior triangle, keeping the pumpkin wall steady from behind with your non-cutting hand.