Halloween Pumpkin Carving Contest · Starts October 1st · $500 in prizes
← Back to ideas
@ai_concepts
Jul 7, 2026
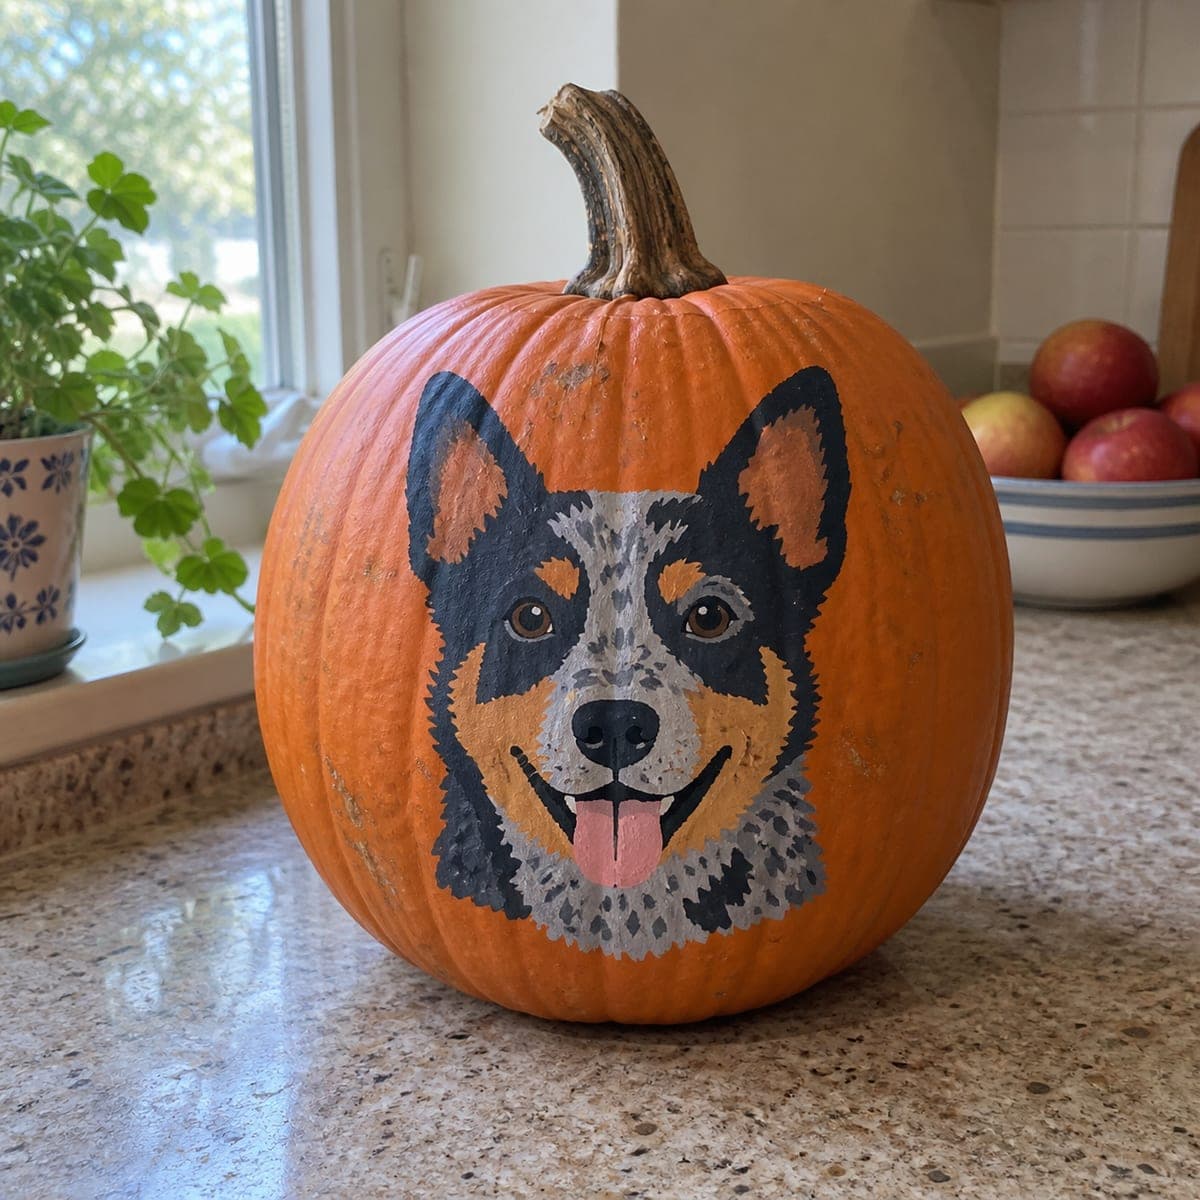
Blue Heeler Cattle Dog Painted Pumpkin PortraitAI
0

Blue Heeler Cattle Dog Painted Pumpkin Portrait

An Australian cattle dog with a happy open-mouth grin and speckled blue-gray coat fills the front of this painted pumpkin. The mottled heeler pattern is easier than it looks: base the head in gray, then stipple darker and lighter flecks with the tip of a stiff brush. Keep the tan eyebrow patches and pink tongue for last, since those small warm accents are what make the portrait read instantly as a blue heeler.

This is an AI-generated concept image: a realistic, carvable design idea rather than a photo of a finished carve. AI concepts are always labeled and sit out the leaderboard and the contest.

No ratings yet · Sign in to rate

Comments (0)

  • No comments yet — be the first.

Save without an account. Sign in to like or comment.

Our tips for carving a similar design

This is a paint-only pumpkin portrait, so the whole trick lives in layered color rather than cutting. Base the dog's face in mid gray, then build the mottled heeler coat by stippling darker and lighter flecks with a stiff brush tip. Save the tan eyebrow patches and pink tongue for the very end, since those warm accents are what instantly read as a cattle dog.

Written by PumpkinCarvingIdeas.com, inspired by the image above. These are our suggestions, not instructions from the uploader. This approach to the AI concept has not been tested on a real pumpkin.

From pumpkin to porch

  1. Pick and prep the pumpkin

    Choose a smooth, wide pumpkin with a flat front panel so the face has room to sit at eye level. Wipe the skin clean and let it dry fully. Since nothing is being cut, you can keep the stem and lid intact. If the surface is glossy, a very light wipe with rubbing alcohol helps paint grip better.

  2. Sketch the head in pencil

    Lightly draw the dog's head shape, the two upright ears, the muzzle, and the open smiling mouth. Mark where the eyes, nose, and tongue will go so proportions stay balanced. Keep lines soft since acrylic will cover them. Step back and check the face is centered on the panel before committing.

  3. Block in the base colors

    Paint the big flat shapes first: gray across the face and cheeks, black on the ears and around the eyes, and tan on the muzzle sides. Let each color dry before touching a neighboring one so edges stay clean. Use a medium round brush and two thin coats rather than one thick one. This flat base is your map for the speckling to come.

  4. Stipple the mottled heeler coat

    Load a stiff, nearly dry brush with dark blue-gray and dab tiny flecks across the gray areas, then repeat with off-white for the lighter speckles. Keep the dabs small and varied so the coat looks natural rather than patterned. Concentrate heavier speckling around the neck ruff and cheeks. Blot excess paint on a paper towel first to avoid blobs.

  5. Add the warm accents and eyes

    Paint the two tan eyebrow dots above the eyes, then the pink tongue hanging from the open mouth. Add the glossy brown eyes with a black pupil and a single white highlight dot in each to bring the face to life. Outline the nose in black and drop in two small nostril dots. These final touches are what make the portrait pop.

  6. Seal and photograph

    Once everything is fully dry, brush on a coat of clear matte or satin acrylic sealer to protect the paint from smudges and moisture. Set the pumpkin on a counter or porch in soft daylight for the best photo. Keep it out of direct sun and heavy rain so the colors last. Display indoors or in a sheltered spot to stretch its life.

Gather your supplies

Check things off as you get ready.

Work on a stable surface, keep your free hand out of the cutting path, and have an adult handle sharp tools.

Three levels of light

  • Leave intact

    The orange pumpkin skin all around the dog stays untouched as the natural background.

  • Peel & shade

    If you want a soft glow, you could lightly scrape the gray coat areas before painting so an inside LED warms them.

  • Cut through

    For an optional lit version, the open mouth or tongue could be cut through for the brightest point, with an LED puck inside.

Learn the carving basics

Before you start cutting

Do I need to carve anything for this design?

No, this is a paint-only portrait, so no cutting is required. That makes it a safe project you can do at a kitchen table without sharp tools. If you later want a glow, you can add a small cutout for an LED, but the painted version stands on its own.

How do I get the speckled coat to look natural?

Use a stiff brush that is almost dry and dab lightly rather than dragging. Vary the size and spacing of the flecks, and alternate a dark blue-gray with an off-white over your gray base. Practice a few dabs on paper first so you can gauge how much paint stays on the bristles.

Which paints hold up best on a pumpkin?

Standard acrylic craft paint adheres well and dries fast, which lets you layer the speckles quickly. Two thin coats cover better than one thick one and resist cracking. Finish with a clear acrylic sealer so the surface does not smudge when handled.

Your take belongs here, too.

Changed a detail? Made it simpler? Share a photo of your version and tell the community what worked.

Share your pumpkin

More pumpkins like this

You've reached the end · 8 pumpkins
The Patch Report

Fresh pumpkins, in your inbox.

The best new carvings, ideas worth stealing, and how-tos for carving season. Short, seasonal, and gone by November.

A short email during carving season. Unsubscribe anytime. See our privacy policy.