@squashbuckler
Sep 7, 2026

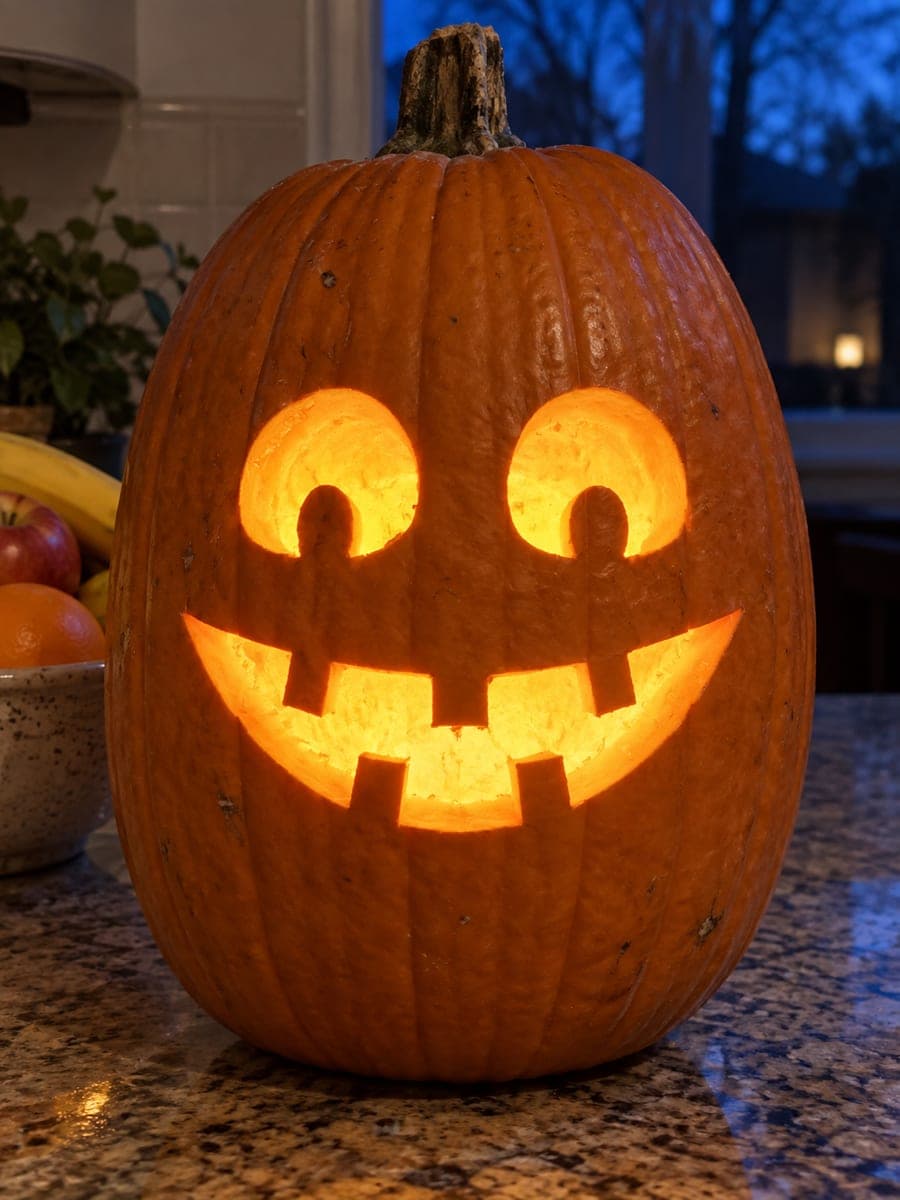
The core trick here is keeping every shape simple and geometric so young helpers can follow the lines. You carve a traditional jack-o'-lantern face with triangle eyes, a small triangle nose, and a friendly toothy grin. Everything is a straight-sided cutout, which makes it forgiving and quick to finish in one sitting.
Written by PumpkinCarvingIdeas.com, inspired by @squashbuckler's photo above. These are our suggestions, not instructions from the uploader, and this approach hasn't been tested on their exact carve.
Choose a tall, round pumpkin with a flat side facing out for the face. An adult cuts a lid around the stem at an angle so it rests back in place without falling through. Angle the knife toward the center so the lid has a ledge to sit on. Set the lid aside for later.
Have kids scoop the seeds and pulp with a sturdy spoon or their hands. Scrape the inside of the face wall until it is about one inch thick, which makes cutting the shapes much easier. A thinner wall lets a child's tool push through with less force. Save the seeds if you want to roast them.
Sketch two triangle eyes, a small triangle nose, and a wide smile with a few square teeth using a washable marker. Keep the shapes big and spaced apart so the pumpkin stays strong between them. Leave solid pumpkin between each tooth so the grin does not become one long slot. Let a child help place the marker dots for the eyes.
An adult cuts the triangle eyes and nose first using a small serrated carving saw, sawing gently along the lines. Push the cut pieces out from the inside with a thumb. Doing the little shapes before the mouth keeps the pumpkin sturdy while you work. Go slow and keep fingers behind the blade.
Save the wide mouth for last since it is the largest opening. Cut each tooth notch carefully, leaving the little squares of skin in place between the gaps. Ease the mouth pieces out gently so the teeth do not snap. This order keeps the face rigid until the very end.
Drop a battery LED tea light or a small LED puck inside and set the lid back on. Skip real candles, especially with kids around. Turn off the room lights to check the glow, then trim any ragged edges from the inside. Gather everyone for a proud family photo.
Check things off as you get ready.
Work on a stable surface, keep your free hand out of the cutting path, and have an adult handle sharp tools.
The whole outer skin of the pumpkin stays dark and orange, framing the face.
You can lightly scrape thin channels around the eyes or mouth for a soft halo if you want extra glow.
The triangle eyes, triangle nose, and the toothy smile are cut fully through for the brightest light.
Kids are great at scooping the seeds, drawing the face with a marker, and pushing cut pieces out from the inside. Leave all the actual cutting to an adult with a proper carving saw. Little ones can also help choose where the eyes go and hold the light at the end.
Draw the teeth as wide, chunky squares with solid pumpkin between each one, and cut the mouth last so the wall stays firm while you work the smaller shapes. Ease each piece out gently rather than forcing it. If a tooth does crack, a toothpick pushed through from behind can pin it back in place.
Scrape the inside of the face area down to about one inch with a metal scoop before drawing anything. A thinner wall lets the saw glide through with far less pressure, which is safer and easier. It also lets more light escape for a brighter glow.
Changed a detail? Made it simpler? Share a photo of your version and tell the community what worked.
The best new carvings, ideas worth stealing, and how-tos for carving season. Short, seasonal, and gone by November.




Comments (0)