Halloween Pumpkin Carving Contest · Starts October 1st · $500 in prizes
← Back to ideas
@ai_concepts
Sep 14, 2026
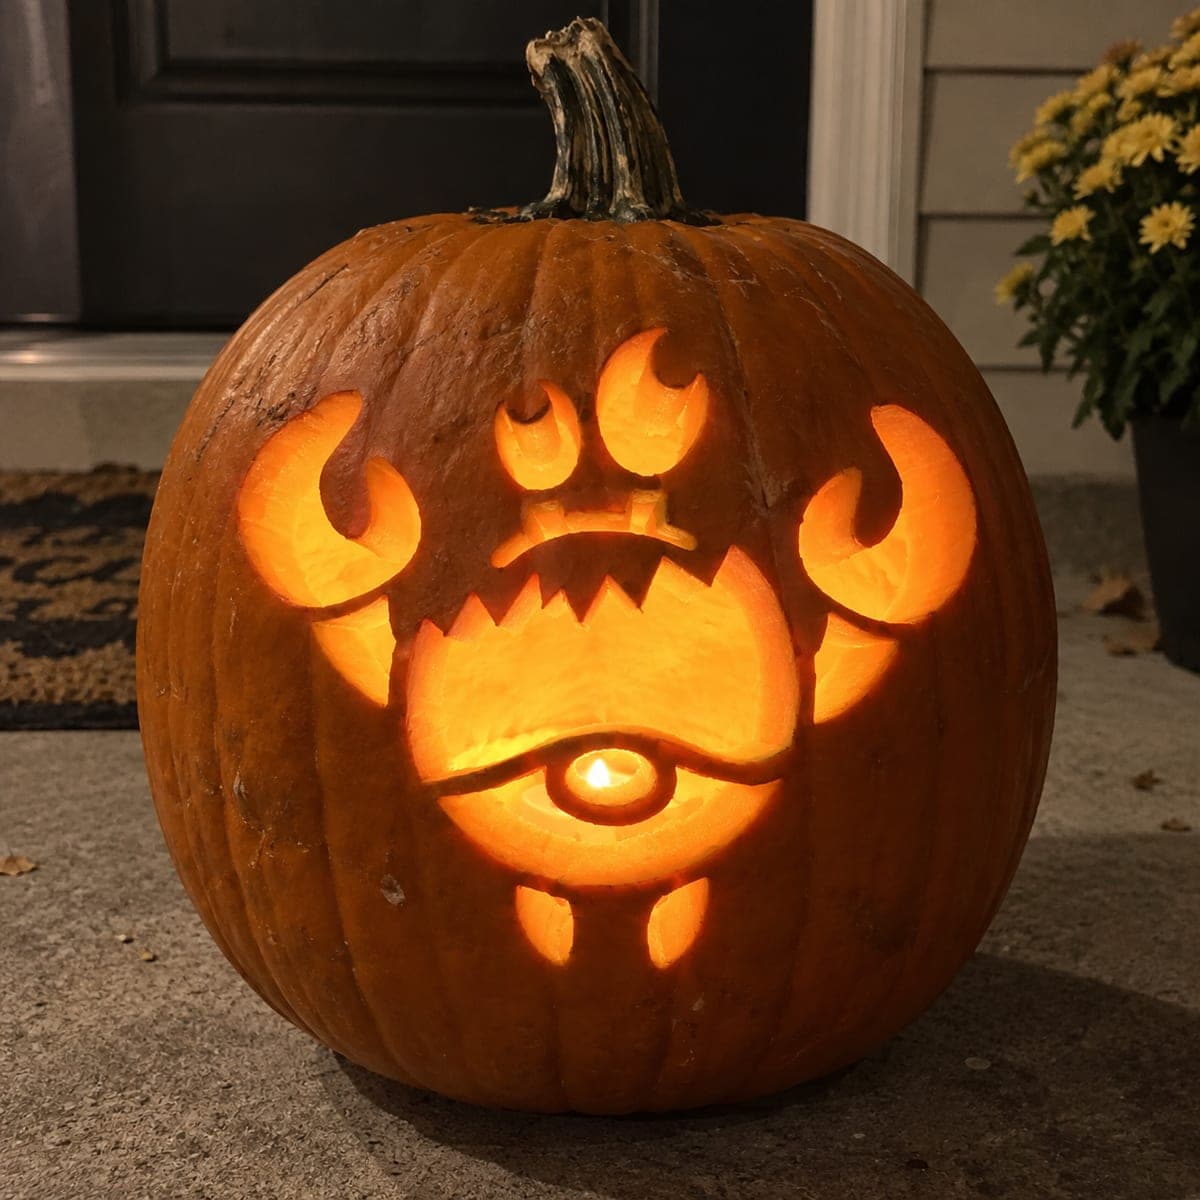
Lopsided One-Eyed Monster Pumpkin
1/2
AI
0

Lopsided One-Eyed Monster Pumpkin

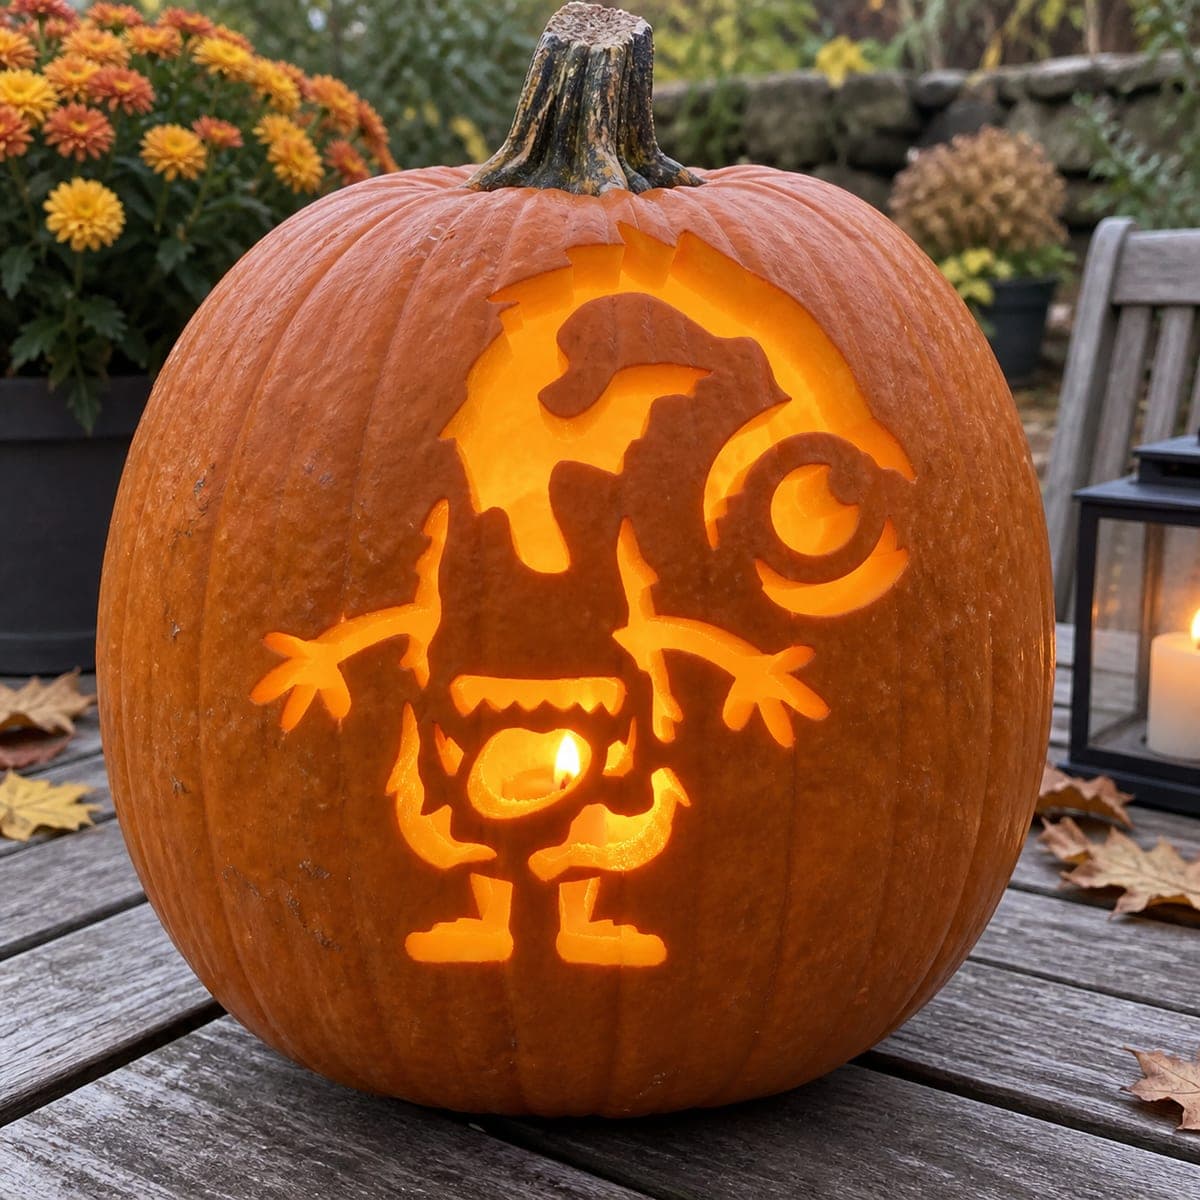
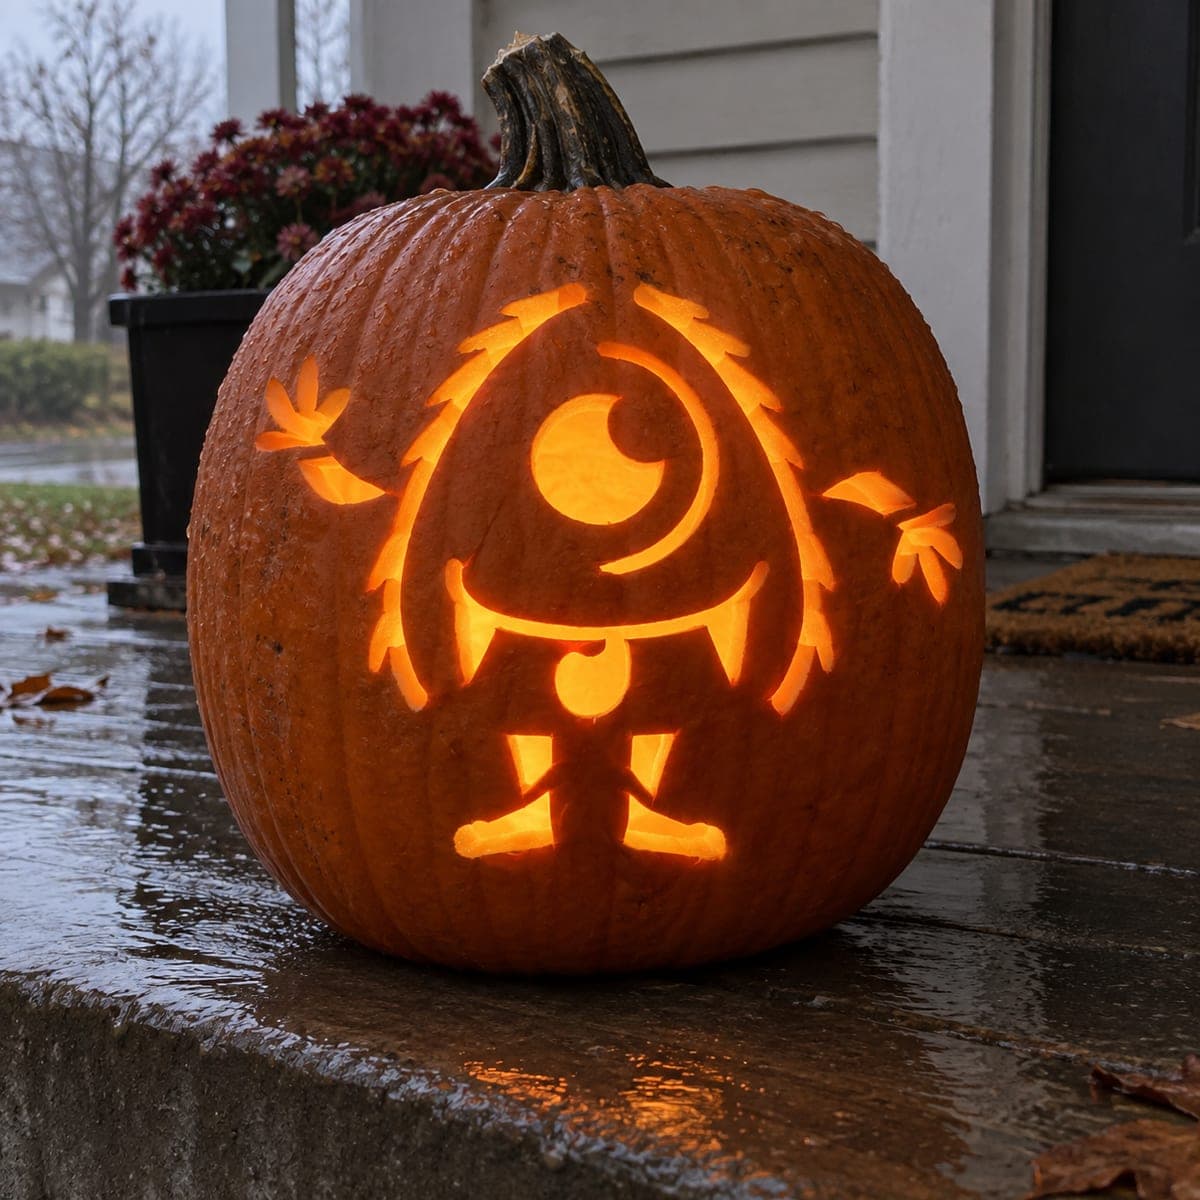
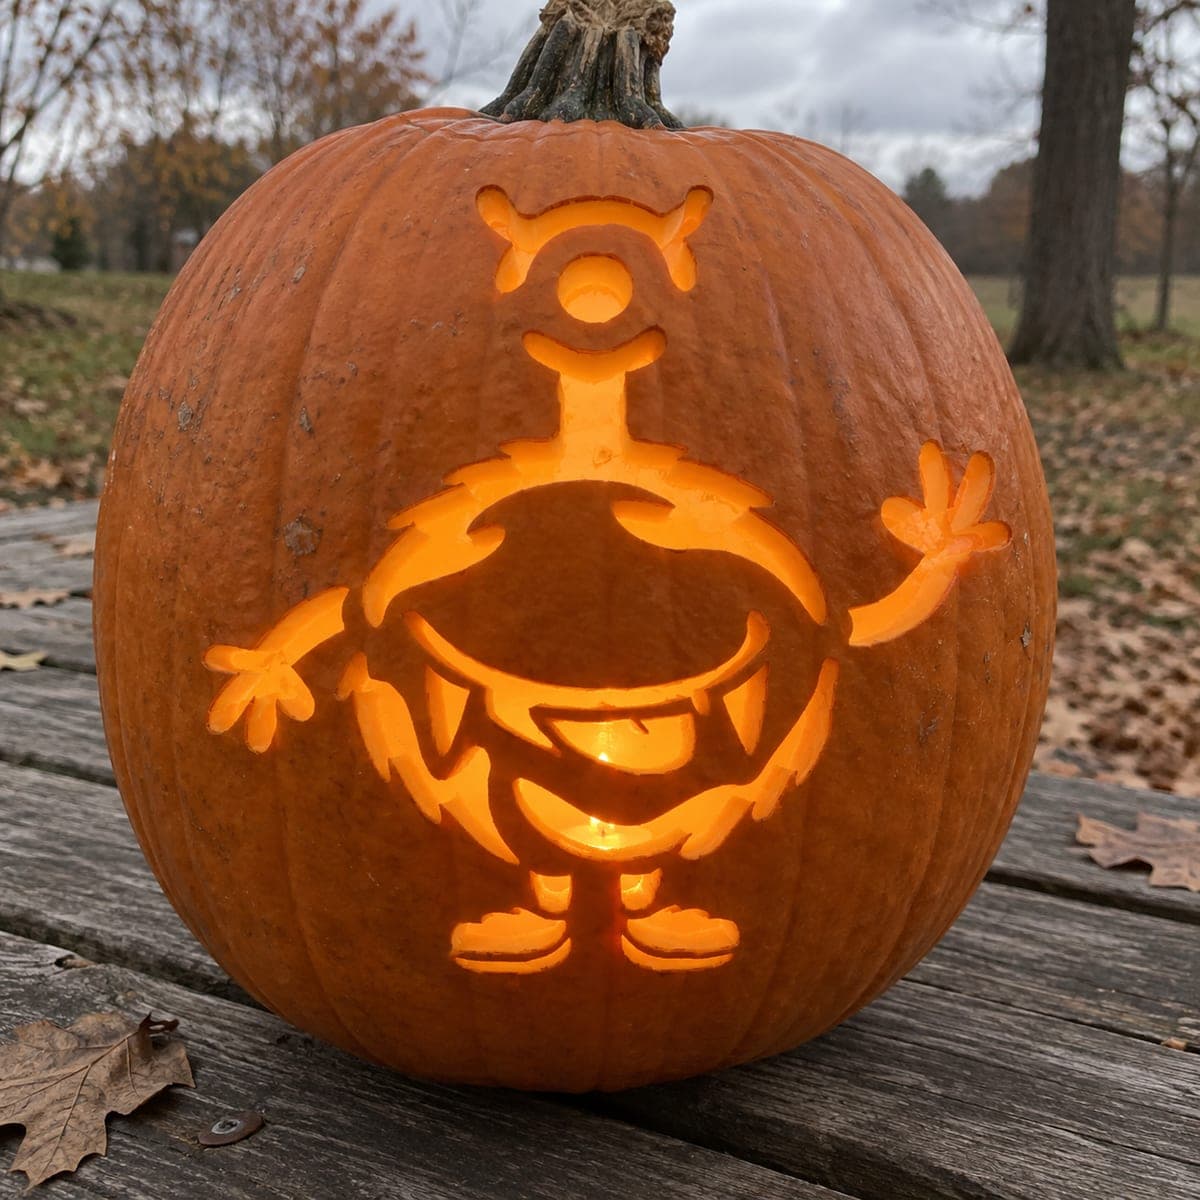
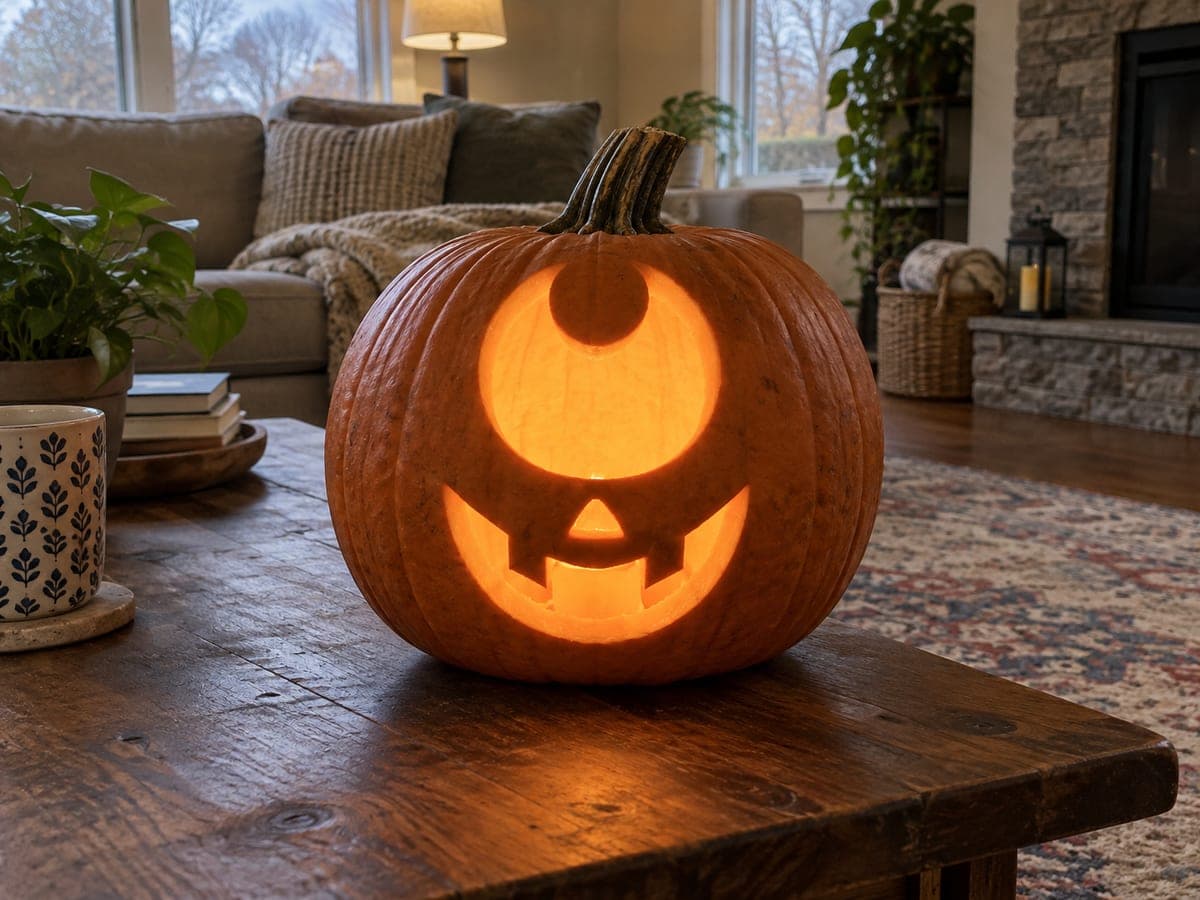
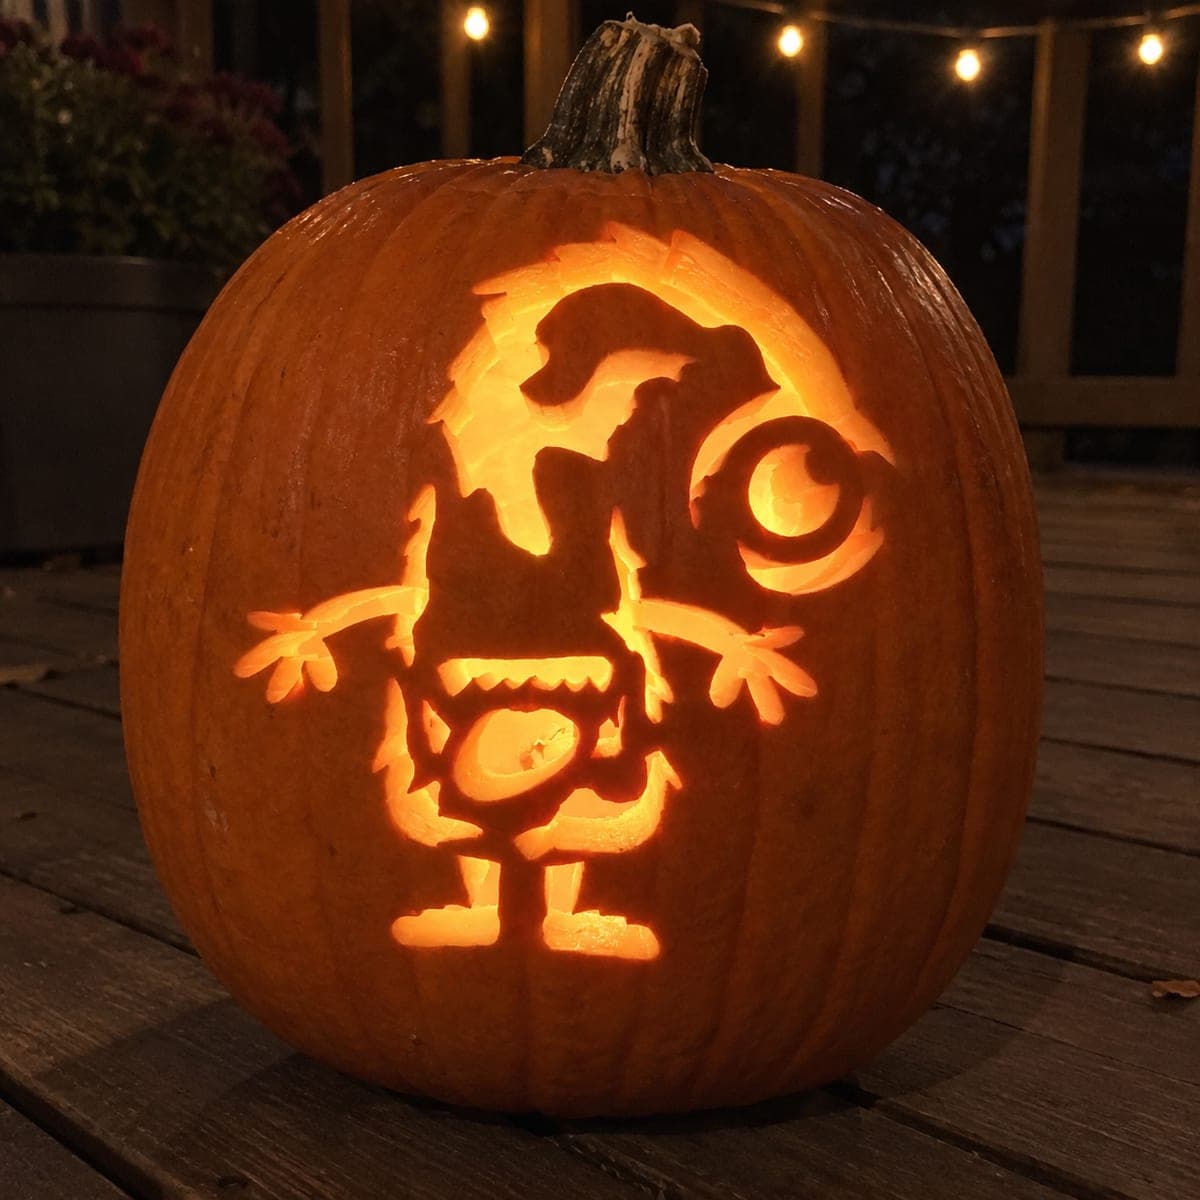
A compact cartoon monster with wild spiky hair, one large crescent-shaped eye on the right, a square-ish mouth with a bottom tooth, and two small hands spreads its arms wide in this funny cutout pumpkin carving idea. The crescent eye is the widest single opening in the design and frames the entire right half of the face. Carve the crescent eye first to establish the lightest zone, then cut the smaller mouth gap and hair spikes, keeping the pumpkin wall thinned evenly so light reads consistently across all the openings.

This is an AI-generated concept image: a realistic, carvable design idea rather than a photo of a finished carve. AI concepts are always labeled and sit out the leaderboard and the contest.

No ratings yet · Sign in to rate
Comments (0)

  • No comments yet — be the first.

Save without an account. Sign in to like or comment.

Our tips for carving a similar design

The core trick here is a single large crescent eye that anchors the whole right side of the face and does most of the lighting work, so everything else stays small and simple. You would carve that big opening first to set your brightest zone, then add the square mouth, the bottom tooth, the spiky hair, and the two little outstretched hands. Thin the pumpkin wall evenly behind the smaller cuts so the light glows at a consistent brightness across the design.

Written by PumpkinCarvingIdeas.com, inspired by the image above. These are our suggestions, not instructions from the uploader. This approach to the AI concept has not been tested on a real pumpkin.

From pumpkin to porch

  1. Clean and prep the pumpkin

    Pick a pumpkin with a wide, flat front so the lopsided face has room to spread. Cut a lid from the bottom or the back rather than the top, since a bottom opening lets you set the pumpkin down over an LED light easily. Scoop out the seeds and pulp, then scrape the inside of the carving wall down to about one inch thick. An even wall is the key to getting all the openings to glow at the same brightness.

  2. Transfer the design

    Print your monster pattern sized to fit the front, then tape it flat, snipping small darts around the curves so the paper hugs the pumpkin. Poke the outlines with a pin or a transfer wheel, following the crescent eye, the square mouth, the hair spikes, and the two hands. Pull the paper and connect the dots with a washable marker if the pattern is hard to read. Double check that the eye sits on the right side and the hair leans over to keep that intentional lopsided look.

  3. Carve the crescent eye first

    Cut the big crescent eye before anything else, since it is the widest single opening and sets your lightest zone. Use a small serrated saw and make slow, steady strokes, keeping the blade perpendicular to the surface. Leave the little round pupil and the curved iris line as attached islands of skin rather than cutting them free, so the eye still reads as an eye. Because this is a concept image, keep any thin ring shapes a bit thicker than they look on screen so they do not snap.

  4. Cut the mouth, tooth, and hair spikes

    Move to the square-ish mouth next and carve the opening, then leave the single bottom tooth as a bridge of uncut skin so it stands out dark against the glow. Cut the jagged hair spikes as separate slots, keeping a small band of skin between each one so the top of the head stays sturdy. Work from the center outward and support the pumpkin with your free hand well away from the blade. Save the widest gaps for last so the wall stays strong while you carve the fine points.

  5. Add the little hands and shade the edges

    Carve the two small outstretched hands as thin cutouts, leaving narrow bridges where the fingers meet so they do not crumble. For a softer look, peel just the top skin off the arms and any outline areas instead of cutting all the way through. This gives you a dim orange glow that separates the bright openings from the dark background. Take your time on these small shapes, since they add the funny, friendly personality to the monster.

  6. Light it and take the photo

    Set a battery LED light inside, ideally a warm flickering one, and lower the pumpkin over it through the bottom opening. Check that the crescent eye, mouth, and hair all read at a similar brightness, and scrape the inside wall a little thinner anywhere that looks dim. Shoot your photo at dusk on a dark porch so the glow pops. A dab of petroleum jelly on the cut edges helps slow drying if you want it to last a few more days.

Gather your supplies

Check things off as you get ready.

Work on a stable surface, keep your free hand out of the cutting path, and have an adult handle sharp tools.

Three levels of light

  • Leave intact

    The untouched skin around the whole face and the little bottom tooth stay dark for contrast.

  • Peel & shade

    Shave the top skin off the arms and outline areas for a soft mid glow that frames the shapes.

  • Cut through

    The crescent eye is the brightest full cutout, with the square mouth, hair spikes, and hands close behind.

Learn the carving basics

Before you start cutting

Since this is an AI concept, will the thin eye ring and hair spikes actually hold up on a real pumpkin?

They can, but you should thicken them slightly from what the image shows. Leave the crescent eye's iris and pupil as attached skin islands rather than free-floating rings, and keep a band of skin between each hair spike. Those small bridges keep the details from cracking or drooping.

Should I carve the big eye or the mouth first?

Carve the crescent eye first because it is the largest single opening and sets your brightest zone. Cutting the biggest hole early lets you judge how much light you have before you add the smaller mouth and hair. Save the very widest gaps for last so the wall stays strong while you work the fine points.

How do I keep the lopsided look from just looking like a mistake?

Commit to the imbalance rather than fighting it. Place the eye clearly on the right side and let the hair lean the same way, so the whole face reads as an intentional cartoon tilt. Keeping the two hands and the mouth centered underneath grounds the design so the lopsided top feels playful, not accidental.

Your take belongs here, too.

Changed a detail? Made it simpler? Share a photo of your version and tell the community what worked.

Share your pumpkin

More pumpkins like this

You've reached the end · 8 pumpkins
The Patch Report

Fresh pumpkins, in your inbox.

The best new carvings, ideas worth stealing, and how-tos for carving season. Short, seasonal, and gone by November.

A short email during carving season. Unsubscribe anytime. See our privacy policy.