Halloween Pumpkin Carving Contest · Starts October 1st · $500 in prizes
← Back to ideas
@ai_concepts
Sep 25, 2026
Open Book Cutout Classroom Pumpkin CarvingAI
0

Report this carving

Tell us what is wrong. Reports are private.

Open Book Cutout Classroom Pumpkin Carving

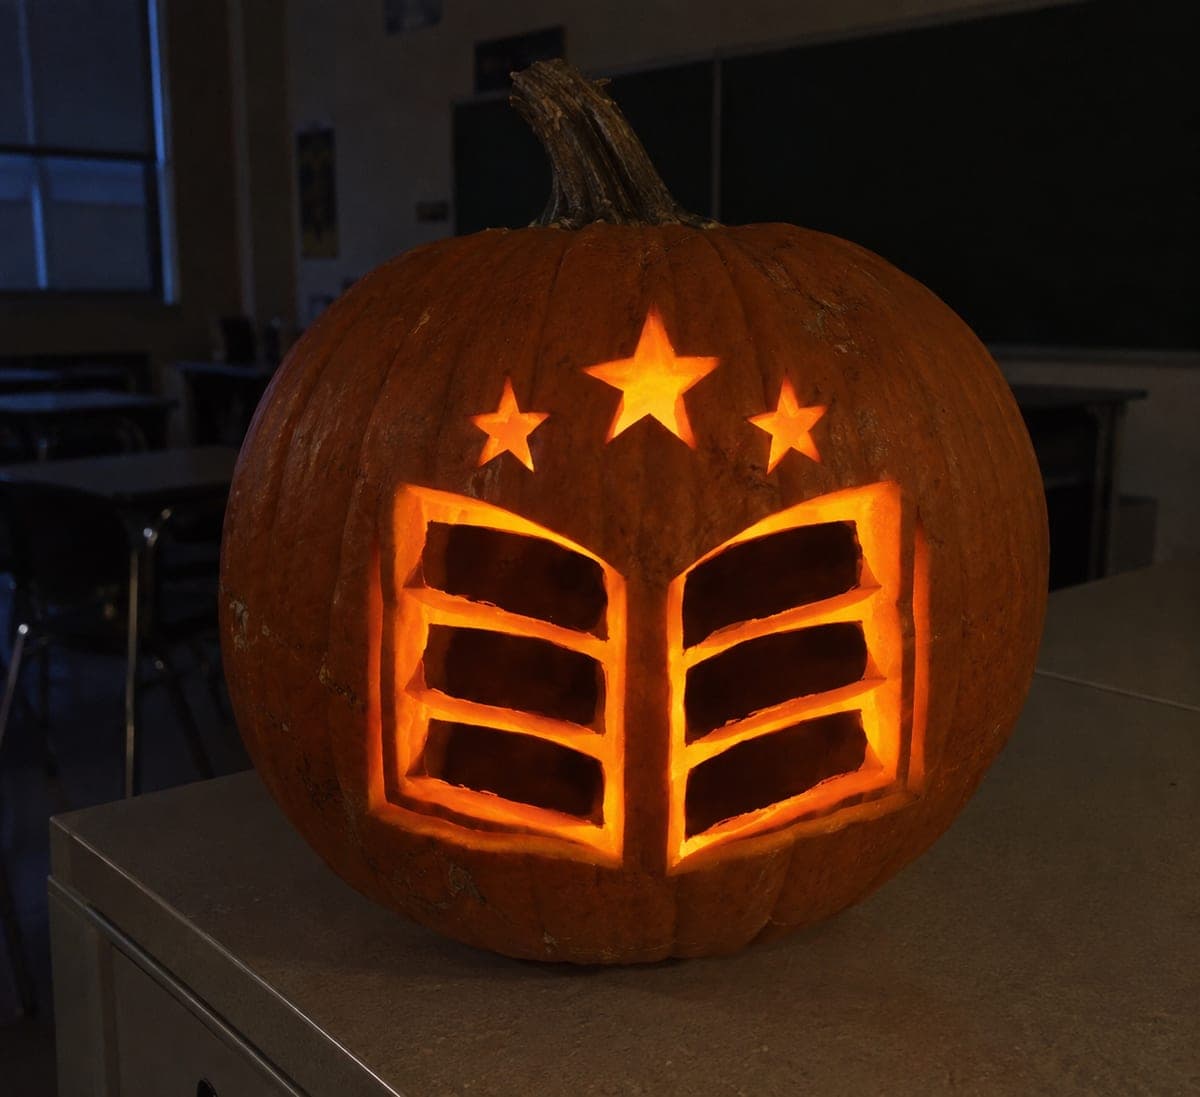
Six glowing page apertures separated by broad retained bands suggest an open book in this clever classroom pumpkin idea. Attach each band to both the central spine and the outer shell so none of the separating pieces become loose during carving. Back the outer book-cover line and the three star accents with thin rind so they add warmth without requiring freestanding cuts. Pair this pumpkin with a stack of picture books on a classroom shelf for a cohesive reading-themed display.

No ratings yet · Sign in to rate

Comments (0)

  • No comments yet — be the first.

Save without an account. Sign in to like or comment.

Our tips for carving a similar design

Six open rectangular page apertures are separated by broad retained bands that each connect to a central spine and to the outer shell, so the structure works like a ladder of bridges. The outer book-cover line and three star accents are backed rather than fully cut, adding warmth without sacrificing rigidity. Cutting the page apertures outward from the spine keeps the pumpkin stable throughout.

From pumpkin to porch

  1. Map the book layout on the pumpkin

    Draw the central spine as a vertical line down the middle of the face. Mark three page-slot positions on each side of the spine, evenly spaced with a solid rind band of at least three-quarters of an inch between each slot. Confirm all six bands touch both the spine and the outer shell edge before cutting.

  2. Transfer the template precisely

    Print or hand-draw the six slots and their separating bands, then transfer via pin holes and connect with a marker. Mark each outer book-cover line and each star accent position in a different color so you do not accidentally cut them through.

  3. Cut page apertures in pairs across the spine

    Cut the center-most slot on each side of the spine first, then move outward to the next pair, alternating across rather than working top to bottom. This keeps the pumpkin load-balanced as material is removed. Push each freed rectangle inward with a finger rather than prying it from the front.

  4. Confirm band integrity after each pair

    After removing each pair of page apertures, grip the pumpkin gently to test for flex. If you feel any give in the bands, stop and reinforce the thinnest bridge by cutting a supporting sliver of rind from inside rather than removing more from the front. All six bands must stay firmly connected throughout.

  5. Score outer book line and star accents

    Once all six slots are cut and the structure is confirmed solid, score the outer book-cover contour as a shallow gouge line following the book shape. Then peel each star accent to a shallow depth with a detail knife, testing from inside with a flashlight after each one.

  6. Light and pair with books for display

    Set a battery LED light inside and arrange the pumpkin on a classroom shelf next to a stack of picture books. The glowing page slots echo the open books nearby. Coat all cut edges with petroleum jelly and check the band connections every few days as the pumpkin ages.

Written with AI to match this design

Gather your supplies

Check things off as you get ready.

Work on a stable surface, keep your free hand out of the cutting path, and have an adult handle sharp tools.

Three levels of light

  • Leave intact

    Broad rind bands between page slots, the central spine, and outer shell corners stay solid and dark

  • Peel & shade

    Outer book-cover contour line and three star accents, skin and thin flesh removed for a soft amber highlight

  • Cut through

    All six open page-slot rectangles fully cut through for bright warm light

Learn the carving basics

Before you start cutting

How wide do the bands between page slots need to be?

Three-quarters of an inch is the practical minimum, but a full inch is safer, especially if the pumpkin wall is thinner than expected after hollowing. Measure the bands on the template before transferring to the pumpkin, since it is very difficult to add rind back once a slot is cut too wide.

My page slots are not perfectly rectangular. Does that matter?

Slight irregularities actually look charming in a hand-carved piece and do not affect the structural integrity of the design. If the uneven slots bother you, use a small metal ruler held against the rind as a cutting guide for the straight sides of each rectangle.

Can I add text to one of the page slots instead of leaving it open?

You can back one slot with a thin rind layer and then carve letters into it, but this is a significantly more complex technique than the rest of this design. A simpler alternative is to score a word into the solid rind band between two slots, which reads well under interior light without requiring precise letter cuts through the full thickness.

Your take belongs here, too.

Changed a detail? Made it simpler? Share a photo of your version and tell the community what worked.

Share your pumpkin

More pumpkins like this

You've reached the end · 8 pumpkins
The Patch Report

Fresh pumpkins, in your inbox.

The best new carvings, ideas worth stealing, and how-tos for carving season. Short, seasonal, and gone by November.

A short email during carving season. Unsubscribe anytime. See our privacy policy.
