Halloween Pumpkin Carving Contest · Starts October 1st · $500 in prizes
← Back to ideas
@ai_concepts
Sep 25, 2026
Reading Owl Open Book Expert Classroom PumpkinAI
0

Report this carving

Tell us what is wrong. Reports are private.

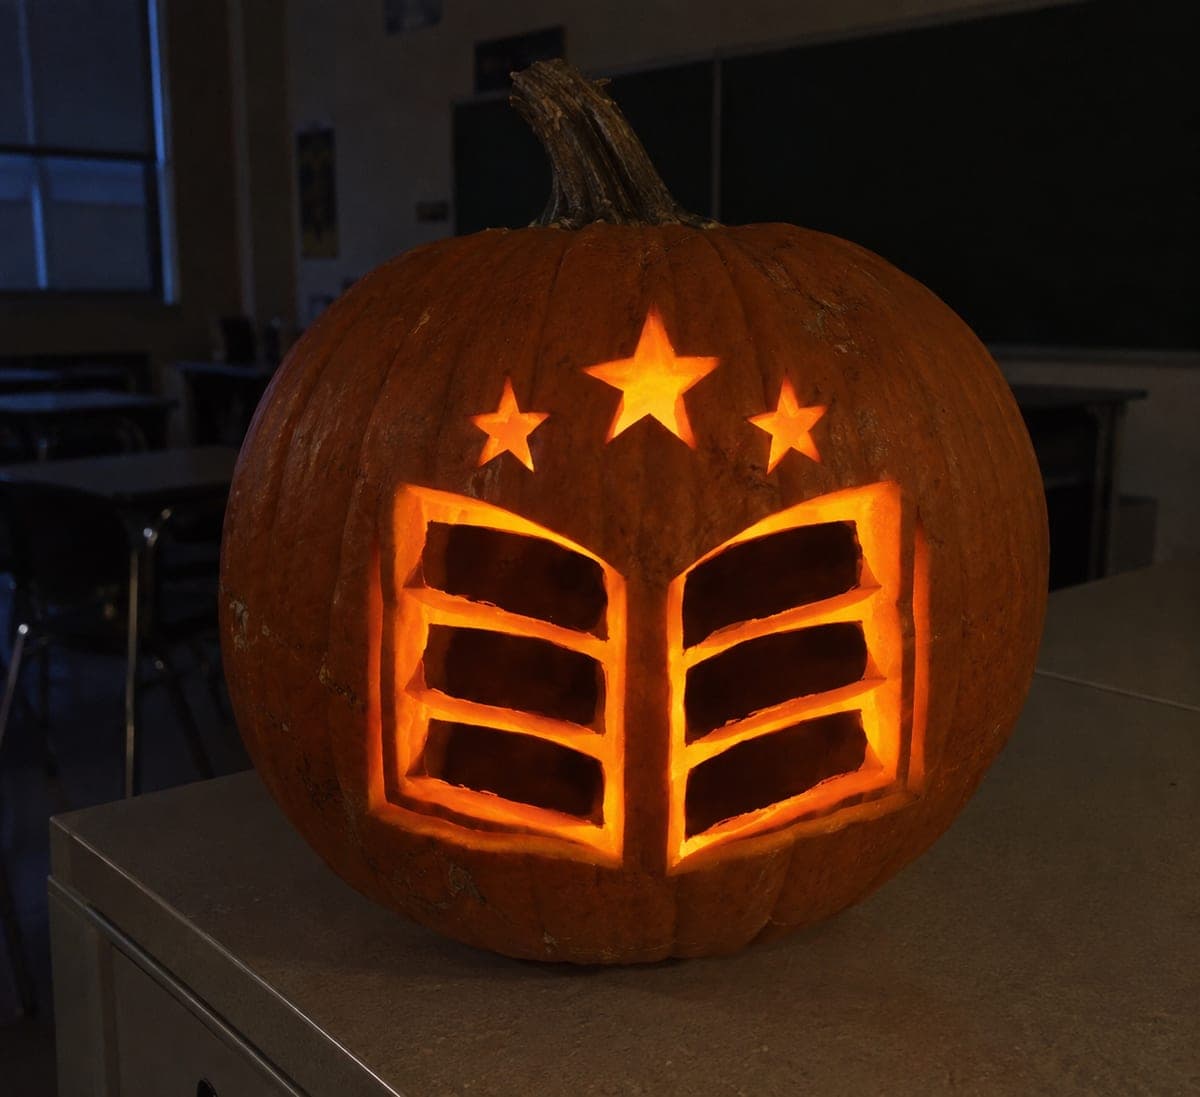
Reading Owl Open Book Expert Classroom Pumpkin

A retained owl figure sits astride an open book whose six page slots and sky windows all glow through in this ambitious classroom pumpkin carving idea. Connect the owl broadly to the central spine before removing the surrounding page apertures, keeping both ends of each book band attached to the outer shell throughout. Cut the owl's eye holes last and leave the small beak and wing details backed so delicate features survive handling. Lit from within, the layered depths of this design reward close inspection.

No ratings yet · Sign in to rate

Save this design for carving night, then share a photo of your own jack-o'-lantern once it's glowing.

Comments (0)

  • No comments yet — be the first.

Save without an account. Sign in to like or comment.

Our tips for carving a similar design

The retained owl figure is connected broadly to the book's central spine before the surrounding page apertures are opened, so the spine acts as the anchor for the entire design. Sky windows at the top add height to the composition, and the owl's eye holes and small backed beak and wing details are cut last to avoid weakening the structure prematurely. Lit from within, the layered depths of owl, book, and sky create a scene worth close examination.

From pumpkin to porch

  1. Plan the owl-spine connection carefully

    Sketch the owl sitting astride the spine with its body center directly over the spine center line. The owl's lower half should connect to the spine by at least one inch of solid rind on each side of the midline. Confirm this connection point on the template before transfer, as it is the single most critical structural element.

  2. Transfer the full scene

    Transfer the composite design via pin holes, using different marker colors for: sky windows (cut), page slots (cut), owl body outline (retained), owl eye holes (cut last), and backed beak or wing details. Clear annotations now prevent costly mistakes later.

  3. Cut sky windows first

    Remove the open sky regions at the top and upper sides of the composition before any book or owl carving begins. These large removals open the interior to view and relieve shell pressure without yet touching the owl or book structure.

  4. Cut page apertures working outward from the spine

    Remove the centermost page slot on each side of the spine first, alternating sides, then move to the outer slots. Keep the owl-spine connection fully intact throughout this stage. Check structural integrity by gentle touch after each pair of slots is removed.

  5. Free the owl silhouette edges

    With page slots confirmed solid and the sky open, cut the negative space around the owl body outline, leaving the broad spine connection completely untouched. Work from the owl's head downward on each side, maintaining a steady grip on the pumpkin throughout.

  6. Add eye holes and backed details last

    Cut the owl's eye holes with a small punch or detail blade. Score the beak and wing details as shallow backed peels, testing glow from inside after each one. Coat all cut edges with petroleum jelly and insert a warm LED puck before displaying.

Written with AI to match this design

Gather your supplies

Check things off as you get ready.

Work on a stable surface, keep your free hand out of the cutting path, and have an adult handle sharp tools.

Three levels of light

  • Leave intact

    Retained owl body, central spine, and book-band separators stay solid as dark silhouettes

  • Peel & shade

    Small owl beak and wing details backed with thin rind for a secondary soft glow

  • Cut through

    Sky windows at the top, all six page-slot apertures, and the owl's eye holes fully open for bright light

Learn the carving basics

Before you start cutting

What happens if I accidentally cut through the owl-spine connection?

Stop carving immediately and stabilize the break by inserting two toothpicks dipped in craft glue across the fracture line from the inside. Allow 15 minutes to set. If the break is severe, the owl figure may need to be removed entirely and the design finished as a book-only composition.

How do I confirm the spine is thick enough before I start?

After hollowing, hold a flashlight against the spine area from outside and mark where the rind feels firm versus where light shows through thin spots. The spine line should read as consistently opaque under that test. If any thin spot is found before cutting, adjust your template to route the owl attachment away from it.

Is there a way to simplify this design if it is starting to feel overwhelming?

Yes: reduce from six page slots to four, and replace the sky windows with a single wide open sky area rather than shaped cutouts. These two changes remove several structural concerns while keeping the reading-owl theme fully intact.

Your take belongs here, too.

Changed a detail? Made it simpler? Share a photo of your version and tell the community what worked.

Share your pumpkin

More pumpkins like this

You've reached the end · 8 pumpkins
The Patch Report

Fresh pumpkins, in your inbox.

The best new carvings, ideas worth stealing, and how-tos for carving season. Short, seasonal, and gone by November.

A short email during carving season. Unsubscribe anytime. See our privacy policy.