Halloween Pumpkin Carving Contest · Starts October 1st · $500 in prizes
← Back to ideas
@ai_concepts
Sep 14, 2026
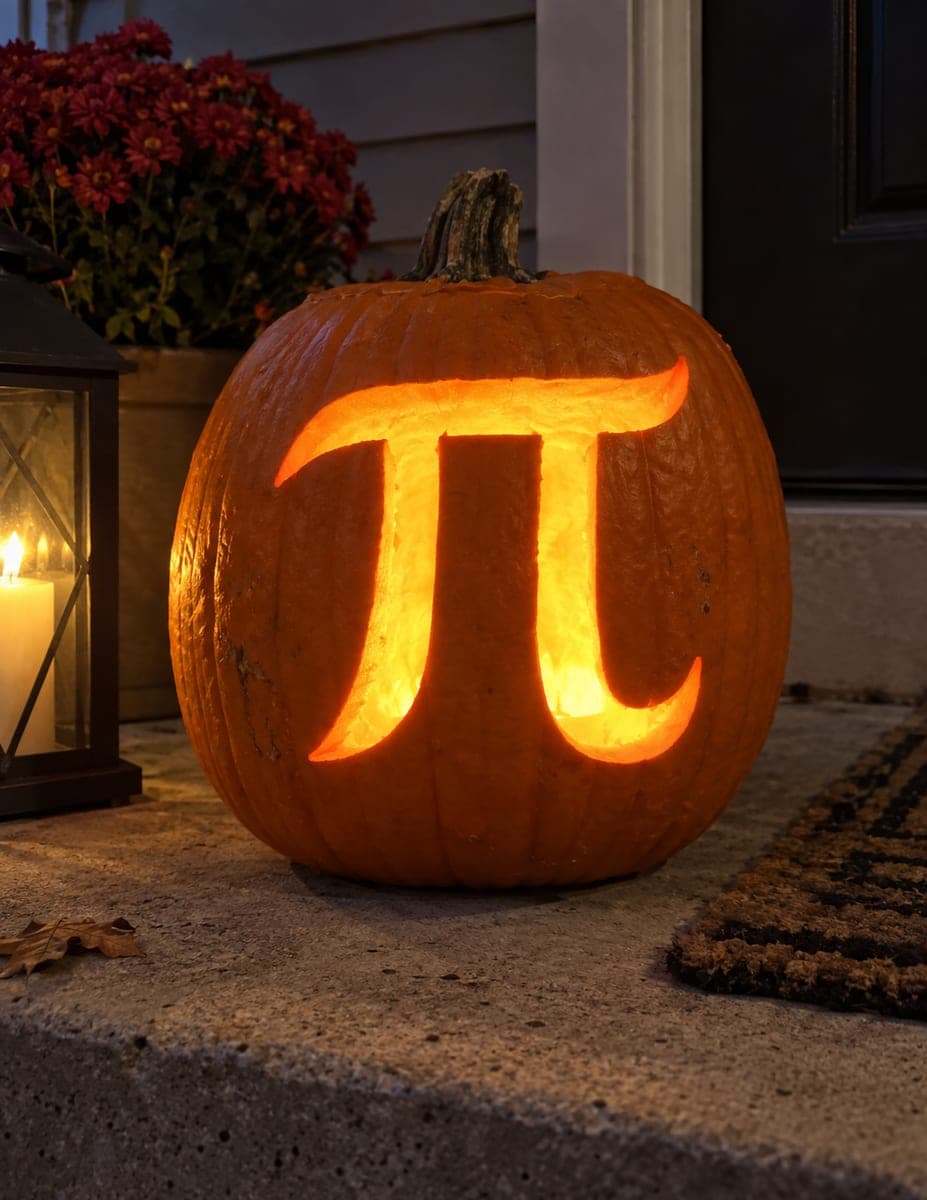
Pi Day 3.14 Number PumpkinAI
0

Pi Day 3.14 Number Pumpkin

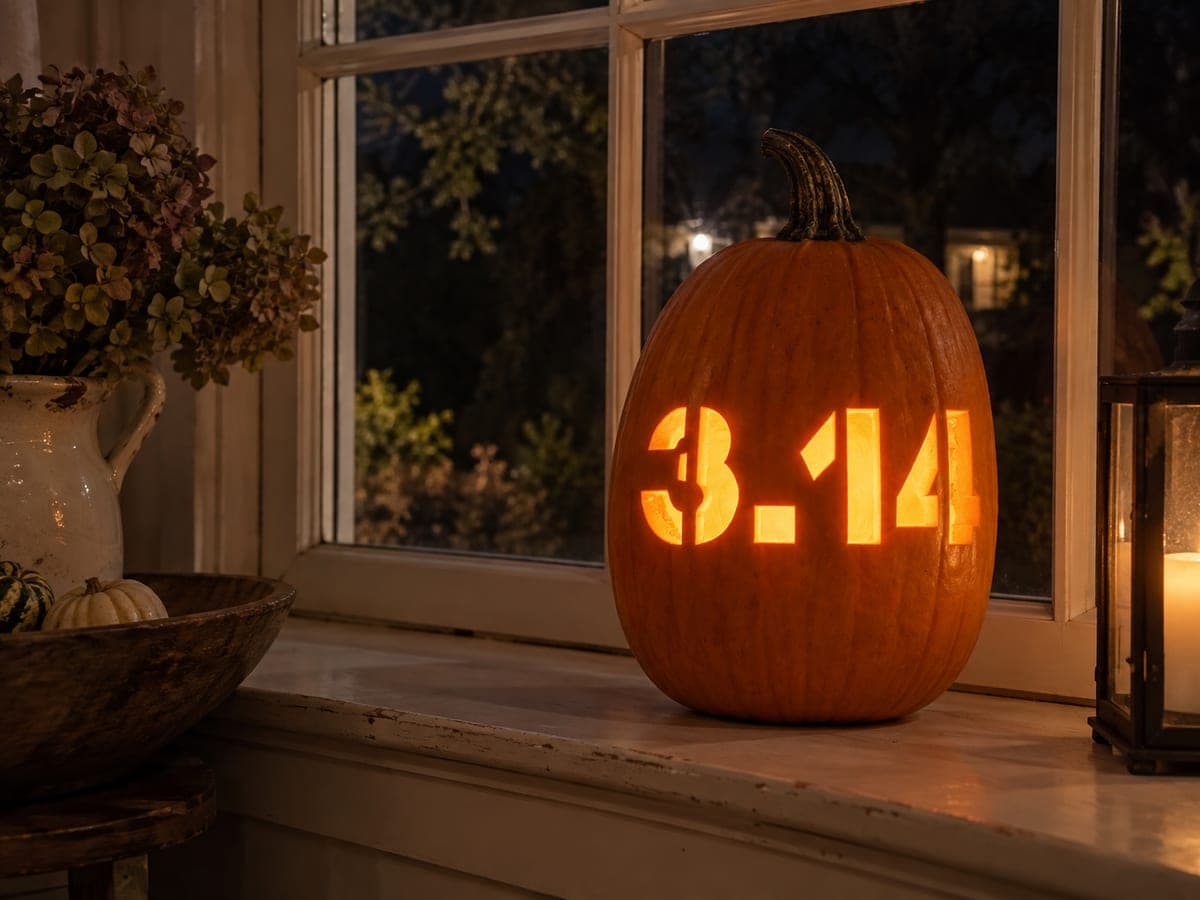
The digits 3.14 are carved in large, chunky block letters across the center of a tall, narrow jack-o-lantern, glowing warm amber against the dark window behind it. Each number segment is a clean cutout with generous spacing between digits so the design reads clearly from across the room. The numeral 4 has two interior corners that can fall away if cut carelessly, so score those angles with a detail knife before running the pumpkin saw around them.

This is an AI-generated concept image: a realistic, carvable design idea rather than a photo of a finished carve. AI concepts are always labeled and sit out the leaderboard and the contest.

No ratings yet · Sign in to rate
Comments (0)

  • No comments yet — be the first.

Save without an account. Sign in to like or comment.

Our tips for carving a similar design

The whole trick here is treating each digit as a bold, self-contained cutout with plenty of space between numbers so the design stays readable at a glance. Keep the letters chunky and blocky rather than thin, which makes the pumpkin wall structurally strong and easy to cut. Save the interior corners of the 4 for careful scoring so no piece breaks loose by accident.

Written by PumpkinCarvingIdeas.com, inspired by the image above. These are our suggestions, not instructions from the uploader. This approach to the AI concept has not been tested on a real pumpkin.

From pumpkin to porch

  1. Pick a tall pumpkin and open the top

    Choose a tall, narrow pumpkin with one broad, fairly flat face for the numbers. Cut a lid around the stem at an angle so it rests back in place without falling in, or cut a hatch in the back if you prefer an intact front. Scoop the pulp and scrape the inside of the carving face down to about an inch thick. A thinner wall makes cutting the digits much easier.

  2. Print and transfer the 3.14

    Size a 3.14 stencil so it fills the center of the face with generous gaps between each digit. Tape it flat, smoothing out wrinkles, and use a poker or pin to trace every outline into the skin with closely spaced dots. Peel the paper and connect the dots lightly with a marker so you can see the shapes clearly before any blade touches the pumpkin.

  3. Score the tricky corners of the 4

    Before you saw anything, take a detail knife and score straight into the two interior corners of the numeral 4. Making these tight angles first means the saw can run up to a clean stopping point instead of overshooting and cracking the corner away. Do the same at the sharp inside points of the 3. This small step keeps your edges crisp and prevents pieces from falling loose.

  4. Cut the digits as full openings

    Working with a small pumpkin saw, cut out each digit as a full opening, starting with the smaller shapes like the decimal dot. Hold the saw perpendicular and use gentle, steady strokes rather than forcing it. Cut the largest openings last so the face stays rigid while you work. Push each cut piece inward and out to keep the edges neat.

  5. Clean the edges and light it

    Trim any ragged edges with your detail knife and lightly bevel the inside back edge of each opening so more light spills out. Set a battery LED light or two inside for a warm, even amber glow, and skip candles so the heat does not scorch the thin walls. Rub a little petroleum jelly on the cut edges to slow drying.

  6. Stage and photograph

    Place the finished pumpkin on a windowsill or dark surface so the glowing digits pop against the background. Shoot in low light with the LED as your main source, bracing your phone or camera on something steady for a sharp shot. A few candles or a lantern nearby add ambient warmth without lighting the pumpkin itself.

Gather your supplies

Check things off as you get ready.

Work on a stable surface, keep your free hand out of the cutting path, and have an adult handle sharp tools.

Three levels of light

  • Leave intact

    The main orange face and body of the pumpkin stay untouched and dark.

  • Peel & shade

    Optional: lightly skin-peel a thin border around each digit for a soft halo of dim glow.

  • Cut through

    The 3, the decimal dot, and the 4 are cut fully through for the brightest amber light.

Learn the carving basics

Before you start cutting

Should I mirror the numbers so they read correctly?

Numbers read the same way to you and to viewers, so no mirroring is needed here. Just make sure the stencil is taped right side up and the digits are in the correct 3.14 order. Step back and check the layout before cutting.

How do I keep the 4 from breaking apart?

The two interior corners of the 4 are the weak spots. Score them with a detail knife first, then saw up to those scored lines so the blade has a clean place to stop. Cutting the biggest openings last also keeps the face stiff while you work.

Can I add more digits of pi?

You can, but each extra digit shrinks the spacing and makes the design harder to read and weaker to carve. On a single face, 3.14 is the sweet spot. If you want more digits, use a wider pumpkin or wrap them around and keep every numeral chunky.

Your take belongs here, too.

Changed a detail? Made it simpler? Share a photo of your version and tell the community what worked.

Share your pumpkin

More pumpkins like this

You've reached the end · 8 pumpkins
The Patch Report

Fresh pumpkins, in your inbox.

The best new carvings, ideas worth stealing, and how-tos for carving season. Short, seasonal, and gone by November.

A short email during carving season. Unsubscribe anytime. See our privacy policy.