@hallowharvest
Sep 5, 2026

Scooping hour
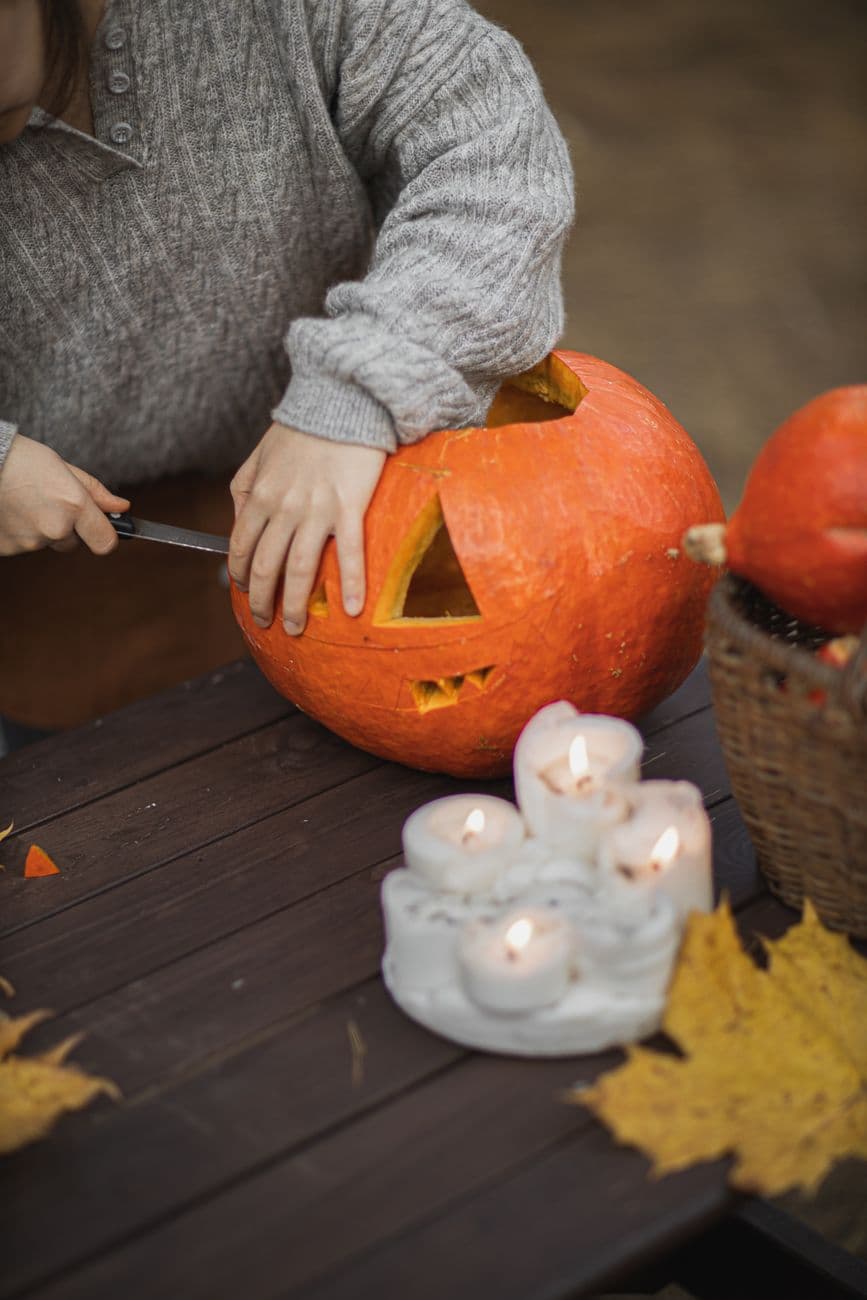
Witch hat on, knife in, seeds out. The freshly cut classic face waits in her lap for its candle.
No ratings yet · Sign in to rate
Witch hat on, knife in, seeds out. The freshly cut classic face waits in her lap for its candle.
The core trick here is the timeless jack-o'-lantern face built from simple geometric shapes: triangle eyes, a triangle nose, and a wide zigzag mouth. Everything relies on clean straight cuts rather than fine detail, so it forgives a shaky first attempt. The plan is to open the top, hollow the inside well, then cut each shape from the front wall and drop the pieces out.
Written by PumpkinCarvingIdeas.com, inspired by @hallowharvest's photo above. These are our suggestions, not instructions from the uploader, and this approach hasn't been tested on their exact carve.
Choose a round pumpkin that sits flat and has one smooth face to work on. Draw a circle around the stem, then have an adult cut the lid at an angle so the piece rests back on top without falling in. Keep the opening wide enough to fit your hand and a scoop. Set the lid aside and check the fit before moving on.
Reach in with a sturdy spoon or a plastic scoop and pull out the seeds and stringy pulp. Scrape the front wall where the face will go down to about one inch thick, which makes cutting easier and lets more light through. Wipe the inside dry with a paper towel. A thinner wall means cleaner cuts and a brighter glow later.
With a washable marker, draw two triangle eyes, a smaller triangle nose, and a wide mouth with pointed teeth along the top and bottom edges. Keep the shapes large and simple, and leave a little space between them so the pumpkin stays strong. Step back and check the spacing before you cut. Redraw anything that looks crooked, since marker wipes away easily.
Start with the eyes and nose using a small serrated carving saw held straight into the pumpkin. Use gentle back-and-forth strokes and let the tool do the work rather than forcing it. Push each cut piece out from the inside with a fingertip so the edges stay clean. Cut the small shapes before the big mouth so the face wall stays sturdy while you work.
Save the wide zigzag mouth for last since it is the largest opening. Follow your zigzag line carefully so the teeth keep their points, and cut the top edge and bottom edge as one continuous shape. Ease the piece out slowly to avoid snapping off a tooth. If a tooth feels fragile, leave it slightly thicker at the base for support.
Drop in a battery LED tea light or a small puck light and set the lid back on. Turn off the room lights to see the glow and check that each shape reads clearly from a few feet away. Trim any rough edges that block the light. Snap your photo in the dark with the pumpkin at eye level for the best jack-o'-lantern shot.
Check things off as you get ready.
Work on a stable surface, keep your free hand out of the cutting path, and have an adult handle sharp tools.
The whole outer skin of the pumpkin stays untouched and dark
Optional: lightly scrape a thin outline around the eyes or mouth for a soft halo
The triangle eyes, triangle nose, and zigzag toothy mouth are cut through for full bright light
No, this classic face is simple enough to draw freehand with a washable marker. Start with two triangles for eyes, one for the nose, and a wide zigzag mouth. If you want it perfectly even, fold a paper template in half so both eyes match.
Aim for about one inch on the side where the face goes. That is thin enough for your saw to glide through cleanly and for light to pour out, but thick enough that the teeth do not crumble. Scrape it down with your scoop before you start cutting.
Thin points snap when you push cut pieces out too hard or too fast. Ease each piece out gently, and keep the base of each tooth a little wider for strength. Cutting the mouth last also helps, since the surrounding wall braces the teeth while you carve.
Changed a detail? Made it simpler? Share a photo of your version and tell the community what worked.
The best new carvings, ideas worth stealing, and how-tos for carving season. Short, seasonal, and gone by November.






Comments (0)