Halloween Pumpkin Carving Contest · Starts October 1st · $500 in prizes
← Back to ideas
@ai_concepts
Sep 14, 2026
Silly Crooked-Mouth Jack-O-Lantern PumpkinAI
0

Silly Crooked-Mouth Jack-O-Lantern Pumpkin

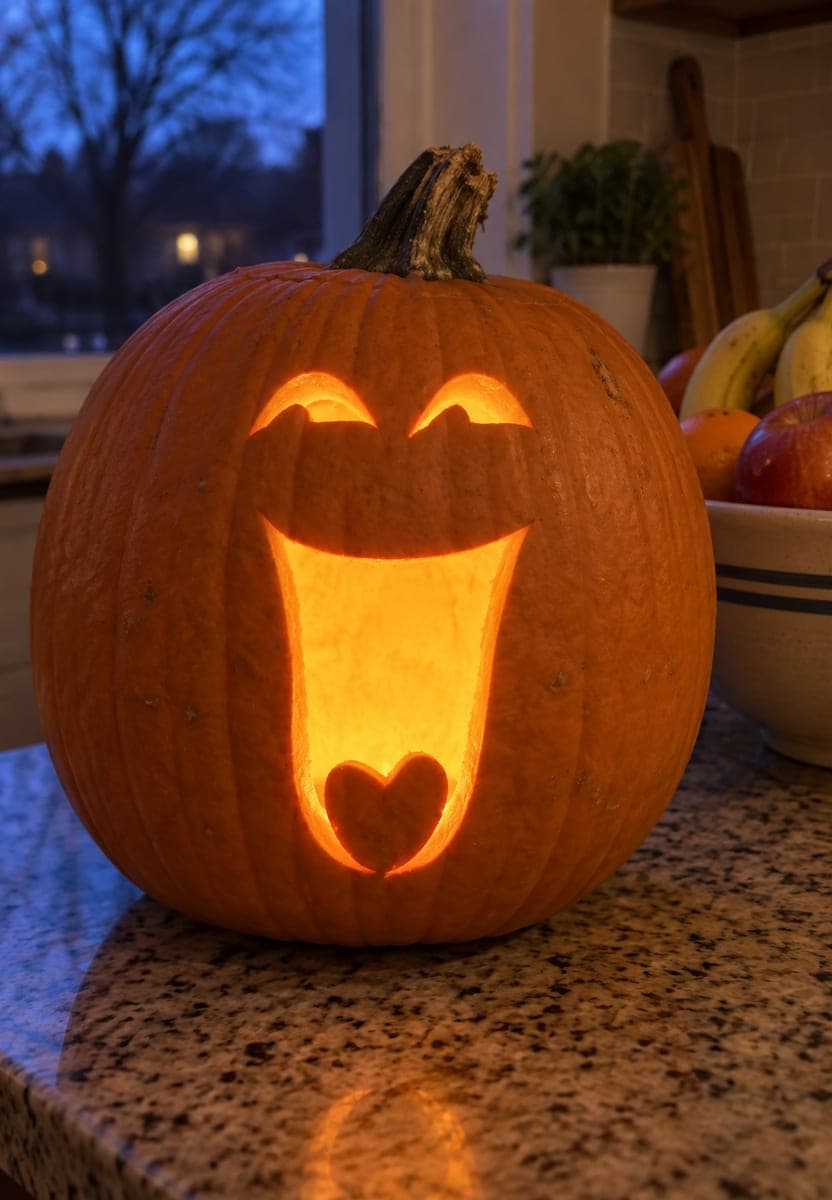
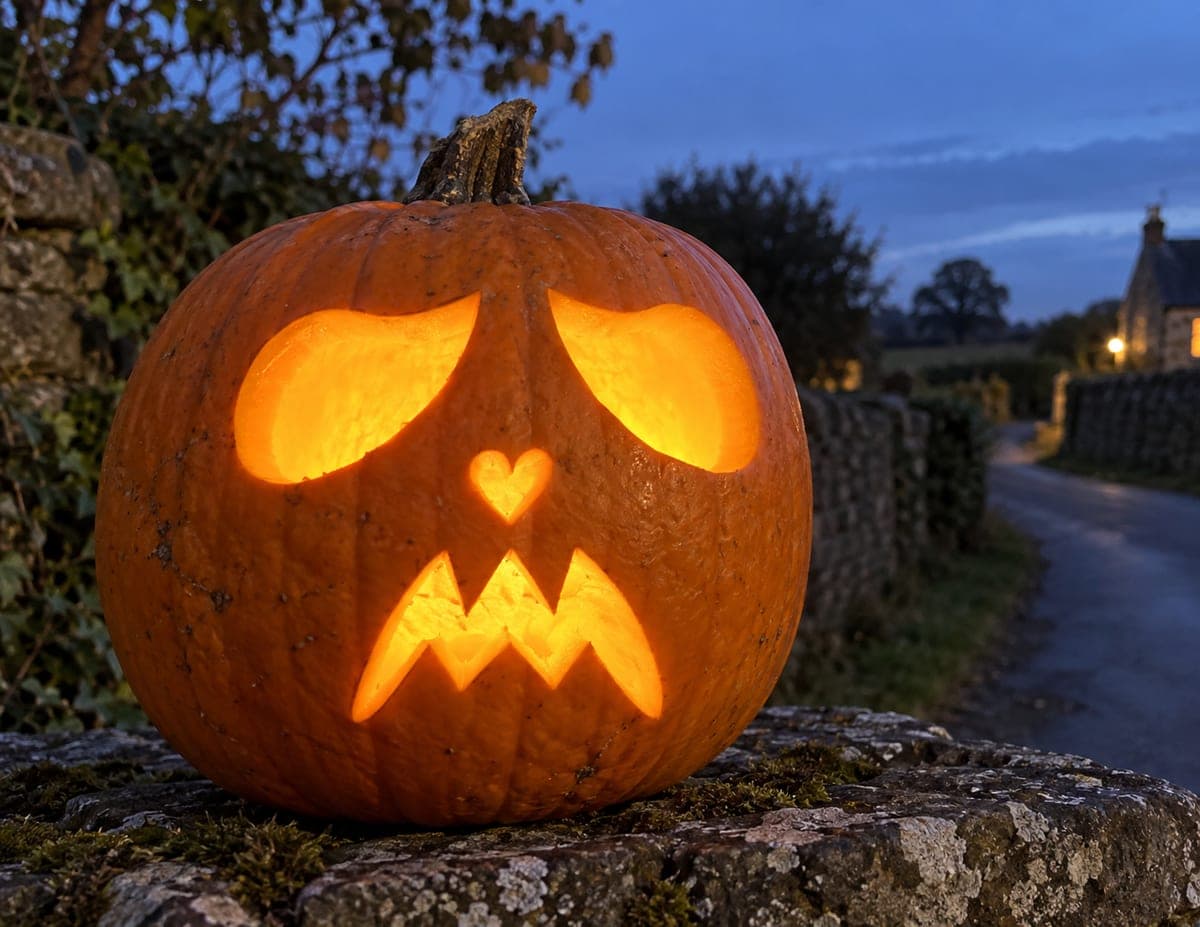
Two small curling eyes sit above a mouth that stretches nearly ear to ear before angling sharply upward on the right side, creating an exaggeratedly lopsided grin with a sly, silly character. The simplicity of the cuts makes this an easy pumpkin carving idea that still reads instantly from across a yard. When transferring the wide mouth, measure the horizontal span first so the right-side upturn lands above the pumpkin's centerline and does not crowd the edge of the face. Placing a short, fat candle rather than a tall one keeps the flame below the wide opening so heat escapes evenly.

This is an AI-generated concept image: a realistic, carvable design idea rather than a photo of a finished carve. AI concepts are always labeled and sit out the leaderboard and the contest.

No ratings yet · Sign in to rate

Comments (0)

  • No comments yet — be the first.

Save without an account. Sign in to like or comment.

Our tips for carving a similar design

The whole personality of this design comes from one trick: a wide mouth that angles sharply upward on the right so the grin looks lopsided and sly. Two small curling eyes sit above it to keep the face light and playful. Plan the mouth span first, then the eyes, and save the big openings for last so the shell stays firm while you work.

Written by PumpkinCarvingIdeas.com, inspired by the image above. These are our suggestions, not instructions from the uploader. This approach to the AI concept has not been tested on a real pumpkin.

From pumpkin to porch

  1. Prep the pumpkin and lid

    Pick a rounded pumpkin with a smooth front panel for the face. An adult cuts a lid at an angle around the stem so it cannot fall in, then scoops the insides until the front wall is about one inch thick. A thinner wall on the face area makes carving the wide mouth easier and lets more light through. Wipe the front dry so your pattern will stick.

  2. Measure and transfer the design

    Before drawing, measure the horizontal span of the mouth so it fits comfortably without crowding the edges of the face. Mark the pumpkin's centerline, then sketch the wide mouth so the right-side upturn lands just above that centerline. Add the two small curling eyes above, spaced evenly. Trace with a washable marker or poke the outline through paper with a pin.

  3. Carve the small eyes first

    Start with the two curling eyes since they are the smallest and most detailed shapes. Use a small carving saw or a fine detail blade and cut slowly, following each curl. Cutting these first keeps the pumpkin sturdy for the bigger mouth cut later. Push the pieces out gently from the inside so the tips of the curls do not snap.

  4. Cut the wide mouth

    Now cut the mouth, working from the middle outward toward each end. Take your time on the sharp upward angle on the right so the line stays crisp and does not tear. Because this opening is wide, leave the very ends for last and support the shell with your free hand as you finish. Trim the inside edge of the opening at a slight bevel so the light spreads.

  5. Clean up and add light

    Smooth any rough edges with the tip of your saw or a small spoon. Use a battery LED light rather than a candle, which is safer and keeps the wide mouth from scorching. Set the light low inside so the glow fills the grin evenly. If you prefer the look of a flame, choose a flickering LED tealight.

  6. Stage and photograph

    Place the finished pumpkin on a flat surface like a low wall or step at dusk for the best glow. Face the grin toward your walkway so it reads from a distance. Snap your photo when the sky still holds a little color behind it. Share it with the community when you are done.

Gather your supplies

Check things off as you get ready.

Work on a stable surface, keep your free hand out of the cutting path, and have an adult handle sharp tools.

Three levels of light

  • Leave intact

    The main pumpkin skin across the face and body stays untouched and dark.

  • Peel & shade

    You could lightly peel a thin halo just outside the mouth for a soft dim glow that frames the grin.

  • Cut through

    The two curling eyes and the wide crooked mouth are cut fully through for the brightest light.

Learn the carving basics

Before you start cutting

How do I keep the wide mouth from making the face weak?

Cut the small eyes first while the shell is still solid, then carve the mouth last from the center outward. Support the shell with your free hand as you reach the ends. A wall about one inch thick gives you enough strength without making the cut too hard.

Where exactly should the upturned corner land?

Mark the pumpkin's centerline before you draw. Place the right-side upturn just above that line so the grin looks lopsided on purpose and does not crowd the edge of the face. Measuring the full horizontal span first keeps both ends balanced.

This is an AI concept image, so how would a real one glow like this?

You can get the same even glow with a battery LED set low inside the pumpkin. A short, fat flickering tealight also works if you want a flame look, since it keeps heat below the wide opening. Skip tall candles, which can scorch the top of the mouth.

Your take belongs here, too.

Changed a detail? Made it simpler? Share a photo of your version and tell the community what worked.

Share your pumpkin

More pumpkins like this

You've reached the end · 8 pumpkins
The Patch Report

Fresh pumpkins, in your inbox.

The best new carvings, ideas worth stealing, and how-tos for carving season. Short, seasonal, and gone by November.

A short email during carving season. Unsubscribe anytime. See our privacy policy.