@grinninggreta
Sep 7, 2026
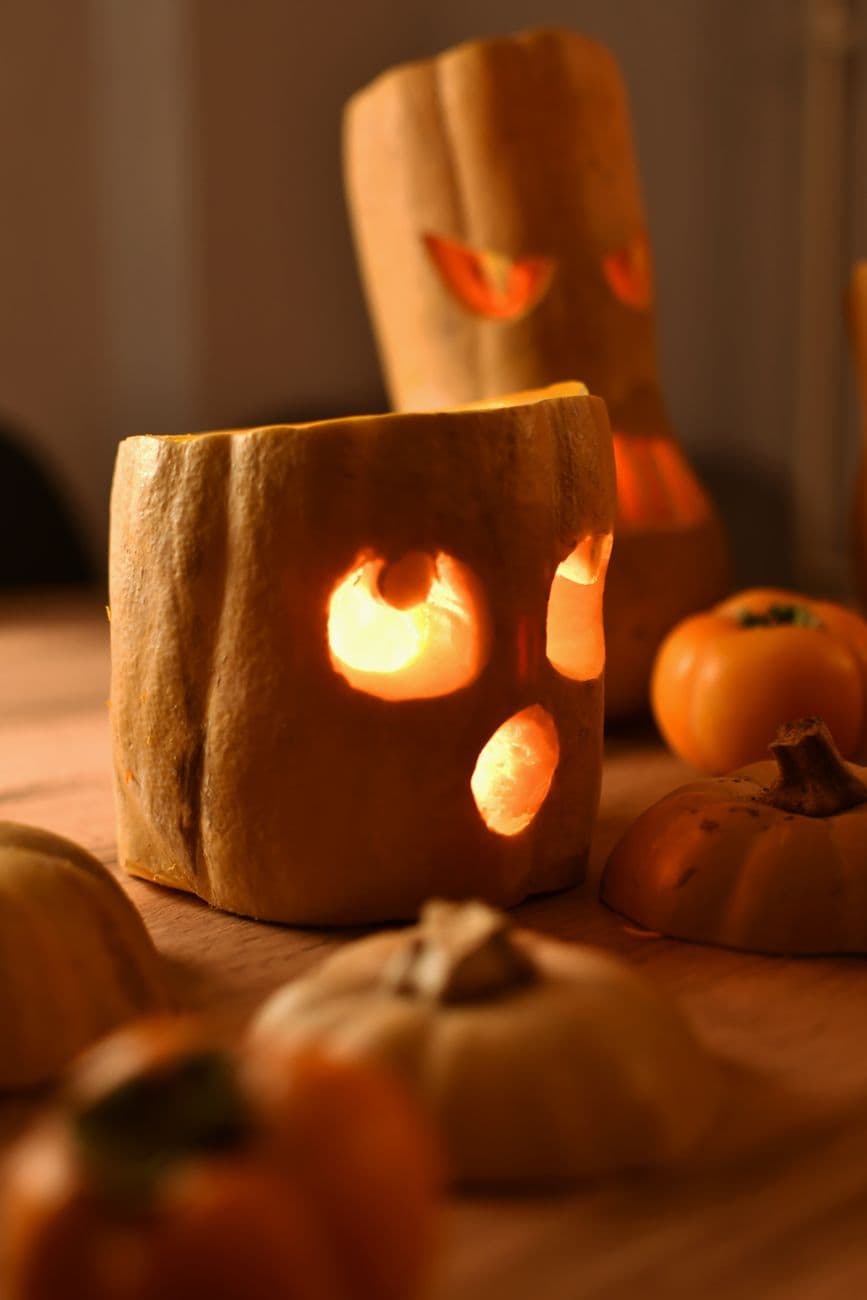
The core trick here is minimalism: a couple of rough eye shapes and a small mouth cut into a tall, narrow gourd read as a funny little character without much fuss. Instead of a wide classic pumpkin, this uses an upright squash or mini pumpkin as a lantern body, so the light glows through just a few openings. Keep the cutouts small and slightly uneven for that silly, cartoonish charm.
Written by PumpkinCarvingIdeas.com, inspired by @grinninggreta's photo above. These are our suggestions, not instructions from the uploader, and this approach hasn't been tested on their exact carve.
Look for a small upright pumpkin or squash with a flat enough base to stand on its own. A shape that is taller than it is wide gives that goofy little totem look. Wipe the skin clean and dry before you mark anything. Set it on a stable cutting surface so it will not wobble while you work.
Have an adult cut a wide opening in the base rather than the top so the lantern stays clean up top. Scoop out the seeds and pulp with a sturdy spoon until the wall is about an inch thick. Thinner walls near the face let light pass more easily. Save the scooped flesh if you want to roast the seeds later.
With a washable marker, draw two lopsided eyes and one small oval mouth. Keep the shapes far apart and a little crooked to get that silly grin. Less is more here, so resist adding too many features. Step back and check the spacing before you cut.
Using a small serrated carving saw, cut out one eye at a time with gentle sawing motions, letting an adult handle the blade. Angle the cut slightly outward so the openings widen toward the inside and catch more light. Push the plugs out from the inside with your thumb. Take breaks so your hand stays steady.
Save the mouth for last since it is the largest opening and removing it early can weaken the face. Cut it small and rounded to keep the goofy look. Clean up any ragged edges with the tip of your tool. Leave the skin between the eyes and mouth intact so the face holds its shape.
Set a battery LED tea light or a small puck light inside through the bottom opening, never a real flame. Lower the gourd over the light so it sits flat. Dim the room and take your photo from slightly below to make your little character look taller and sillier. Add a few mini pumpkins around it for a cozy group shot.
Check things off as you get ready.
Work on a stable surface, keep your free hand out of the cutting path, and have an adult handle sharp tools.
The full body of the gourd stays untouched and dark, keeping the character solid and mysterious.
Optional: lightly scrape a thin halo of skin around each eye for a soft dim glow that frames the face.
The two eyes and the small mouth are cut clean through for bright pools of light.
Cutting the base keeps the top of the gourd smooth and unbroken, which looks cleaner on a tall little character. It also makes it easy to just lift the whole pumpkin off and set it over your LED light. Make sure the base opening is wide enough to fit your hand and the light.
Scoop the inside wall thinner near the face area, aiming for about an inch. A small serrated carving saw works better than a kitchen knife for control. Go slow with gentle back and forth strokes and let an adult handle the blade.
Keep the eyes rounded and slightly mismatched rather than sharp or slanted, and make the mouth a small simple oval. Wide spacing between features reads as silly. If it starts looking mean, round off the corners a little more.
Changed a detail? Made it simpler? Share a photo of your version and tell the community what worked.
The best new carvings, ideas worth stealing, and how-tos for carving season. Short, seasonal, and gone by November.





Comments (0)