Halloween Pumpkin Carving Contest · Starts October 1st · $500 in prizes
← Back to ideas
@ai_concepts
Sep 14, 2026
Star-Staff Wizard Silhouette PumpkinAI
0

Star-Staff Wizard Silhouette Pumpkin

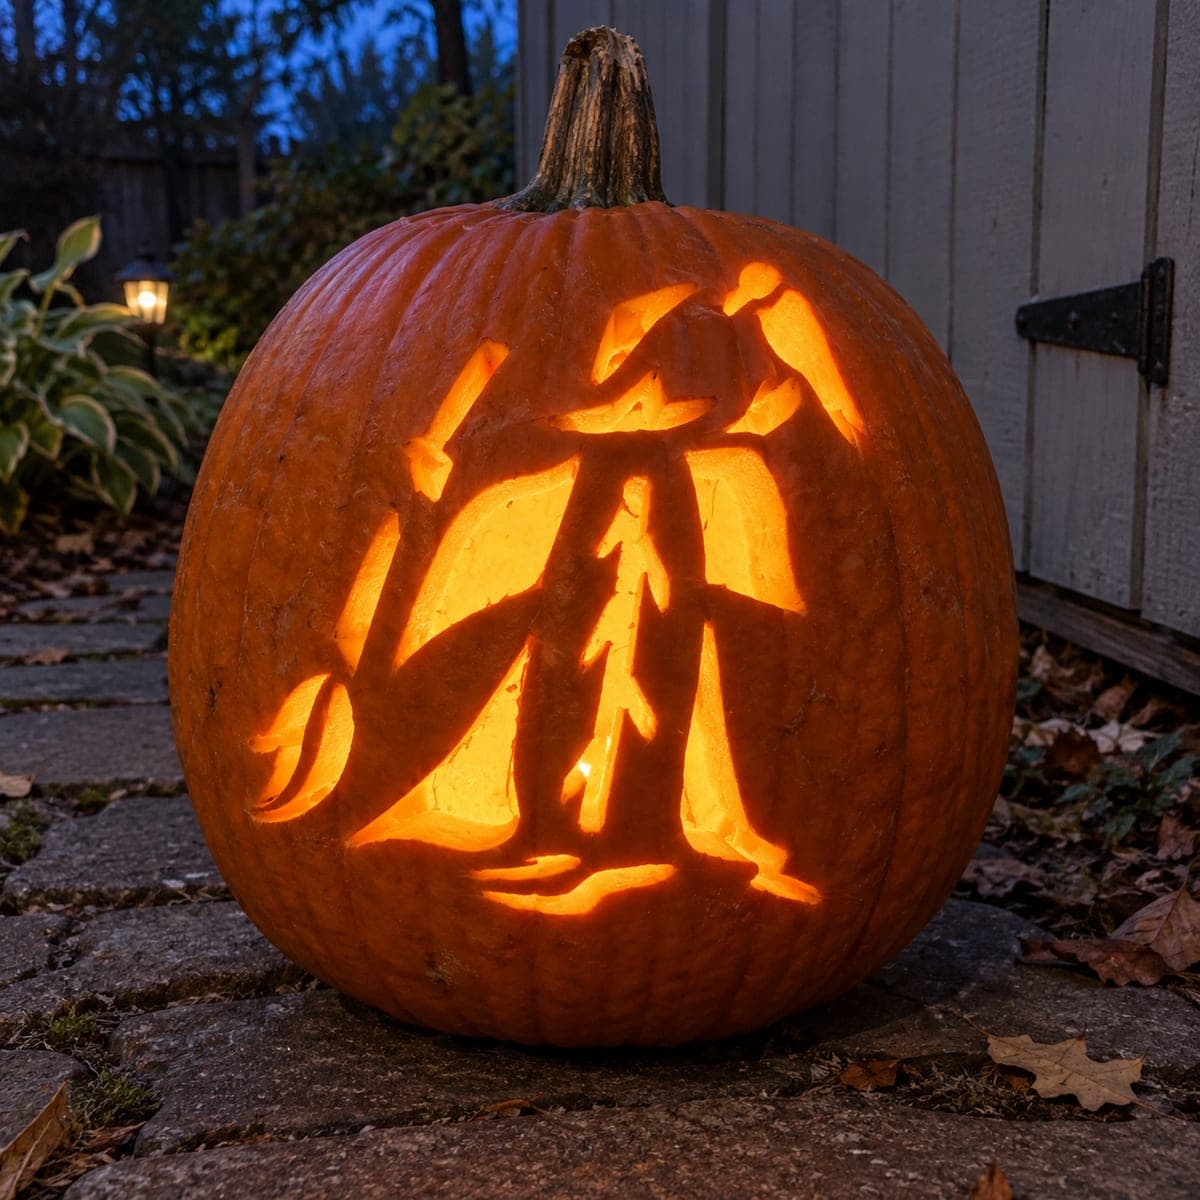
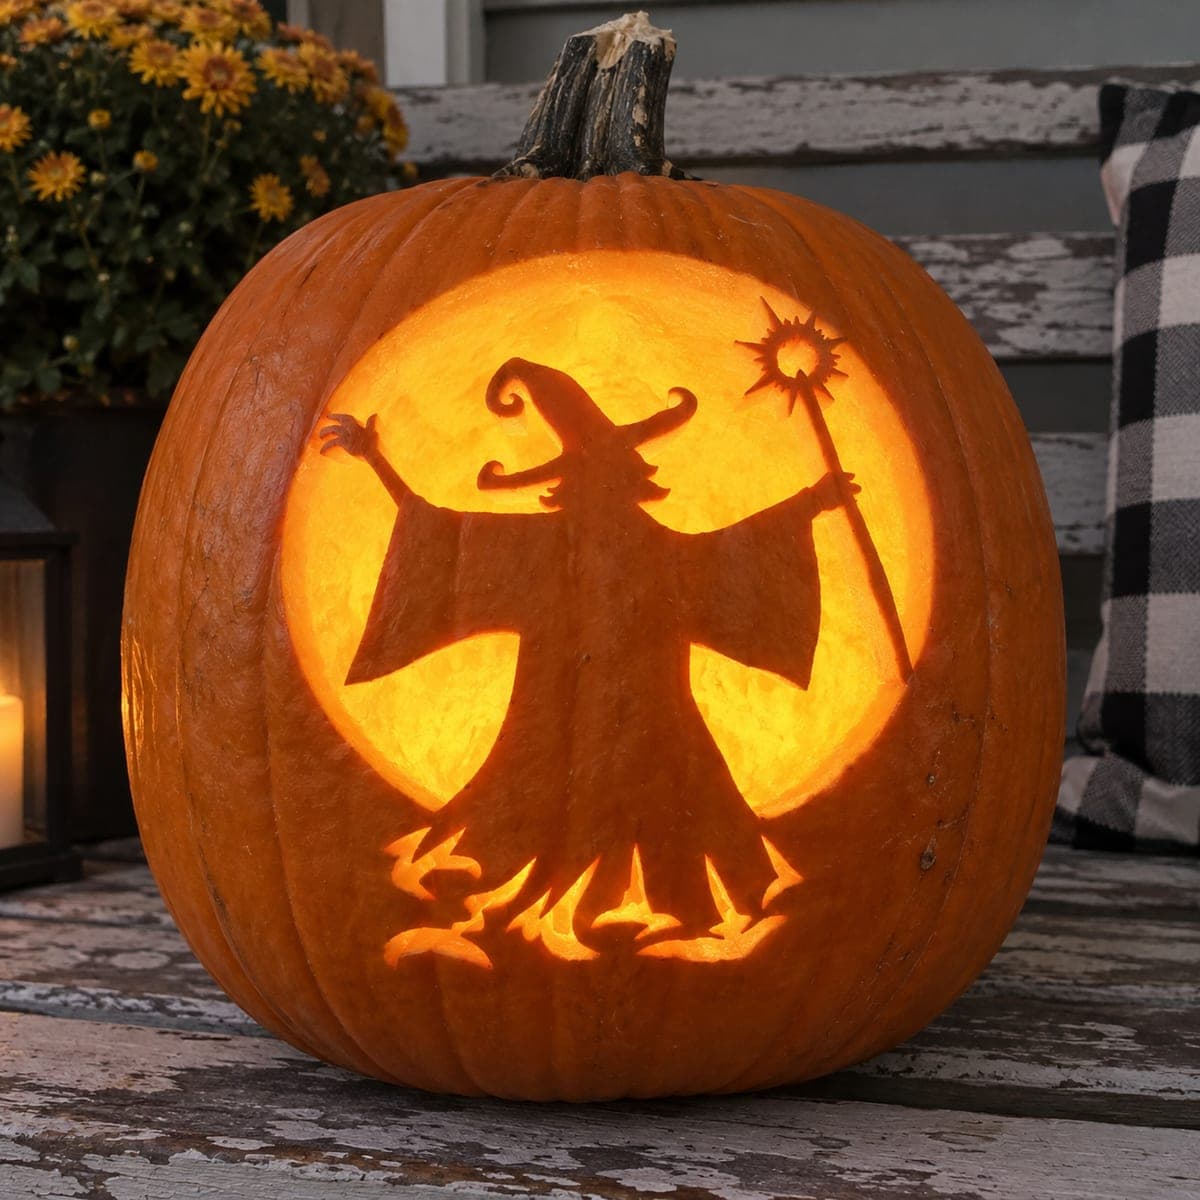
A wide-cloaked wizard with an exaggerated hooked nose spreads both arms and raises a star-tipped staff against a large circular moon, all rendered as a dark silhouette against the glowing interior. The round moon background is cut through while the wizard shape stays as intact rind in this silhouette pumpkin carving idea. Cut the spiky star atop the staff last since its five points are tiny; widen each point to about a quarter inch before carving so they hold their shape when the pumpkin is handled.

This is an AI-generated concept image: a realistic, carvable design idea rather than a photo of a finished carve. AI concepts are always labeled and sit out the leaderboard and the contest.

No ratings yet · Sign in to rate
Comments (0)

  • No comments yet — be the first.

Save without an account. Sign in to like or comment.

Our tips for carving a similar design

The core trick here is a reverse silhouette: the wizard stays as solid, untouched rind while the big round moon behind him is cut all the way through so it blazes with light. Plan to carve from the outside in, opening the moon disc around the figure and saving the tiny star points on the staff for the very end. Keep the whole figure connected to the surrounding rind so it never floats free.

Written by PumpkinCarvingIdeas.com, inspired by the image above. These are our suggestions, not instructions from the uploader. This approach to the AI concept has not been tested on a real pumpkin.

From pumpkin to porch

  1. Prep and transfer the design

    Cut a wide lid or a large plug in the back so you can reach the whole carving area, then hollow the pumpkin until the front wall is about one inch thick. Tape your stencil flat over the front and poke the outline with a pin or a needle tool. Trace the moon circle, the full wizard shape, the staff, and the flame licks at the base. Peel the paper and connect your dots with a marker so the silhouette reads clearly.

  2. Lock in the wizard outline first

    Before you remove any material, go over the edge where the wizard meets the moon with a light scoring cut. This defines the silhouette so you do not accidentally cut into the hat, hooked nose, spread arms, or cloak. Take your time on the pointed hat tip and the outstretched fingers, since those are the most fragile parts of the figure. Everything inside this line stays as intact skin.

  3. Cut the moon background

    Using a fine saw blade, cut through the moon disc in the open areas around the wizard, working in small sections and pulling each piece out gently. Cut the large upper background first, then the areas beside the cloak and between the arms and the staff. Leave narrow bridges of rind where the staff and fingertips would otherwise separate from the body. Support the wall with your free hand as you push, and keep cuts slow so the blade does not skip into the figure.

  4. Open the flames at the base

    Carve the pointed flame shapes along the bottom of the cloak by cutting through the gaps between the licks. Keep each flame tip at least a quarter inch wide so it stays strong when the pumpkin is moved. These small cutouts let light spill out at the hem and give the wizard a rising-from-fire look. Save these before the star so your hand still has a stable surface to brace against.

  5. Cut the star tip last

    The five-pointed star on top of the staff is the most delicate cut, so do it last. Widen each point to about a quarter inch before you carve so the tips hold their shape and do not crumble. Cut the star as a small pierced shape at the top of the staff, keeping the staff itself as a thin bridge of rind connecting to the wizard. Work with the tip of a fine blade or a small drill for the center, then clean the points with light strokes.

  6. Light it and photograph

    Drop in a battery LED puck or a string of warm LEDs, never a candle, since the interior is deep and the cutouts are large. Set the light low and slightly forward so the moon glows evenly behind the figure. Wipe the cut edges and rub a little petroleum jelly on them to slow drying. Shoot your photo in a dim setting at dusk so the bright moon and the dark wizard show maximum contrast.

Gather your supplies

Check things off as you get ready.

Work on a stable surface, keep your free hand out of the cutting path, and have an adult handle sharp tools.

Three levels of light

  • Leave intact

    The entire wizard, his pointed hat, hooked nose, spread arms, cloak, and staff stay as untouched dark skin.

  • Peel & shade

    Lightly shave a thin halo just inside the moon's edge for a soft dim ring if you want a gradient around the figure.

  • Cut through

    The full moon disc behind the wizard, the flame gaps at the hem, and the tiny star atop the staff are cut through for the brightest light.

Learn the carving basics

Before you start cutting

How do I keep the star on the staff from breaking off?

Widen each of the five points to about a quarter inch before you carve so they have enough thickness to survive handling. Cut the star last, after the rest of the design is done, so the wall stays stable while you work everything else. Keep the staff itself as a connected strip of rind rather than a floating line.

Since this is a concept image, how thin should the arms and fingers really be?

This design started as an AI concept, so treat the spread fingers and thin staff as guides, not exact measurements. On a real pumpkin, keep any narrow rind section at least a quarter inch wide and leave small bridges where the fingertips or staff meet the moon opening. That keeps the silhouette intact when you move or light the pumpkin.

Why cut the moon instead of the wizard?

This is a reverse silhouette, so the figure is meant to read as a dark shape against a bright glow. Cutting the round moon through lets the interior light frame the wizard, while the solid rind keeps every detail of his shape crisp. If you cut the wizard instead, you would lose the outline and the effect.

Your take belongs here, too.

Changed a detail? Made it simpler? Share a photo of your version and tell the community what worked.

Share your pumpkin

More pumpkins like this

You've reached the end · 8 pumpkins
The Patch Report

Fresh pumpkins, in your inbox.

The best new carvings, ideas worth stealing, and how-tos for carving season. Short, seasonal, and gone by November.

A short email during carving season. Unsubscribe anytime. See our privacy policy.