Halloween Pumpkin Carving Contest · Starts October 1st · $500 in prizes
← Back to ideas
@ai_concepts
Aug 24, 2026
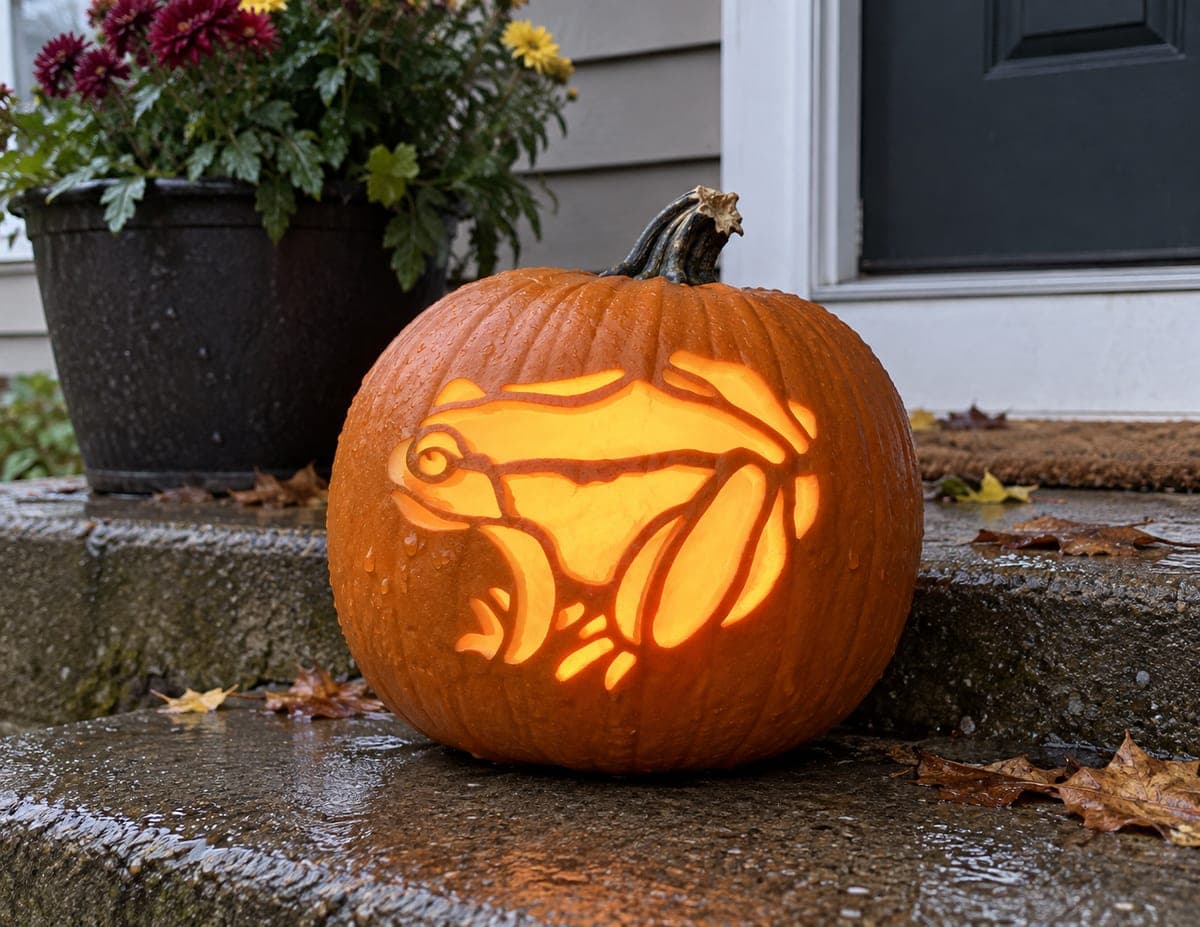
Wide-Eyed Frog Carved Pumpkin in CattailsAI
0

Wide-Eyed Frog Carved Pumpkin in Cattails

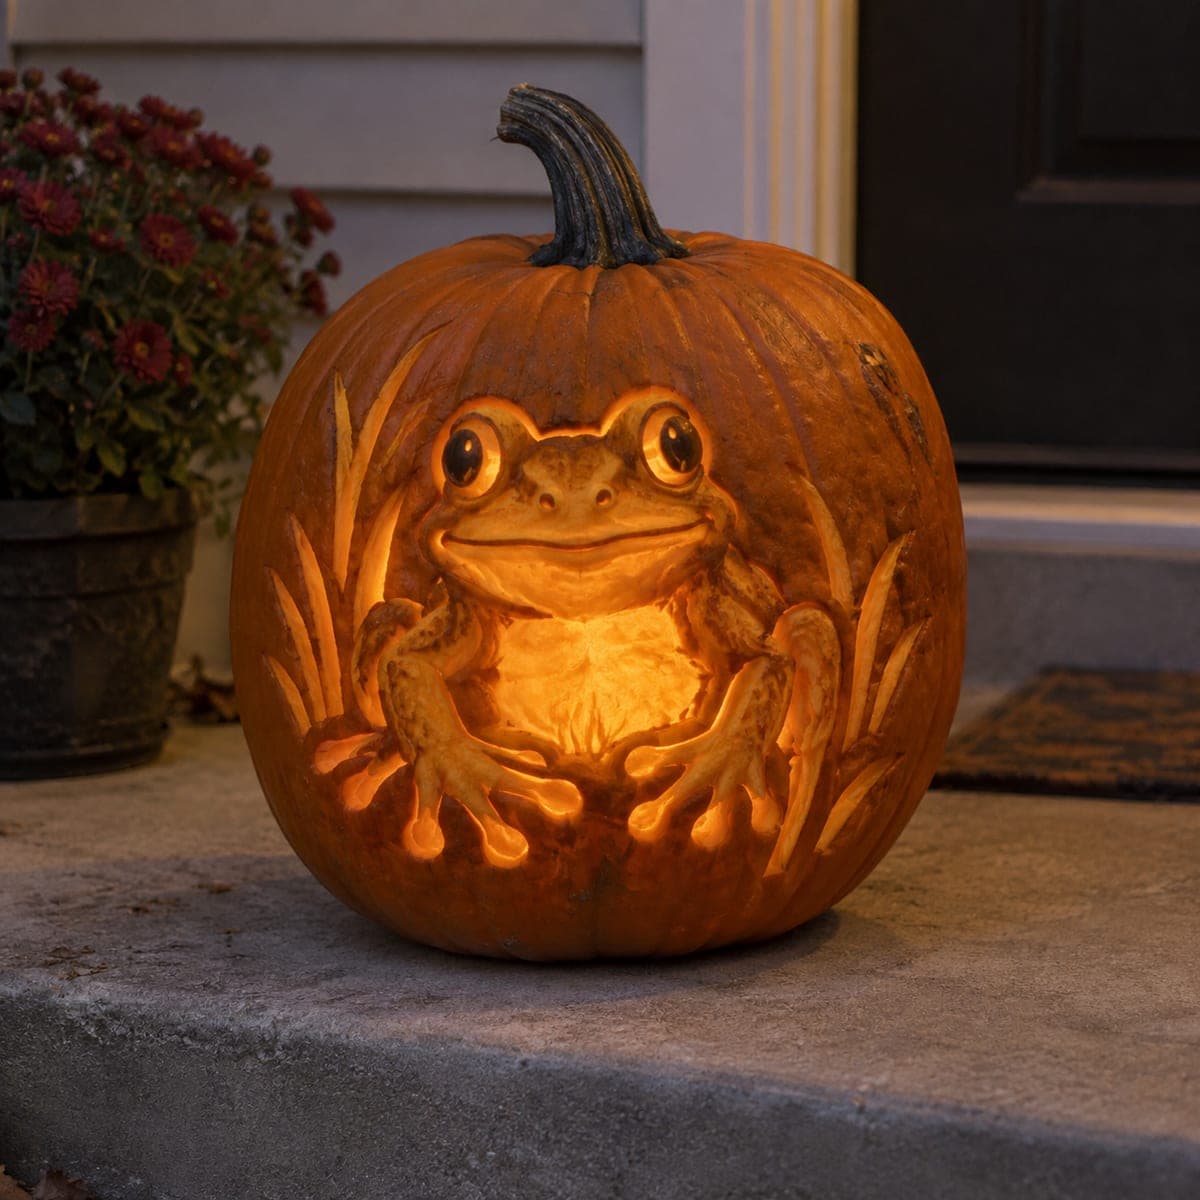
A big-eyed frog crouches between carved reeds on this pumpkin, its rounded belly glowing brightest where the flesh is shaved thinnest. The webbed toes splayed along the bottom edge are the standout detail, each one raised in relief with careful outline cuts. Sculpt the domed eyes first since they give the frog its personality, then thin the belly gradually while checking the glow with a flashlight inside. Charming beside a garden pond or on a back patio step.

This is an AI-generated concept image: a realistic, carvable design idea rather than a photo of a finished carve. AI concepts are always labeled and sit out the leaderboard and the contest.

No ratings yet · Sign in to rate
Comments (0)

  • No comments yet — be the first.

Save without an account. Sign in to like or comment.

Our tips for carving a similar design

The core trick here is relief sculpting, where you shave the pumpkin skin to different depths so light reads as shading rather than open holes. The frog's rounded belly is the thinnest, brightest spot, the domed eyes sit up in relief, and the cattails and webbed toes are outlined so they stand proud of the background. Plan to carve almost entirely with a shaving tool and save any true cutouts for the very end.

Written by PumpkinCarvingIdeas.com, inspired by the image above. These are our suggestions, not instructions from the uploader. This approach to the AI concept has not been tested on a real pumpkin.

From pumpkin to porch

  1. Transfer the pattern and map your depths

    Wipe the pumpkin dry and tape your frog and cattail stencil smoothly over the front. Poke the outlines with a pin or transfer tool so you have a dotted guide underneath. Before cutting, mark in your head which zones stay dark, which get shaved thin, and which glow brightest. Having a depth map first keeps a shading design from turning muddy.

  2. Sculpt the domed eyes first

    Give the frog its personality by shaping the two big eyes early. Use a small loop tool to round each eye into a gentle dome, leaving them slightly raised above the face. Shave a thin ring around each eye so light catches the curve. Leave the tiny pupils as untouched dark skin so they read as glossy dots.

  3. Outline the toes and cattails in relief

    Trace around each webbed toe and each reed with a fine detail knife, cutting straight down just a little way. Then shave the background around them so the toes and cattails stand up in relief. Keep every toe attached along its full length so nothing snaps off. Work slowly here, since these splayed toes along the bottom are the standout detail.

  4. Shade the body gradually

    Now thin the frog's face, legs, and belly with your loop tool, going deepest at the center of the belly. Take off a little at a time and check often, because you cannot put flesh back. Stop when the belly wall feels thin and slightly springy but still solid. This gradual taper is what creates the soft glowing dome.

  5. Test the glow and refine

    Drop an LED light or hold a flashlight inside and look at the front in a dim room. Bright spots show where you shaved too much, dark spots where you can go thinner. Even out the belly and lighten the eye highlights until the frog reads clearly. Adjust before you commit to any full cutouts.

  6. Add final cutouts and photograph

    If you want a few sharp accents, make small true cutouts last, such as tiny gaps between the toes or the darkest eye edges. Cutting these last keeps the shell strong while you do the heavy shading. Seat a battery LED inside, set the pumpkin on a step near some mums, and shoot in low light for the warmest glow. Never use a real candle with a thin-walled carving like this.

Gather your supplies

Check things off as you get ready.

Work on a stable surface, keep your free hand out of the cutting path, and have an adult handle sharp tools.

Three levels of light

  • Leave intact

    The pupils, the outer background, and the darkest reed shadows stay as untouched skin.

  • Peel & shade

    The face, legs, cattails, and webbed toes get shaved to a mid glow with the eyes slightly brighter.

  • Cut through

    The rounded belly is shaved thinnest for the brightest center, with only tiny true cutouts added last.

Learn the carving basics

Before you start cutting

This is shown as a concept image, so can a frog like this really be carved?

Yes, a design like this is achievable with relief and shading techniques on a real pumpkin. The image is an AI concept, so no actual pumpkin was carved, but the plan here keeps every toe and reed attached and structurally sound. Work on a thick-walled pumpkin and take your time thinning the belly.

How thin should I shave the belly without breaking through?

Aim for a wall that glows warmly when lit but still feels firm to a gentle press. Go a little at a time and test with a flashlight after each pass. If a spot suddenly gets very bright or feels flexible, stop shaving there, since that is close to breaking through.

How do I keep the webbed toes from snapping off?

Treat them as relief details, not cutouts, so each toe stays connected to the pumpkin along its whole length. Only shave the background around them rather than cutting fully through. If you want dark gaps between toes, make those tiny cuts shallow and save them for the very end.

Your take belongs here, too.

Changed a detail? Made it simpler? Share a photo of your version and tell the community what worked.

Share your pumpkin

More pumpkins like this

You've reached the end · 8 pumpkins
The Patch Report

Fresh pumpkins, in your inbox.

The best new carvings, ideas worth stealing, and how-tos for carving season. Short, seasonal, and gone by November.

A short email during carving season. Unsubscribe anytime. See our privacy policy.