Similar to This
View all stencils →About this stencil
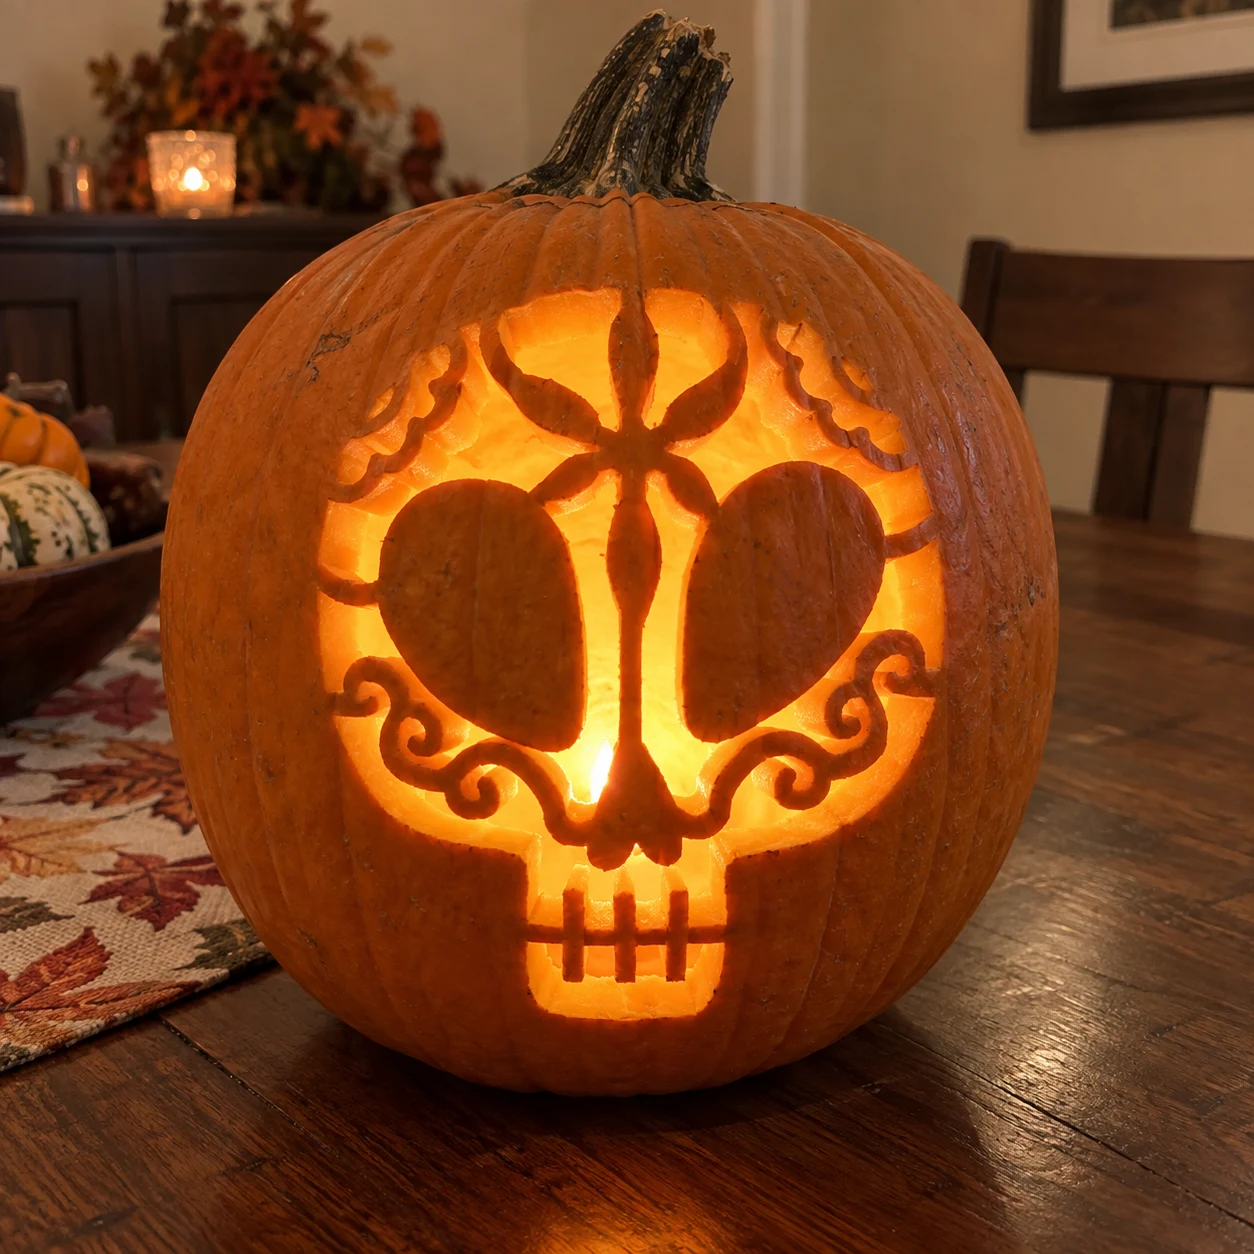
This sugar-skull pumpkin stencil features a circular skull face filled with symmetrical Dia de los Muertos ornamentation: two large almond-shaped eye sockets, a central floral cross motif above them, scrollwork tendrils curling outward on both cheeks, and a rectangular tooth-grid at the chin. The design carves as a mix of open negative spaces and solid orange bridges that define each decorative element. Cut the cheek scrollwork before removing the large eye sockets, since the thin curling lines are easier to control while the surrounding wall is still solid. This design is rated Advanced and takes most carvers around 150 minutes from trace to glow. Multi-layer cuts with skin-peel shading. Plan your cuts first.
Pumpkin size guide
- 🎃 Small (5–7") — print at 80%
- 🎃 Medium (7–10") — print at 100% (recommended)
- 🎃 Large (11–13") — print at 130%
- 🎃 Giant (14"+) — print at 150% on tabloid paper
Frequently asked questions
Can I resize this stencil?▾
Yes. The PDF is vector so it scales cleanly. Print at 100% for a 7–10 inch pumpkin, 130% for 11–13 inch, or 150% for a giant. Use your printer's "Fit to page" or "Custom scale" setting.
What kind of paper works best?▾
Standard 20 lb letter or A4 printer paper is fine. Heavier paper is harder to bend around the pumpkin curve. If your printer supports it, set the quality to 'best' so the lines are crisp.
How long will the carved pumpkin last?▾
Usually 5–10 days. Coat all cut surfaces with petroleum jelly and store the pumpkin somewhere cool overnight. Avoid direct sun. Battery tea lights produce no heat and double the lifespan.
Can I sell pumpkins carved with this stencil?▾
Yes, the carved pumpkin you make is yours. The license covers personal and small-scale commercial carving (selling carved pumpkins, photographing them, posting on social). You may not resell the PDF file itself.
What if my printer doesn't print the whole stencil?▾
Set 'Page scaling' to 'Fit' in the print dialog and uncheck 'Auto-rotate'. If it still cuts off, the design includes 0.25" of safe-area margin so a small crop won't ruin it.
How to carve this stencil
- Transfer the full design; note that the cheek scrollwork and the cross petal above the eyes have very thin connecting bridges.
- Cut the chin tooth-grid first, removing each rectangular slot carefully from the bottom up.
- Carve the scrollwork tendrils on the left cheek, then the right, keeping the curling tip connected to the outer ring until the scroll is fully released.
- Remove the four cross-petal shapes above the eye sockets next, working around the center bridge that divides them.
- Cut the two large eye-socket ovals last, as removing them opens the most wall area.
- A warm amber LED set low in the pumpkin makes the scrollwork glow against the dark eye sockets.
Tools you'll need
For a advanced carve like this you'll want a linoleum cutter set, x-acto knife, peel tool, and pin transfer wheel. Here's the kit we reach for — start with whatever you already own.

Elmchee Pumpkin Carving Kit
13-piece kit with carrying case
Saws for the larger cutouts, plus a scoop for hollowing. Covers both jobs in one kit.
View on Amazon ↗
Speedball 4131 Lino Cutter Set
Handle + 5 interchangeable cutters
Interchangeable cutters for peeling and shading the face. Useful for the finer details.
View on Amazon ↗
Homemory LED Tea Lights
24-pack of battery-operated lights
Battery-operated, flickering lights for a candle-like glow inside your finished pumpkin.
View on Amazon ↗
Community Pumpkin Carving Ideas
Carving ideas that use stencils like this one.
Related stencils
Carvers who liked this one also downloaded these.
- Expert / Pro
Sugar Skull with Roses Pumpkin Stencil
A sugar skull face with flower-ringed eye sockets, a crown of jagged flames, a heart-shaped nose, and rectangular teeth is surrounded by six individually carved roses in this expert pumpkin stencil. Every petal cluster, leaf, and decorative element is a separate pierce-through, creating an intricate Day of the Dead tableau. The carved pumpkin glows through dozens of individual openings simultaneously. Work from the center outward: finish all skull face details before the outer roses, so you can brace the pumpkin face-side-down when carving the perimeter flower clusters.
- Advanced
Sugar Skull Pumpkin Stencil
A sugar skull face radiates symmetry in this Dia de los Muertos pumpkin stencil, with two large oval eye openings, a heart-shaped nose, and a row of rectangular teeth cut through, flanked on each side by detailed rose clusters with petal loops. The forehead band is a broad solid bridge separating the floral crown region from the face below. Cut the intricate rose petal loops before the large eye ovals, since the petals are fragile and need the surrounding wall still intact for support.
- Expert / Pro
Sugar Skull Sombrero Pumpkin Stencil
A Dia de los Muertos sugar skull wears an enormous sombrero whose brim is covered in repeating triangular geometric cutouts, while the skull face below shows heart-shaped flower eyes with petals, small crescent cheek scrolls, and a toothy grin in this expert sugar-skull pumpkin stencil. The tight zigzag pattern on the sombrero brim requires precise, repetitive cuts that must stay connected by narrow bridges to hold the hat together. Carve the hat band and dome details at the top first, then work row by row down the brim triangles before tackling the face, so the skull does not shift while the delicate geometric grid is still being cut.
- Expert / Pro
Dancing Skeleton Dia de Muertos Pumpkin Stencil
A skeletal Dia de los Muertos figure wearing a flower-crowned hat dances atop a row of pointed picket-fence stakes in this expert sugar-skull pumpkin stencil, with crossbones at its sides, a lacy ruffled collar, and small flower rosettes scattered at the fence tops. Dozens of small isolated cut pieces, including the fence picket slots, collar ruffles, and flower details, create a composition that must be carved in strict order to avoid structural collapse. Start with the fence picket slots at the bottom of the design and work upward, finishing the skeleton body details last.