Halloween Pumpkin Carving Contest · Starts October 1st · $500 in prizes
← Back to ideas
@ai_concepts
Sep 14, 2026
Heart-Eyed Sugar Skull PumpkinAI
0

Heart-Eyed Sugar Skull Pumpkin

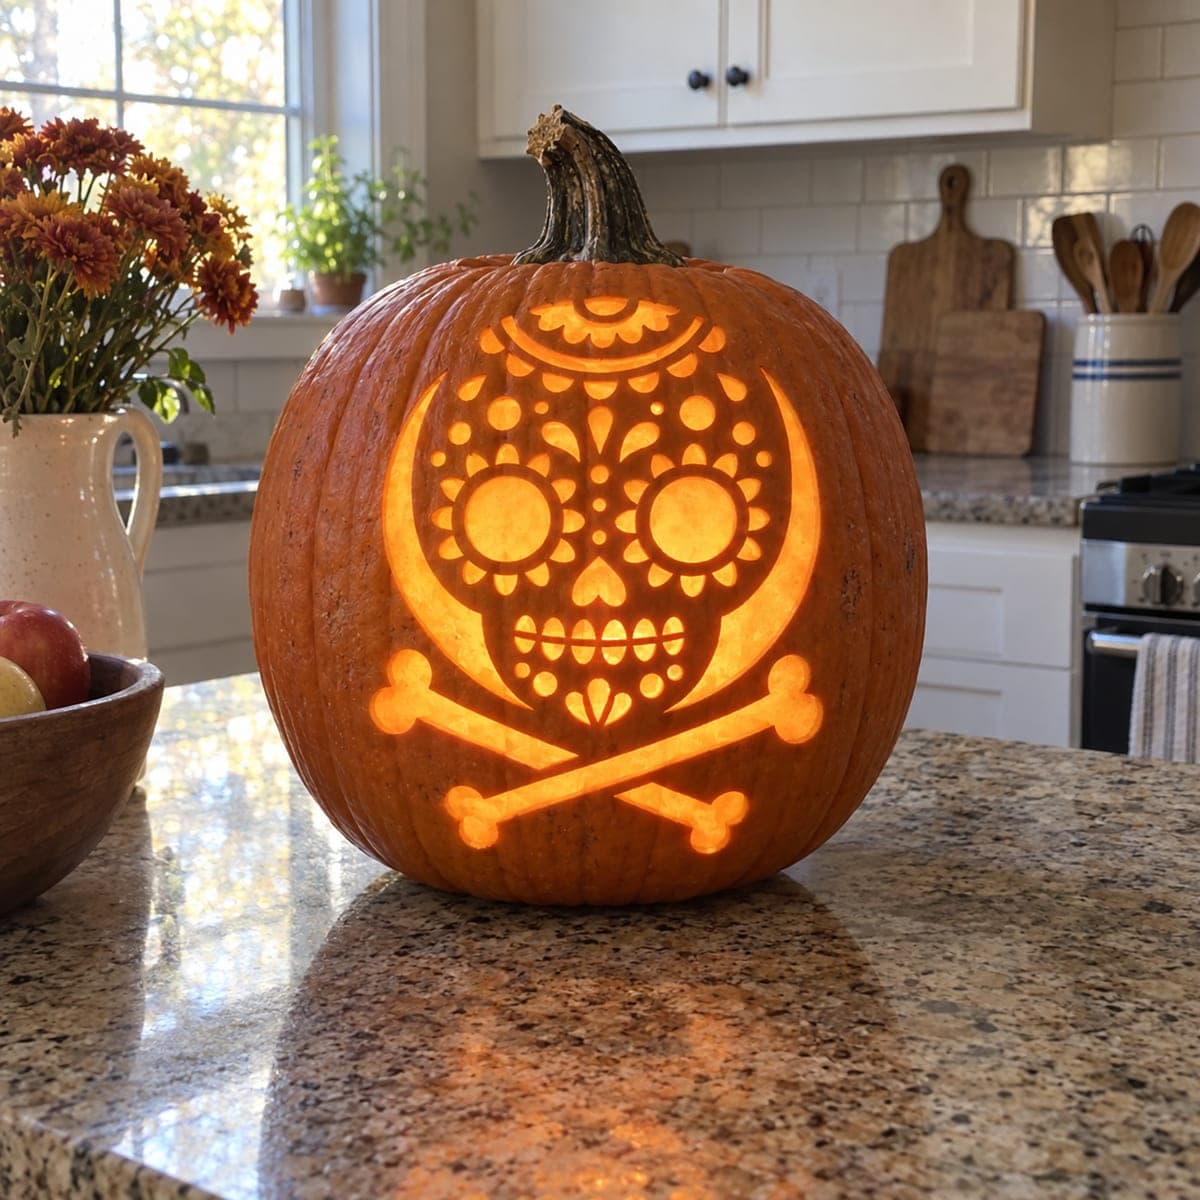
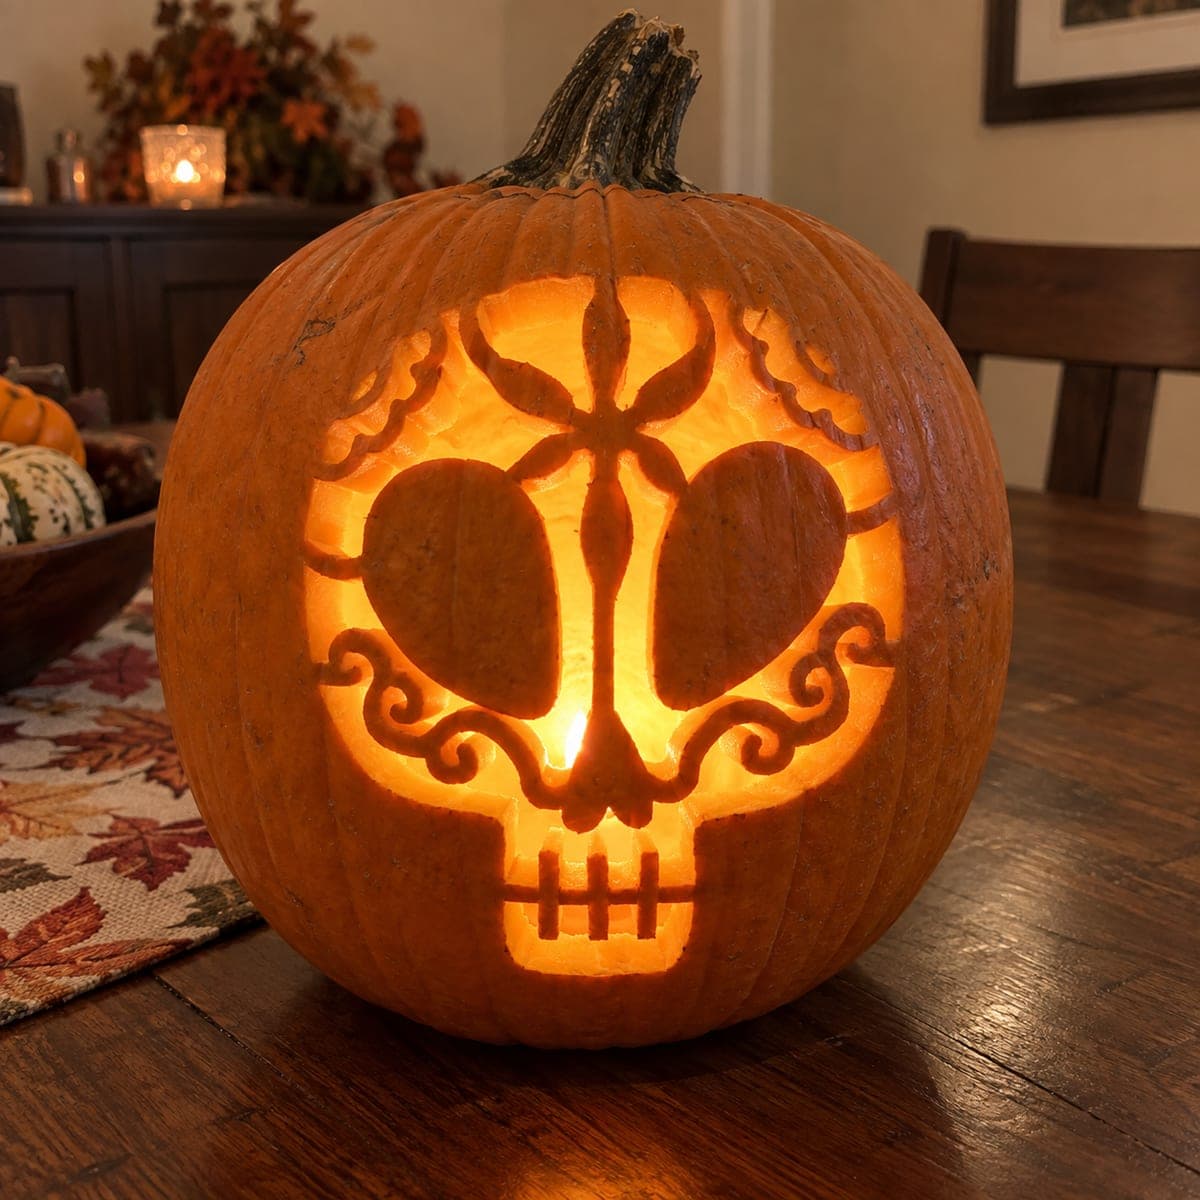
Two large heart-shaped eye sockets dominate a Dia de los Muertos skull decorated with symmetrical floral scrollwork at the cheeks, a diamond on the forehead, and a row of teeth along the jaw. The cutout approach opens each heart eye and the decorative scroll shapes as pierced sections, while the skull form itself stays as dark rind. Carve the small scroll flourishes at the cheek with a narrow detail blade before opening the large eye hearts, because those scrolls are the most fragile elements once the adjacent wall is weakened. This artistic sugar skull pumpkin carving idea looks especially striking on a mantel with a single candle.

This is an AI-generated concept image: a realistic, carvable design idea rather than a photo of a finished carve. AI concepts are always labeled and sit out the leaderboard and the contest.
No ratings yet · Sign in to rate

Comments (0)

  • No comments yet — be the first.

Save without an account. Sign in to like or comment.

Our tips for carving a similar design

The core trick here is a reversal of the usual jack-o-lantern: the skull shape stays as solid dark rind while the heart eyes, diamond, scrolls, and teeth are pierced all the way through so light pours out around the face. Since this is a concept image, think of it as a plan you could follow on a real pumpkin. Work the delicate cheek scrolls first and save the two big heart eyes for last so the wall stays strong while you carve the fine lines.

Written by PumpkinCarvingIdeas.com, inspired by the image above. These are our suggestions, not instructions from the uploader. This approach to the AI concept has not been tested on a real pumpkin.

From pumpkin to porch

  1. Pick a big round pumpkin and open the back

    Choose a tall, wide pumpkin with a smooth front face so the symmetrical design has room to breathe. Cut a hatch in the back rather than the top, which keeps the front wall unbroken for carving. Scrape the inside front wall down to about one inch thick with a loop tool so light passes through easily. A thinner, even wall makes both the scrollwork and the big cutouts cleaner.

  2. Transfer the sugar skull pattern

    Tape your stencil flat against the front, snipping the edges so it hugs the curve without wrinkling. Poke the outlines with a pushpin or a transfer wheel, spacing dots close together along the tight scroll curves and heart edges. Peel the paper and connect the dots lightly with a pencil so you can see the diamond, hearts, scrolls, and teeth clearly. Double check that the left and right sides mirror each other before you cut.

  3. Carve the fragile cheek scrolls first

    Start with the small floral scroll flourishes at the cheeks using a narrow detail blade. Cut these while the surrounding wall is still solid, because they are the most fragile parts once the big eyes are opened. Make short, controlled strokes and let curls stay connected to the surrounding rind at their base so they do not snap free. Take your time here, since these thin shapes are what give the skull its Day of the Dead character.

  4. Cut the diamond, teeth, and nose

    Move to the diamond on the forehead and the small nose opening, keeping the little bridge that splits the nose into two halves. Carve the row of teeth along the jaw as separate slots, leaving the vertical rind strips between them so the teeth read as individual squares. Keep an adult on the sharp tools and always push the blade away from your holding hand. These medium cuts are good practice for your knife control before the largest openings.

  5. Open the two big heart eyes last

    Save the large heart-shaped eye sockets for the final cuts, since removing that much rind weakens the whole face. Score the heart outlines fully, then gently push each piece inward and out through the back. If a heart is large, cut it in two halves and remove them one at a time so the wall does not crack. Clean up the edges with a light bevel from the inside to help the light spread.

  6. Light it and take the photo

    Drop in a battery LED, ideally a warm flickering one, and set it low so the glow rises through the hearts and scrolls. Photograph in a dim room, on a mantel or table, with the camera slightly below the face for drama. Mist the cut edges with water and refrigerate the pumpkin overnight between showings to slow shrinking. If the scrolls start to curl, a quick water spritz freshens them.

Gather your supplies

Check things off as you get ready.

Work on a stable surface, keep your free hand out of the cutting path, and have an adult handle sharp tools.

Three levels of light

  • Leave intact

    The skull face itself, keeping the whole head shape as dark untouched rind.

  • Peel & shade

    Optional thin outlines around the hearts or a shallow halo behind the skull for a soft dim ring.

  • Cut through

    The two heart eyes, forehead diamond, nose, cheek scrolls, and the row of teeth, all pierced through for full brightness.

Learn the carving basics

Before you start cutting

How do I keep the cheek scrolls from breaking off?

Carve them before you open the large heart eyes, while the surrounding wall is still solid and supportive. Leave each curl attached to the rind at its base rather than cutting it completely free. Use a narrow detail blade with short strokes so you are not prying against thin sections.

Why cut the heart eyes last instead of first?

The hearts remove the most rind, and once they are open the face loses a lot of its structural strength. Carving them last means the delicate scrolls and teeth are already finished while the wall is still firm. If a heart is very large, remove it in two halves to avoid cracking.

Do the teeth need bridges between them?

Yes, cut each tooth as its own slot and leave the vertical strips of rind between them intact. Those strips are the bridges that hold the jaw together and make the teeth read as separate squares. Removing them would leave one big gap and lose the sugar skull look.

Your take belongs here, too.

Changed a detail? Made it simpler? Share a photo of your version and tell the community what worked.

Share your pumpkin

More pumpkins like this

You've reached the end · 8 pumpkins
The Patch Report

Fresh pumpkins, in your inbox.

The best new carvings, ideas worth stealing, and how-tos for carving season. Short, seasonal, and gone by November.

A short email during carving season. Unsubscribe anytime. See our privacy policy.