Halloween Pumpkin Carving Contest Β· Starts October 1st Β· $500 in prizes
← Back to ideas
@ai_concepts
Aug 9, 2026
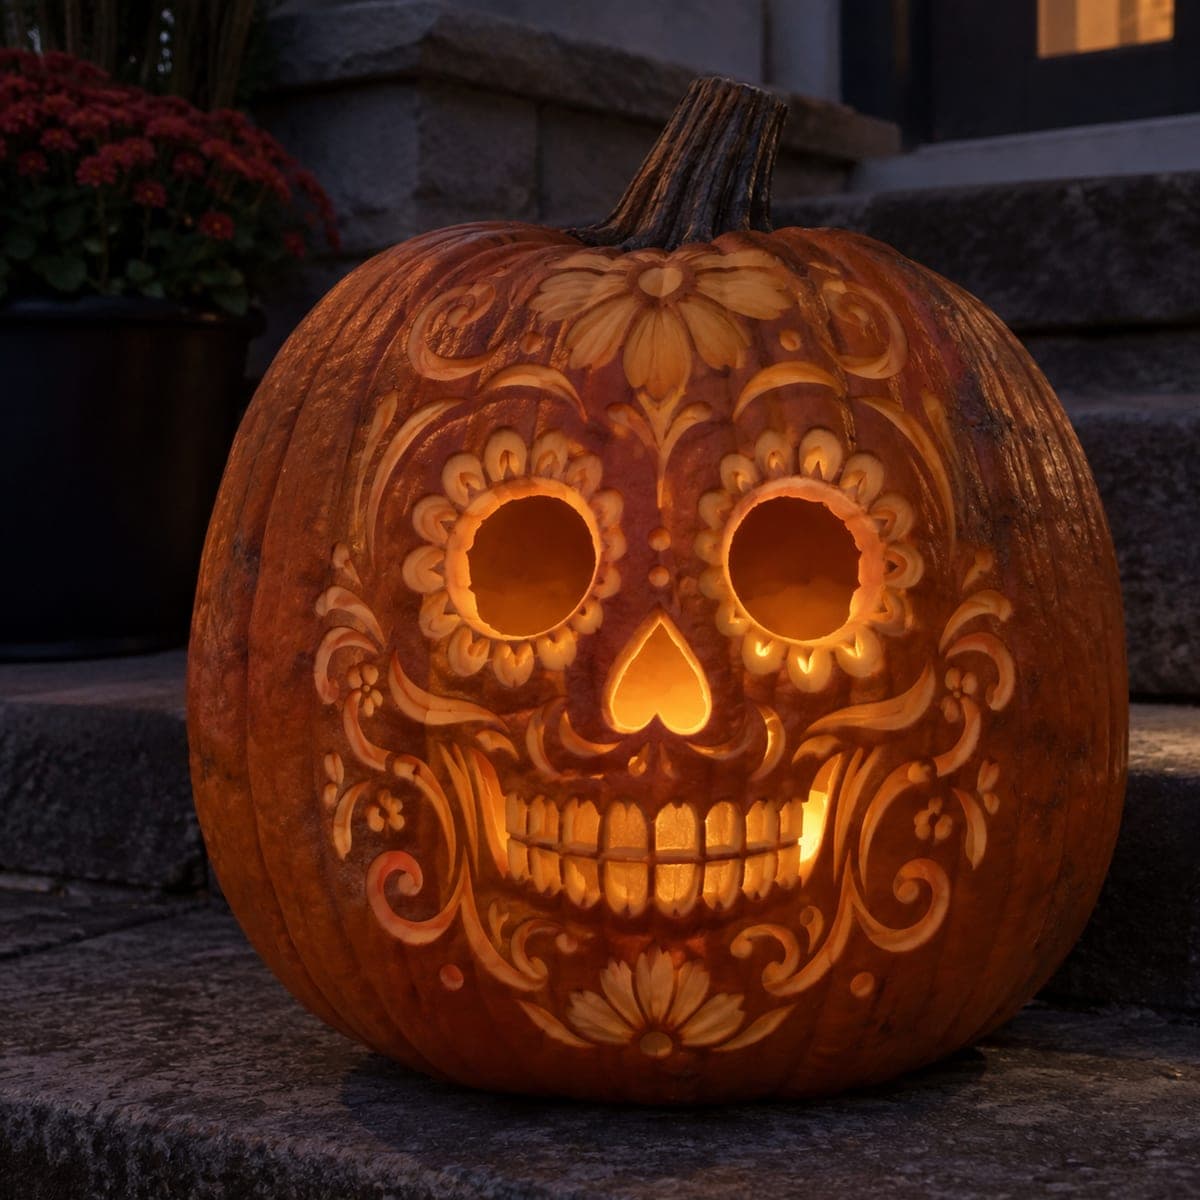
Day of the Dead Sugar Skull Jack-O-Lantern with FloralsAI
0

Day of the Dead Sugar Skull Jack-O-Lantern with Florals

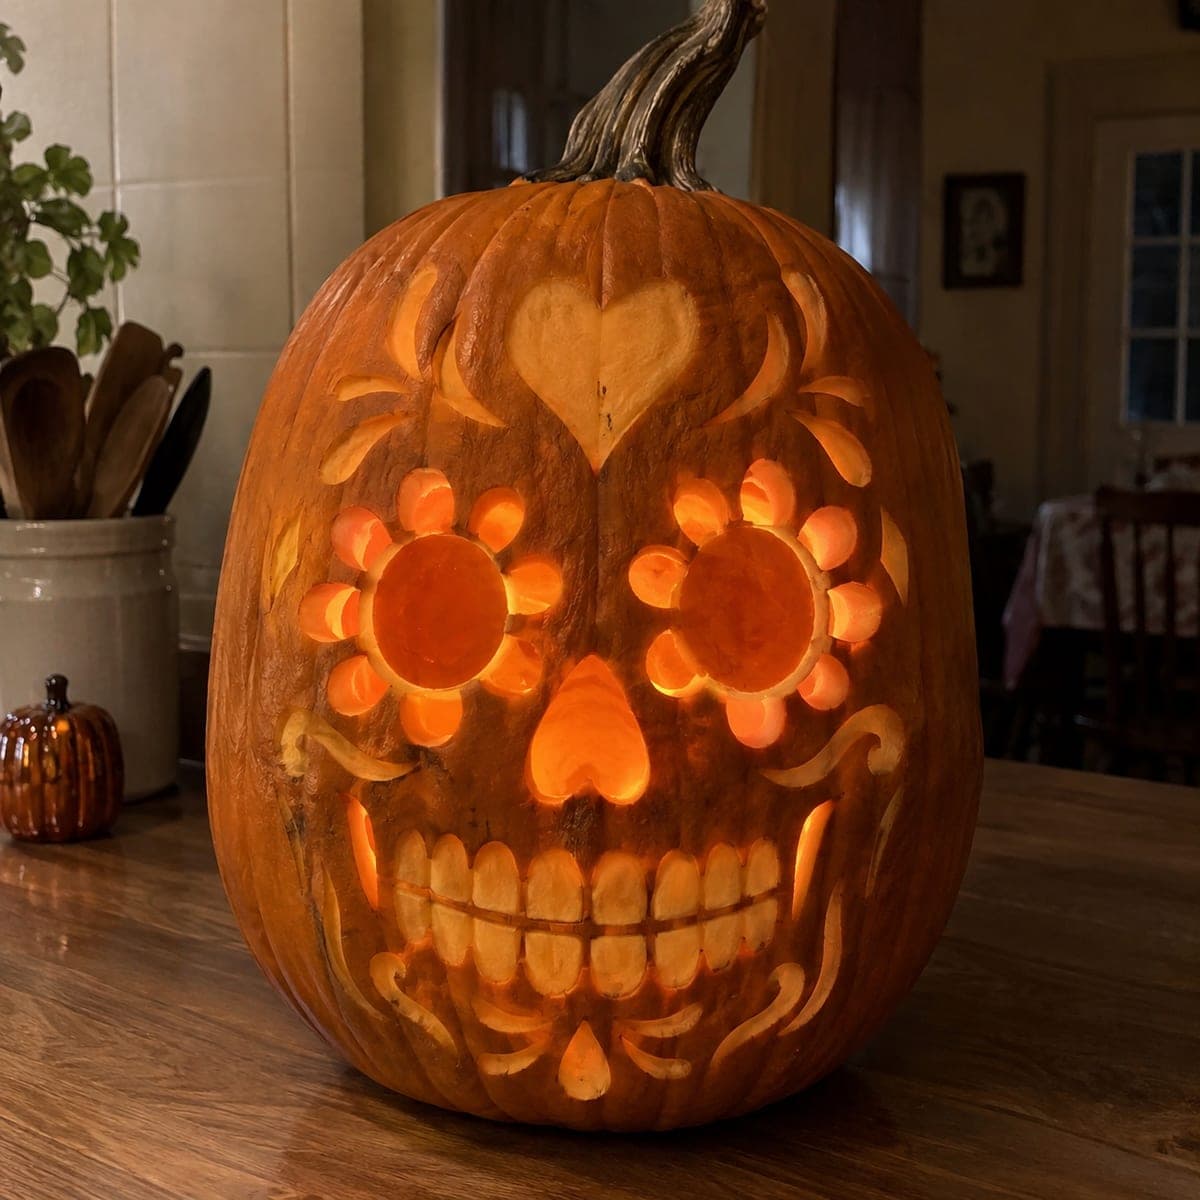
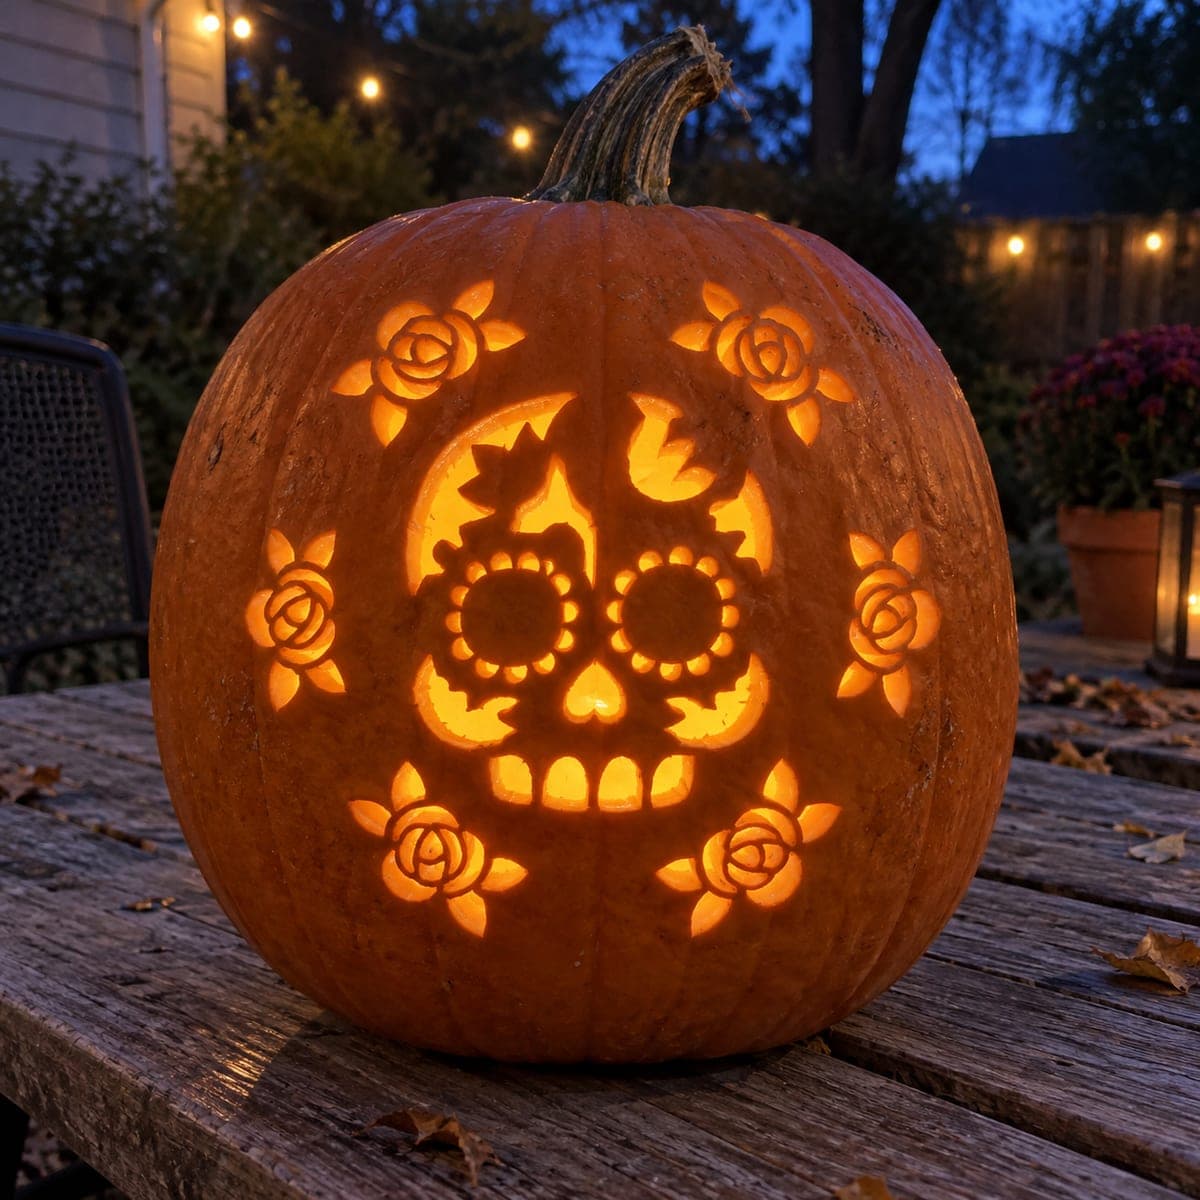
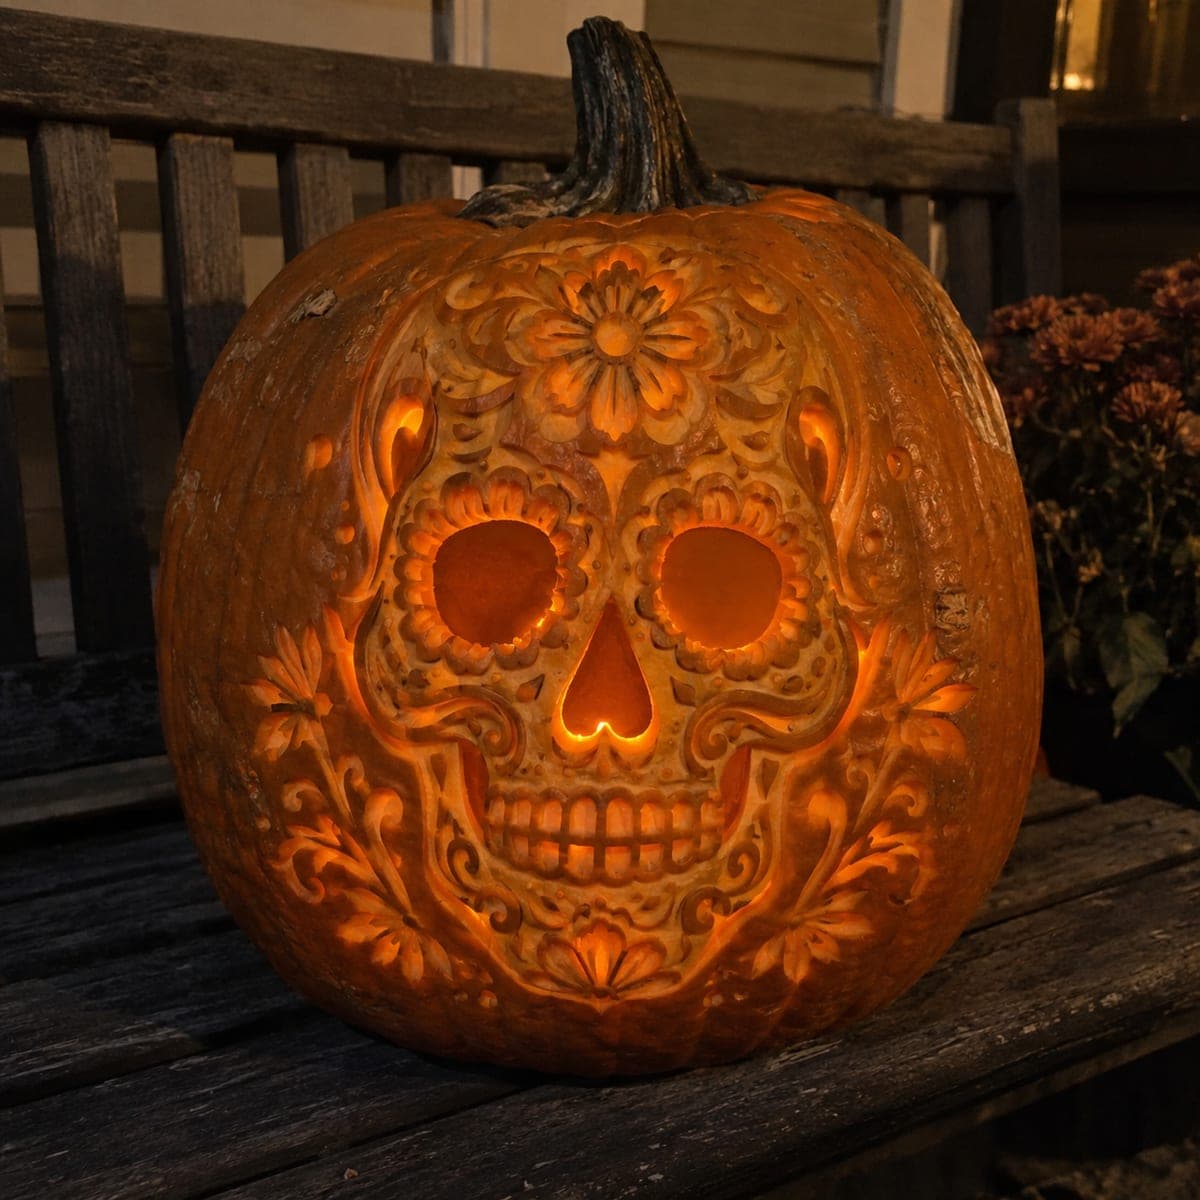
Intricate floral rosettes, scrolling filigree, and circular eye ornaments frame a smiling sugar skull face on this stunning Dia de los Muertos pumpkin carving idea. The design blends cutout work for the eyes and nose with surface etching for the decorative floral patterns, so interior light shines through the eyes while the carved ornaments glow softly. Transfer the symmetrical pattern with a tracing stylus and carbon paper before cutting, and carve the thin filigree lines with a V-gouge rather than cutting fully through so they hold structurally. Placing it on stone steps with votive candles on either side echoes traditional ofrenda altar styling beautifully.

This is an AI-generated concept image: a realistic, carvable design idea rather than a photo of a finished carve. AI concepts are always labeled and sit out the leaderboard and the contest.
No ratings yet Β· Sign in to rate

Comments (0)

  • No comments yet β€” be the first.

Save without an account. Sign in to like or comment.

Our tips for carving a similar design

The core trick here is the contrast between a few clean cutouts and a lot of shallow surface carving. The round eyes and heart nose are cut all the way through for bright light, while the flowers, scrolling filigree, and grinning teeth are only skin-peeled or etched so they glow softly. Plan the whole face symmetrically before you touch a blade, since the design lives or dies on both sides matching.

Written by PumpkinCarvingIdeas.com, inspired by the image above. These are our suggestions, not instructions from the uploader. This approach to the AI concept has not been tested on a real pumpkin.

From pumpkin to porch

  1. Pick a tall pumpkin and open the base

    Choose a large, evenly round pumpkin with a smooth front face and a sturdy stem. Cut a wide opening in the bottom rather than the top so the pumpkin sits flat and you can set it down over an LED light later. Scrape the inside wall behind the face down to about one inch thick so the shading will glow. A thinner wall lets more light through the peeled areas.

  2. Transfer the symmetrical pattern

    Tape your sugar skull stencil tightly over the front, poking small darts around the curves so the paper hugs the pumpkin. Slip carbon paper underneath and trace every line with a stylus, or dot along the lines with a poking tool. Take your time getting the two eye rosettes and both cheek scrolls to mirror each other. A crooked transfer is much harder to fix once you start carving.

  3. Etch the flowers and filigree first

    Start with the shallow decorative work while the pumpkin is still strong and solid. Use a V-gouge to trace the scrolling filigree lines and the petal outlines, cutting a shallow groove rather than punching through. For the flower rosettes and the forehead bloom, peel just the outer skin with a ribbon or loop tool so orange flesh shows and catches light. Keep these lines connected so nothing crumbles.

  4. Shade the teeth and shallow shapes

    Carve the grinning teeth as peeled panels, then score the vertical tooth divisions lightly so the light reads as separate teeth without cutting through. Do the same soft peeling on the small dots and leaf shapes around the eyes. Vary your depth a little so some areas glow brighter than others. This layered shading is what gives the face its painted sugar skull look.

  5. Cut the eyes and nose last

    Save the full cutouts for the very end, once all the delicate work is safely done. Cut the two round eyes and the heart shaped nose all the way through, working from the center outward with slow, controlled strokes. An adult should handle these blade cuts, and keep your free hand out of the cutting path. These openings are the brightest points, so clean edges matter.

  6. Light it and stage the photo

    Set the pumpkin over a warm LED puck or a string of battery lights, never a real flame near all this thin carving. Place it on stone steps with flameless votives on either side to echo an ofrenda altar. Shoot at dusk so the peeled florals glow while the eyes blaze. Mist the surface lightly to refresh it before the photo.

Gather your supplies

Check things off as you get ready.

Work on a stable surface, keep your free hand out of the cutting path, and have an adult handle sharp tools.

Three levels of light

  • Leave intact

    The untouched orange skin around the outer edges and background stays dark to frame the face.

  • Peel & shade

    The flower rosettes, forehead bloom, scrolling filigree, and teeth are skin-peeled for a soft mid glow.

  • Cut through

    The two round eyes and the heart shaped nose are cut through for the brightest light.

Learn the carving basics

Before you start cutting

How do I keep the two sides of the face matching?

Use a symmetrical printed stencil and fold or mark a center line down the pumpkin before transferring. Trace one side, then check the mirror side against it as you go. Carving freehand almost always drifts, so lean on the transferred lines for every scroll and petal.

Will the thin filigree lines break apart?

They will hold if you only groove them with a V-gouge instead of cutting through the wall. Shallow etched lines keep the skin and flesh connected, so nothing hangs loose. Save all full cutouts for the eyes and nose at the very end.

Since this is a concept image, can a real pumpkin look this detailed?

Yes, though it takes patience and the right tools. This is an AI concept, so no real pumpkin was carved, but the techniques shown are achievable with surface peeling and a few clean cutouts. Choose a large smooth pumpkin and thin the wall so your shading glows the way the image suggests.

Your take belongs here, too.

Changed a detail? Made it simpler? Share a photo of your version and tell the community what worked.

Share your pumpkin

More pumpkins like this

You've reached the end Β· 8 pumpkins
The Patch Report

Fresh pumpkins, in your inbox.

The best new carvings, ideas worth stealing, and how-tos for carving season. Short, seasonal, and gone by November.

A short email during carving season. Unsubscribe anytime. See our privacy policy.