Halloween Pumpkin Carving Contest · Starts October 1st · $500 in prizes
← Back to ideas
@ai_concepts
Aug 8, 2026
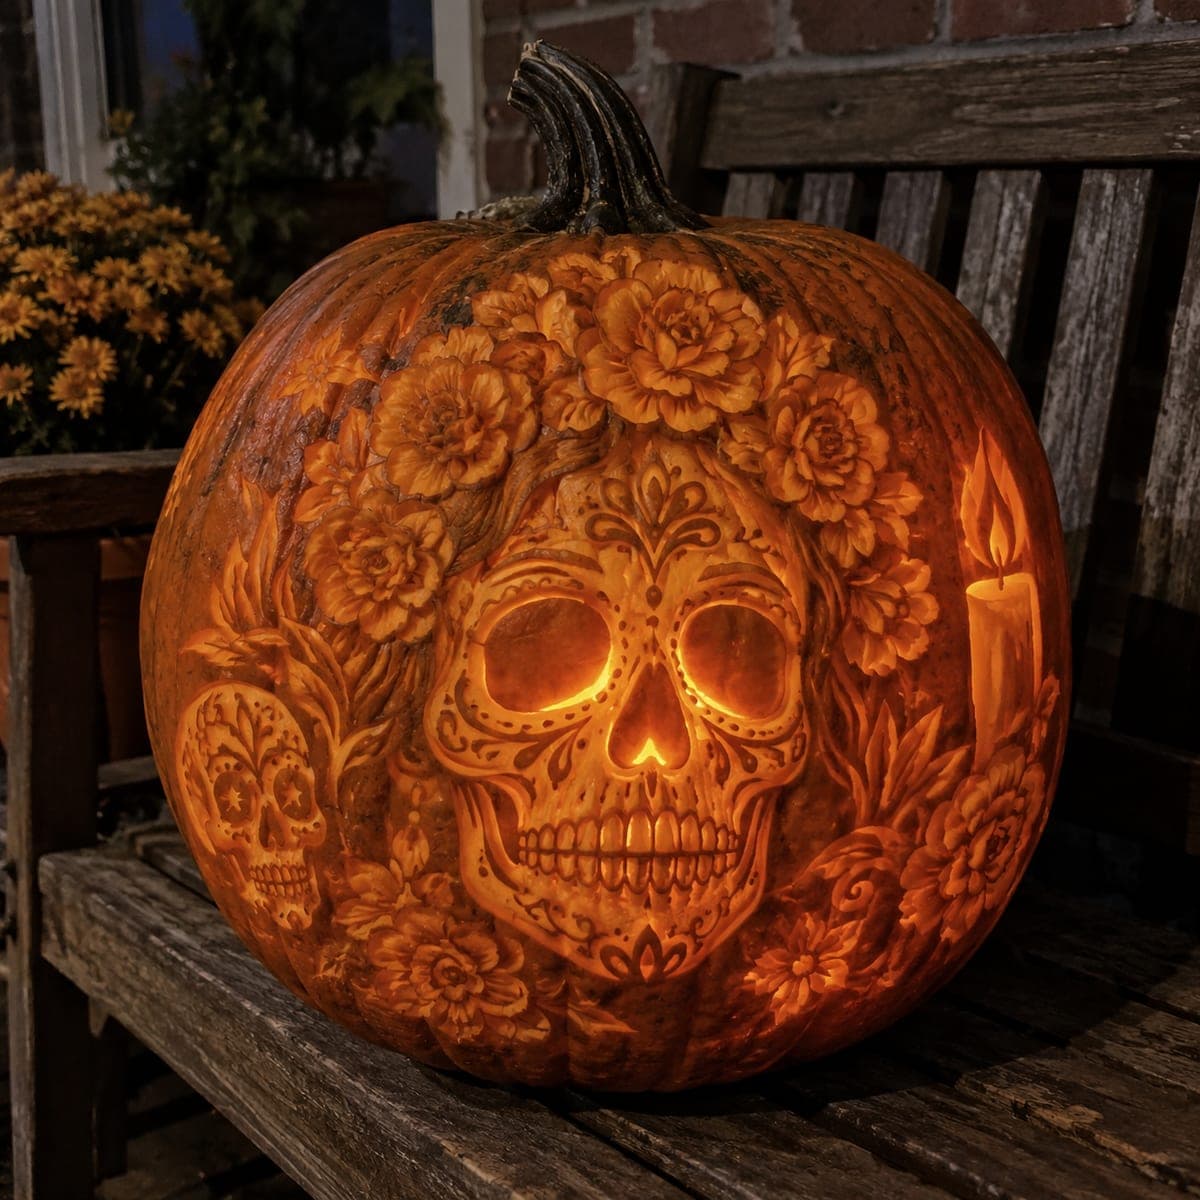
Sugar Skull and Marigold Day of the Dead PumpkinAI
0

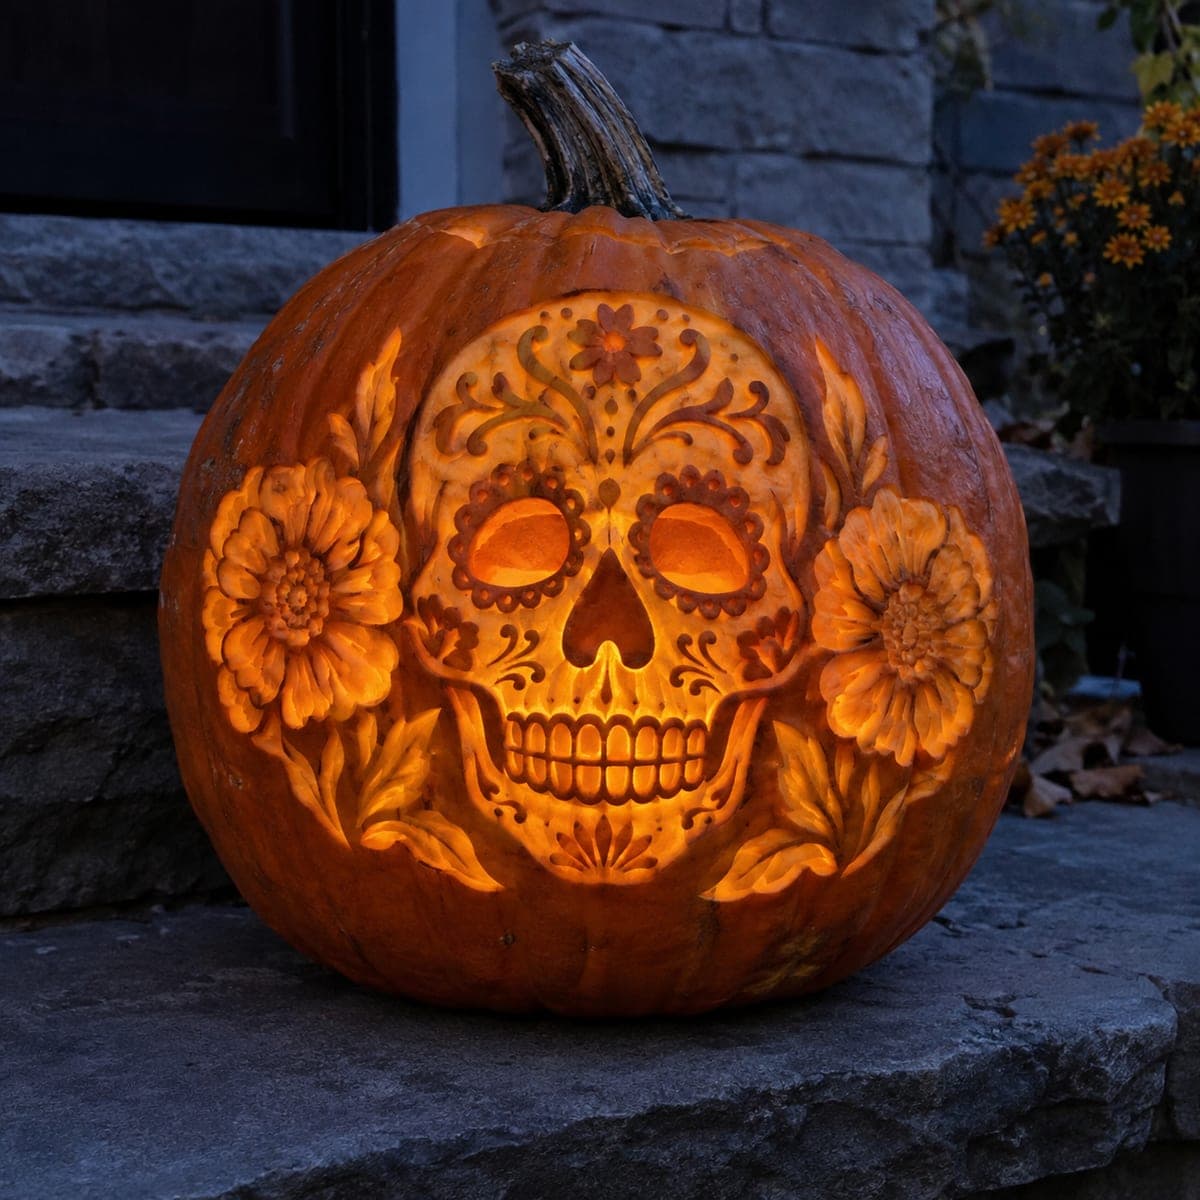
Sugar Skull and Marigold Day of the Dead Pumpkin

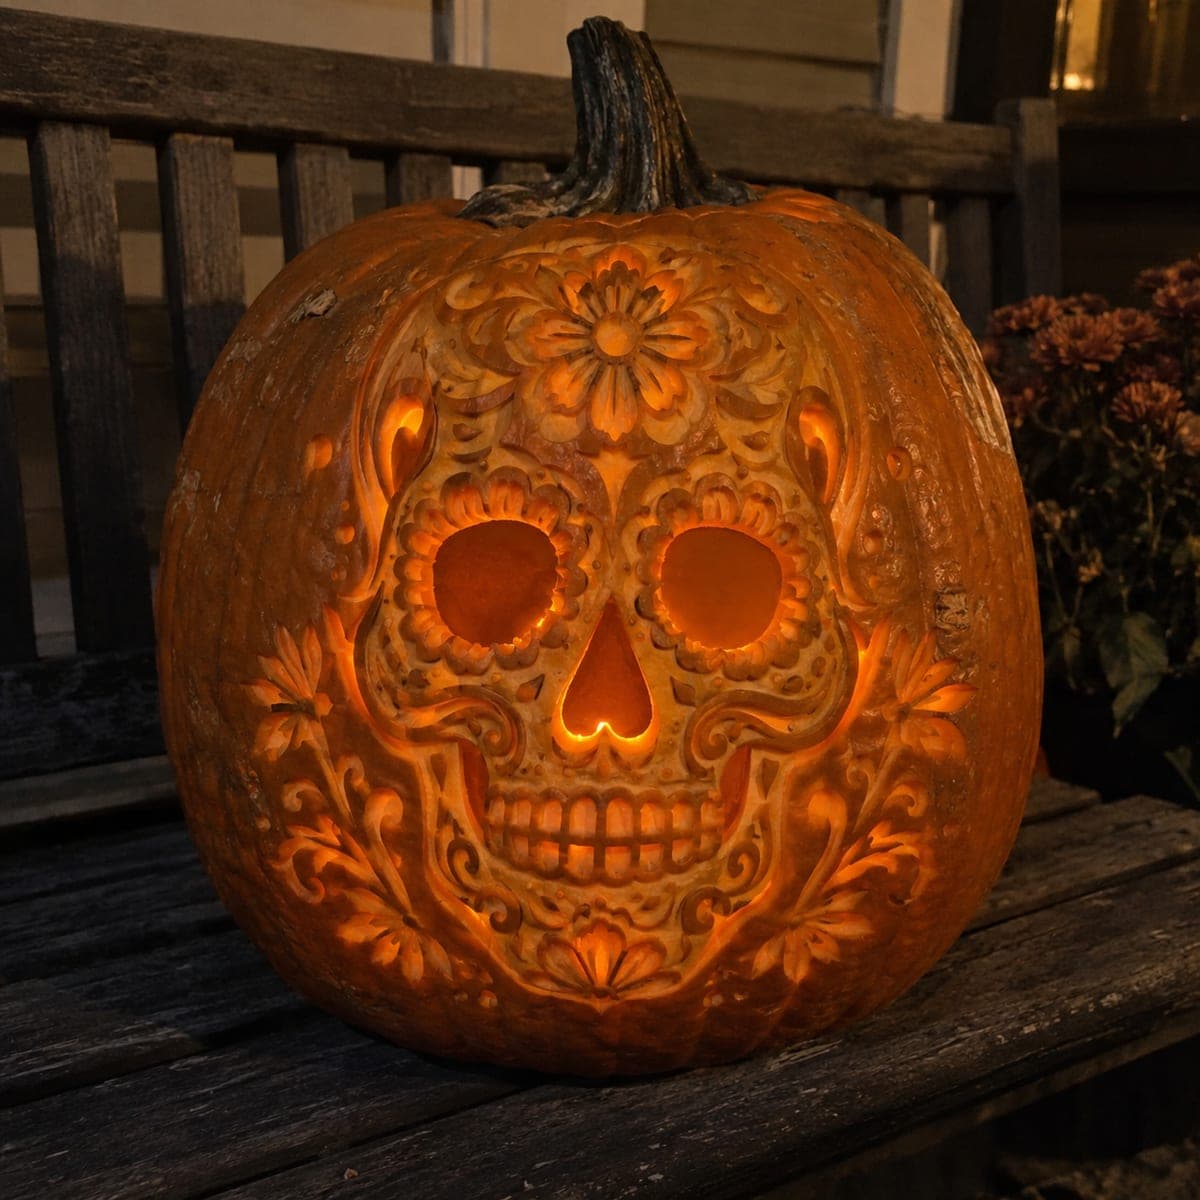
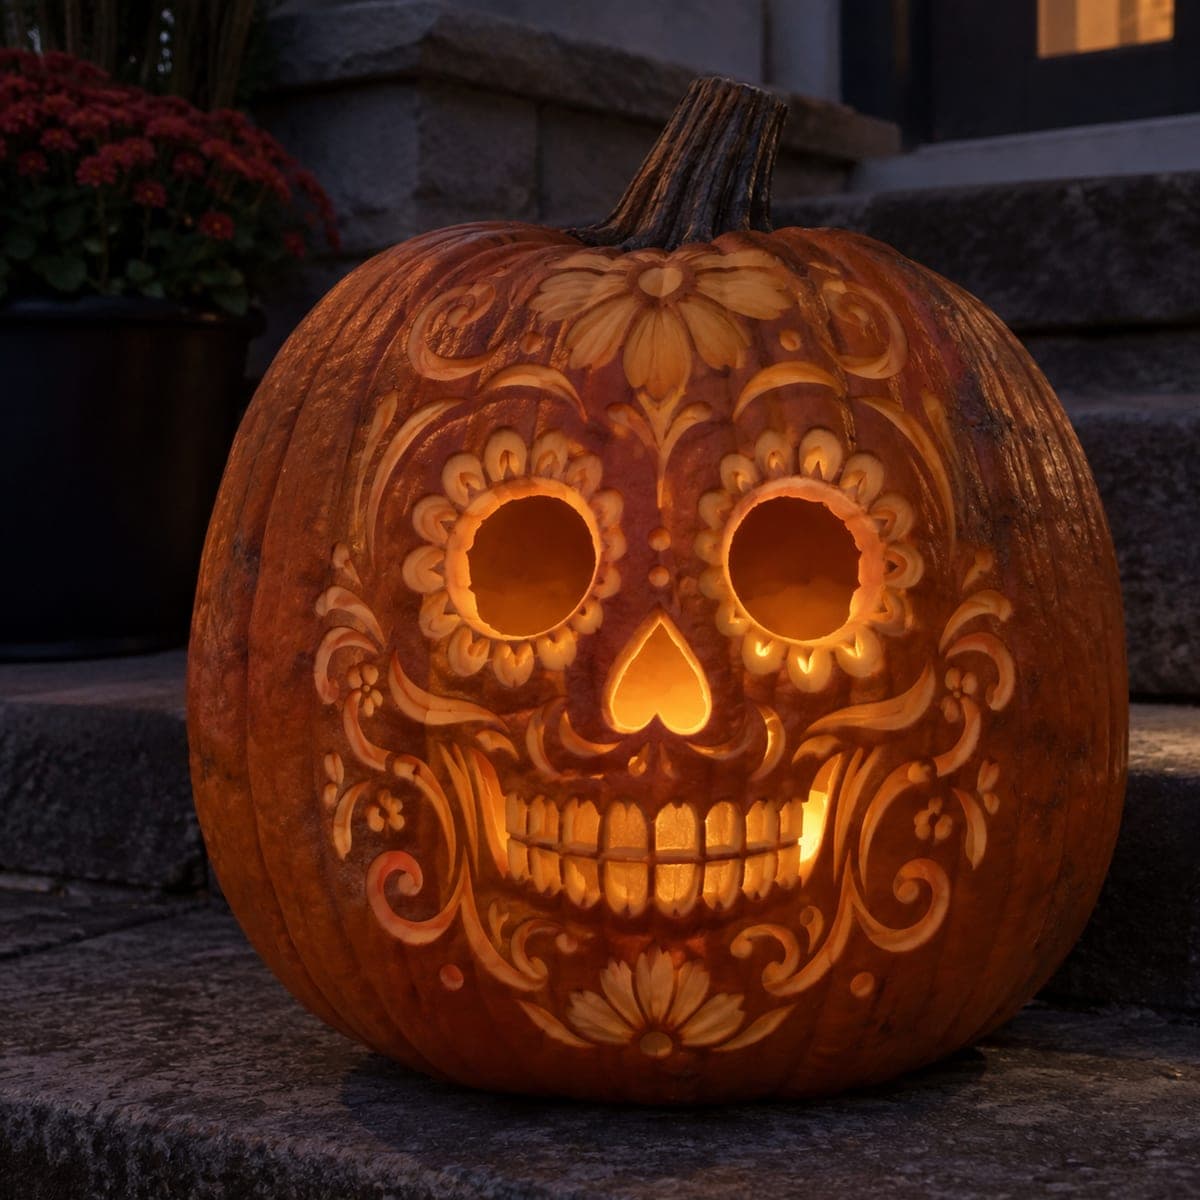
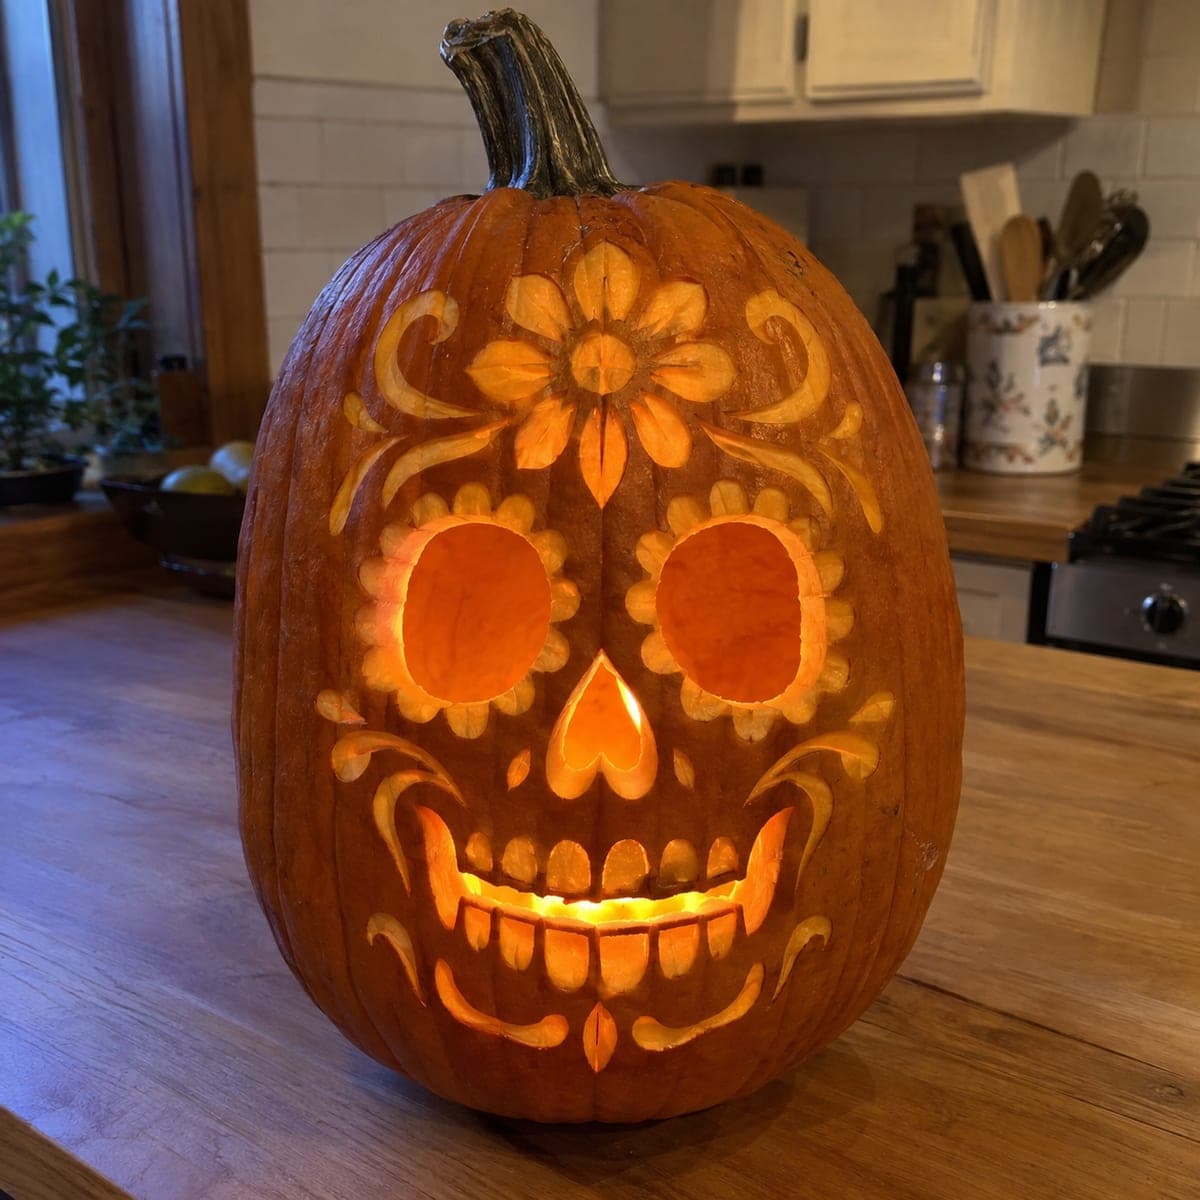
An ornate sugar skull framed by carved marigolds turns this pumpkin into a Day of the Dead showpiece. Dozens of dots, petals, and scallops are etched at shallow depth, letting light trace every decorative line without cutting through. Transfer the symmetrical pattern with pins through a paper template, then work from the center of the face outward. Two tea lights spread the glow to the flowers on both shoulders.

This is an AI-generated concept image: a realistic, carvable design idea rather than a photo of a finished carve. AI concepts are always labeled and sit out the leaderboard and the contest.

No ratings yet · Sign in to rate
Comments (0)

  • No comments yet — be the first.

Save without an account. Sign in to like or comment.

Our tips for carving a similar design

The trick here is depth control: nearly everything is shaded at shallow depth so light glows through the skin, and only the eyes and the gaps between teeth are cut all the way through. Work from the center of the face outward so your symmetry stays true, and save the framing marigolds for a raised, sculpted treatment that catches side light. Think of it as three light levels layered over one clean skull outline.

Written by PumpkinCarvingIdeas.com, inspired by the image above. These are our suggestions, not instructions from the uploader. This approach to the AI concept has not been tested on a real pumpkin.

From pumpkin to porch

  1. Pick a wide pumpkin and clean the wall

    Choose a large, round, evenly colored pumpkin with a broad flat face so the skull and both flowers fit side by side. Cut a lid from the bottom instead of the top so the stem stays intact and the pumpkin sits steady. Scoop the inside and scrape the carving wall down to about one inch thick where the face will go. A thinner, even wall makes the shaded areas glow consistently.

  2. Transfer the symmetrical pattern

    Tape a paper stencil over the face, centered between the widest points. Poke pin holes along every line, dot, and petal edge, working slowly through the dense filigree. Peel the paper and connect the dots lightly with a washable marker. Take your time here, since the whole design depends on the two sides matching.

  3. Etch the fine skull details first

    Using a small detail gouge or a lino-style U-tool, remove only the top skin along the swirls, scallops, and dot clusters so the flesh underneath glows dim orange. Keep the cuts shallow and uniform, testing depth on a hidden spot first. Do the delicate face patterns before you tire, when your hand is steadiest. Leave the raised skull edges and cheekbone outlines untouched so they read as dark lines.

  4. Sculpt the marigolds on the shoulders

    For the two flowers, carve at varying shallow depths to shape petals that step back in layers, rounding each edge with a small gouge. This 3D shading catches light from the sides rather than punching through. Keep the flower centers slightly deeper and textured with tiny dots. Bridges of skin between petals keep the blooms strong.

  5. Cut the openings last

    Only now cut fully through the two eye sockets, the triangular nose, and the thin gaps between the teeth. Cut the eyes and nose as clean shapes, then make the tooth lines narrow so the teeth stay bright but attached. Cutting these big openings last keeps the face rigid while you handle it. Support the wall with your free hand as you finish each opening.

  6. Light it and photograph

    Set two battery LED tea lights inside, one shifted toward each shoulder, so the glow reaches both marigolds. Skip real candles, since the thin etched wall can scorch and the detail deserves steady, even light. Coat the cut edges with petroleum jelly to slow drying. Shoot at dusk on a step or stone ledge for the warm contrast.

Gather your supplies

Check things off as you get ready.

Work on a stable surface, keep your free hand out of the cutting path, and have an adult handle sharp tools.

Three levels of light

  • Leave intact

    The raised skull outline, cheekbone ridges, and the dark lines separating each swirl and petal stay as untouched skin.

  • Peel & shade

    The filigree swirls, dot clusters, scallops, and the layered marigold petals are skin-peeled for a soft mid glow.

  • Cut through

    The two eye sockets, the heart-shaped nose, and the narrow gaps between the teeth are cut through for the brightest light.

Learn the carving basics

Before you start cutting

How do I keep the two sides of the skull symmetrical?

Use a pin-pricked paper template rather than freehand drawing, and fold or mirror the stencil so both halves come from the same source. Mark a light vertical centerline down the face first and check each dot cluster against its mirror as you go. Work outward from the center so any small drift is easy to spot early.

Since this is an AI concept, can a real pumpkin hold all this detail?

Yes, if you keep the fine work as shallow etching and shading rather than cutouts. The dense dots and swirls glow through a thinned wall without weakening it. Only turn the eyes, nose, and tooth gaps into true openings, and keep the tooth lines thin so the teeth stay bridged and strong.

Why sculpt the marigolds instead of cutting them out?

The flowers read best as raised, layered relief that catches side light, which keeps them distinct from the glowing face. Carving them at shallow stepped depths avoids large holes that would wash out the design. Angling two LED lights toward the shoulders brings out the petal shadows.

Your take belongs here, too.

Changed a detail? Made it simpler? Share a photo of your version and tell the community what worked.

Share your pumpkin

More pumpkins like this

You've reached the end · 8 pumpkins
The Patch Report

Fresh pumpkins, in your inbox.

The best new carvings, ideas worth stealing, and how-tos for carving season. Short, seasonal, and gone by November.

A short email during carving season. Unsubscribe anytime. See our privacy policy.