Halloween Pumpkin Carving Contest · Starts October 1st · $500 in prizes
← Back to ideas
@ai_concepts
Aug 26, 2026
Antler and Pine Forest Painted PumpkinAI
0

Antler and Pine Forest Painted Pumpkin

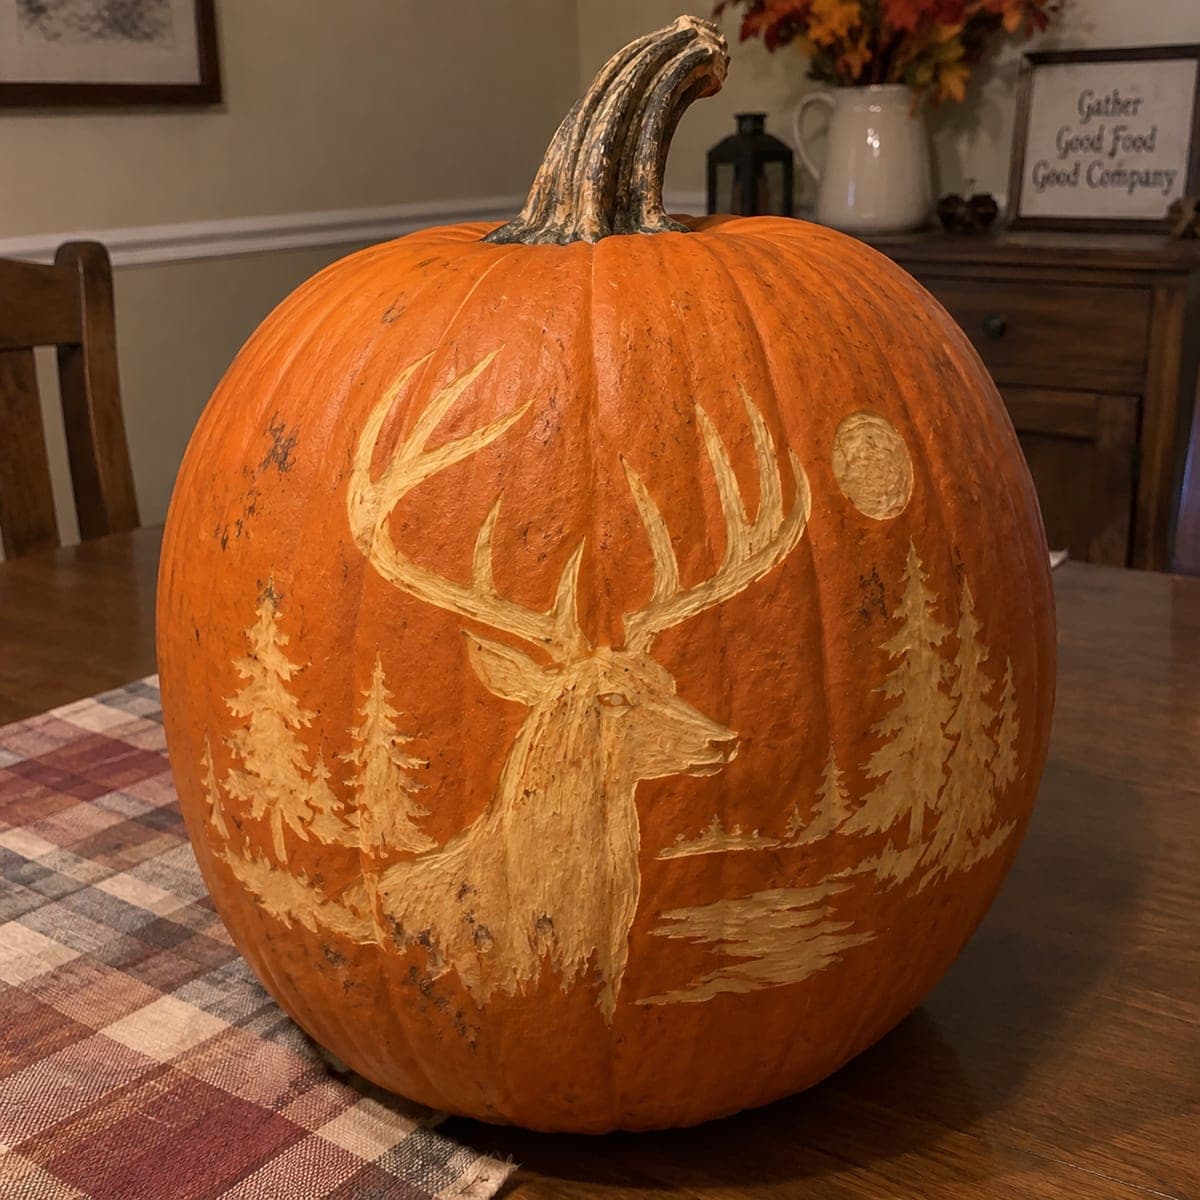
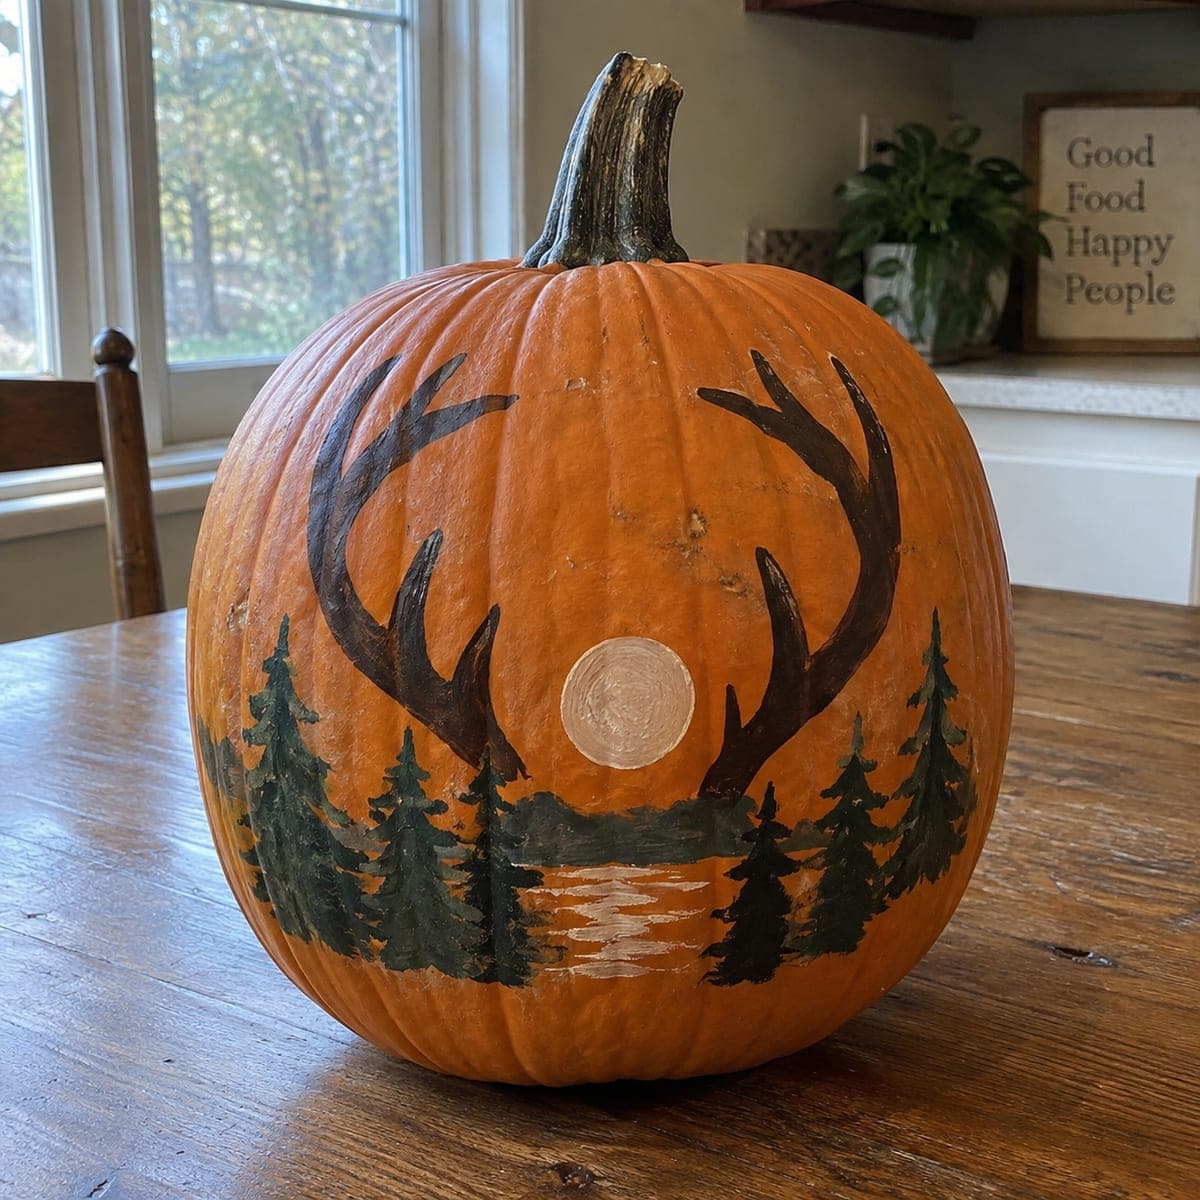
A pair of deer antlers frames a pale full moon above a painted pine treeline and shimmering lake on this rustic no-carve pumpkin. The whole scene is done in acrylic craft paint, with the antlers blocked in first and the trees dabbed on with a stiff brush. Sketch the antler shapes in pencil before painting so the two sides stay symmetrical, and seal with a matte spray for weeks of display.

This is an AI-generated concept image: a realistic, carvable design idea rather than a photo of a finished carve. AI concepts are always labeled and sit out the leaderboard and the contest.

No ratings yet · Sign in to rate
Comments (0)

  • No comments yet — be the first.

Save without an account. Sign in to like or comment.

Our tips for carving a similar design

The core trick here is symmetry: a matching pair of antlers arcs up and over a pale full moon, framing a pine treeline and a shimmering lake below. Since this is a painted, no-carve design, the plan is to sketch everything in pencil first, block in the big dark antlers, then layer the trees and water on top. Because this is an AI concept image, treat it as a look you can recreate rather than a real pumpkin someone finished.

Written by PumpkinCarvingIdeas.com, inspired by the image above. These are our suggestions, not instructions from the uploader. This approach to the AI concept has not been tested on a real pumpkin.

From pumpkin to porch

  1. Clean and sketch the layout

    Wipe the pumpkin down so paint grips the skin, and let it dry fully. Find the flattest display face and lightly pencil a center line from stem to base. Sketch the moon as a circle in the middle, then draw one antler on each side so they mirror across that line. Step back often to check that both antlers rise to about the same height.

  2. Block in the antlers

    Load a small round brush with dark brown and fill the antler shapes solidly, working from the base of each beam out to the tips. Keep the tines slightly tapered so they read as points. Two thin coats look better than one thick one, so let the first dry and go over it again. Clean up any wobbly edges with a fine liner brush.

  3. Paint the moon and sky glow

    Fill the moon circle with off white or pale cream, adding a faint swirl of light gray for texture. Let a soft halo of thinned white blend outward into the orange skin so it feels like moonlight. Keep the moon lower on the pumpkin so the antlers appear to cradle it. Let this layer dry before adding anything in front of it.

  4. Dab in the pine treeline

    Switch to a stiff, dry brush and dark green paint, then dab short downward strokes to build pine trees along the bottom third. Start each tree with a narrow top and widen as you move down for that classic evergreen shape. Vary the heights so the tree line looks natural, and let some trees overlap the antler bases. A stiff brush keeps the edges feathery instead of solid.

  5. Add the lake and highlights

    Paint a band of dark teal water between the trees, then drag short horizontal strokes of white and pale gray across it for the moon's reflection. Keep the reflection roughly under the moon so it lines up. Add a few lighter green tips to the front trees to give them depth. Fix any smudges now while the paint is still workable.

  6. Seal and stage the photo

    Once everything is bone dry, take the pumpkin outside and mist it with a matte clear spray in light passes to protect the paint. Let it cure per the can before handling. Set it on a wood table or shelf with soft, even room light so the scene stays crisp. A warm LED nearby brings out the orange without candles or flame.

Gather your supplies

Check things off as you get ready.

Work on a stable surface, keep your free hand out of the cutting path, and have an adult handle sharp tools.

Three levels of light

  • Leave intact

    The untouched orange skin acts as the glowing sky and background behind the whole scene.

  • Peel & shade

    For an optional lit version, lightly scrape only the moon so it glows dim and soft when backlit.

  • Cut through

    If you want real light, cut a small vent in the back and set an LED inside, keeping all painted areas on the front intact.

Learn the carving basics

Before you start cutting

How do I keep the two antlers symmetrical?

Draw a pencil center line first, then sketch one antler and mirror its main curves on the other side before any paint touches the pumpkin. Compare tine counts and heights as you go. It is much easier to erase and redraw pencil than to fix dried paint.

Since it is no-carve, can I still light it up?

Yes, but keep the light on the outside or vent the back. Cut a small opening low on the rear and drop in a battery LED so the painted front stays whole. Skip candles entirely so the flame never touches the paint or sealer.

What if my pine trees look like solid blobs?

Use a stiff, fairly dry brush and dab rather than sweep, letting the bristles split into little needle marks. Build each tree in short downward taps from a narrow top to a wider base. Let bits of the orange skin peek through so the trees feel airy instead of flat.

Your take belongs here, too.

Changed a detail? Made it simpler? Share a photo of your version and tell the community what worked.

Share your pumpkin

More pumpkins like this

You've reached the end · 8 pumpkins
The Patch Report

Fresh pumpkins, in your inbox.

The best new carvings, ideas worth stealing, and how-tos for carving season. Short, seasonal, and gone by November.

A short email during carving season. Unsubscribe anytime. See our privacy policy.