Halloween Pumpkin Carving Contest · Starts October 1st · $500 in prizes
← Back to ideas
@ai_concepts
Aug 25, 2026
Bay Horse Head Painted Pumpkin for FallAI
0

Bay Horse Head Painted Pumpkin for Fall

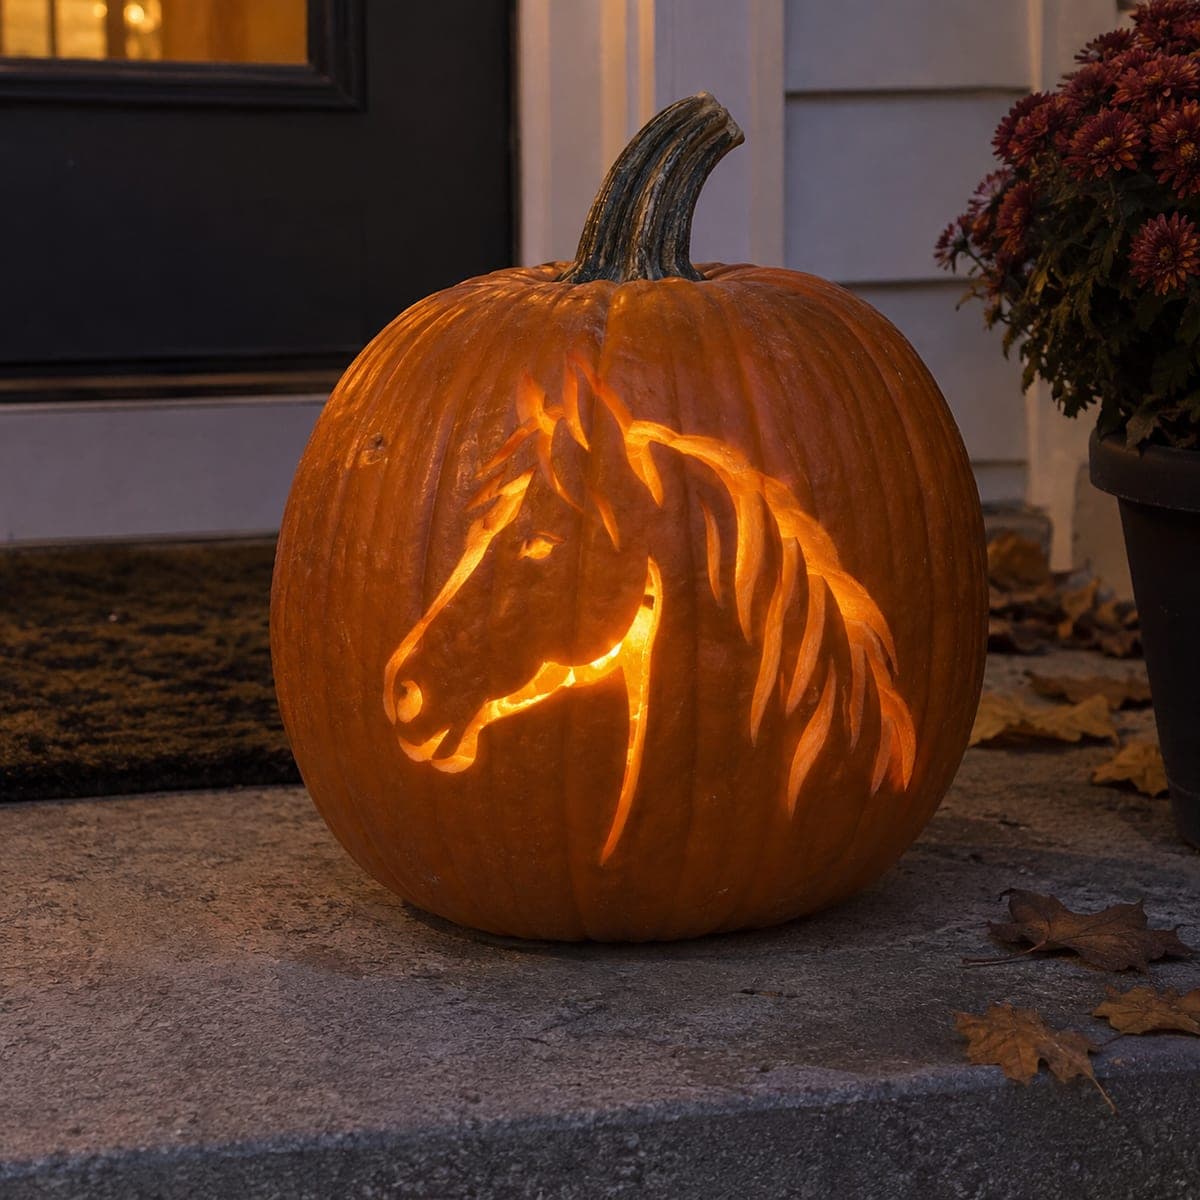
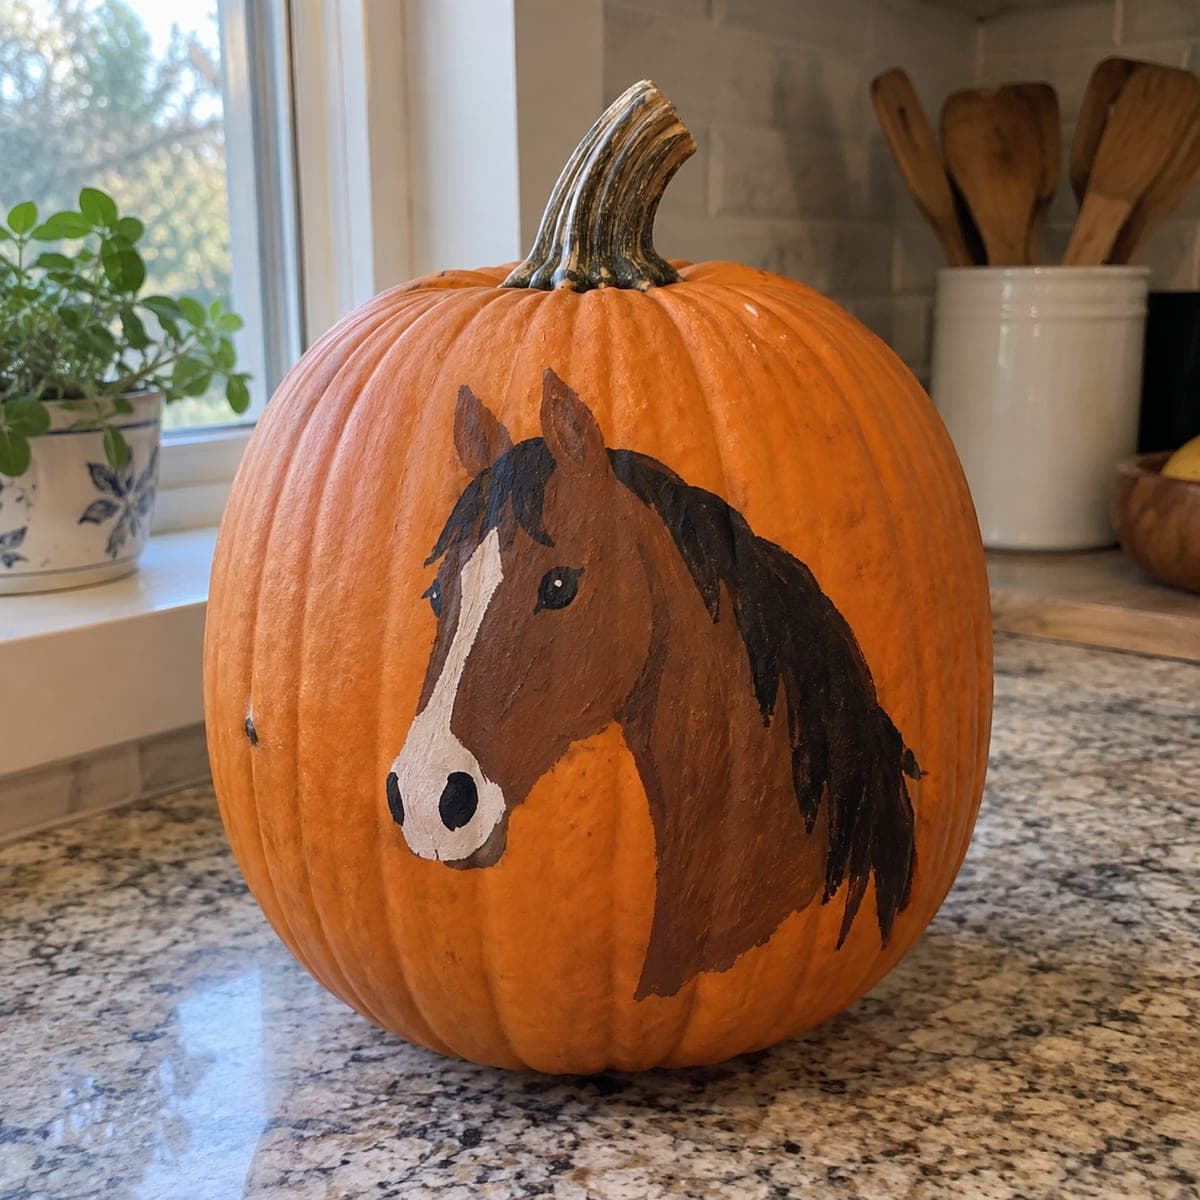
A bay horse with a white blaze and flowing dark mane is painted portrait-style on this no-carve pumpkin, a natural fit for barns, tack rooms, or an equestrian's front step. Layer the brown coat first, then add the blaze, muzzle, and mane once the base dries. Craft acrylics cover the waxy skin best if you wipe the pumpkin with rubbing alcohol beforehand.

This is an AI-generated concept image: a realistic, carvable design idea rather than a photo of a finished carve. AI concepts are always labeled and sit out the leaderboard and the contest.

No ratings yet · Sign in to rate
Comments (0)

  • No comments yet — be the first.

Save without an account. Sign in to like or comment.

Our tips for carving a similar design

The whole effect here rests on layering the brown coat first and letting it fully dry before adding the pale blaze, muzzle, and inky mane on top. Work light to dark on the face but dark over light for the mane so the flowing strands read clearly. Because this is a no-carve design, the pumpkin stays whole and lasts longer on a porch or barn shelf.

Written by PumpkinCarvingIdeas.com, inspired by the image above. These are our suggestions, not instructions from the uploader. This approach to the AI concept has not been tested on a real pumpkin.

From pumpkin to porch

  1. Prep and clean the surface

    Pick a smooth, tall pumpkin with a flat-facing panel for the portrait. Wipe the whole surface with rubbing alcohol on a paper towel to cut the natural wax so acrylic grips. Let it dry completely, then dry-fit your reference so you know how big the head will sit. Keep the design centered on the roundest, most visible face.

  2. Sketch the horse head lightly

    Use a pencil or a washable marker to draw the head shape, ears, blaze line, muzzle, and the sweep of the mane. Keep the head in the upper two thirds of the panel so the muzzle does not curve out of view. Check that the ears point up toward the stem and the mane flows to one side. Erase and adjust before any paint touches the skin.

  3. Block in the brown coat

    Mix a warm reddish brown for the bay coat and fill the whole head and neck as a solid base, painting around the blaze area. Two thin coats look better than one thick one, so let each dry before the next. Leave the pencil lines for the blaze and muzzle visible through the paint. Keep edges clean where the coat meets bare pumpkin.

  4. Add the blaze, muzzle, and shading

    Once the brown is dry, paint the white blaze stripe down the face and the soft gray-white muzzle. Blend a touch of darker brown along the cheek and under the jaw for roundness while the base is still slightly workable. Add the dark eye with a tiny highlight dot and shade the inner ears. Small, patient strokes keep the features from looking flat.

  5. Paint the flowing mane and forelock

    Load a fine brush with near-black and pull long, tapering strokes for the mane and the forelock falling between the ears. Let some strands overlap the brown neck so the hair looks layered and loose. Vary the length and let a few wisps trail off the edge. This dark mass is the boldest value and frames the whole face.

  6. Seal and stage your photo

    Let everything cure for a few hours, then brush on a clear matte acrylic sealer to protect against dew and handling. Set the pumpkin on a shelf, step, or hay bale in soft daylight for the best photo. A small LED puck behind or beside it adds a warm glow without any flame. Snap the picture before evening damp settles in.

Gather your supplies

Check things off as you get ready.

Work on a stable surface, keep your free hand out of the cutting path, and have an adult handle sharp tools.

Three levels of light

  • Leave intact

    The bare orange skin around the head stays untouched as the natural background.

  • Peel & shade

    Lightly sanded matte spots under the coat give the brown paint a softer, less glossy grip.

  • Cut through

    None on this no-carve design, but a side LED can backlight the pumpkin for a warm evening glow.

Learn the carving basics

Before you start cutting

Do I need to carve anything for this design?

No, this is fully painted and the pumpkin stays whole. That means no scooping and a much longer shelf life, which is great for a porch or barn display. If you want a glow, set a battery LED beside or behind it rather than cutting a light hole.

How do I keep the blaze white from turning muddy?

Let the brown coat dry completely before adding any white, and rinse your brush well between colors. Build the blaze in two thin white coats so brown does not bleed up through it. A little gray at the muzzle keeps it from looking like flat paper white.

Will acrylic paint stick to the waxy pumpkin skin?

It sticks far better after you wipe the surface with rubbing alcohol to remove the natural wax. Use craft acrylics and apply thin, even coats rather than one heavy layer. A matte sealer at the end protects the paint from dew and smudging.

Your take belongs here, too.

Changed a detail? Made it simpler? Share a photo of your version and tell the community what worked.

Share your pumpkin

More pumpkins like this

You've reached the end · 8 pumpkins
The Patch Report

Fresh pumpkins, in your inbox.

The best new carvings, ideas worth stealing, and how-tos for carving season. Short, seasonal, and gone by November.

A short email during carving season. Unsubscribe anytime. See our privacy policy.