Halloween Pumpkin Carving Contest · Starts October 1st · $500 in prizes
← Back to ideas
@ai_concepts
Aug 25, 2026
Bull Terrier Cutout Pumpkin Carving Front PorchAI
0

Bull Terrier Cutout Pumpkin Carving Front Porch

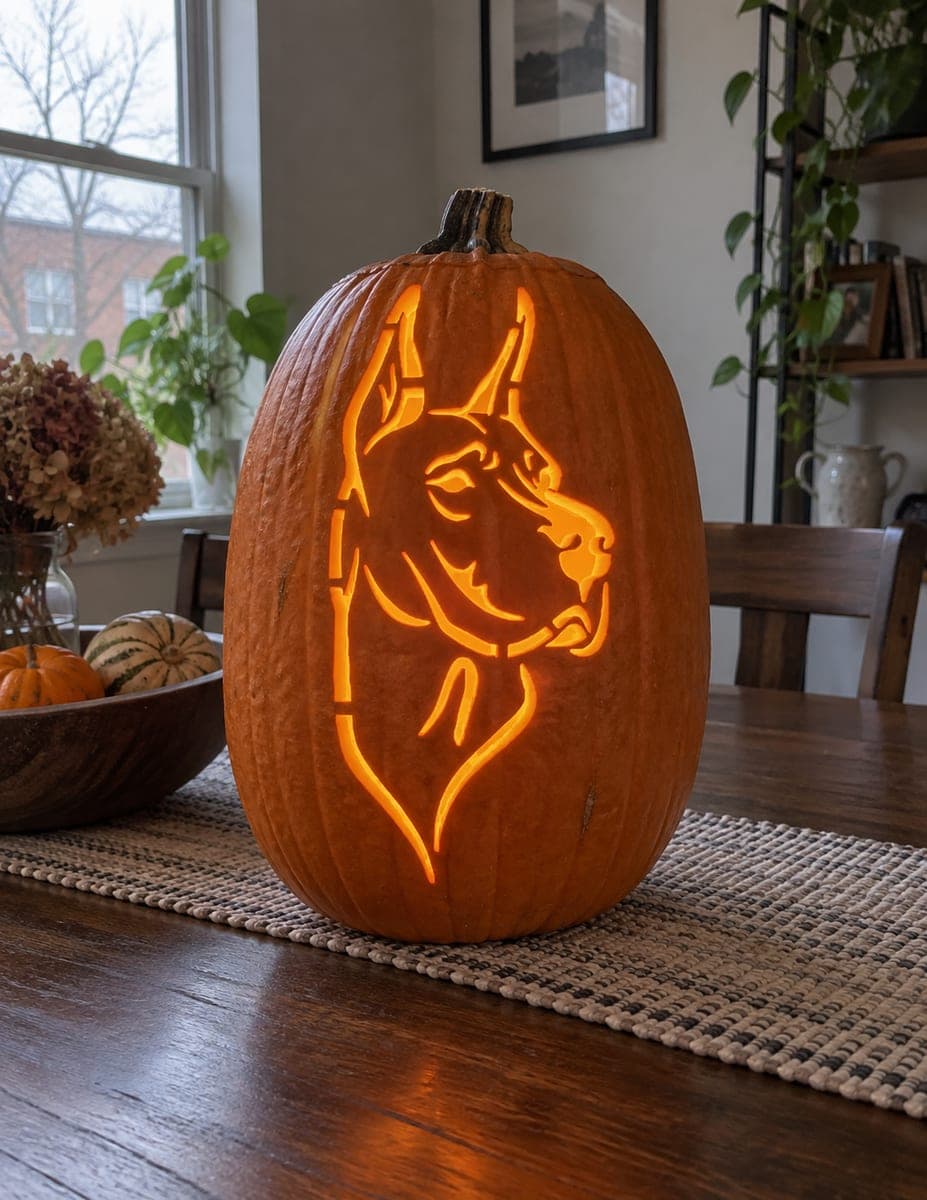
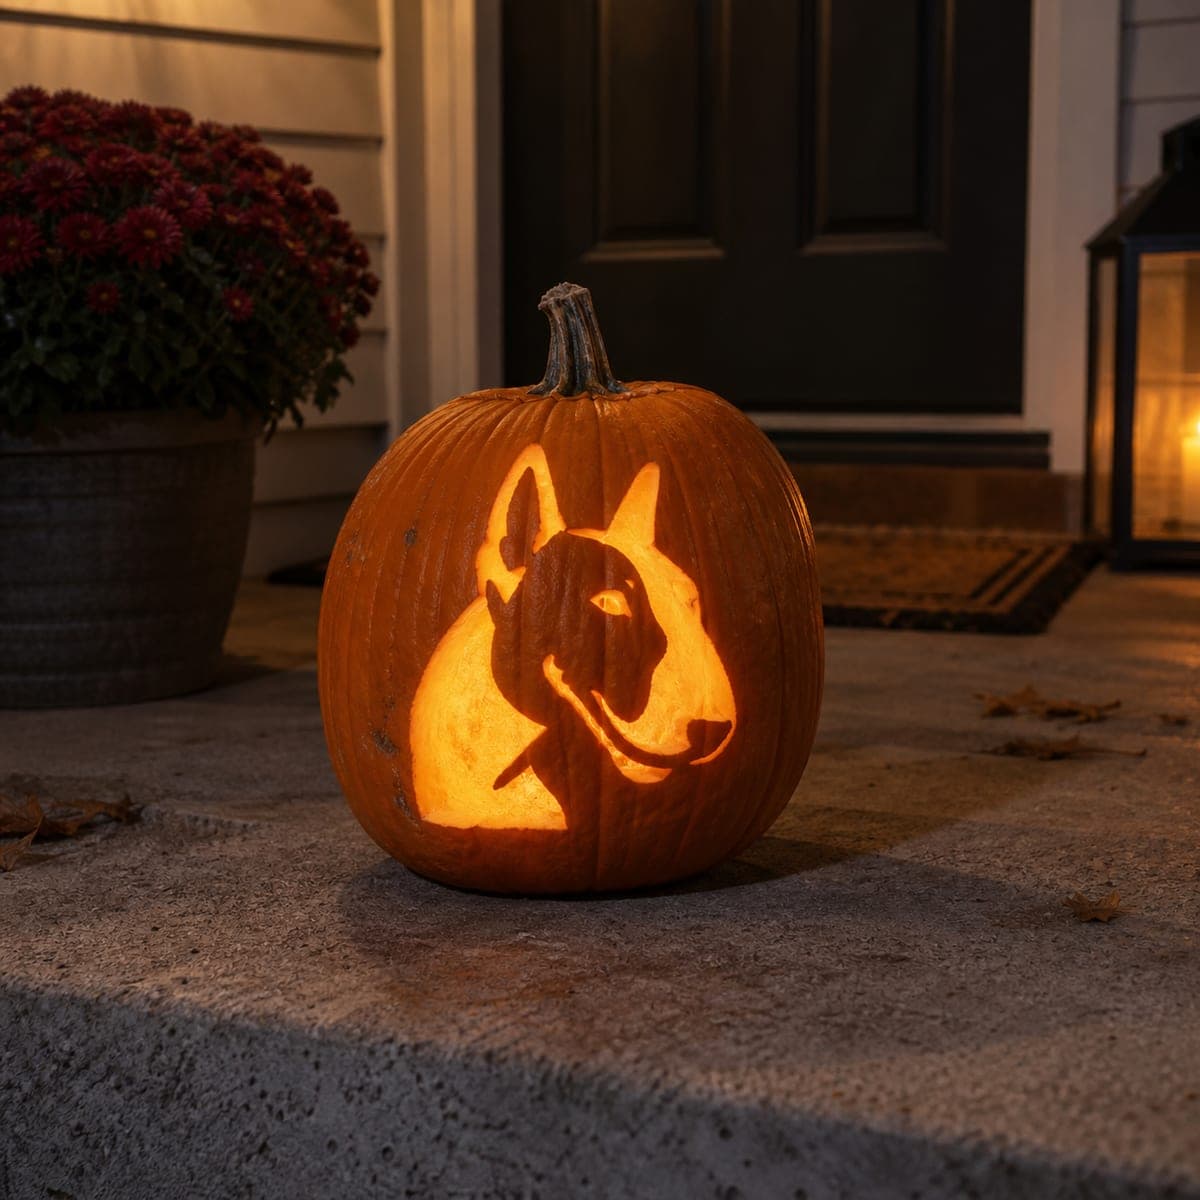
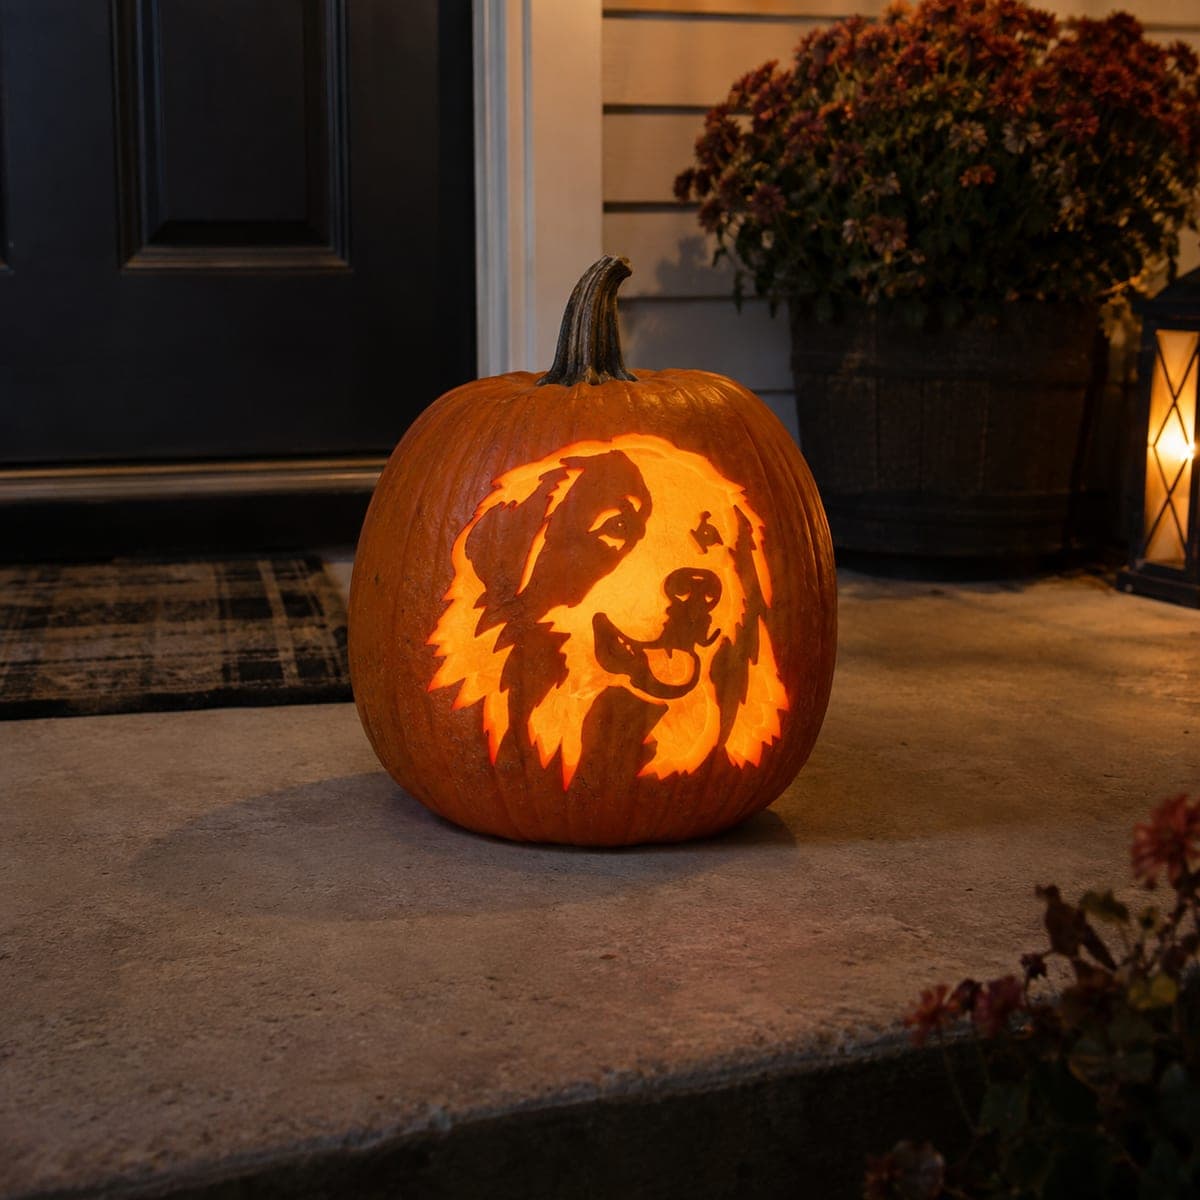
A bull terrier head in profile with its distinctive egg-shaped skull and alert ears is carved as a cutout silhouette, the face and neck shape removed from the pumpkin wall so candlelight outlines every crisp edge in warm amber. This dog pumpkin carving idea is a great way for breed enthusiasts to personalize their front-porch display. Use a pumpkin saw to cut the outer profile first, then carefully remove the face details with a smaller blade to create the eye and muzzle openings. The lit silhouette reads clearly from the street and doubles as a tribute to the family pet.

This is an AI-generated concept image: a realistic, carvable design idea rather than a photo of a finished carve. AI concepts are always labeled and sit out the leaderboard and the contest.
No ratings yet · Sign in to rate

Comments (0)

  • No comments yet — be the first.

Save without an account. Sign in to like or comment.

Our tips for carving a similar design

The trick here is reverse silhouette: the bull terrier's egg-shaped head and neck stay as solid dark skin while everything around them gets cut away, so light rushing through the opening traces the dog's profile in sharp amber. A single tiny eye cutout and a hint of the collar line give the face its expression. Work from the outer background inward, and save the largest openings for last so the pumpkin wall stays strong while you carve.

Written by PumpkinCarvingIdeas.com, inspired by the image above. These are our suggestions, not instructions from the uploader. This approach to the AI concept has not been tested on a real pumpkin.

From pumpkin to porch

  1. Prep and light-test the pumpkin

    Pick a tall pumpkin with a broad, flat front panel so the whole profile fits without wrapping around the curve. Cut a lid or, better, a wide door in the back so you can reach in and thin the front wall. Scoop the front wall down to about one inch so it carves cleanly. Drop in an LED light and confirm the front glows evenly before you transfer any lines.

  2. Transfer the profile stencil

    Print the bull terrier head and neck at a size that leaves a few inches of uncarved pumpkin all around it. Tape it flat and poke closely spaced dots along every edge with a pushpin or poker tool. Pay extra attention to the pointed ears and the slope of the muzzle, since those curves define the breed. Peel the paper and connect your dots lightly in pencil so you can see the dark shape you want to keep.

  3. Outline the shape with a saw

    Using a fine pumpkin saw held straight in and out, cut carefully along the outer edge of the background field, not into the dog itself. Move slowly around the ear tips and the narrow neck so you do not overshoot into the silhouette. Make short relief cuts as you go rather than one long pass. The goal is a clean boundary between the solid dog and the area you will open up.

  4. Remove the background in sections

    Break the large glowing area into two or three smaller pieces and pop each one out gently by pushing from the inside. Working in sections keeps the pumpkin wall from flexing and cracking around the thin ears. Trim any ragged inner edges with a small blade so the light reads as a crisp silhouette. Leave the dog shape completely intact at this stage.

  5. Cut the eye and refine the muzzle

    Switch to your smallest saw or a detail blade for the eye opening, keeping it small and slightly almond shaped so the face stays alert. Add the thin mouth or collar line as a narrow slit, leaving short skin bridges so nothing pieces detaches. Keep the ear tips connected to the surrounding rim so they do not snap. Step back often to check that the profile still reads as a dog.

  6. Light it and set it out

    Rub petroleum jelly on all cut edges to slow drying and keep the outline sharp. Place a bright warm LED puck inside and aim it toward the front wall. Set the pumpkin at eye level near the door so the silhouette faces the street. Snap your photo after dark when the amber glow shows off every clean edge.

Gather your supplies

Check things off as you get ready.

Work on a stable surface, keep your free hand out of the cutting path, and have an adult handle sharp tools.

Three levels of light

  • Leave intact

    The bull terrier's head, ears, and neck stay as untouched dark skin so the profile stands out in silhouette.

  • Peel & shade

    Lightly shade-peel the collar line and a soft halo just inside the background edge for a dim transition glow.

  • Cut through

    The full background field around the dog and the small eye opening are cut through for the brightest amber light.

Learn the carving basics

Before you start cutting

How do I keep the pointed ears from breaking off?

The ears are the thinnest part of the retained silhouette, so leave them fully attached to the surrounding rim rather than cutting all the way around them. Carve the background near the ears in small, patient passes and avoid twisting your blade. If the pumpkin wall feels flexible there, thin the inside less aggressively in that zone.

Should I cut the outline or the details first?

Start with the outer profile boundary using the saw, then remove the large background field in sections, and save the tiny eye and collar cuts for last. Cutting the small details before the big openings keeps the wall rigid while you work. Large openings weaken the pumpkin, so they always come near the end.

This is a concept image, so can a real pumpkin look the same?

Yes, a design like this carves well in real life because it relies on one big cutout and a couple of small openings rather than fragile floating pieces. Keep the eye small and add short skin bridges on the mouth or collar so nothing falls out. A one inch front wall and a bright LED will give you the same crisp glowing edge.

Your take belongs here, too.

Changed a detail? Made it simpler? Share a photo of your version and tell the community what worked.

Share your pumpkin

More pumpkins like this

You've reached the end · 8 pumpkins
The Patch Report

Fresh pumpkins, in your inbox.

The best new carvings, ideas worth stealing, and how-tos for carving season. Short, seasonal, and gone by November.

A short email during carving season. Unsubscribe anytime. See our privacy policy.