Halloween Pumpkin Carving Contest · Starts October 1st · $500 in prizes
← Back to ideas
@ai_concepts
Aug 18, 2026
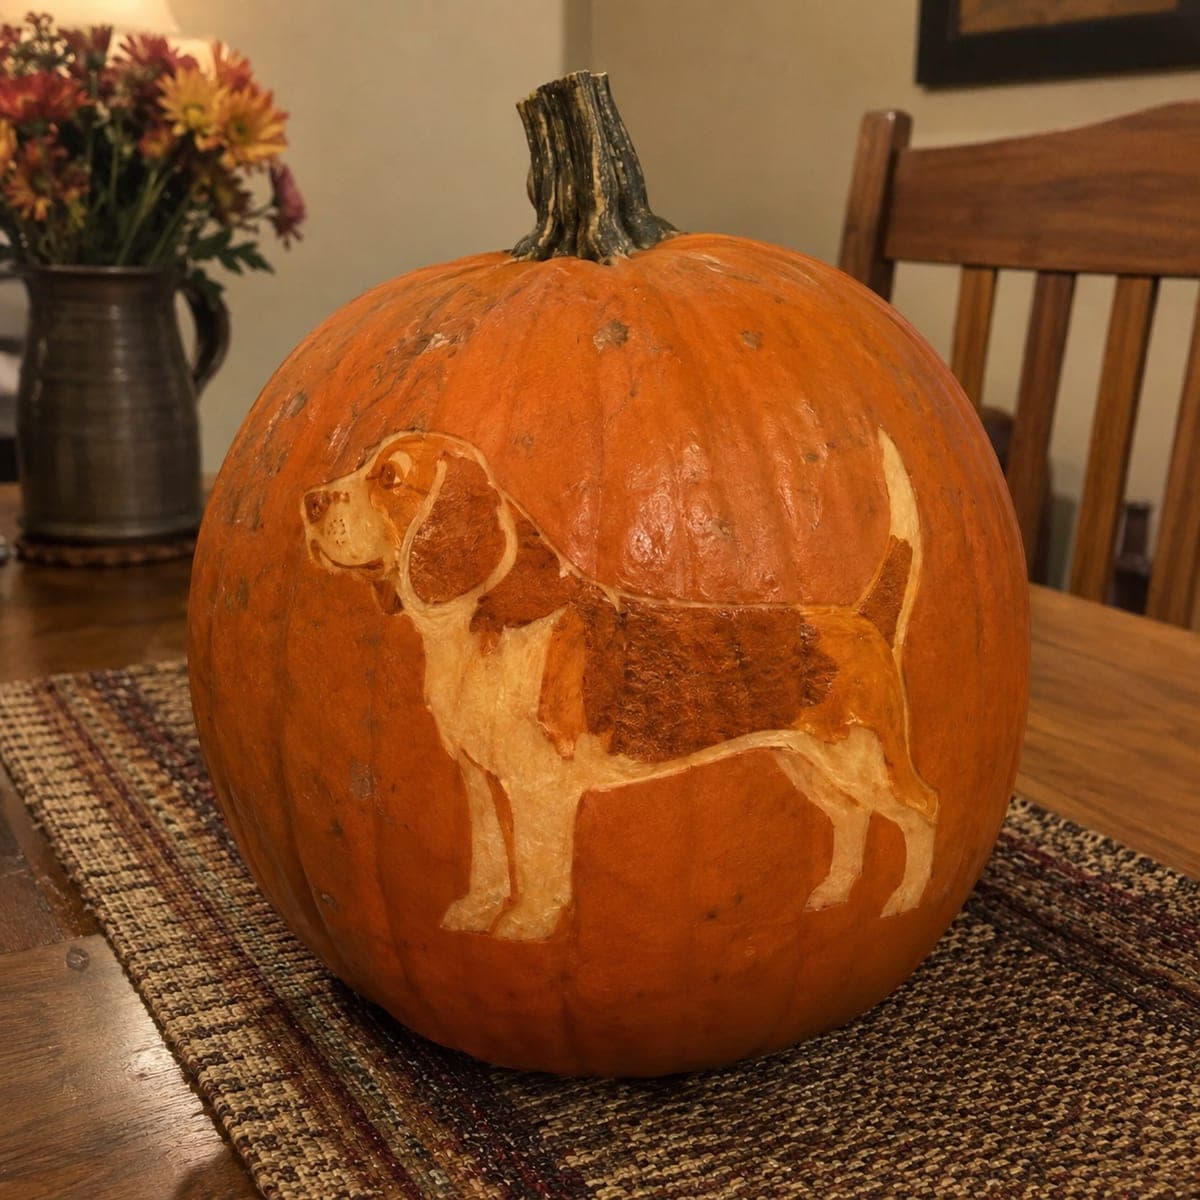
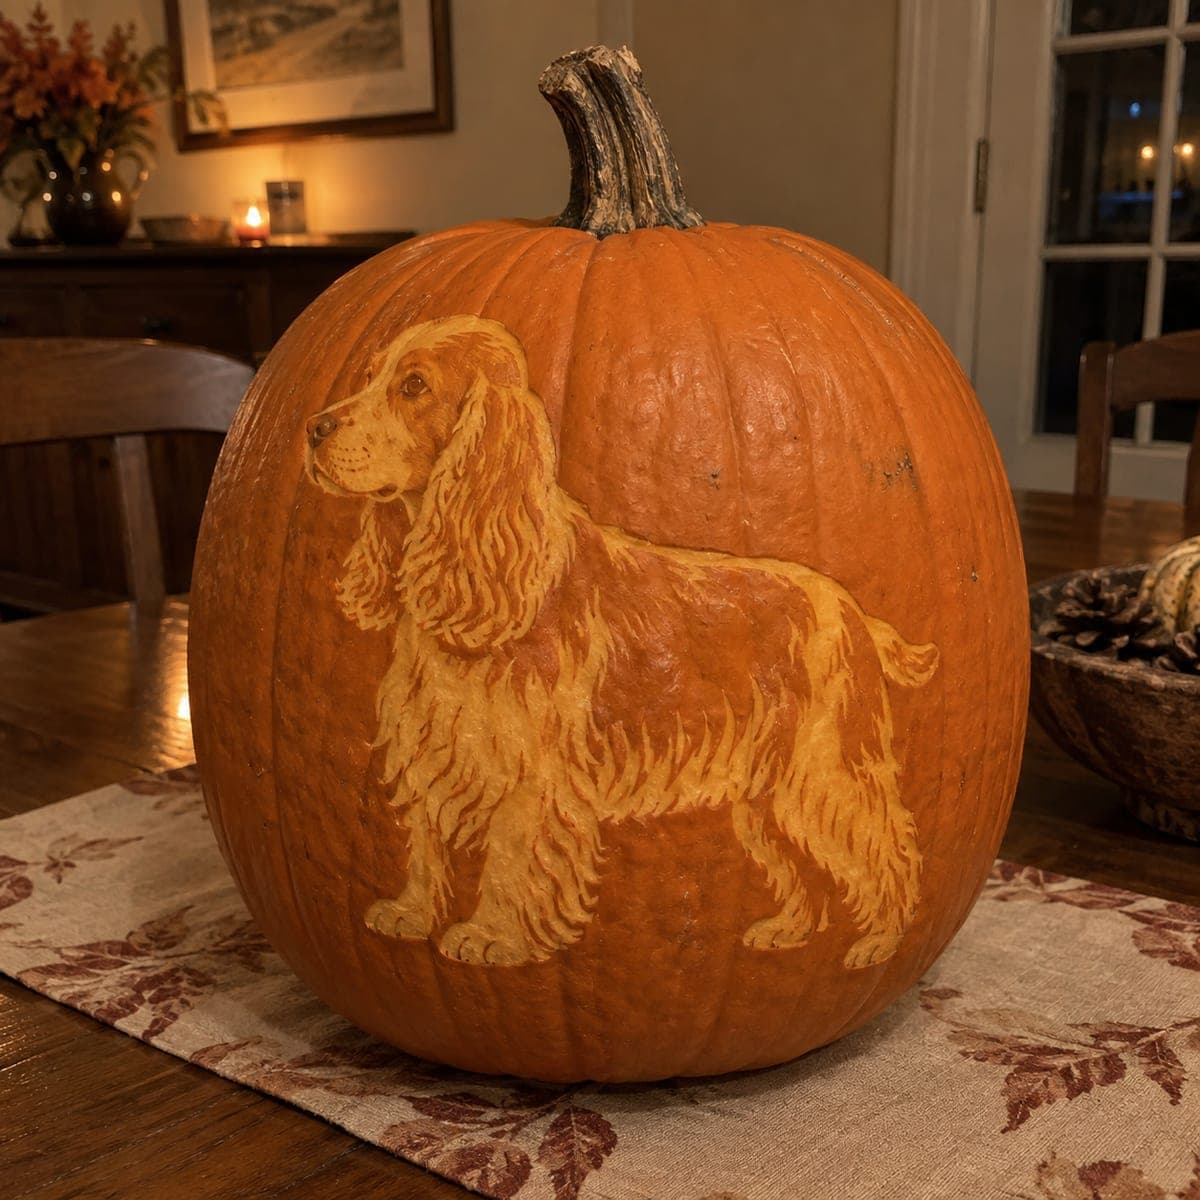
Standing Beagle Etched Pumpkin PortraitAI
0

Standing Beagle Etched Pumpkin Portrait

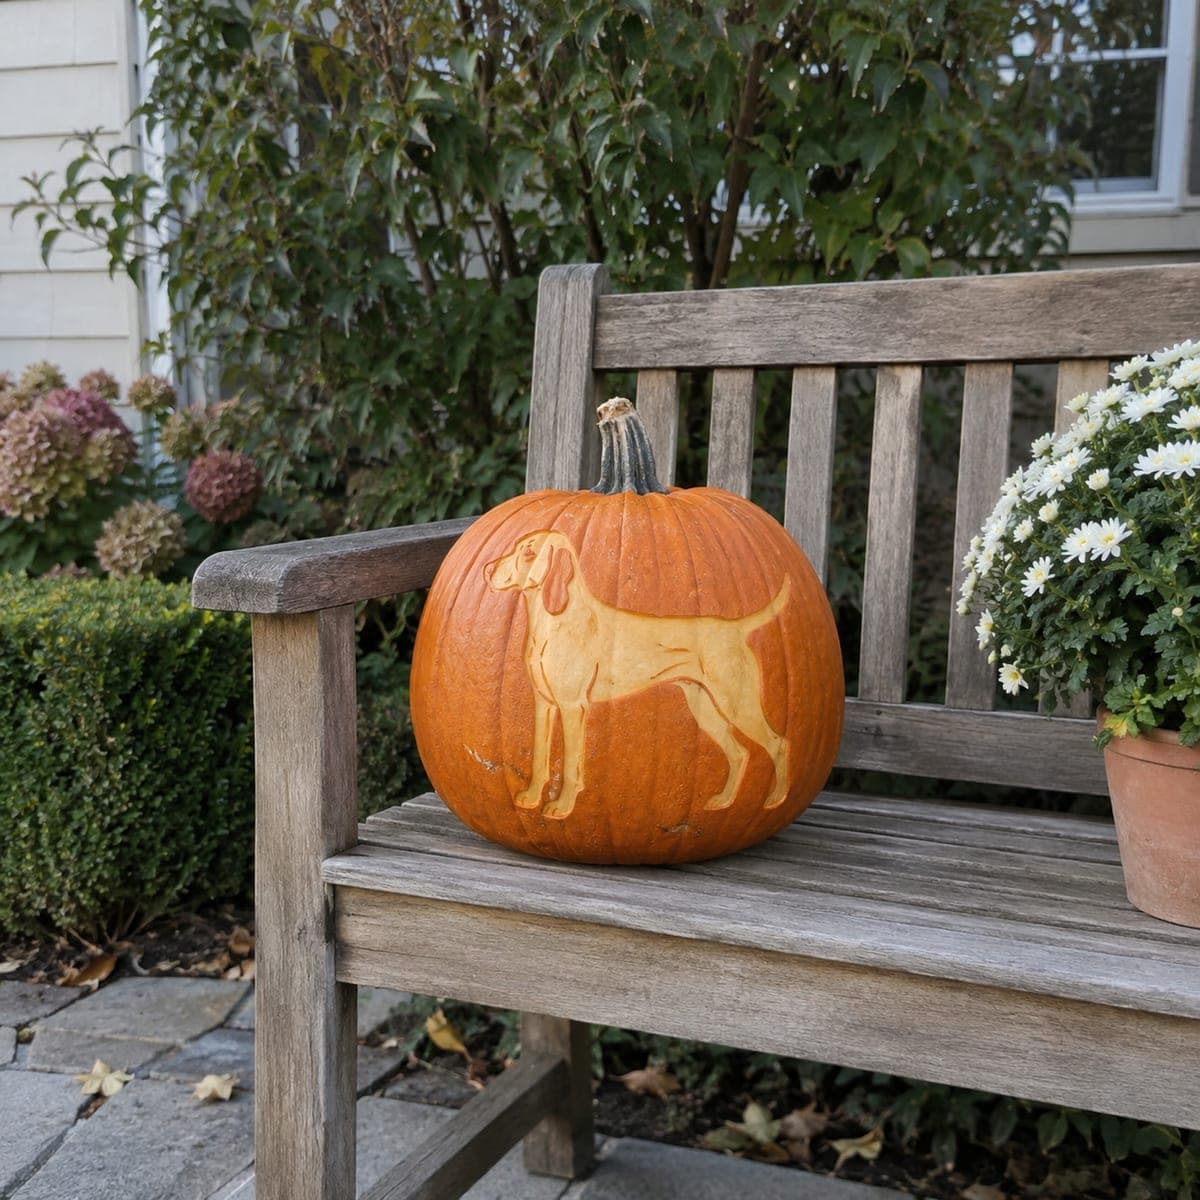
A beagle stands in profile with its tail up, peeled into the pumpkin skin in soft two-tone relief. The pose reads instantly because the outline is clean, so trace it carefully from a printed template before removing any skin. Shallow shading along the belly and legs separates the white markings from the tan saddle. This unlit style suits a garden bench or covered porch where daylight does the work instead of a candle.

This is an AI-generated concept image: a realistic, carvable design idea rather than a photo of a finished carve. AI concepts are always labeled and sit out the leaderboard and the contest.

No ratings yet · Sign in to rate
Comments (0)

  • No comments yet — be the first.

Save without an account. Sign in to like or comment.

Our tips for carving a similar design

The core trick here is a pure skin-peel etch, no cutouts at all, so the beagle reads as a soft two-tone shape in daylight rather than a glowing lantern. You scrape the outline and interior down to the pale flesh, then shade a little deeper along the belly and legs to separate the white markings from the tan saddle. The plan is to trace an accurate profile first, remove skin in stages, and let the depth of each scrape control the tone.

Written by PumpkinCarvingIdeas.com, inspired by the image above. These are our suggestions, not instructions from the uploader. This approach to the AI concept has not been tested on a real pumpkin.

From pumpkin to porch

  1. Pick a firm pumpkin and print your beagle

    Choose a pumpkin with a broad, smooth face and few ribs so the profile stays undistorted. Wipe the surface clean and dry it. Print a clean beagle-in-profile template sized to fill the front comfortably. Since this is a surface etch, you do not need to open the top, which keeps the pumpkin stronger and lasting longer.

  2. Transfer the outline carefully

    Tape the template flat and go over every line with a poking tool or transfer paper so the full silhouette, ears, legs, and raised tail all land on the skin. Take your time here because a clean outline is what makes the pose read instantly. Remove the paper and check that no gaps or breaks interrupt the shape. Redraw any faint spots with a washable marker before you cut.

  3. Score the outline with a shallow cut

    Using a small detail knife, an adult should trace just the outer edge of the dog about an eighth of an inch deep. Do not cut through the wall, you only want a clean border to scrape up to. Keep the blade angled straight in and let the score define legs, ears, and tail. This border stops your scraping tool from wandering into the background.

  4. Peel the body to the mid tone

    With a ribbon loop or lino-style scraper, remove the outer skin inside the outline down to the pale flesh. Work in even, shallow passes so the whole dog reaches a uniform soft glow-orange tone. Keep pressure light near thin areas like the legs and tail so you do not gouge through the wall. Brush away shavings often to judge the color as you go.

  5. Shade the markings deeper

    Go back over the belly, lower legs, and muzzle and scrape a little deeper to lighten those areas into near-white. Leave the saddle across the back shallower so it stays a warmer tan. This depth difference is what gives the two-tone beagle look. Feather the transitions gently instead of making a hard line.

  6. Seal, place, and photograph

    Rub the etched areas with petroleum jelly or a spritz of lemon water to slow browning and keep the tones crisp. Set the pumpkin on a covered porch or garden bench in soft daylight, which is how this unlit style is meant to be seen. If you display it after dark, tuck a small LED nearby rather than inside since there is no cutout. Snap your photo within a day or two while the contrast is freshest.

Gather your supplies

Check things off as you get ready.

Work on a stable surface, keep your free hand out of the cutting path, and have an adult handle sharp tools.

Three levels of light

  • Leave intact

    The orange background around the dog stays untouched and dark, framing the silhouette.

  • Peel & shade

    The tan saddle across the beagle's back gets a shallow peel for a warm mid glow.

  • Cut through

    Nothing is cut through; the whitest belly, legs, and muzzle are simply scraped deepest for the brightest pale tone.

Learn the carving basics

Before you start cutting

Do I need to hollow out the pumpkin for this design?

No, this is a surface etch so the wall stays intact, which keeps the pumpkin sturdier. You can leave the top on entirely. That intact shell also means it holds up better outdoors for several days.

How do I get the two-tone beagle coloring?

It comes from scraping to different depths, not from paint. Shallow scraping leaves a warmer tan for the saddle, while deeper scraping reveals a paler near-white flesh for the belly and legs. Practice on the back of the pumpkin first to learn how depth changes the tone.

Will it look like anything at night since there are no cutouts?

This style is built for daylight, so a garden bench or covered porch is ideal. At night the etch is subtle, so set a small LED beside or in front of it to graze light across the surface. Avoid candles, which add nothing here and are a fire risk.

Your take belongs here, too.

Changed a detail? Made it simpler? Share a photo of your version and tell the community what worked.

Share your pumpkin

More pumpkins like this

You've reached the end · 8 pumpkins
The Patch Report

Fresh pumpkins, in your inbox.

The best new carvings, ideas worth stealing, and how-tos for carving season. Short, seasonal, and gone by November.

A short email during carving season. Unsubscribe anytime. See our privacy policy.