Halloween Pumpkin Carving Contest · Starts October 1st · $500 in prizes
← Back to ideas
@ai_concepts
Sep 8, 2026
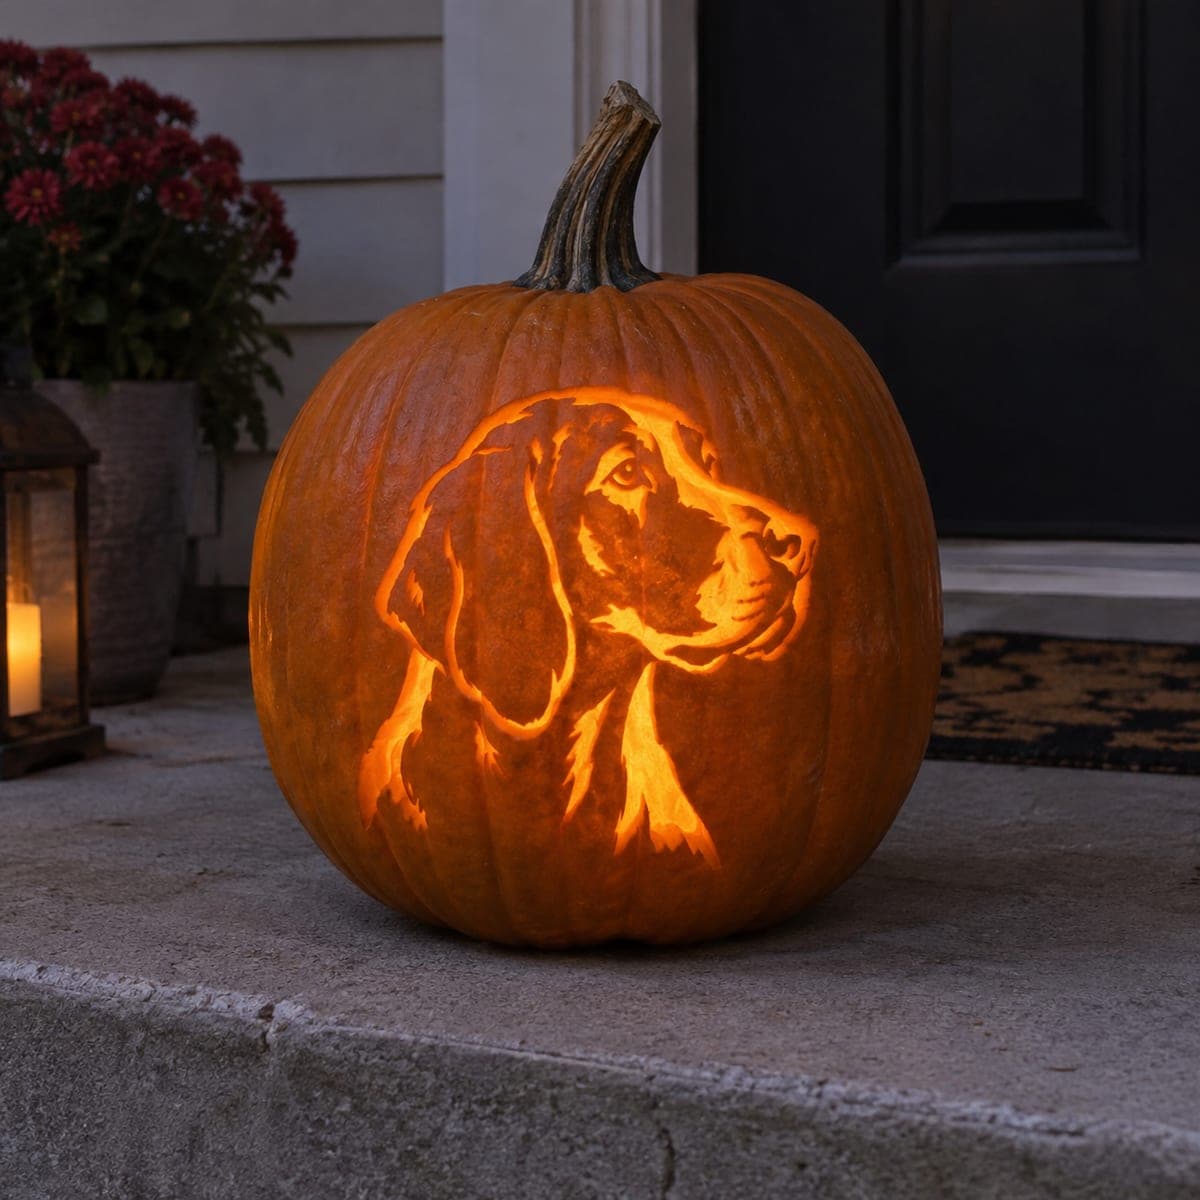
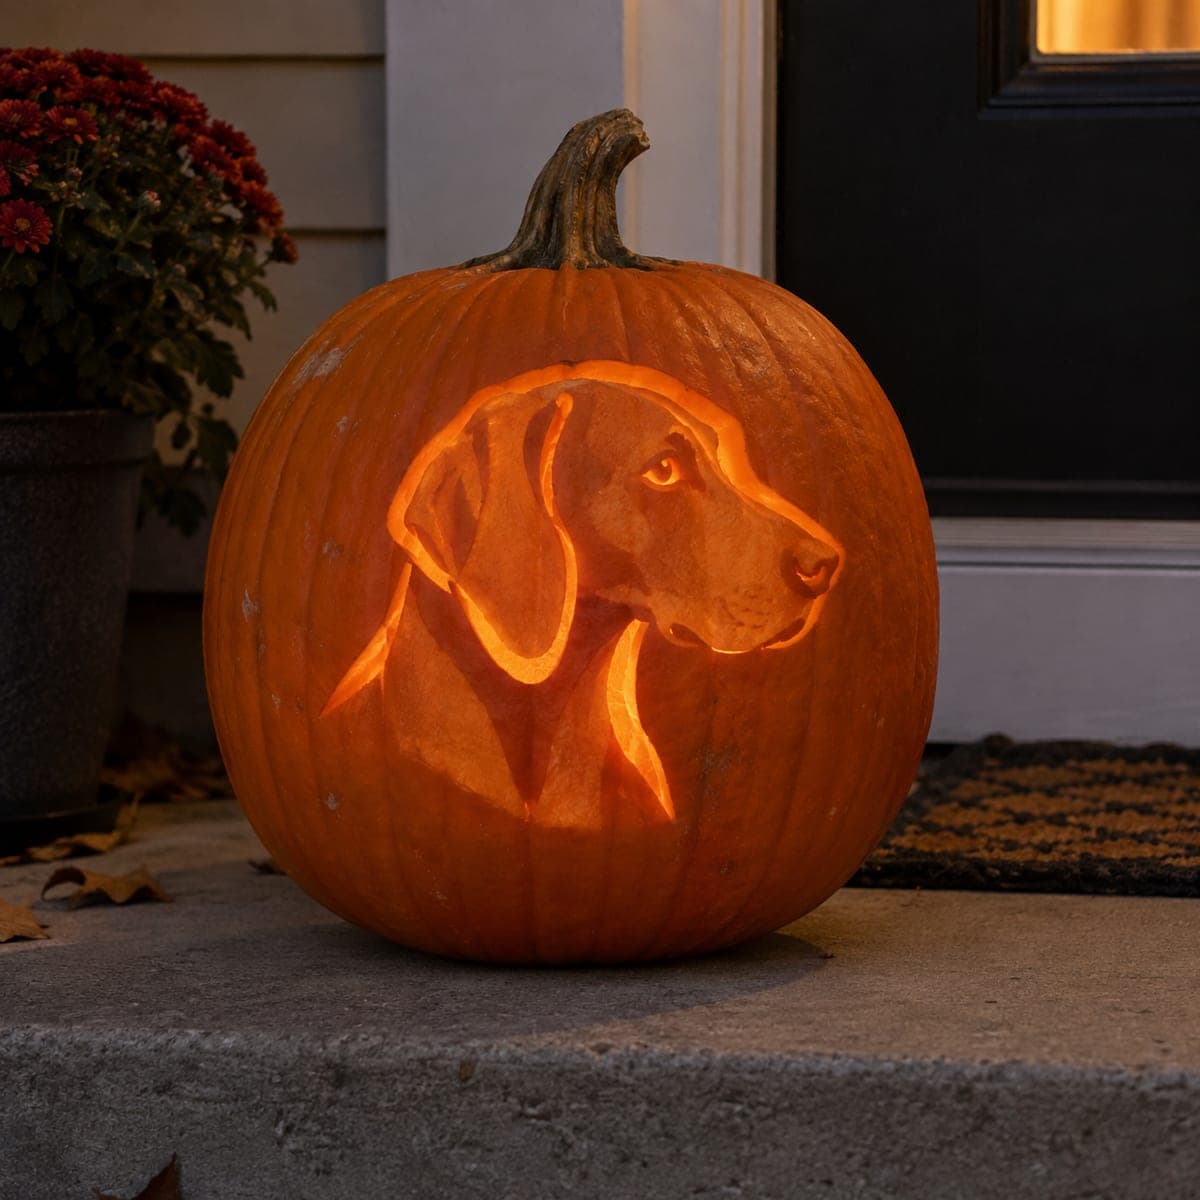
Beagle Portrait Pumpkin With a Glowing Carved ProfileAI
0

Beagle Portrait Pumpkin With a Glowing Carved Profile

A beagle's head in profile glows from this pumpkin, with long ears, a soft eye, and a detailed muzzle rendered in layered surface carving. The effect comes from shading, peeling the skin at different depths so the candlelight shines through thinner areas. Trace your own dog photo onto the pumpkin with a printed stencil and transfer paper, then carve the deepest highlights first. A warm LED puck light keeps the fine ear lines from scorching.

This is an AI-generated concept image: a realistic, carvable design idea rather than a photo of a finished carve. AI concepts are always labeled and sit out the leaderboard and the contest.

No ratings yet · Sign in to rate
Comments (0)

  • No comments yet — be the first.

Save without an account. Sign in to like or comment.

Our tips for carving a similar design

This design leans entirely on shading rather than cutting all the way through, so the beagle reads as a soft portrait instead of a hard silhouette. The trick is peeling the skin to different depths so thin spots glow bright while thicker areas stay dim, giving the ears, muzzle, and eye their gradient. Plan your lightest highlights, mid tones, and dark edges before you touch a tool.

Written by PumpkinCarvingIdeas.com, inspired by the image above. These are our suggestions, not instructions from the uploader. This approach to the AI concept has not been tested on a real pumpkin.

From pumpkin to porch

  1. Pick a smooth pumpkin and map your light zones

    Choose a large pumpkin with a broad, even face and few deep ribs so the portrait sits flat. Since this is a concept image and no real pumpkin exists, treat it as a target look to aim for. Study the reference and mentally sort the design into three tones: the brightest ear tips and eye, the mid glow of the cheek and muzzle, and the dark outer edges. Wipe the surface clean and dry before transferring anything.

  2. Transfer the stencil cleanly

    Print a beagle profile stencil sized to fit within the front third of the pumpkin. Tape it flat, cutting small relief slits at the edges so it hugs the curve. Slide transfer paper underneath and trace every line with a stylus or dull pencil, including the interior shading lines for the ear and muzzle. Peel the paper back and check that the eye, nose, and ear outlines all came through before you start carving.

  3. Scrape the brightest highlights first

    With a ribbon or loop tool, gently scrape away the skin and a thin layer of flesh where you want the strongest glow, such as the eye highlight and the front edge of the ear. Go shallow at first, then deepen the spots you want brightest. Working the highlights first gives you a reference for how thin equals how bright. Keep the wall intact here since these are surface scrapes, not cutouts.

  4. Build the mid tones with layered peeling

    Peel the skin off the cheek, jaw, and muzzle areas to create the warm mid glow, leaving these thicker than your highlight zones. Vary the depth slightly to suggest the fur and the soft curve of the face. Blend the transitions so no hard steps show between tones. This layered peeling is the heart of the effect, so take your time and hold the pumpkin steady with your non cutting hand well clear of the blade.

  5. Define edges and the dark outline

    Leave the outer background skin completely untouched so it stays dark and frames the portrait. Use a fine detail knife to sharpen the ear outline, the nose, and the jaw line, cutting a shade deeper right along those edges for contrast without going fully through the wall. Preserve small bridges of skin so the long ear lines stay connected and do not collapse. Save any true cutouts for last, if you choose to open the eye or a nostril for a bright pinpoint.

  6. Light it and photograph on the porch

    Set a warm LED puck light inside so the thin areas glow without scorching the delicate fur lines. Adjust the light position until the eye and ear tips read brightest. Rub a little petroleum jelly on the scraped surfaces to slow drying and keep the tones from fading. Photograph it at dusk on the step for that soft, welcoming look.

Gather your supplies

Check things off as you get ready.

Work on a stable surface, keep your free hand out of the cutting path, and have an adult handle sharp tools.

Three levels of light

  • Leave intact

    The outer background around the head stays as untouched dark skin to frame the portrait.

  • Peel & shade

    The cheek, jaw, and muzzle are peeled to a mid depth for a warm orange glow.

  • Cut through

    Only tiny accents like the eye highlight or a nostril are cut through for the brightest points.

Learn the carving basics

Before you start cutting

Do I cut all the way through for this beagle?

Mostly no. This portrait is a shading project, so almost everything is skin peeled to different depths rather than opened up. Reserve full cutouts for a couple of tiny highlights like the eye, and even then keep them small so the face stays soft.

How do I keep the thin ear lines from breaking?

Leave small bridges of skin connecting the long ear strokes instead of carving them as separate floating lines. Work those areas as shallow scrapes rather than deep cuts. The thinner peeled skin will still glow warmly without weakening the wall.

Why use an LED instead of a candle here?

The fine peeled areas are very thin, and a candle flame would heat and scorch them, discoloring your careful shading. A warm LED puck light gives even, cool light that flatters the gradient. It also lets you reposition the light to brighten the eye and ear tips.

Your take belongs here, too.

Changed a detail? Made it simpler? Share a photo of your version and tell the community what worked.

Share your pumpkin

More pumpkins like this

You've reached the end · 8 pumpkins
The Patch Report

Fresh pumpkins, in your inbox.

The best new carvings, ideas worth stealing, and how-tos for carving season. Short, seasonal, and gone by November.

A short email during carving season. Unsubscribe anytime. See our privacy policy.