Halloween Pumpkin Carving Contest · Starts October 1st · $500 in prizes
← Back to ideas
@ai_concepts
Jul 14, 2026
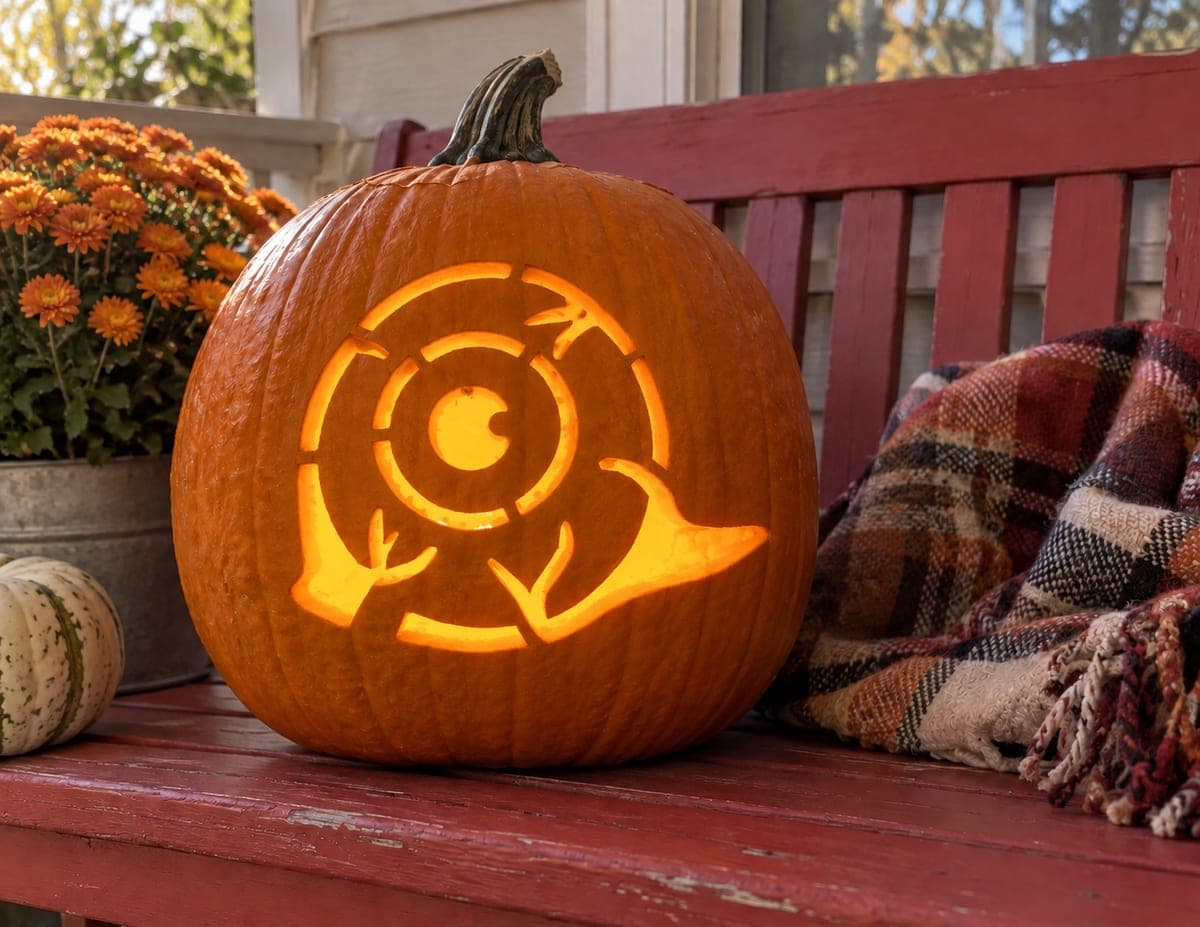
Cheerful Snail Jack-O-Lantern for KidsAI
0

Cheerful Snail Jack-O-Lantern for Kids

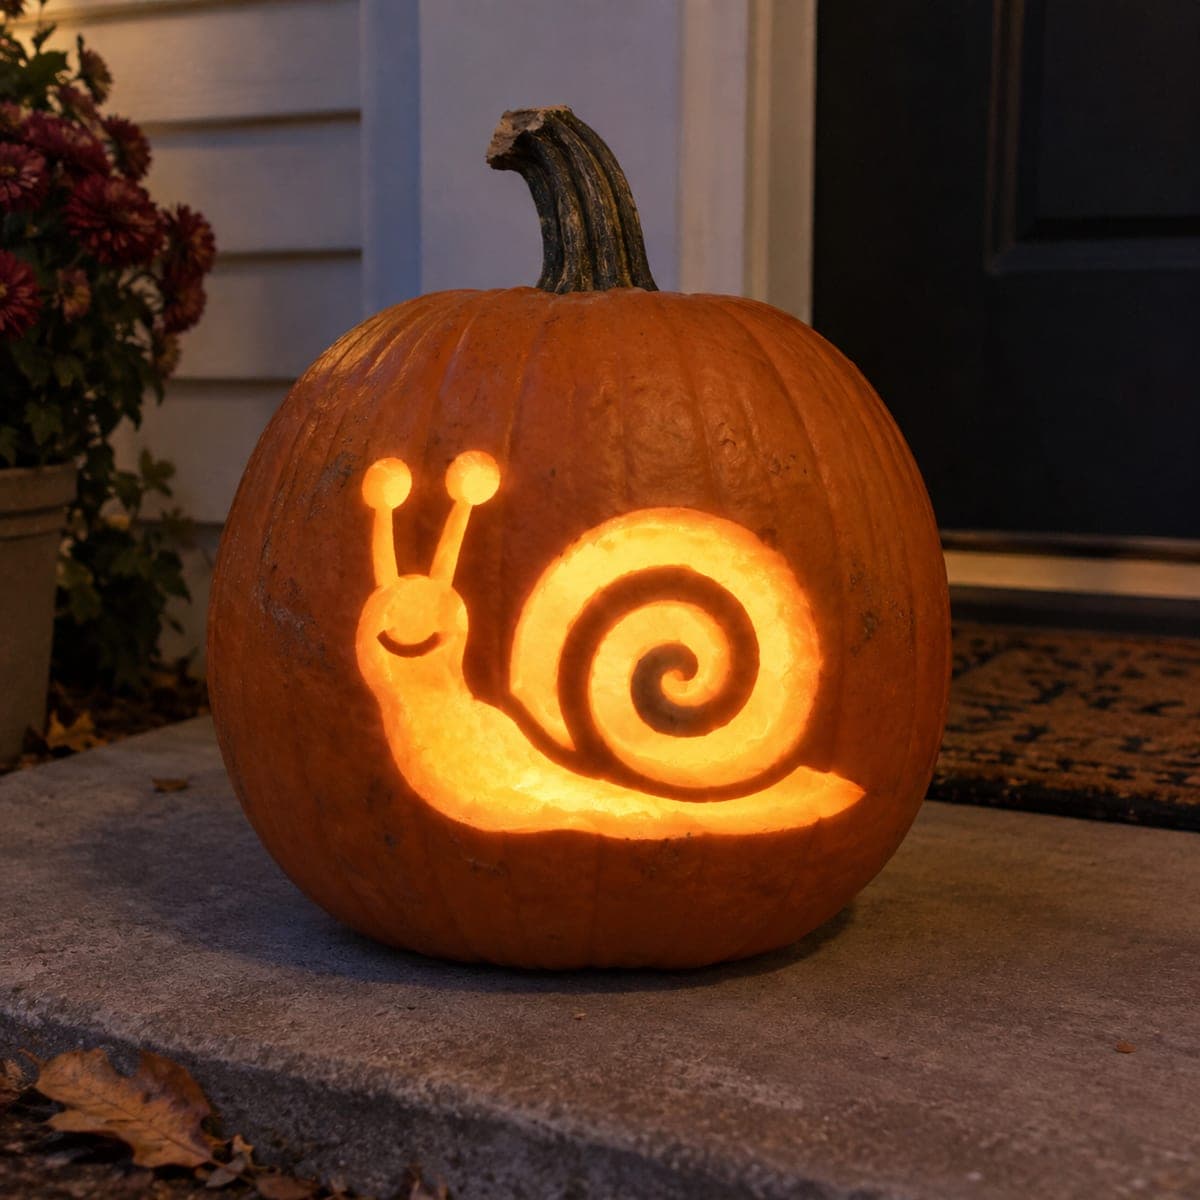
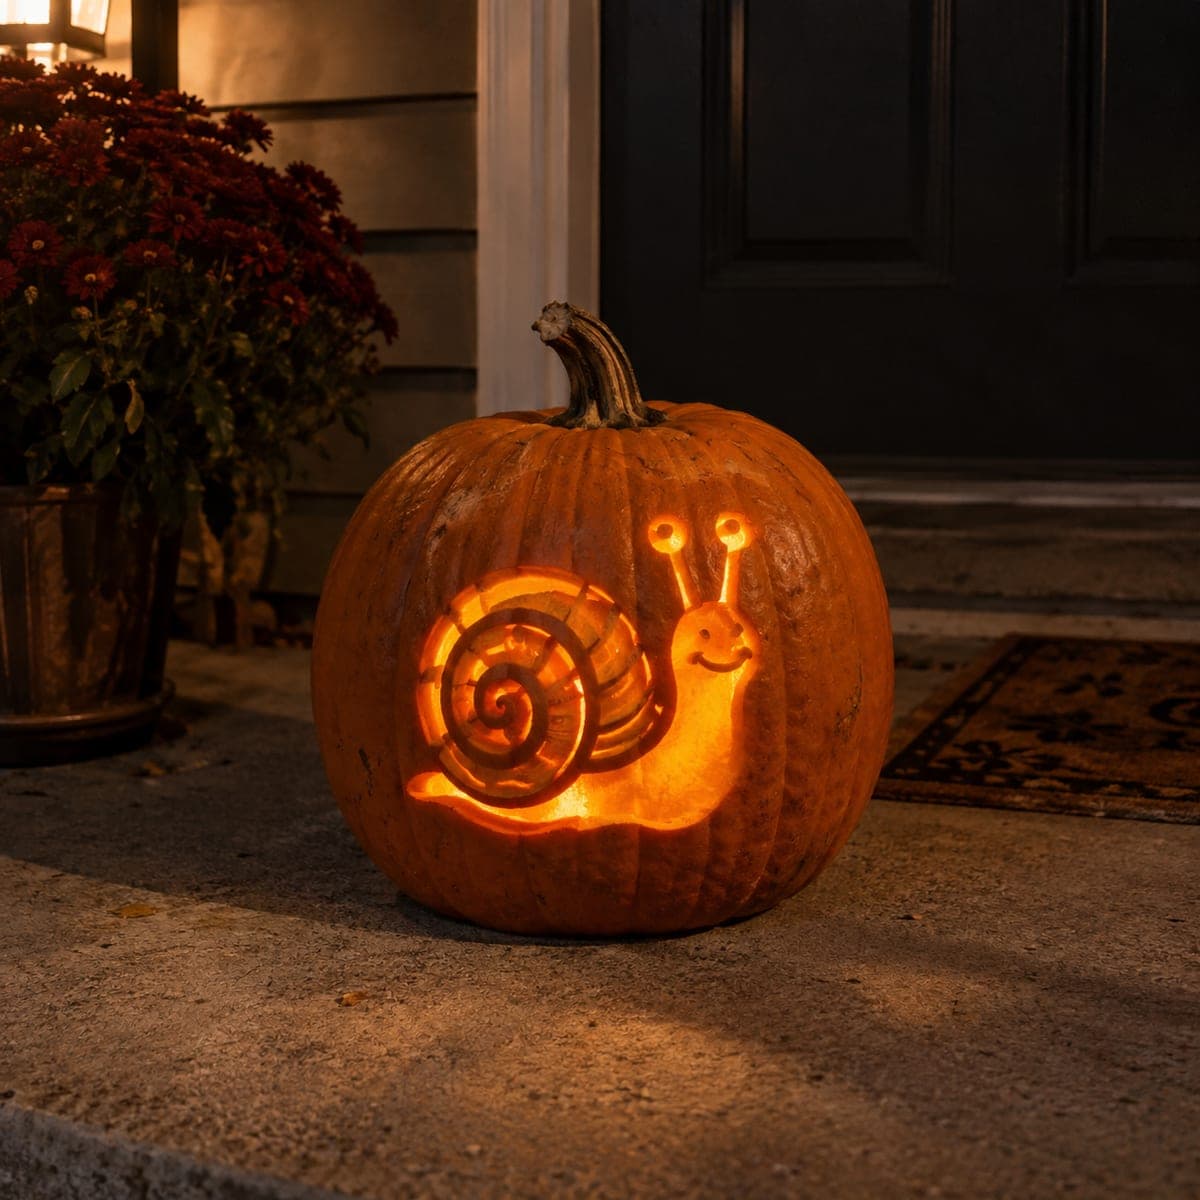
A smiling cartoon snail with a striped spiral shell and bobble-tipped antennae glows sweetly from this pumpkin. The spiral is the star, carved as alternating bands of pierced and etched rings so the shell shows depth, while the happy face keeps things friendly for little ones. Draw the spiral freehand starting from the center dot, and cut the antennae channels narrow so they stay strong. A gentle first-night pumpkin for kids who do not love scary designs.

This is an AI-generated concept image: a realistic, carvable design idea rather than a photo of a finished carve. AI concepts are always labeled and sit out the leaderboard and the contest.

No ratings yet · Sign in to rate
Comments (0)

  • No comments yet — be the first.

Save without an account. Sign in to like or comment.

Our tips for carving a similar design

The core trick here is the shell spiral, carved as alternating bands so some rings are cut all the way through and others are only skin-peeled for a softer glow. That contrast gives the shell real depth without a lot of fussy detail. The rest of the plan is simple: a rounded body, a smiling face, and two slim antenna channels that stay strong because they are cut narrow.

Written by PumpkinCarvingIdeas.com, inspired by the image above. These are our suggestions, not instructions from the uploader. This approach to the AI concept has not been tested on a real pumpkin.

From pumpkin to porch

  1. Pick and prep the pumpkin

    Choose a round, smooth pumpkin with one flat-ish face for the snail. An adult should cut a lid from the bottom or back so the light sits level and the stem stays intact on top. Scrape the inside wall behind your design down to about one inch thick so light passes through easily. A thinner wall makes the peeled shading rings glow much better.

  2. Transfer the design

    Tape your stencil to the front, or draw the snail freehand with a washable marker. Start the shell at a center dot and spiral outward so the bands stay even. Sketch the body curve, the smiling face, and two antennae ending in small round bobbles. Step back and check the snail reads clearly before any blade touches the skin.

  3. Etch the shading rings first

    Use a lino or ribbon tool to peel away only the orange skin on every other ring of the spiral, leaving the pale flesh exposed. Do not cut through the wall on these bands. These peeled rings will glow a soft, dim orange and separate the brighter cut rings. Work slowly and keep the ring edges clean so the spiral looks intentional.

  4. Cut the alternating spiral bands

    Now cut fully through the remaining spiral bands with a small carving saw, following your lines from the center outward. Keep a thin bridge of skin between each cut ring so the shell holds together and does not collapse. Cut the body outline and belly opening once the spiral is done. Save the largest openings for last so the pumpkin stays sturdy while you work.

  5. Carve the face and antennae

    Cut a simple curved smile and two small dot eyes on the snail's head for the friendly look. Cut the two antenna channels narrow, about the width of a pencil, and leave the bobble tips as small round holes. Narrow channels keep these thin parts strong so they will not tear. Clean up any rough edges with the tip of your tool.

  6. Light it and photograph

    Drop in a battery LED light, never a candle, since the thin walls sit close to the flame risk. Set it near a door or step and let the shell spiral catch the glow. Snap your photo in the dark so the bright cut rings and dim peeled rings both show. Share it and enjoy a jack-o-lantern that stays cheerful all night.

Gather your supplies

Check things off as you get ready.

Work on a stable surface, keep your free hand out of the cutting path, and have an adult handle sharp tools.

Three levels of light

  • Leave intact

    The snail's body outline, the eyes, and the surrounding pumpkin skin stay dark.

  • Peel & shade

    Every other spiral ring on the shell is skin-peeled for a soft, dim orange band.

  • Cut through

    The alternating spiral bands, the smile, and the antenna bobbles are cut through for the brightest light.

Learn the carving basics

Before you start cutting

How do I keep the spiral from collapsing when I cut through it?

Leave a thin bridge of skin between each fully cut ring instead of cutting one continuous groove. Alternating cut rings with peeled rings does this naturally, since the peeled bands act as supports. Work from the center outward so the outer rings stay anchored while you carve.

Will the thin antennae break off?

They hold up well if you cut the channels narrow, about a pencil width, rather than carving the antennae as free-standing stalks. Keeping them as slim cut lines against solid skin means there is nothing fragile to snap. Leave the bobble tips as small round holes for the same reason.

This is an AI concept image, so can a real pumpkin look like this?

Yes, the design is fully carvable on a real pumpkin. Thin the wall behind the shell, peel alternating spiral rings for the dim glow, and cut the other rings through with skin bridges between them. Keep the antennae as narrow channels and it will stand up on the porch.

Your take belongs here, too.

Changed a detail? Made it simpler? Share a photo of your version and tell the community what worked.

Share your pumpkin

More pumpkins like this

You've reached the end · 8 pumpkins
The Patch Report

Fresh pumpkins, in your inbox.

The best new carvings, ideas worth stealing, and how-tos for carving season. Short, seasonal, and gone by November.

A short email during carving season. Unsubscribe anytime. See our privacy policy.