Halloween Pumpkin Carving Contest · Starts October 1st · $500 in prizes
← Back to ideas
@ai_concepts
Aug 9, 2026
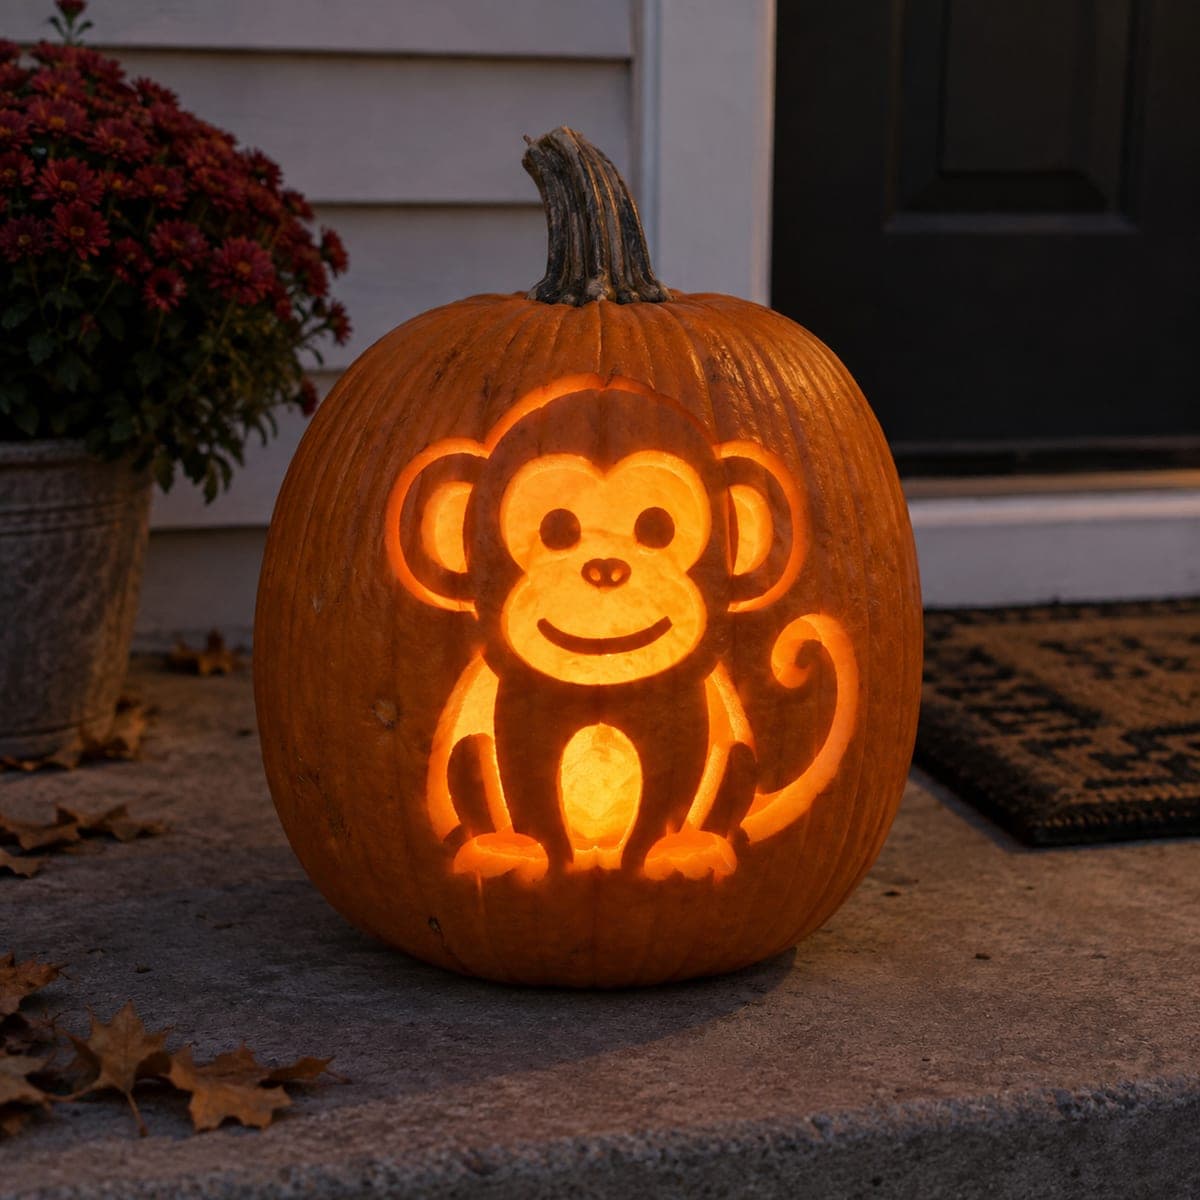
Cartoon Mouse Face Carved Pumpkin with Round EarsAI
0

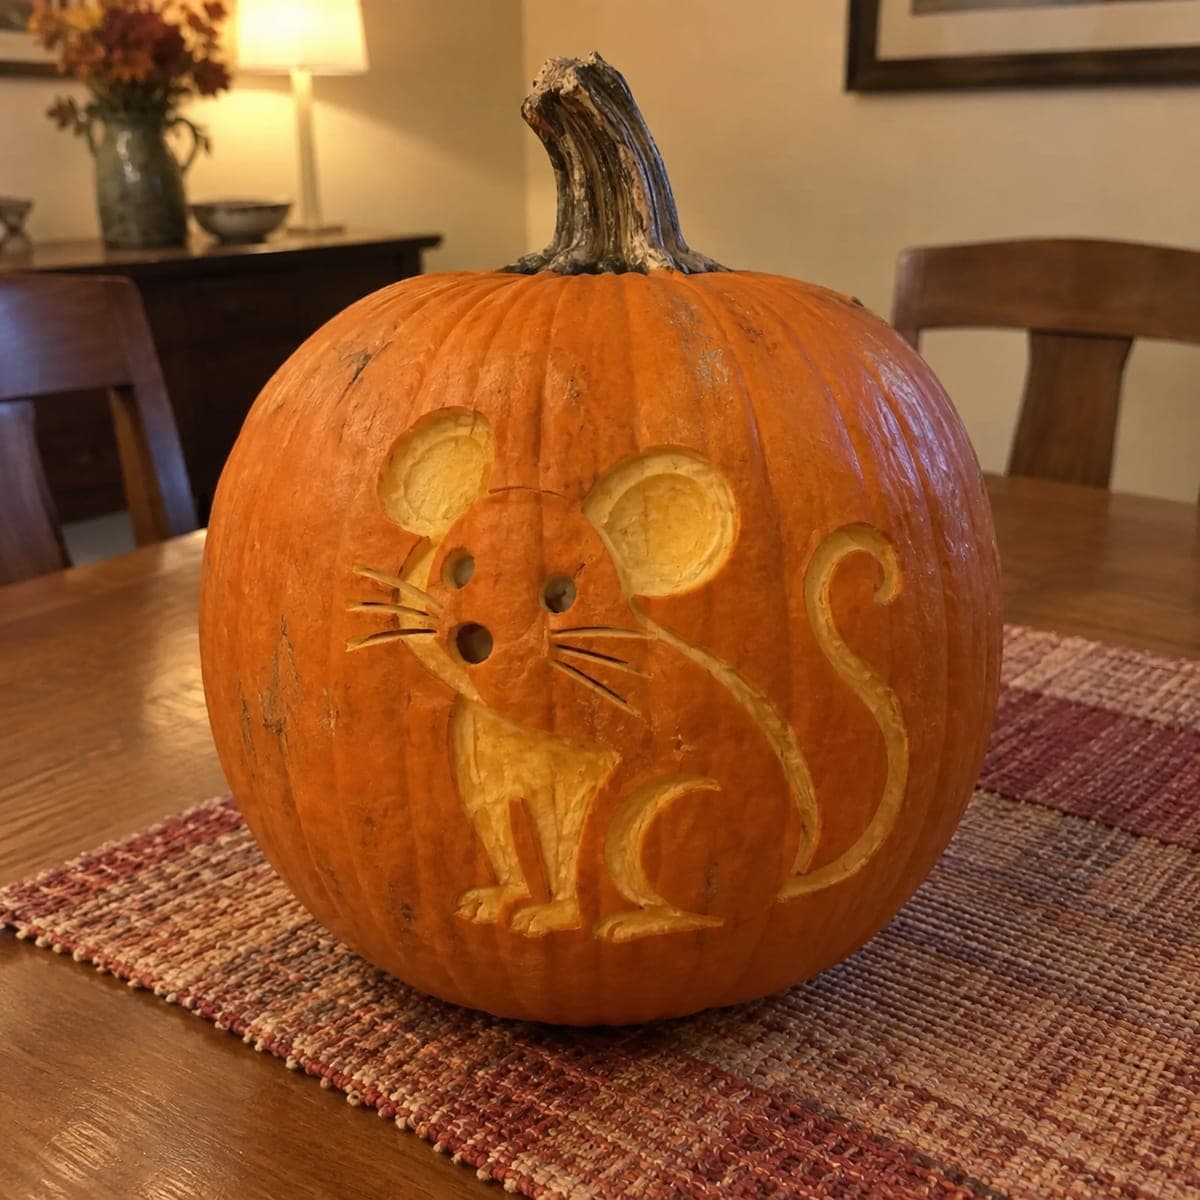
Cartoon Mouse Face Carved Pumpkin with Round Ears

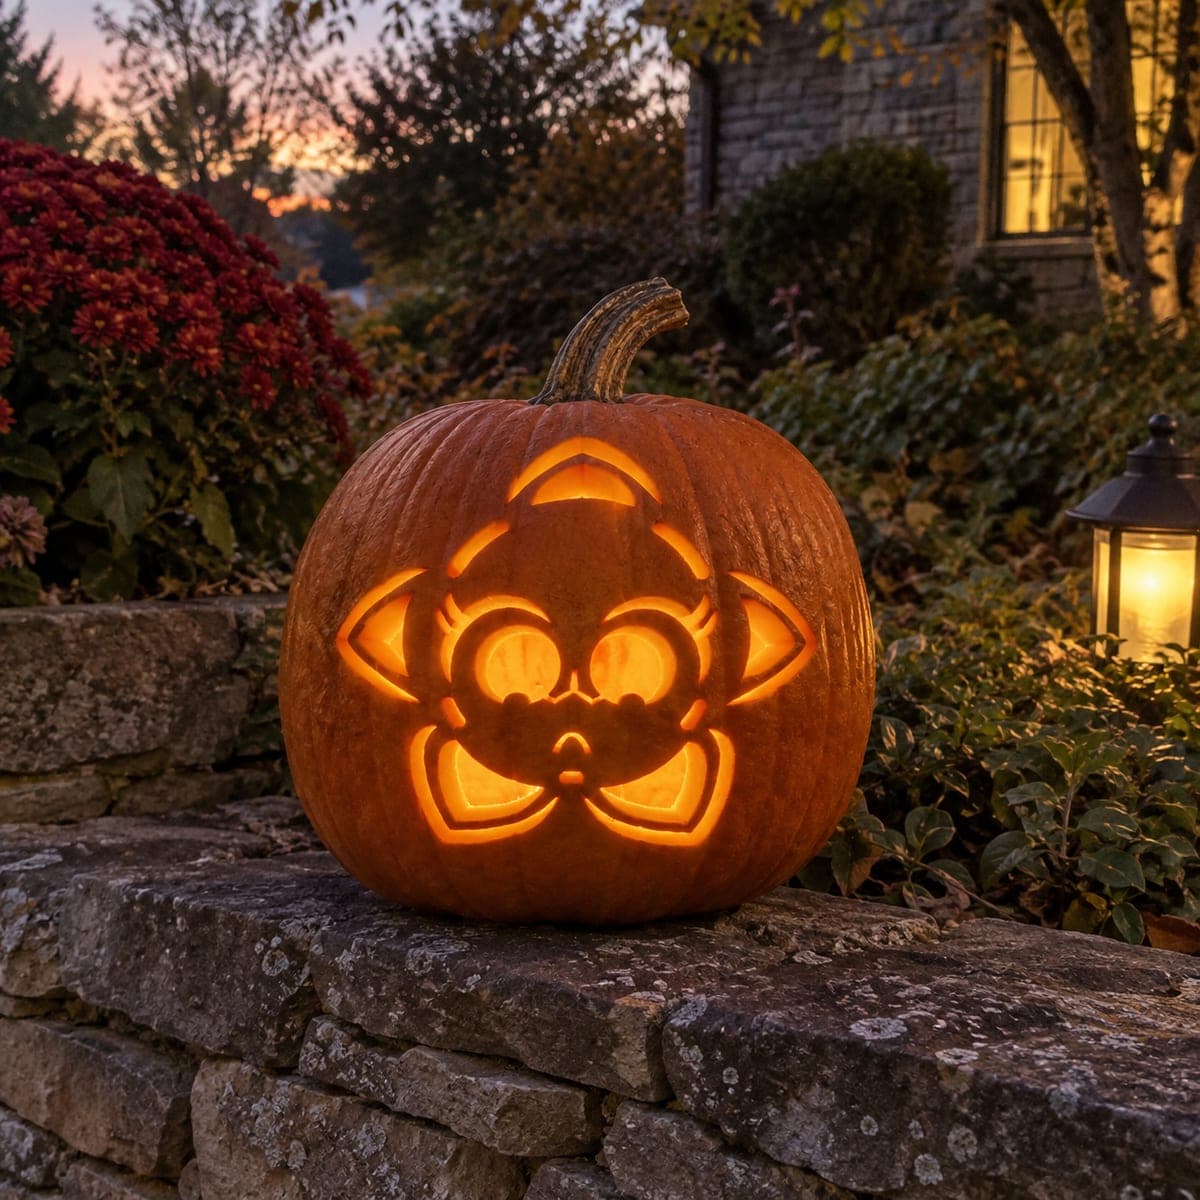
A wide-faced cartoon mouse with oversized round ears carved as relief shapes, whisker lines, dot nostrils, and a curling tail peeking to one side makes this pumpkin instantly lovable. The ears are etched rather than cut through so they stay attached and frame the face in a symmetrical arc. Carve the whisker lines with a slim V-tool using three strokes per side radiating from the nose, and score the tail groove in a gentle S-curve. This mouse pumpkin carving idea is an excellent gateway project for children joining the family carving session.

This is an AI-generated concept image: a realistic, carvable design idea rather than a photo of a finished carve. AI concepts are always labeled and sit out the leaderboard and the contest.

No ratings yet · Sign in to rate
Comments (0)

  • No comments yet — be the first.

Save without an account. Sign in to like or comment.

Our tips for carving a similar design

The core trick here is relief carving, where you peel the skin off the ears, body, and tail so they glow softly while the background stays dark. Only the tiny eyes and nose dots are cut all the way through for bright accents. Since this is a concept image, think of it as a plan you can follow to build a similar wide-faced mouse on a real pumpkin.

Written by PumpkinCarvingIdeas.com, inspired by the image above. These are our suggestions, not instructions from the uploader. This approach to the AI concept has not been tested on a real pumpkin.

From pumpkin to porch

  1. Pick a round pumpkin and prep it

    Choose a tall, round pumpkin with a smooth front panel so the wide mouse face has room to spread out. Cut a lid from the bottom instead of the top so the stem stays as a decoration, then scoop the inside until the front wall is about one inch thick. A thinner wall makes the shading steps much easier. Wipe the surface dry before you transfer your design.

  2. Transfer the mouse outline

    Tape your stencil flat against the front and poke through the main lines with a pushpin or transfer tool. Mark the two big round ears, the wide head, the seated body, the curling S-tail off to one side, plus the eye and nose dots. Take your time keeping the ears symmetrical, since they frame the whole face. Peel the paper and connect any faint dotted lines with a washable marker.

  3. Score all the outlines

    With a slim V-tool or a small detail knife, trace along every marked line to a shallow depth. This gives you clean edges to shade against and keeps the ear and body shapes crisp. Cut the three whisker lines per side as single light strokes radiating out from the nose. Score the tail as one gentle S-curve groove so it reads as a smooth curl.

  4. Peel the skin for the glowing shapes

    Use a lino-style ribbon tool or the edge of a spoon to shave off just the orange skin inside the ears, the head, the body, and the tail. Aim for an even, dim orange surface and do not go all the way through. Peel the inner ears a touch deeper than the head so they stand out as a lighter arc. Keep the whisker grooves and the outline between shapes untouched so they stay dark and defined.

  5. Cut the eyes and nose last

    Save the full cutouts for the end so the pumpkin stays sturdy while you work. Carefully cut through the two small round eyes and the single nose dot, plus the two tiny nostril dots if your design has them. Keep these openings small and clean, since they are the brightest points on the face. Push each piece out from the inside to avoid chipping the front.

  6. Light it and take your photo

    Drop in a battery LED tea light or a small puck light rather than a candle, which keeps the thin relief areas safe and cool. Set it low inside so the light spreads up through the peeled shapes evenly. Snap your photo in a dim room to show the contrast between the dark background and the glowing mouse. Wipe cut edges and store the pumpkin somewhere cool between showings.

Gather your supplies

Check things off as you get ready.

Work on a stable surface, keep your free hand out of the cutting path, and have an adult handle sharp tools.

Three levels of light

  • Leave intact

    The pumpkin background and the outline grooves between shapes, plus the dark whisker lines

  • Peel & shade

    The round ears, head, body, and curling tail, shaved to a dim orange glow

  • Cut through

    The two eyes and the nose dot, cut through for the brightest accents

Learn the carving basics

Before you start cutting

How do I keep the two big ears looking even?

Fold your stencil in half before transferring to check that both ears mirror each other, then mark a light center line down the face as a guide. Score both ear outlines before you peel anything so you can adjust the shapes while they are still shallow. Peeling both inner ears to the same depth keeps them matched in brightness.

Should the whiskers be cut through or just scored?

Score them, do not cut through. Thin cut lines weaken fast and can tear, especially with kids helping. A shallow V-groove reads as a clean dark whisker against the peeled face and holds up much longer.

Since there is no real pumpkin here, how deep should I peel for the glow?

This is a concept image, so use it as a target look rather than a record of a real carve. On an actual pumpkin, peel down through just the orange skin, roughly an eighth of an inch, until the flesh turns pale. Test one small spot with your LED on to see how much light comes through, then match that depth across the ears, body, and tail.

Your take belongs here, too.

Changed a detail? Made it simpler? Share a photo of your version and tell the community what worked.

Share your pumpkin

More pumpkins like this

You've reached the end · 8 pumpkins
The Patch Report

Fresh pumpkins, in your inbox.

The best new carvings, ideas worth stealing, and how-tos for carving season. Short, seasonal, and gone by November.

A short email during carving season. Unsubscribe anytime. See our privacy policy.