Halloween Pumpkin Carving Contest · Starts October 1st · $500 in prizes
← Back to ideas
@ai_concepts
Jul 21, 2026
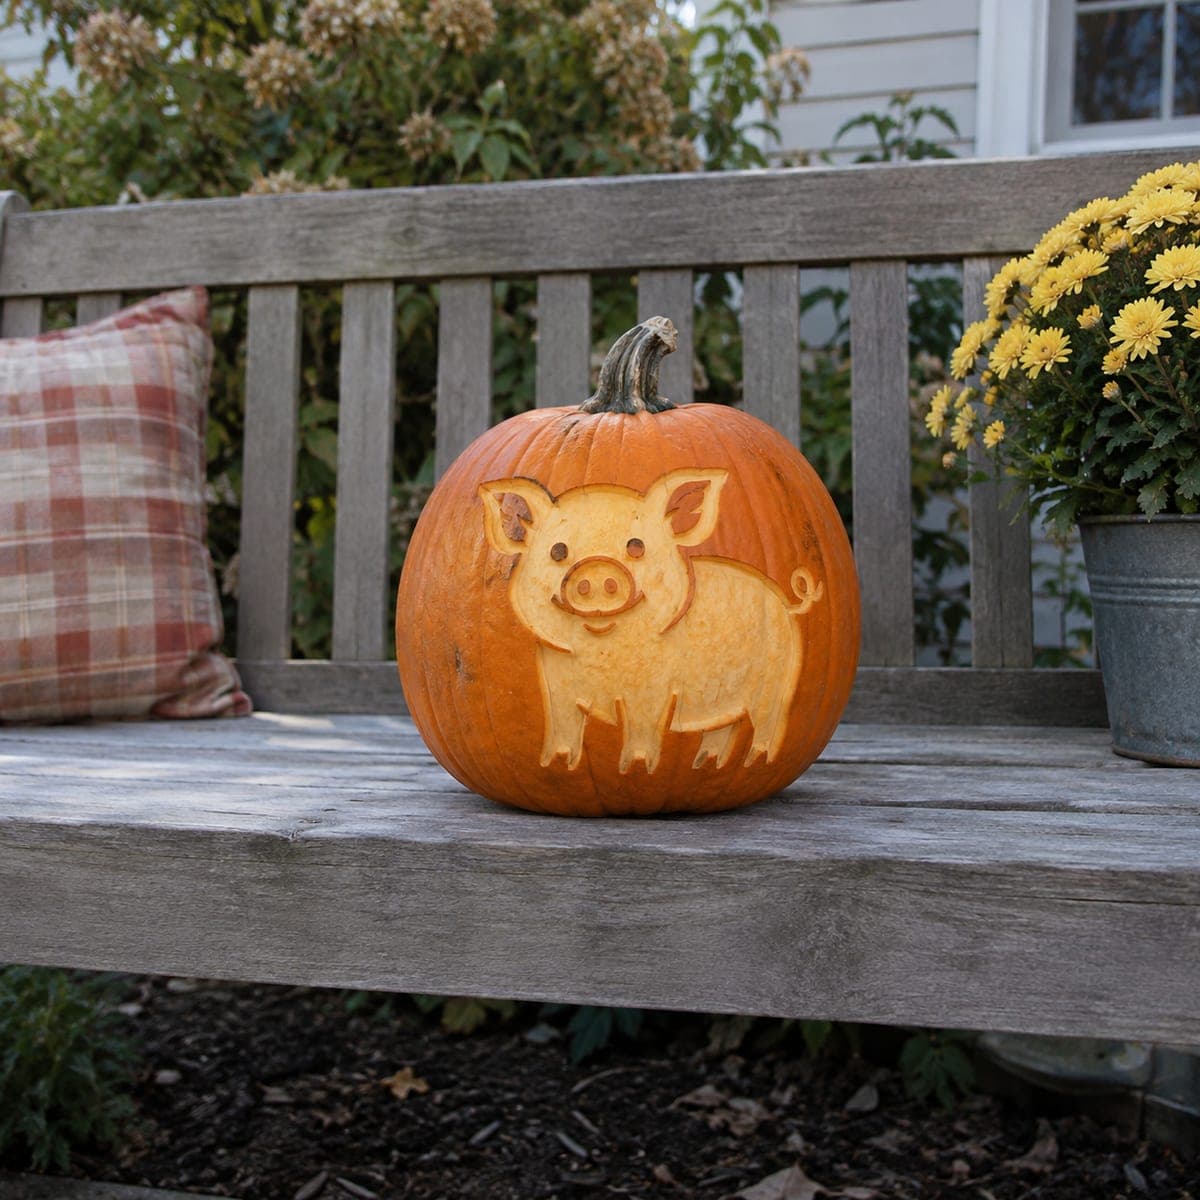
Smiling Hippo Etched Pumpkin for KidsAI
0

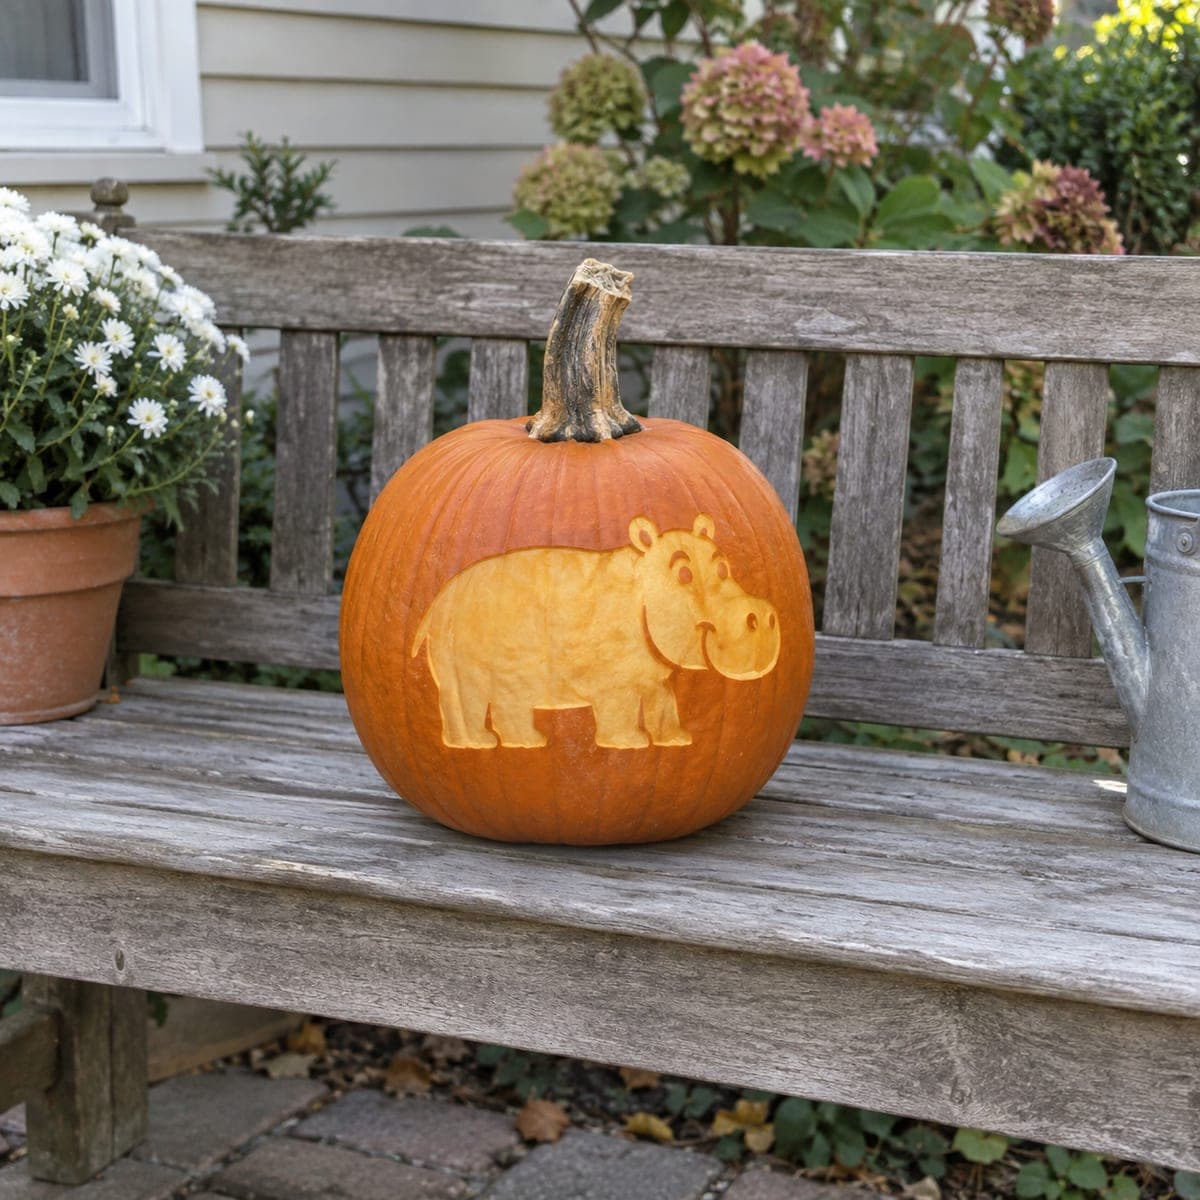
Smiling Hippo Etched Pumpkin for Kids

A chunky cartoon hippo with a sweet grin is peeled in shallow relief on this daytime pumpkin, no interior light required. Removing just the orange skin exposes the pale flesh beneath, which is why the animal pops against the rind even in sunlight. Trace a simple hippo outline, strip the shape with a vegetable peeler or clay ribbon tool, and rub lemon juice on the exposed flesh to slow browning.

This is an AI-generated concept image: a realistic, carvable design idea rather than a photo of a finished carve. AI concepts are always labeled and sit out the leaderboard and the contest.

No ratings yet · Sign in to rate
Comments (0)

  • No comments yet — be the first.

Save without an account. Sign in to like or comment.

Our tips for carving a similar design

The whole trick here is surface etching rather than cutting all the way through. You peel away only the thin orange rind to reveal the pale flesh underneath, so the hippo stays bright even in sunlight with no interior light. Keep the shape simple and blocky so the outline reads clearly from a few feet away.

Written by PumpkinCarvingIdeas.com, inspired by the image above. These are our suggestions, not instructions from the uploader. This approach to the AI concept has not been tested on a real pumpkin.

From pumpkin to porch

  1. Pick and prep the pumpkin

    Choose a pumpkin with a smooth, fairly flat panel on one side for your hippo. Wipe the surface clean and dry it well so your stencil sticks. Since this is a surface etch, you do not need to open the top or scoop the insides. Set it on a towel at a comfortable working height.

  2. Transfer the hippo outline

    Print or draw a simple, chunky cartoon hippo and tape the stencil onto the flat panel. Trace the outline and the small details like the eye, ear, and smile by poking through the paper with a pushpin or transfer tool. Space the dots close together so the shape is easy to follow. Remove the paper and connect the dots lightly with a washable marker.

  3. Score the outline

    With a small detail blade or a lino cutter, gently score along the marked outline about an eighth of an inch deep. This gives you a clean edge to peel up to and keeps the etched area from tearing past the line. Adults should handle any sharp blades. Take your time on the curves of the belly and snout.

  4. Peel the body to expose the flesh

    Use a vegetable peeler or a clay ribbon tool to shave off just the orange skin inside your scored outline. Work in shallow passes until you reach the smooth pale flesh, keeping the depth even across the whole hippo. Do not dig deep, a thin peel is all you need for that bright glow. Leave the eye, nostril, and mouth line as untouched skin so they read as dark markings.

  5. Add gentle shading

    For soft dimension, peel a little deeper along the belly and lower jaw to make those spots glow slightly brighter than the back. Leave a thin ridge of skin around the ear and cheek so the face has shape. Step back often to check that the hippo reads clearly. This light shading is what gives the cartoon its rounded, chunky look.

  6. Preserve and display

    Rub fresh lemon juice over all the exposed flesh to slow browning, and blot off the excess. Wipe away any leftover marker with a damp cloth. Set the pumpkin on a shady porch or bench for a daytime display, since this design shows off without any light inside. Refresh with lemon juice each day to keep the hippo pale and bright.

Gather your supplies

Check things off as you get ready.

Work on a stable surface, keep your free hand out of the cutting path, and have an adult handle sharp tools.

Three levels of light

  • Leave intact

    The eye, nostril, and smile line stay as untouched orange skin so they read as dark features.

  • Peel & shade

    The main body and head are peeled to the pale flesh for a soft, even glow against the rind.

  • Cut through

    Nothing is cut all the way through on this design, since it is a surface etch meant for daytime.

Learn the carving basics

Before you start cutting

Do I need to light this pumpkin?

No, this design is built for daytime. The pale peeled flesh contrasts with the orange rind on its own, so it shows up clearly in sunlight. If you want a little evening presence, an LED tucked nearby will wash light across the surface, but no interior candle is needed.

How deep should I peel?

Just deep enough to remove the thin orange skin and reach the smooth lighter flesh underneath, usually about an eighth of an inch. Shallow, even passes give the best glow and keep the surface from getting mushy. Peeling too deep makes the flesh browner and can distort the shape.

How do I keep the hippo from turning brown?

Exposed flesh browns as it dries, so rub fresh lemon juice over the peeled areas right after carving. Reapply once a day and keep the pumpkin out of direct sun and heat. An etched pumpkin like this typically looks its best for two or three days.

Your take belongs here, too.

Changed a detail? Made it simpler? Share a photo of your version and tell the community what worked.

Share your pumpkin

More pumpkins like this

You've reached the end · 8 pumpkins
The Patch Report

Fresh pumpkins, in your inbox.

The best new carvings, ideas worth stealing, and how-tos for carving season. Short, seasonal, and gone by November.

A short email during carving season. Unsubscribe anytime. See our privacy policy.