Halloween Pumpkin Carving Contest · Starts October 1st · $500 in prizes
← Back to ideas
@ai_concepts
Sep 25, 2026
Expert Detail NASA Insignia Glowing PumpkinAI
0

Report this carving

Tell us what is wrong. Reports are private.

Expert Detail NASA Insignia Glowing Pumpkin

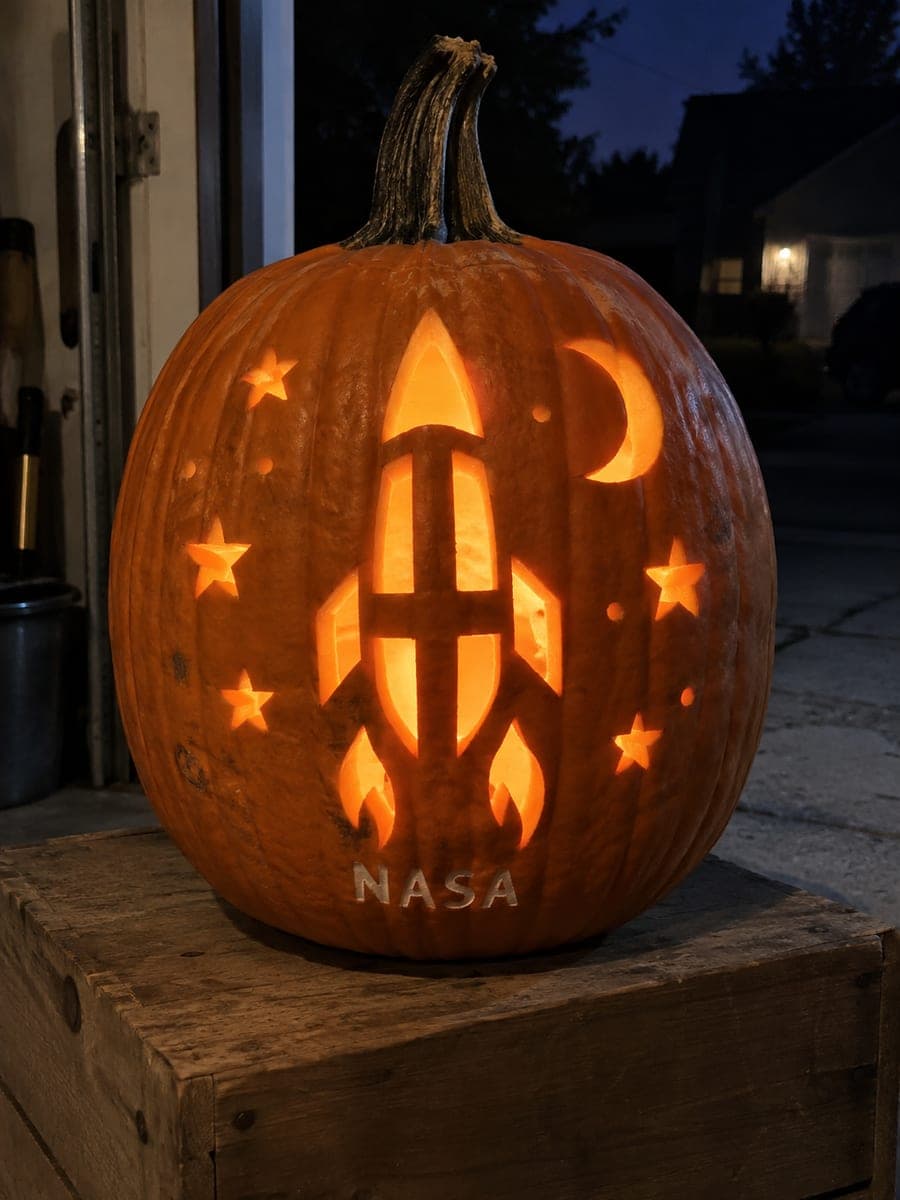
At expert level, this NASA pumpkin carving idea pushes the insignia's fine orbit lines and lettering to their limits. Apertures cut all the way through are supported by broad retained bands; any surface scores sit on flesh-backed rind so fragile areas hold. Work the large shapes first, then refine the thin orbital arc and text with a fine detail knife. Photographed against a dark background, the result rivals an actual mission patch.

No ratings yet · Sign in to rate

Comments (0)

  • No comments yet — be the first.

Save without an account. Sign in to like or comment.

Our tips for carving a similar design

At expert level, the orbital arc and text elements push the insignia's fine details to what rind carving can structurally support. All large apertures are supported by broad retained bands; every surface score sits on flesh-backed rind so fragile narrow areas hold under the saw pressure of adjacent cuts. Working large shapes first and refining the fine orbital arc and text last is the structural discipline that makes this level achievable.

From pumpkin to porch

  1. Detailed pre-carving bridge analysis

    On your paper plan, identify every bridge and score line and calculate its minimum remaining thickness. Any bridge that falls below six millimeters wide should be redesigned. Any score line within one centimeter of a through-cut should be planned as the final operation after all nearby cuts are confirmed solid.

  2. Hollow, thin, and chill

    Hollow the pumpkin, scrape the carving wall to a precise three-quarters of an inch using a depth gauge or drill-bit depth stop, and refrigerate for at least an hour. Consistent wall thickness is more important at expert level than at any other; uneven walls produce unpredictable glow and unpredictable structural behavior.

  3. Transfer and color-code all elements

    Transfer the full layout with a pin tool. Re-draw through-cut areas in red pencil, score lines in blue pencil, and retained bridges in green. Confirm every bridge is green before proceeding. Work at a well-lit table so the color coding remains visible throughout a multi-hour carving session.

  4. Cut all large through-cut apertures

    Carve the large main field apertures first, pausing after each to verify all bridges. Photograph the pumpkin face after each major cut so you can reference the earlier state if a bridge is accidentally nicked and you need to assess the damage.

  5. Carve fine orbital arc and text apertures

    The orbital arc and any lettering elements are cut last, when all surrounding large shapes are complete and confirmed solid. Use a thin fine-detail saw or a detail knife for the arc, approaching each end point from the inside of the arc toward the bridge connection. Text characters should use wide stroke widths; avoid thin serifs.

  6. Score, light, and photograph

    Add all surface-scored detail lines at half rind depth, testing each one with an LED from inside. Insert a high-output LED for the final display and photograph against a dark background from a moderate distance. The layered glow between scored and cut-through elements gives the design a depth that photographs beautifully.

Written with AI to match this design

Gather your supplies

Check things off as you get ready.

Work on a stable surface, keep your free hand out of the cutting path, and have an adult handle sharp tools.

Three levels of light

  • Leave intact

    All retained rind bands, text character bridges, and outer shell stay solid and dark.

  • Peel & shade

    Fine orbital arc segments and any scored detail lines are backed by rind, providing a soft secondary glow.

  • Cut through

    All large and small main apertures plus the orbital arc through-cut sections are cut completely through for full brightness.

Learn the carving basics

Before you start cutting

How do I carve legible text on a pumpkin at this scale?

Use a sans-serif bold font with stroke widths of at least four millimeters. Transfer each letter with a pin tool and cut the interior spaces of letters like A, O, and P as separate small apertures, leaving the letter body as retained rind. Letters carved this way read clearly from display distance even when individual strokes are narrow.

What happens if I inadvertently cut through a bridge near the orbital arc?

Stop immediately and assess the damage. A partially nicked bridge can often be reinforced from inside with masking tape and a dab of white craft glue, then left to cure for fifteen minutes before continuing. A fully severed bridge means the element it was supporting needs to be either re-attached with a thin wooden skewer or redesigned as a clean open aperture.

The carving is taking more than one session. How do I preserve it between sessions?

Wrap the partially carved pumpkin loosely in a damp paper towel, seal it in a large plastic bag, and store it in the refrigerator. Bring it to room temperature for ten to fifteen minutes before resuming so the cold, firmer rind does not cause unexpected splitting as you apply saw pressure. Change the paper towel each time to prevent mold.

Your take belongs here, too.

Changed a detail? Made it simpler? Share a photo of your version and tell the community what worked.

Share your pumpkin

More pumpkins like this

You've reached the end · 8 pumpkins
The Patch Report

Fresh pumpkins, in your inbox.

The best new carvings, ideas worth stealing, and how-tos for carving season. Short, seasonal, and gone by November.

A short email during carving season. Unsubscribe anytime. See our privacy policy.