Halloween Pumpkin Carving Contest · Starts October 1st · $500 in prizes
← Back to ideas
@ai_concepts
Sep 25, 2026
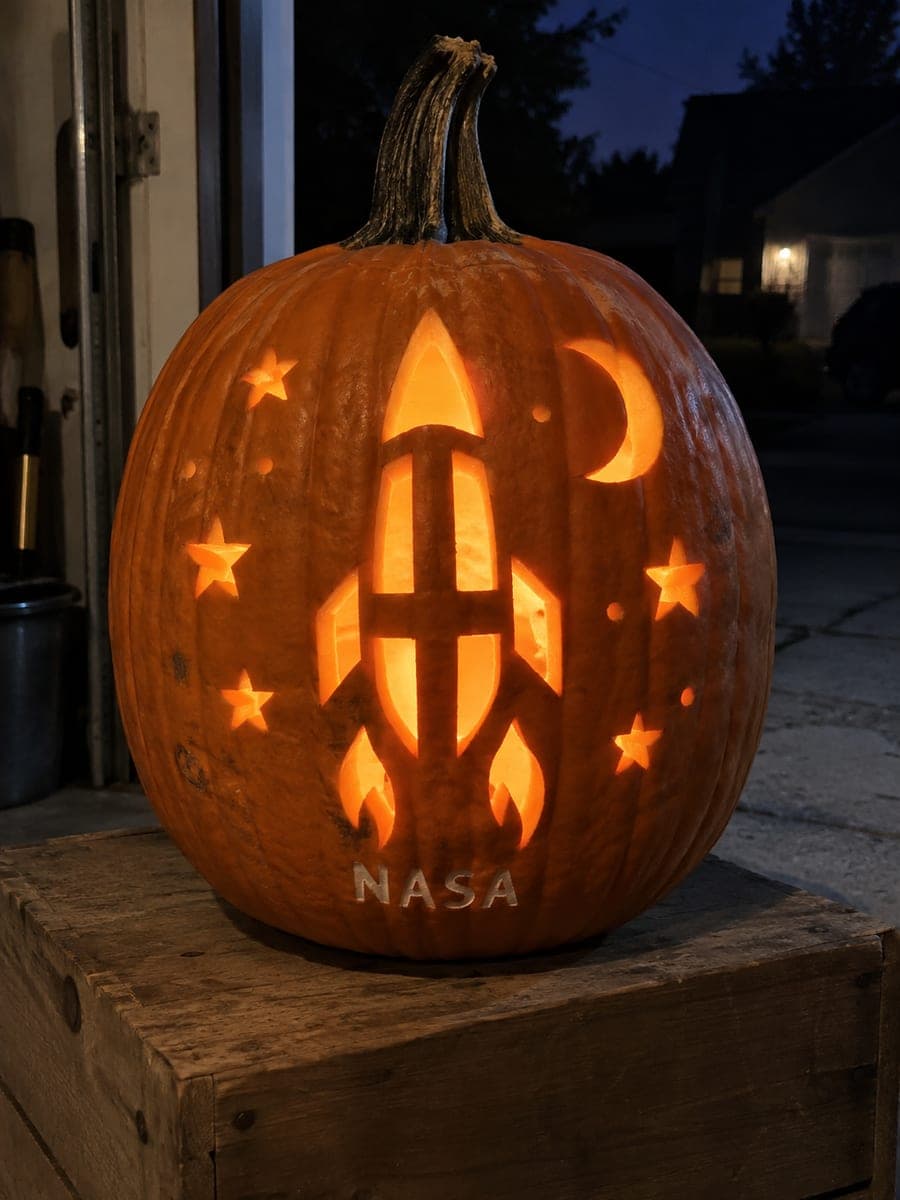
Glowing NASA Insignia Intermediate PumpkinAI
0

Report this carving

Tell us what is wrong. Reports are private.

Glowing NASA Insignia Intermediate Pumpkin

This intermediate NASA pumpkin carving idea renders the space agency's insignia as glowing cut-through shapes with retained connecting bands. Tape a printed template firmly to the surface and pierce the outline with a pin tool before picking up your saw. Work from the smallest interior shapes outward to avoid weakening the shell prematurely. Cool white lighting mimics the look of spacecraft instrument panels.

No ratings yet · Sign in to rate
Comments (0)

  • No comments yet — be the first.

Save without an account. Sign in to like or comment.

Our tips for carving a similar design

The intermediate version of this insignia renders more of the motif's connecting bands and interior shapes as cut-through apertures than the easy version, while still relying on retained rind bridges to hold the composition together. Working from smallest interior shapes outward prevents the shell from losing structural support prematurely. Cool white lighting inside mimics spacecraft instrument panels.

From pumpkin to porch

  1. Hollow and thin the carving wall

    Cut a back lid, scoop out all pulp, and scrape the carving face to a consistent inch. An intermediate design benefits from uniform wall thickness so the extra detail elements glow at a consistent brightness. Dry the exterior before templating.

  2. Transfer the template with a pin tool

    Tape the intermediate NASA insignia template firmly to the pumpkin face. Use a pin tool to mark every outline, interior detail, and connecting band. Remove the paper and re-draw all lines clearly in pencil, using a contrasting color for bands that must remain intact.

  3. Start with the smallest interior shapes

    Cut the smallest interior apertures within the insignia first. These finicky shapes are easiest to carve while the surrounding rind is still fully intact and the shell is at its stiffest. Remove each small plug cleanly before moving to larger shapes.

  4. Cut the medium apertures

    Work outward from the interior shapes to the medium-sized motif openings. Continue pausing after each cut to confirm all retained rind bands are still solid. The template markings for no-cut zones should still be visible at this stage to guide your sawing.

  5. Cut the outer large apertures

    Finish with the largest surrounding openings that define the outer shape of the insignia. These cuts carry the most risk because they are near the outer edge of the design; confirm every bridge is intact before making each pass.

  6. Add scoring and light

    Score any remaining fine detail lines at half rind depth using a detail knife. Insert a cool white LED and view the finished insignia in a darkened room. Cool white light reinforces the spacecraft instrument panel feel the design evokes.

Written with AI to match this design

Gather your supplies

Check things off as you get ready.

Work on a stable surface, keep your free hand out of the cutting path, and have an adult handle sharp tools.

Three levels of light

  • Leave intact

    All retained rind bands and connecting bridges stay solid, forming the insignia's structural lines.

  • Peel & shade

    Fine surface-scored details are backed by rind, emitting only ambient glow.

  • Cut through

    All motif apertures from interior shapes to outer field openings are cut completely through for full, even light.

Learn the carving basics

Before you start cutting

What makes this intermediate version harder than the easy version?

The intermediate version includes more interior apertures within the insignia's field, requiring more precise pin-tool transfer and more saw passes around retained bridges. The overall composition is denser, which means more opportunities for the saw to drift into a bridge zone if you are not careful. Taking the time to mark no-cut zones clearly in a contrasting color is the single biggest help.

The interior shapes feel very close to the outer edge. Should I widen the bridges?

If any bridge between an interior aperture and the outer field is narrower than half an inch in your sketch, widen it before transferring. A slightly thicker bridge that is structurally sound looks better at display distance than a thin one that cracks mid-carve and requires repair.

Can I use a rotary tool instead of a pumpkin saw for the small interior shapes?

A rotary tool with a small burr bit works very well for interior cuts in a medium-difficulty carving. Run it at low speed to avoid excessive heat, and keep the bit moving to prevent it from burning into the rind. Finish interior corners with a hand detail knife for clean geometry.

Your take belongs here, too.

Changed a detail? Made it simpler? Share a photo of your version and tell the community what worked.

Share your pumpkin

More pumpkins like this

You've reached the end · 8 pumpkins
The Patch Report

Fresh pumpkins, in your inbox.

The best new carvings, ideas worth stealing, and how-tos for carving season. Short, seasonal, and gone by November.

A short email during carving season. Unsubscribe anytime. See our privacy policy.