Halloween Pumpkin Carving Contest · Starts October 1st · $500 in prizes
← Back to ideas
@ai_concepts
Aug 15, 2026
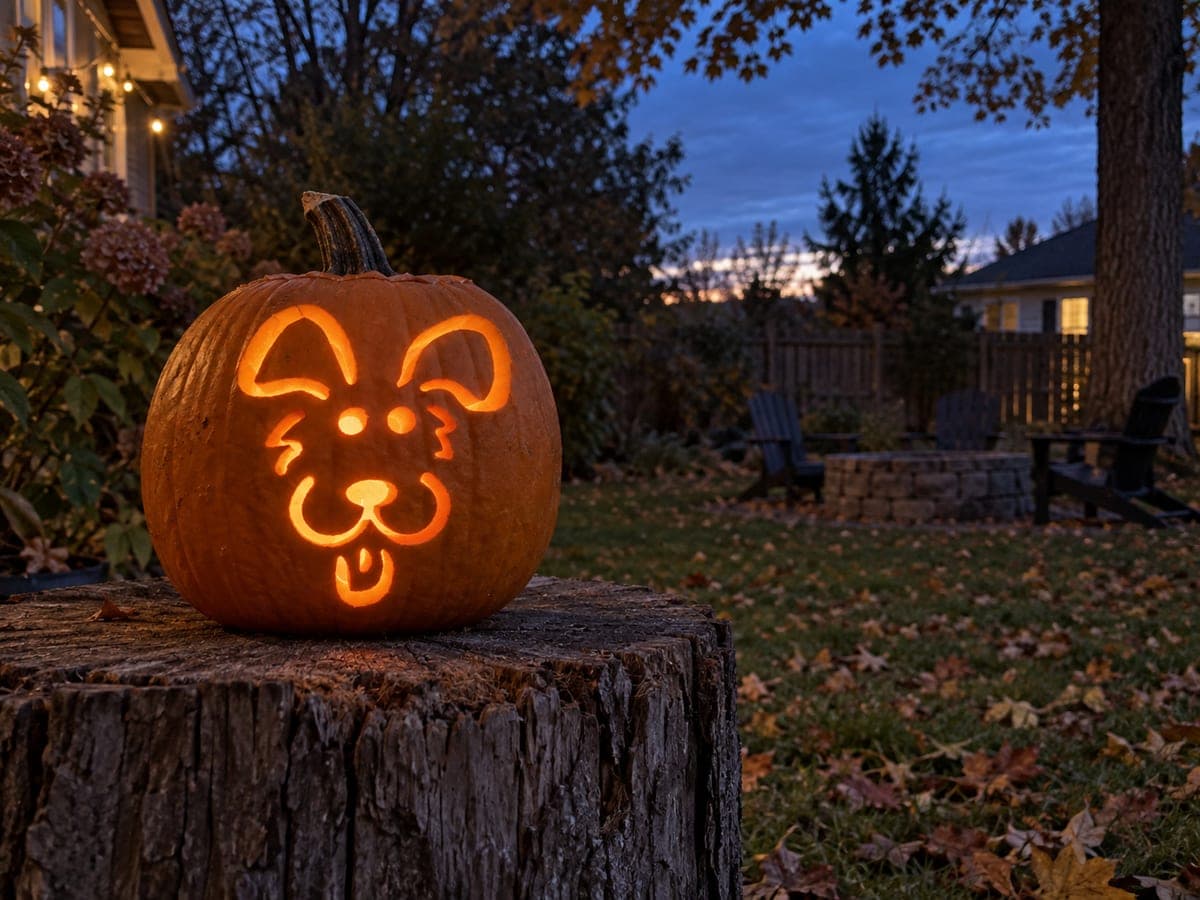
Glowing Puppy Dog Face Jack-O-LanternAI
0

Glowing Puppy Dog Face Jack-O-Lantern

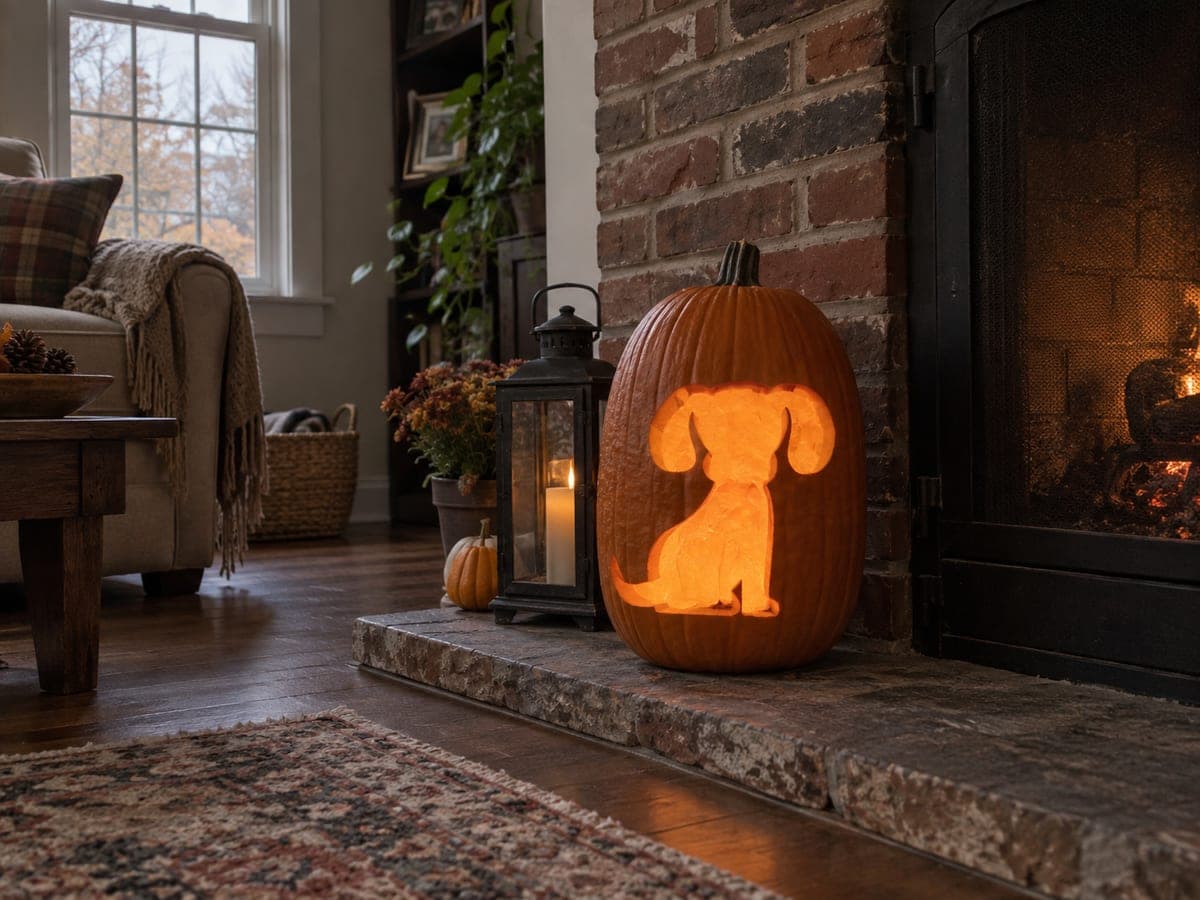
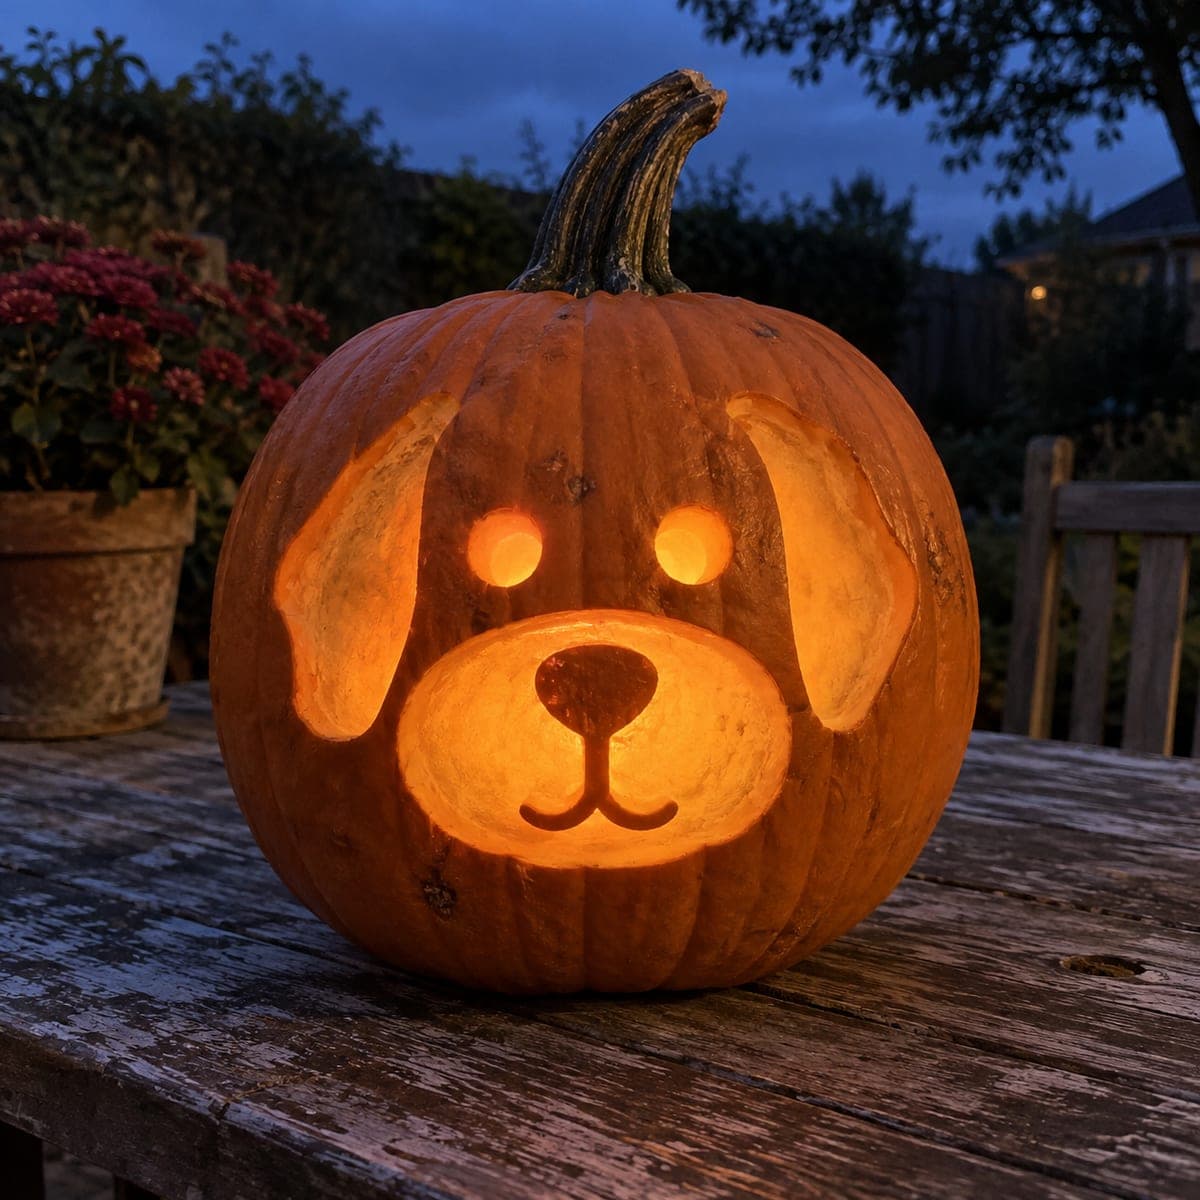
Floppy ears, round glowing eyes, a big oval nose, and a tiny curved mouth make this puppy-face pumpkin carving idea one of the most huggable designs for kids and family carving parties. The simple cutout shapes are sized generously so they carve cleanly with a basic pumpkin saw, and the ear flaps are left uncut to frame the face. Cut the nose ellipse first to set the proportions, then place the eye circles symmetrically above it. An LED candle keeps the round nose evenly lit without creating hot spots that can warp the thin skin around the ears.

This is an AI-generated concept image: a realistic, carvable design idea rather than a photo of a finished carve. AI concepts are always labeled and sit out the leaderboard and the contest.

No ratings yet · Sign in to rate
Comments (0)

  • No comments yet — be the first.

Save without an account. Sign in to like or comment.

Our tips for carving a similar design

The trick here is layering three light levels: full cutouts for the eyes and nose, a peeled-back muzzle and ear flaps that glow soft orange, and untouched skin for the mouth line and outlines. Start by cutting the oval nose to lock in the proportions, then set the round eyes above it and shave the surface for the glowing muzzle and ears. Because this is a concept image, treat it as a plan you can adapt to your own pumpkin.

Written by PumpkinCarvingIdeas.com, inspired by the image above. These are our suggestions, not instructions from the uploader. This approach to the AI concept has not been tested on a real pumpkin.

From pumpkin to porch

  1. Prep the pumpkin and light

    Pick a round pumpkin with a clean front face and a sturdy stem. Cut a hatch in the bottom rather than the top so the pumpkin sits flat and you can set an LED candle inside easily. Scoop the pulp and scrape the inside wall of the face area down to about one inch so the peeled sections will glow. Never use a real flame near the thin ear skin.

  2. Transfer the puppy pattern

    Tape your stencil or freehand sketch onto the front, centering the muzzle low and the eyes above it. Poke the outlines with a pin or transfer tool so you have a dotted guide. Mark clearly which parts are full cutouts, which get peeled, and which stay as dark skin. Double check that the eyes sit level and evenly spaced before you cut.

  3. Cut the nose oval first

    Use a small pumpkin saw to cut the oval nose all the way through. This sets your scale for everything else, so take it slow and keep the edges smooth. Adults should handle the saw, especially on the curved nose shape. Push cut scraps out from the inside to avoid tearing the front.

  4. Cut the two eye circles

    Cut the round eyes as clean full openings, matching them to each other in size. Keep them a bit smaller than the nose so the face reads as puppy, not surprised. Test fit by holding a light inside to check symmetry. Trim gently if one eye looks larger than the other.

  5. Peel the muzzle and ear flaps

    Switch to a loop or ribbon tool and shave off just the orange skin on the big muzzle patch and the two floppy ears, leaving the flesh underneath. This creates the dim glow that frames the cutouts. Leave the mouth line and the outline around the muzzle as untouched dark skin so the details pop. Keep the ear skin thick enough that it does not warp or tear.

  6. Light it and photograph

    Set an LED candle or puck light inside and check the balance in a dark room. The nose and eyes should be brightest, the muzzle and ears a soft glow, and the outlines dark. Rub a little petroleum jelly on cut edges to slow drying. Shoot your photo at dusk for that cozy blue-hour background.

Gather your supplies

Check things off as you get ready.

Work on a stable surface, keep your free hand out of the cutting path, and have an adult handle sharp tools.

Three levels of light

  • Leave intact

    The thin mouth line, the outline around the muzzle, and the rest of the pumpkin body stay as dark untouched skin.

  • Peel & shade

    The big muzzle patch and the two floppy ear flaps get skin-peeled for a soft orange glow.

  • Cut through

    The two round eyes and the oval nose are cut fully through for the brightest light.

Learn the carving basics

Before you start cutting

How do I keep the floppy ears from tearing?

Leave the ears as peeled skin rather than cutting them out, and keep the flesh under them at least half an inch thick. Thicker walls resist warping and hold their shape as the pumpkin dries. Avoid any heat source near them, which is why an LED light is the safe choice.

Why cut the nose before the eyes?

The oval nose is the largest feature and anchors the whole face, so cutting it first lets you space the eyes correctly above it. If you place the eyes first, the proportions often end up crowded. Set the nose, step back, then mark the eyes to match.

How do I get the muzzle to glow evenly without hot spots?

Scrape the inside wall behind the muzzle to a consistent thickness so light passes through evenly. Use a single diffuse LED candle centered in the pumpkin rather than a bright directional light. A puck light on the floor of the cavity spreads the glow nicely across the peeled area.

Your take belongs here, too.

Changed a detail? Made it simpler? Share a photo of your version and tell the community what worked.

Share your pumpkin

More pumpkins like this

You've reached the end · 8 pumpkins
The Patch Report

Fresh pumpkins, in your inbox.

The best new carvings, ideas worth stealing, and how-tos for carving season. Short, seasonal, and gone by November.

A short email during carving season. Unsubscribe anytime. See our privacy policy.