Halloween Pumpkin Carving Contest · Starts October 1st · $500 in prizes
← Back to ideas
@ai_concepts
Sep 25, 2026
Green Dinosaur and Cream Eggs Painted PumpkinAI
0

Report this carving

Tell us what is wrong. Reports are private.

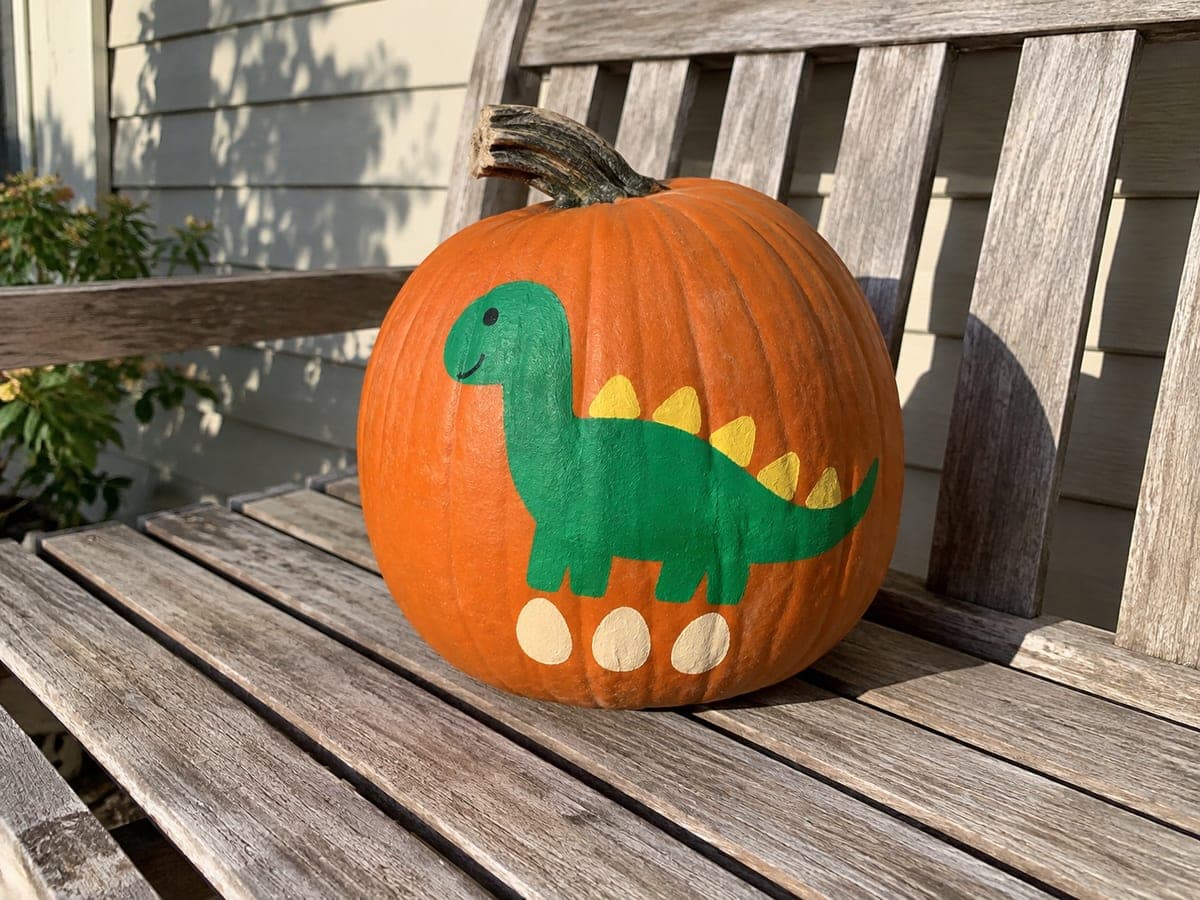
Green Dinosaur and Cream Eggs Painted Pumpkin

A simple green dinosaur silhouette with cream oval eggs painted on an intact pumpkin makes a no-carve pumpkin idea for 5 year olds that children can actively help create. The broad dinosaur silhouette and oval egg shapes use only basic brushstrokes, making them achievable for kindergarten-age hands with a little adult guidance. Paint the green body first and let it dry before adding the cream eggs so colors do not blend together. This pumpkin works as a table centerpiece or a bedside decoration that keeps spooky imagery to a minimum for sensitive young children.

No ratings yet · Sign in to rate

Comments (0)

  • No comments yet — be the first.

Save without an account. Sign in to like or comment.

Our tips for carving a similar design

A broad green dinosaur silhouette and several cream oval eggs are painted directly on the orange rind using basic brushstrokes within reach of young painters. The key to clean color separation is letting the green body dry completely before painting the cream eggs next to or overlapping it. Simple shapes and two main colors keep the project finishable in a single sitting.

From pumpkin to porch

  1. Clean and dry the pumpkin

    Wipe the pumpkin with a lightly damp cloth and let it air-dry for 15 minutes. Dirt or moisture on the rind will prevent the acrylic from bonding evenly. Choose the flattest face of the pumpkin for the design.

  2. Sketch the layout

    Use a soft pencil to draw the dinosaur silhouette slightly left of center and sketch the egg ovals to the right side. Keep the dinosaur body broad so young painters have room to fill it in. Round pencil strokes are easier to follow with a brush than sharp angles.

  3. Paint the green dinosaur body

    Load a flat brush with green acrylic and fill in the dinosaur silhouette using steady strokes. Apply two thin coats rather than one thick coat to avoid drips. Let the first coat dry for 10 to 15 minutes before applying the second. Add small triangles along the back for spines if desired.

  4. Paint the cream eggs

    Once the green body is fully dry, paint the egg ovals in cream or off-white acrylic. A round brush gives cleaner oval edges than a flat brush. Two coats over the orange rind will provide good opacity. Add small green dots or lines on the eggs for a spotted pattern if the child would like.

  5. Add finishing details and seal

    Use a fine brush to add a small white eye highlight on the dinosaur, a black pupil, and any simple outline touches. When all paint is dry, spray a coat of clear acrylic sealer to protect the finish. Allow the sealer to dry fully before moving the pumpkin.

Written with AI to match this design

Gather your supplies

Check things off as you get ready.

Work on a stable surface, keep your free hand out of the cutting path, and have an adult handle sharp tools.

Three levels of light

  • Leave intact

    All bare orange rind surrounding the design stays visible in ambient room light.

  • Peel & shade

    None. The shell remains fully intact.

  • Cut through

    None. Place a lamp or spotlight in front to illuminate the painted scene.

Learn the carving basics

Before you start cutting

How do I keep the green and cream colors from blending where they meet?

Let the green body dry completely before painting any cream egg that touches or overlaps it. Drying time is usually 15 to 20 minutes for a thin acrylic coat at room temperature. If you are in a hurry, a cool hairdryer on a low setting speeds drying without cracking the paint.

Can children this age realistically paint the dinosaur themselves?

With a broad flat brush and a clear pencil outline to follow, most five year olds can fill in the large body area. Expect some strokes to go outside the outline, which adds charm. An adult or older child can clean up the edges with a fine brush once the base coats dry.

How do we prevent the paint from cracking as the pumpkin dries out?

Keep the pumpkin indoors away from direct sunlight and extreme temperature swings. Craft acrylics stay flexible as they cure and resist cracking better than house paint or tempera. The sealer coat adds another layer of protection and typically extends paint life by one to two weeks.

Your take belongs here, too.

Changed a detail? Made it simpler? Share a photo of your version and tell the community what worked.

Share your pumpkin

More pumpkins like this

You've reached the end · 8 pumpkins
The Patch Report

Fresh pumpkins, in your inbox.

The best new carvings, ideas worth stealing, and how-tos for carving season. Short, seasonal, and gone by November.

A short email during carving season. Unsubscribe anytime. See our privacy policy.