Halloween Pumpkin Carving Contest · Starts October 1st · $500 in prizes
← Back to ideas
@ai_concepts
Sep 25, 2026
Rainbow and Smiling Clouds Painted Pumpkin for PreschoolersAI
0

Report this carving

Tell us what is wrong. Reports are private.

Rainbow and Smiling Clouds Painted Pumpkin for Preschoolers

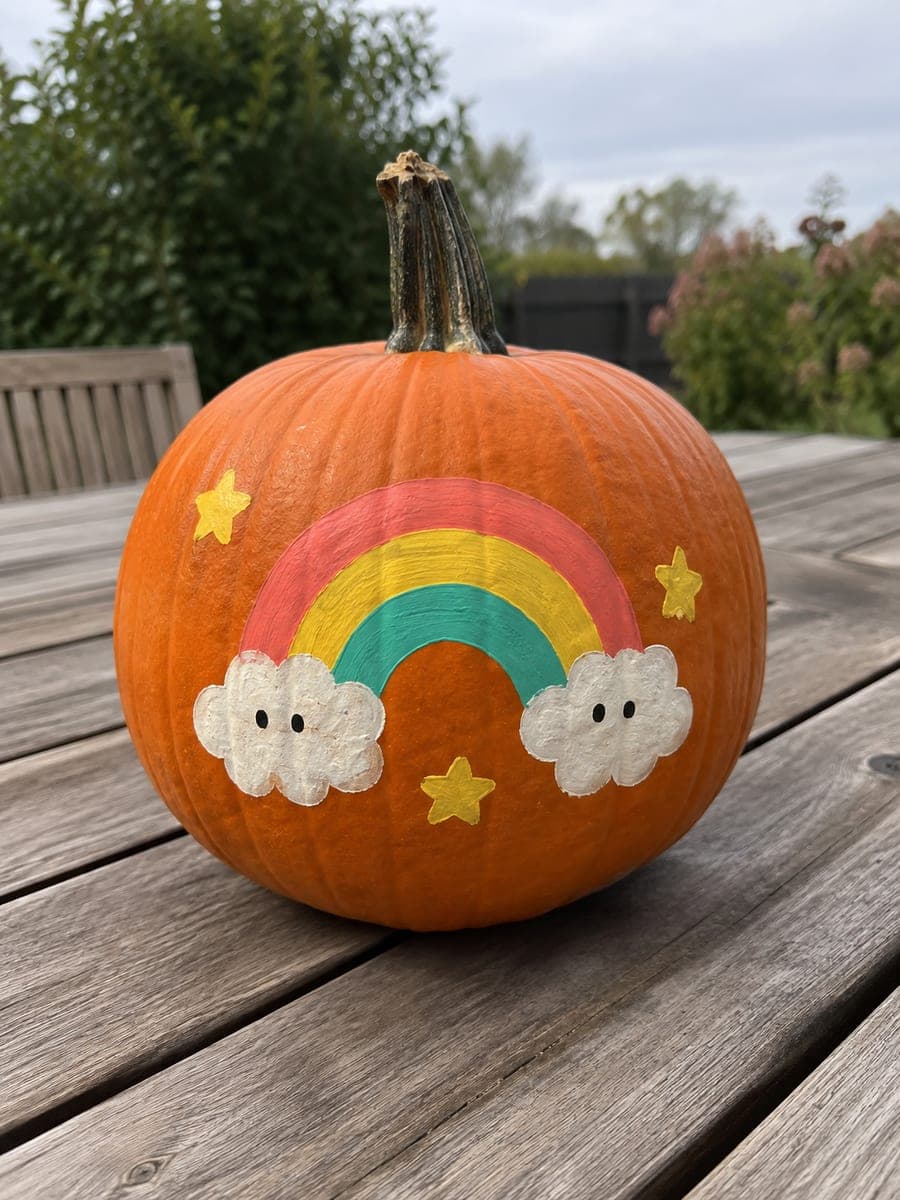
Thick painted rainbow arches, scalloped clouds with dot eyes, and a smiling face on an intact pumpkin make this no-carve preschool pumpkin idea a perfect group craft activity. Let preschoolers paint the broad arch stripes with foam brushes while an adult adds the fine cloud scallops and eye dots. Washable acrylic craft paint works well since little hands will inevitably touch the surface mid-project. Seal the finished pumpkin with matte medium so the rainbow colors last through the full autumn season.

No ratings yet · Sign in to rate

Save this design for carving night, then share a photo of your own jack-o'-lantern once it's glowing.


Comments (0)

  • No comments yet — be the first.

Save without an account. Sign in to like or comment.

Our tips for carving a similar design

Thick painted rainbow arches in bold colors, scalloped cloud shapes with dot eyes and smiles, and a happy face on the pumpkin front are all applied in flat acrylics on an intact pumpkin. The design works particularly well as a group craft because the arch stripes are wide enough for small hands with foam brushes, while an adult handles the finer cloud scallops and eye dots. Sealing the finished piece with matte medium ensures the colors survive the full autumn season.

From pumpkin to porch

  1. Clean and dry the pumpkin

    Wipe the pumpkin thoroughly with a barely damp cloth and allow it to dry for fifteen minutes. Preschoolers can help wipe if you give each child a dry corner of the cloth to finish off the surface.

  2. Sketch the arch layout

    Lightly pencil four or five concentric arcs across the upper third of the pumpkin face, and sketch a cloud shape at each end of the lowest arch. Mark a simple smile face below the arches for the main face element.

  3. Have preschoolers paint the arch stripes

    Give each child a foam brush loaded with a single arch color, red at the outermost, then orange, yellow, and green. Guide each child to drag their brush along one arch stripe. Keep colors in separate cups to prevent muddy mixing.

  4. Add the blue and violet arches

    An adult or older child handles the innermost two arches with a narrower brush, as these arcs are smaller and require more control to stay within the pencil lines.

  5. Paint the clouds and face

    An adult uses a medium round brush to paint the white cloud shapes with their scalloped edges. Once dry, add small dot eyes and a curved smile to each cloud. Paint the main face smile and eye dots below the arches.

  6. Seal and display

    Apply a thin coat of matte acrylic medium over the entire design once fully dry. Display on a classroom shelf or autumn table where the bright rainbow colors make a cheerful seasonal centerpiece.

Written with AI to match this design

Gather your supplies

Check things off as you get ready.

Work on a stable surface, keep your free hand out of the cutting path, and have an adult handle sharp tools.

Three levels of light

  • Leave intact

    The bare orange rind outside the painted design area remains as the natural background.

  • Peel & shade

    None. The shell is never broken in this no-carve design.

  • Cut through

    None. Display in natural light or near a lamp to illuminate the painted rainbow from the front.

Learn the carving basics

Before you start cutting

How do I keep the arch stripes from bleeding into each other when multiple children paint them simultaneously?

Let each stripe dry for at least five minutes before a neighboring stripe is added. You can also leave a thin pencil-line gap between each arch as a natural buffer. Any bleed can be touched up with the adjacent color once both stripes are dry.

The white cloud paint looks off-white over the orange rind. How do I make it pop?

Apply two coats of white for the cloud body. The second coat, applied over a dry first coat, nearly eliminates the orange show-through and makes the cloud look bright and clean.

Can we do this design on a mini pumpkin for individual child keepsakes?

Mini pumpkins work beautifully for this. Scale the arch stripes down to two or three arcs and simplify the clouds to small blobs with dot eyes. Each child can take home their own rainbow pumpkin as a personalized autumn craft.

Your take belongs here, too.

Changed a detail? Made it simpler? Share a photo of your version and tell the community what worked.

Share your pumpkin

More pumpkins like this

You've reached the end · 8 pumpkins
The Patch Report

Fresh pumpkins, in your inbox.

The best new carvings, ideas worth stealing, and how-tos for carving season. Short, seasonal, and gone by November.

A short email during carving season. Unsubscribe anytime. See our privacy policy.