Similar to This
View all stencils →About this stencil
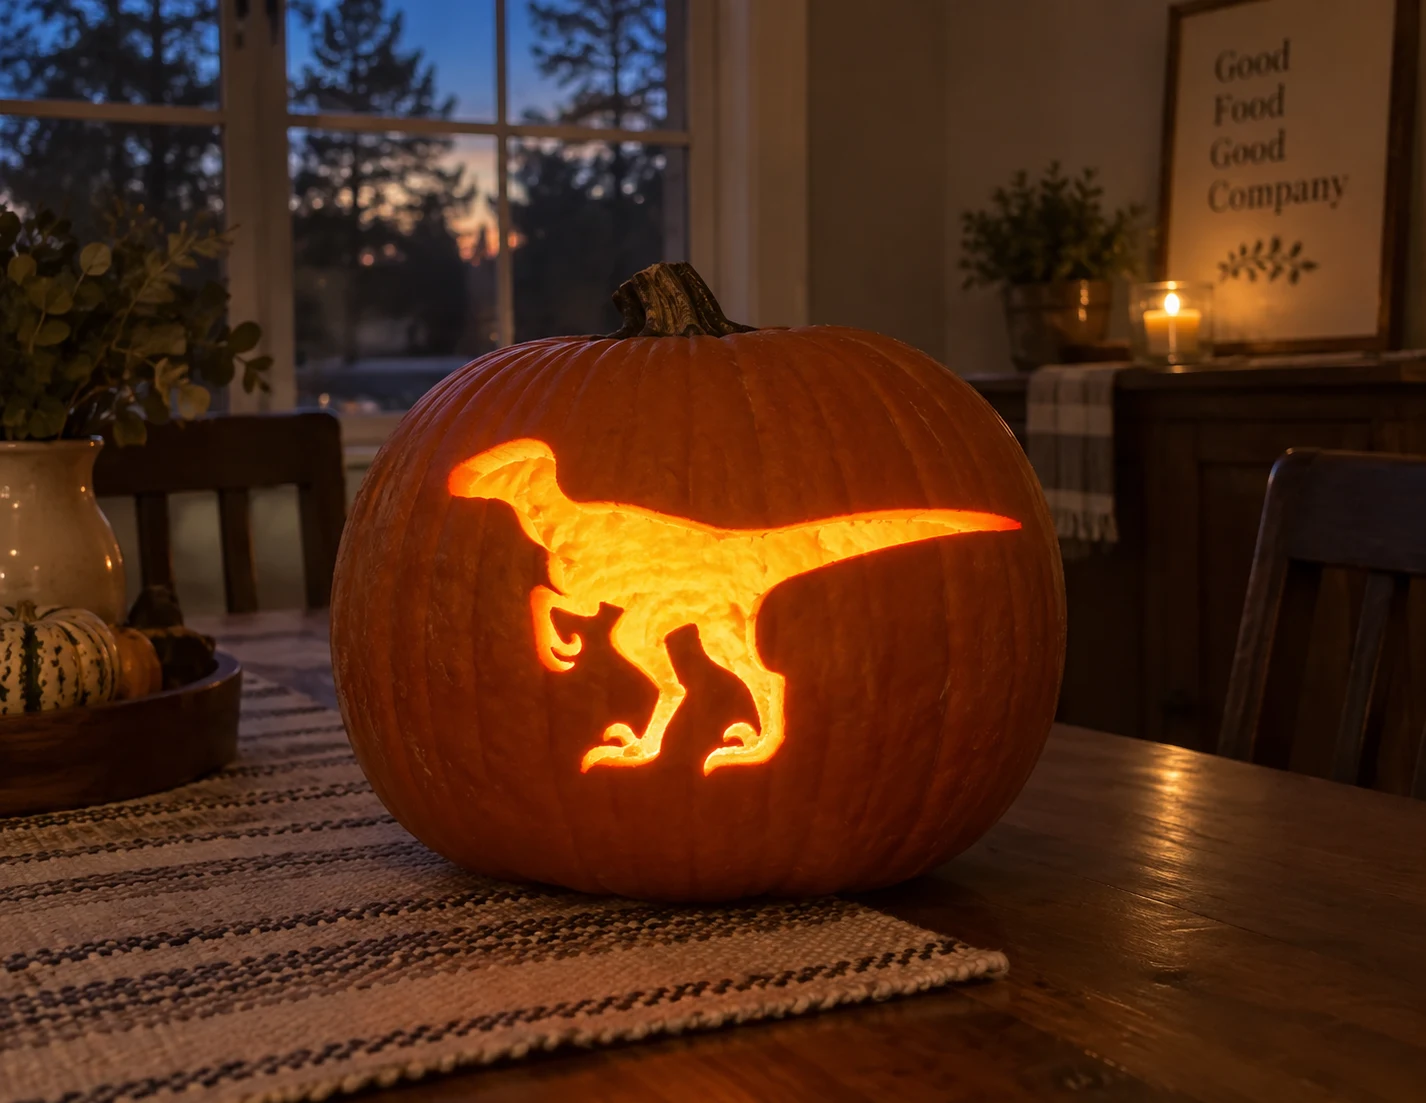
A velociraptor in full stride dominates this easy pumpkin stencil, shown in profile with its distinctive upright neck, narrow head, small forelimbs, and long stiffened tail extended behind it. The entire dinosaur silhouette is cut as a single open shape, and a small inner detail near the chest is removed separately to show the bent arm. Lit from behind, it reads instantly as a raptor shadow against the glowing pumpkin. Trace the tail outline before cutting because the long thin tail tip can run outside the pumpkin's curve if not centered. This design is rated Beginner-friendly and takes most carvers around 30 minutes from trace to glow. Great for kids and first-timers. Big shapes, short cuts.
Pumpkin size guide
- 🎃 Small (5–7") — print at 80%
- 🎃 Medium (7–10") — print at 100% (recommended)
- 🎃 Large (11–13") — print at 130%
- 🎃 Giant (14"+) — print at 150% on tabloid paper
Frequently asked questions
Can I resize this stencil?▾
Yes. The PDF is vector so it scales cleanly. Print at 100% for a 7–10 inch pumpkin, 130% for 11–13 inch, or 150% for a giant. Use your printer's "Fit to page" or "Custom scale" setting.
What kind of paper works best?▾
Standard 20 lb letter or A4 printer paper is fine. Heavier paper is harder to bend around the pumpkin curve. If your printer supports it, set the quality to 'best' so the lines are crisp.
How long will the carved pumpkin last?▾
Usually 5–10 days. Coat all cut surfaces with petroleum jelly and store the pumpkin somewhere cool overnight. Avoid direct sun. Battery LED pumpkin lights produce no heat and double the lifespan.
Can I sell pumpkins carved with this stencil?▾
Yes, the carved pumpkin you make is yours. The license covers personal and small-scale commercial carving (selling carved pumpkins, photographing them, posting on social). You may not resell the PDF file itself.
What if my printer doesn't print the whole stencil?▾
Set 'Page scaling' to 'Fit' in the print dialog and uncheck 'Auto-rotate'. If it still cuts off, the design includes 0.25" of safe-area margin so a small crop won't ruin it.
How to carve this stencil
This is a cut-through stencil: the gray areas on the printable pattern are the pieces you remove, and everything white stays attached. The steps below give you the safest carving order. Plan on about 60-90 minutes from print to candle.
Set up first. Print the PDF at 100% scale on letter or A4 paper. Cut the lid at an angle, scoop the pumpkin clean, and thin the carving wall to about 1 inch where the design will sit. Tape the pattern on (snip small darts in the paper so it hugs the curve) and transfer every outline by poking dots along the lines, about one every 1/8 inch. Peel the paper away and carve dot to dot with short, straight strokes.
Carving order
- Open the arm and leg gaps. Start with the white hooked claw gap under the chest and the white space between the two legs. Cut these interior openings first while the shell is strong; saw toward each claw point from both sides.
- Cut the head and jaw. Work around the snout and the notch of the open jaw. Back the saw out of the jaw corner rather than twisting it.
- Cut the feet and toe claws. Cut around each foot's curved toe claws. These little hooks are fragile; approach each point from both directions.
- Cut the tail. Cut both sides of the long tapering tail, working from the body toward the fine tip. Do not press hard near the tip; the strip of shell above and below it must stay solid.
- Release the body. Finish the back and belly lines, leaving a small tab on the back. Support the large plug, free the tab, and push the raptor out from inside.
Clear loose fibers out of each opening as you go, and never twist or pry the blade against the shell; back it out and recut instead. When every piece is out, wipe the cut edges dry and drop in a battery LED puck.
Tools you'll need
For a beginner-friendly carve like this you'll want a paring knife, spoon / scoop, marker, and led pumpkin light. Here's the kit we reach for — start with whatever you already own.

Elmchee Pumpkin Carving Kit
13-piece kit with carrying case
Saws for the larger cutouts, plus a scoop for hollowing. Covers both jobs in one kit.
View on Amazon ↗
HOME MOST LED Pumpkin Lights
4-pack, battery operated, with remote + timer
Orange glow made for jack-o'-lanterns. The remote and timer light the pumpkin every evening without reaching inside.
View on Amazon ↗
Speedball 4131 Lino Cutter Set
Handle + 5 interchangeable cutters
Interchangeable cutters for peeling and shading the face. Useful for the finer details.
View on Amazon ↗
Community Pumpkin Carving Ideas
Carving ideas that use stencils like this one.

Related stencils
Carvers who liked this one also downloaded these.
 Intermediate
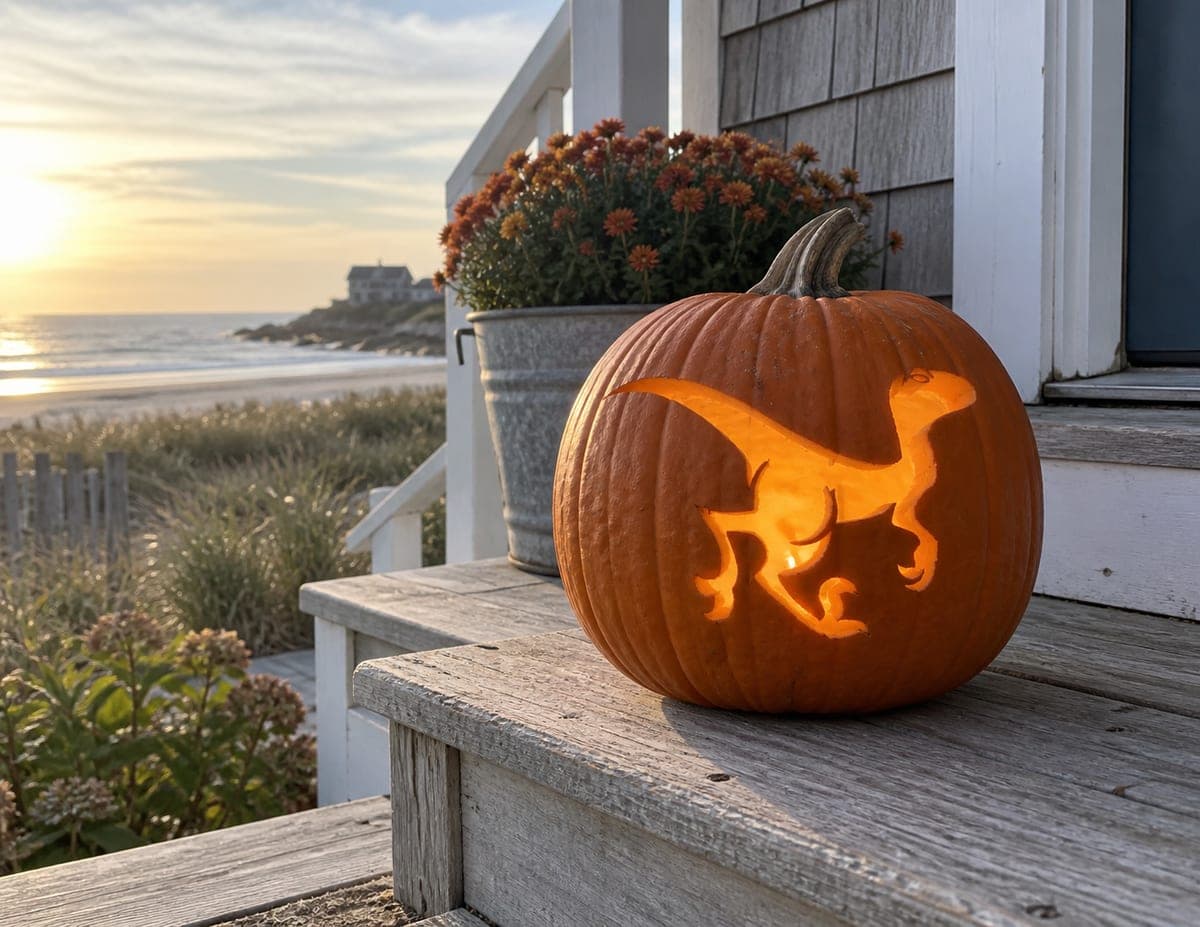
Running Dinosaur and Long Tail
A velociraptor sprints across the pumpkin in full silhouette, head low, clawed legs mid-stride, and its long tail sweeping behind for balance. The entire dinosaur cuts through as one glowing shape, with the narrow tail and slim legs providing the medium challenge. Carve the thin tail and leg sections first in short segments, then remove the large body last so the delicate extremities are never left unsupported.
 Advanced
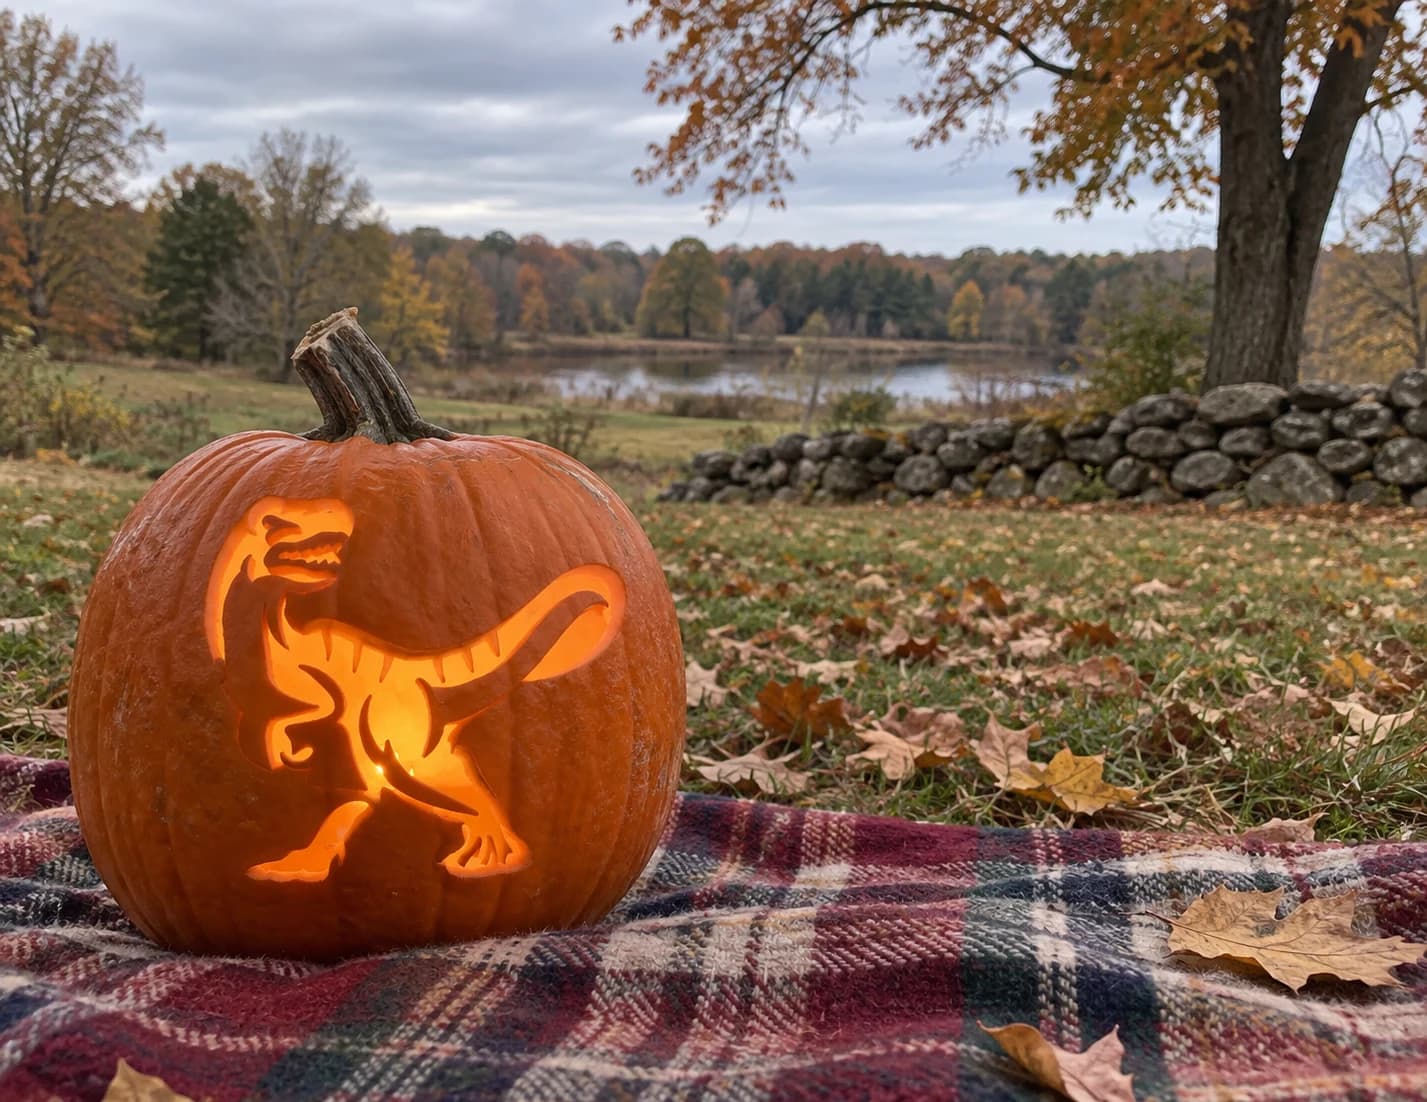
Velociraptor Pumpkin Stencil
A snarling velociraptor lunges forward on this dinosaur pumpkin stencil, its open jaws showing individual teeth, forelegs raised with curved claws, and a long stiff tail arcing behind. The design uses a mix of pierced negative space and thin pumpkin-wall bridges to define the body segments, so the lit jack-o-lantern shows the raptor as an orange figure ringed by dark gaps. Start by cutting the smallest interior tooth shapes and claw details before removing the large body sections, so the surrounding wall keeps the stencil stable throughout.
 Intermediate
Three-Horn Dino and Tall Frill
A friendly triceratops in full profile, cut through as one connected silhouette with its tall neck frill, three horns, sturdy legs, and thick tail all glowing. The single-opening design keeps things straightforward despite the detailed outline. The horns and the gaps between the legs are the trickiest spots; drill small relief holes at each tight corner so your saw can turn without tearing the rind.
 Beginner-friendly
Curved-Neck Dino and Left Tail
A gentle brachiosaurus in full-body silhouette, its long neck curving up to a small head while a thick tail sweeps out behind sturdy rounded legs. The whole dinosaur is cut through as one connected opening, so the friendly giant glows edge to edge. An easy favorite for dino-loving kids; start cutting at the wide belly and work outward so the slender neck is supported until the very end.
 Intermediate
Tall Dino and Three Leaves
A long-necked brachiosaurus stretches up toward three tropical leaves floating above it, its full body cut through as one flowing silhouette from tail tip to tiny head. The leaves are separate cutouts with notched edges that add extra glow around the dino's snack. Cut the leaves first for practice, then work the dinosaur from the tail forward, saving the slender neck for careful final strokes.
 Beginner-friendly
Long-Neck Dinosaur
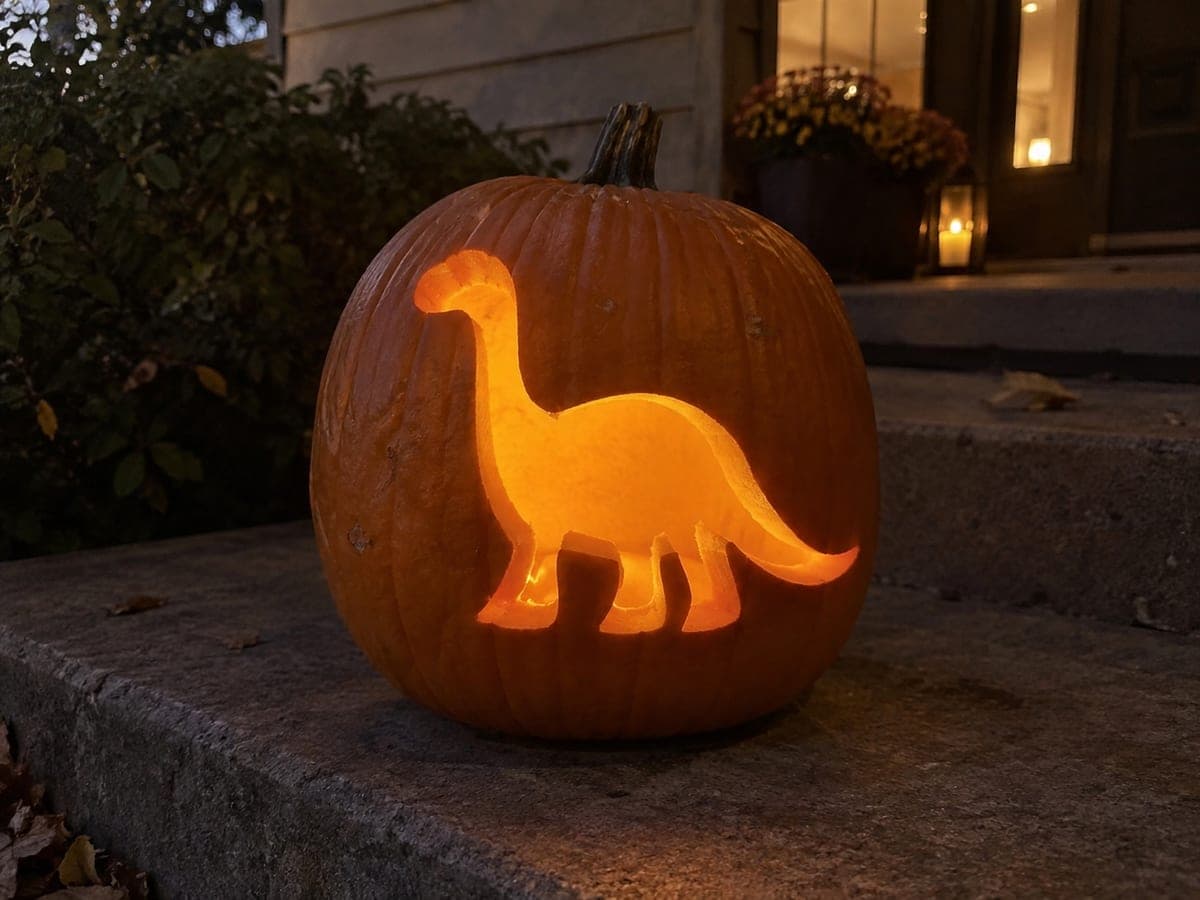
A friendly long-necked sauropod stands in profile, its arched neck, rounded body, four legs, and tapering tail all glowing as one connected silhouette. Because the entire dinosaur comes out as a single cutout, there are no interior pieces to manage, keeping this an easy favorite for dino-loving kids. Take your time on the skinny neck and tail; saw with gentle strokes and keep a hand braced inside the pumpkin so the narrow curves cut clean.