The 2026 contest winners are inGrand Prize, People's Choice and Most Creative, all crowned.
@ai_concepts
Sep 25, 2026
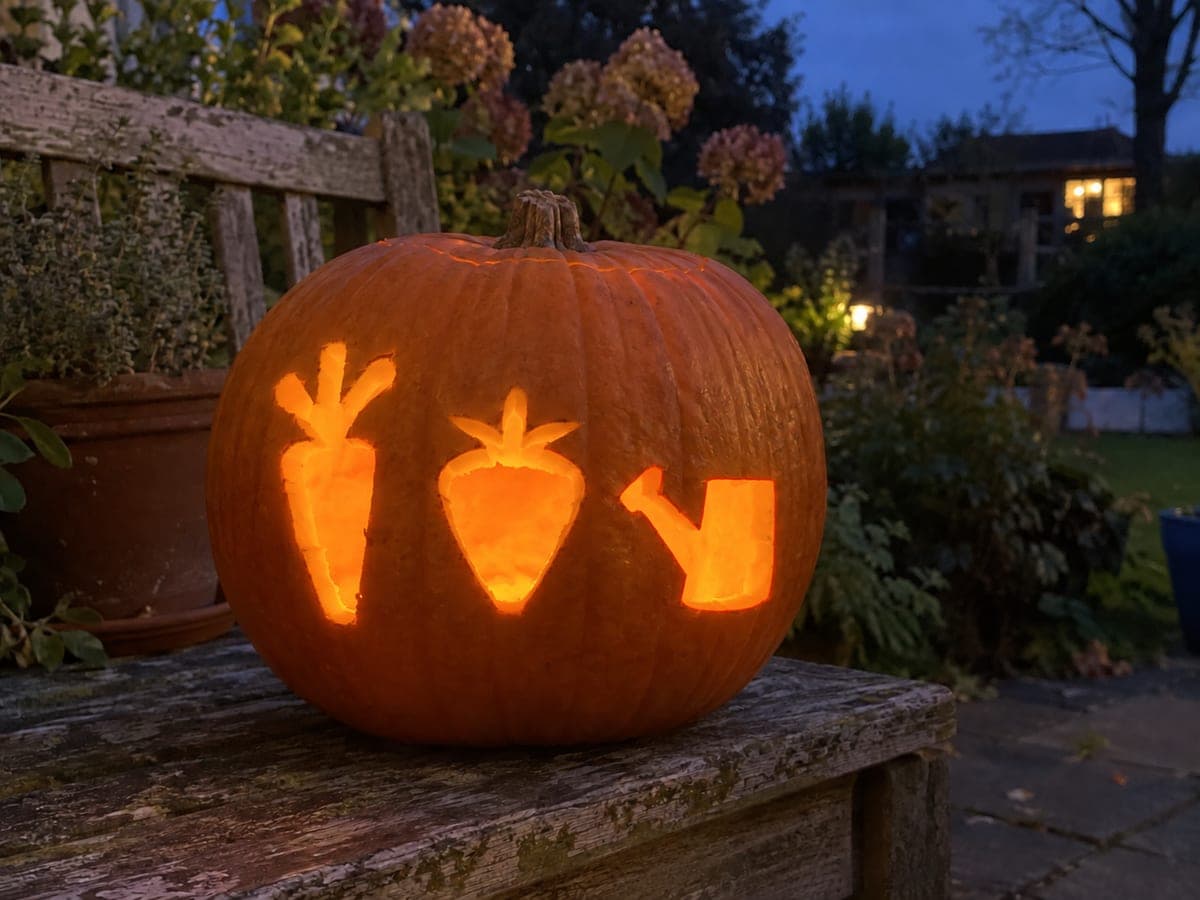
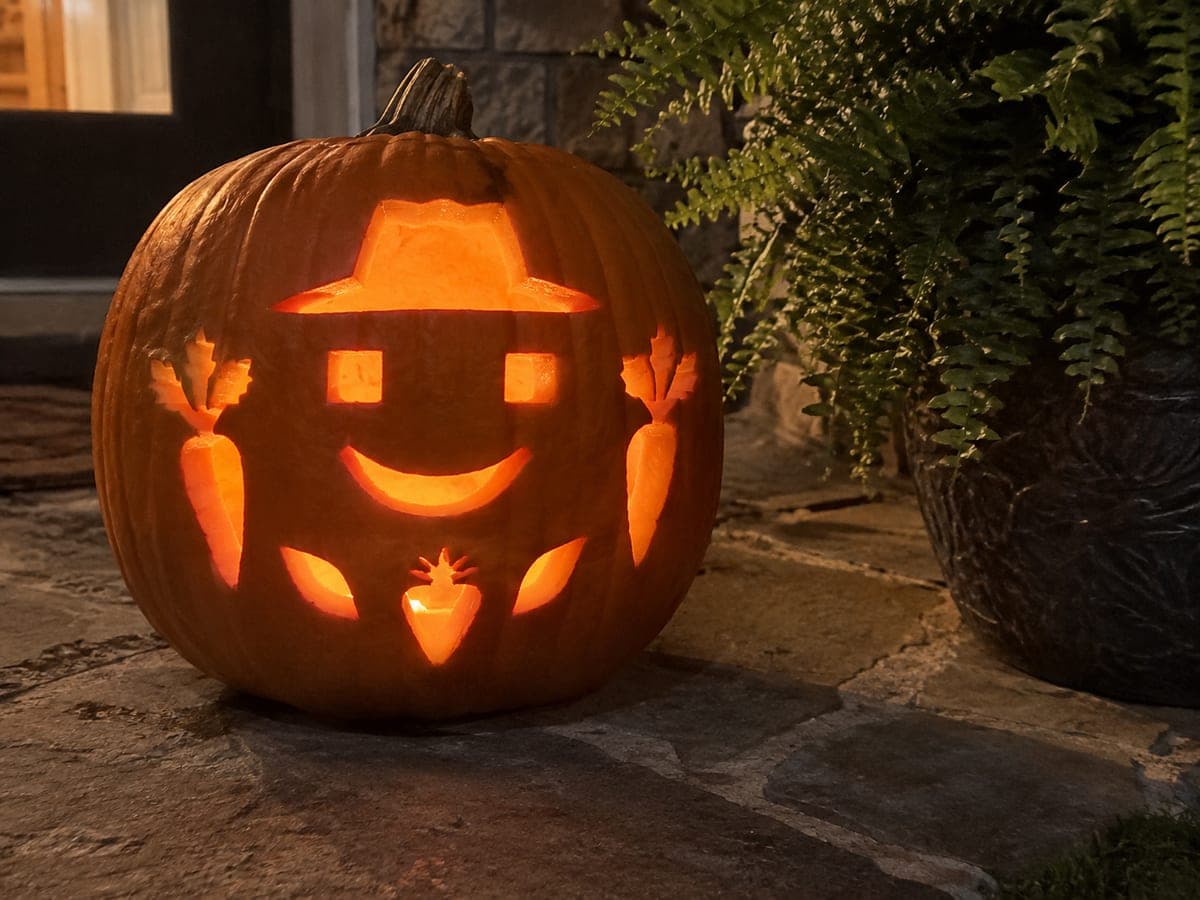
Grow a Garden Carrot PumpkinAI
0

Report this carving

Tell us what is wrong. Reports are private.

Grow a Garden Carrot Pumpkin

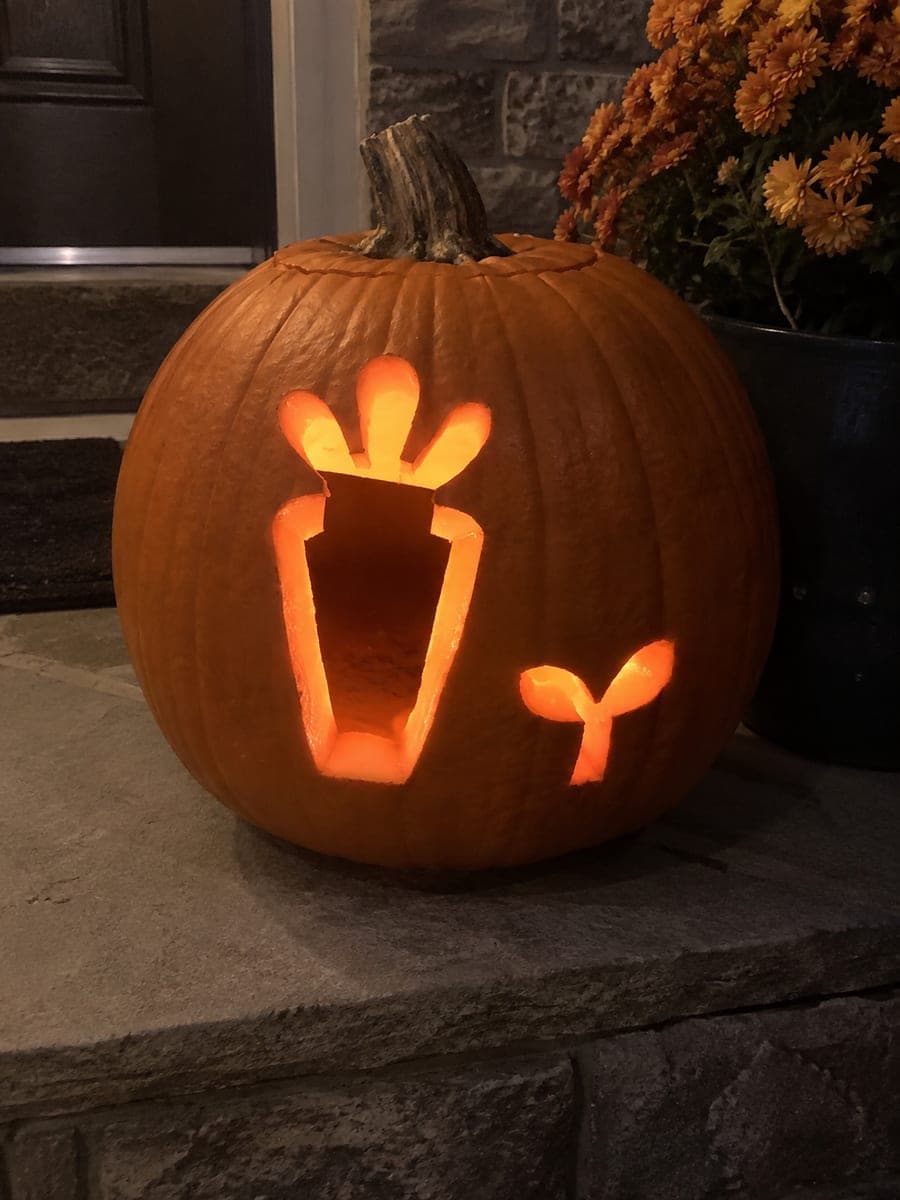
This easy grow a garden pumpkin carving cuts a single big blocky carrot silhouette with three chunky leaf lobes at the top alongside a small two-leaf seedling hole for an instantly charming garden-themed design. Both shapes are simple single-aperture cuts with no internal islands, making this a low-stress pumpkin carving idea for beginners and kids. Use a fine-toothed jab saw to cut the leaf lobes cleanly, and keep the seedling hole small enough to stay structurally sound.

No ratings yet · Sign in to rate
grow-a-gardenseasonalvideo-gamerobloxgardencutesilhouetteeasy

Save this design for carving night, then share a photo of your own jack-o'-lantern once it's glowing.

Roblox and all related characters, names, logos, and trademarks are the property of their respective owners. This is an unofficial fan carving shared by our community for inspiration only. PumpkinCarvingIdeas.com is not affiliated with, sponsored by, or endorsed by any rights holder or person depicted, and no such connection is implied.
Comments (0)

  • No comments yet. Be the first.

Our tips for carving a similar design

The design uses only two unconnected silhouette cuts, a large carrot with three chunky leaf lobes at the top and a small two-leaf seedling hole beside it. No internal islands and no bridges to manage make this one of the cleanest entry-level pumpkin carving ideas for this game theme.

From pumpkin to porch

  1. Scoop the pumpkin

    Cut the lid from the back and scoop the interior to about one inch of rind. Uniform wall thickness helps both openings glow at the same brightness. Save a flat-sided scoop for the inside of the carrot area, which needs to be thinner than the rest for crisp edges.

  2. Print and position your templates

    Place your carrot template on the left or center of the pumpkin and the small seedling to its right, leaving generous orange rind between them. Secure both with tape and poke holes along every outline with a poker tool. Remove your templates and connect the poked dots with pencil.

  3. Cut the carrot body first

    Use a fine-toothed jab saw to cut the main tapering carrot shape from tip to shoulder. Take your time on the narrow tip since thin cuts at the base of the carrot can cause cracking. Make each cut stroke clean and deliberate rather than rushing.

  4. Cut the three leaf lobes

    The three chunky lobes sit at the top of the carrot and are part of the same single aperture. Cut from one side lobe inward, across the top of the carrot shoulder, and down the other lobe in one continuous path. Keep the lobes rounded and blocky to match the game art style.

  5. Cut the seedling hole

    The seedling is a small two-leaf shape, simple enough to cut in under a minute. Use the fine-toothed saw and cut slowly around the leaf curves. The seedling hole should be clearly smaller than the carrot so the size contrast reads clearly when lit.

  6. Light and display

    A single LED tea light inside makes both shapes glow equally. Position the pumpkin so the carrot is at chest height for approaching kids, which makes it immediately visible. The warm amber glow through the carrot silhouette looks especially good against a dark background.

Written with AI to match this design

Gather your supplies

Check things off as you get ready.

Work on a stable surface, keep your free hand out of the cutting path, and have an adult handle sharp tools.

Three levels of light

  • Leave intact

    All the orange rind surrounding the carrot and seedling stays dark and intact.

  • Peel & shade

    None, this design uses clean through-cuts only.

  • Cut through

    The entire carrot silhouette including leaf lobes and the small seedling hole are cut completely through.

Learn the carving basics

Before you start cutting

How do I keep the carrot tip from snapping off?

Cut slowly and support the rind piece from inside with one finger as you near the tip. If the tip still feels fragile once cut, leave a thin bridge of rind at the very point and no one will notice once the pumpkin is lit. Avoid pressing on the carved face from the outside after cutting.

How big should the seedling be relative to the carrot?

Make the seedling about one-third the height of the carrot for a good visual balance. Too small and it disappears in the glowing orange field; too large and it competes with the carrot for attention. Scale both templates side by side before attaching them to the pumpkin.

Can kids do this carving?

Your template transfer with a poker tool is a great kid-friendly step. Actual sawing should be handled by an adult since jab saws are sharp enough to cause injury. Kids can help scoop the interior with a large plastic spoon and choose where the pumpkin gets displayed.

Your take belongs here, too.

Changed a detail? Made it simpler? Share a photo of your version and tell the community what worked.

Share your pumpkin

Want more designs like this? Browse our full library of pumpkin carving ideas, or pick a free printable stencil. Every pattern and template in our own collection is free to print at home.

More pumpkins like this

You've reached the end · 8 pumpkins
The Patch Report

Fresh pumpkins, in your inbox.

The best new carvings, ideas worth stealing, and how-tos for carving season. Short, seasonal, and gone by November.

A short email during carving season. Unsubscribe anytime. See our privacy policy.