The 2026 contest winners are inGrand Prize, People's Choice and Most Creative, all crowned.
@ai_concepts
Sep 25, 2026
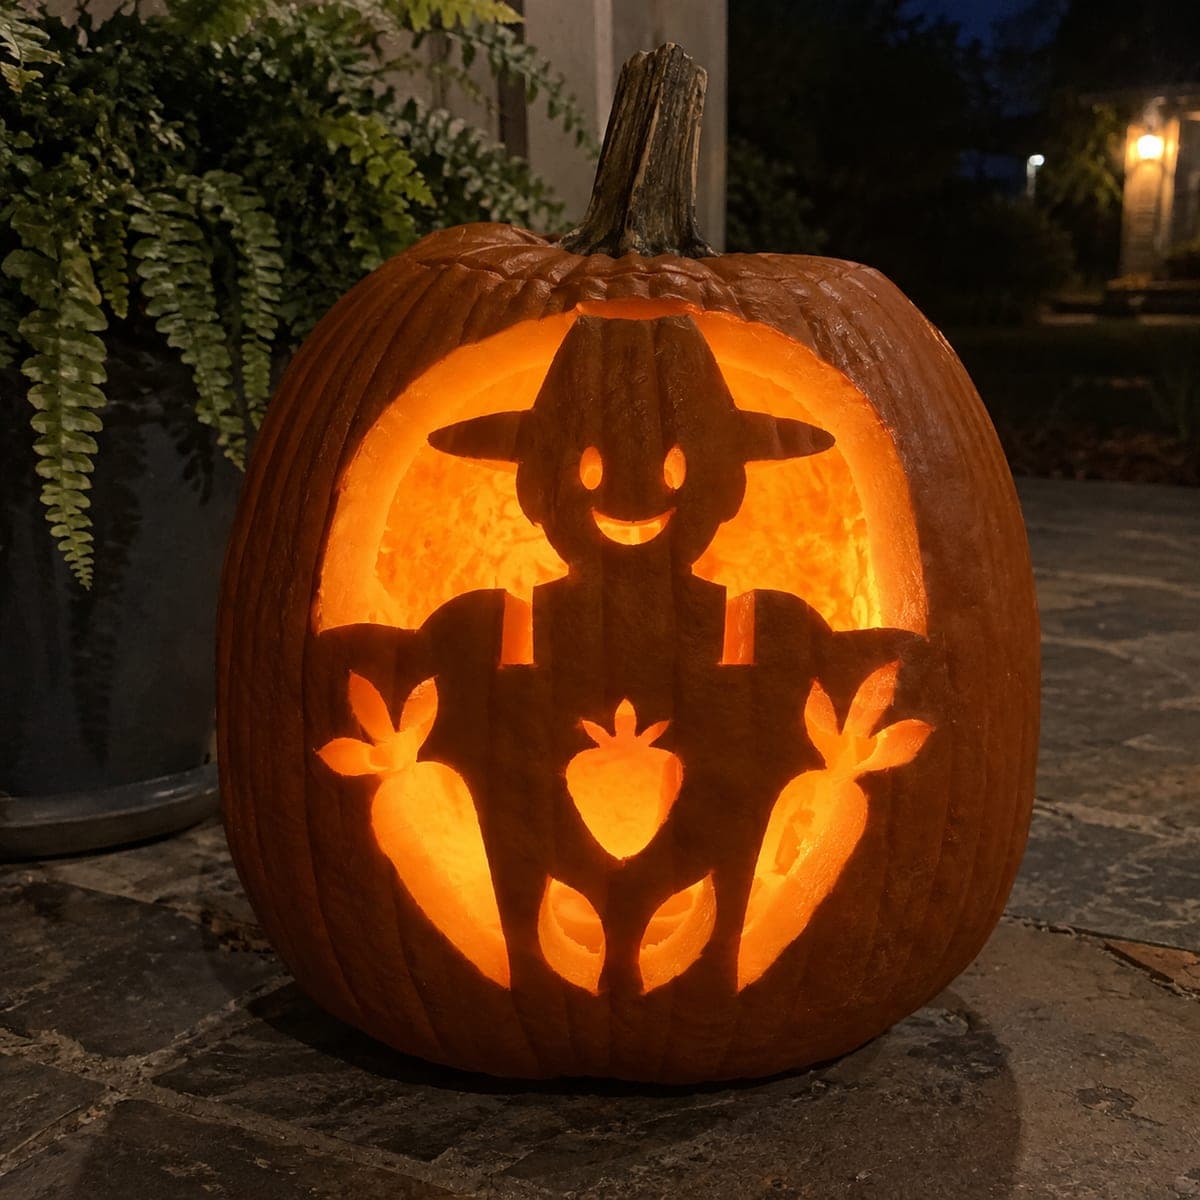
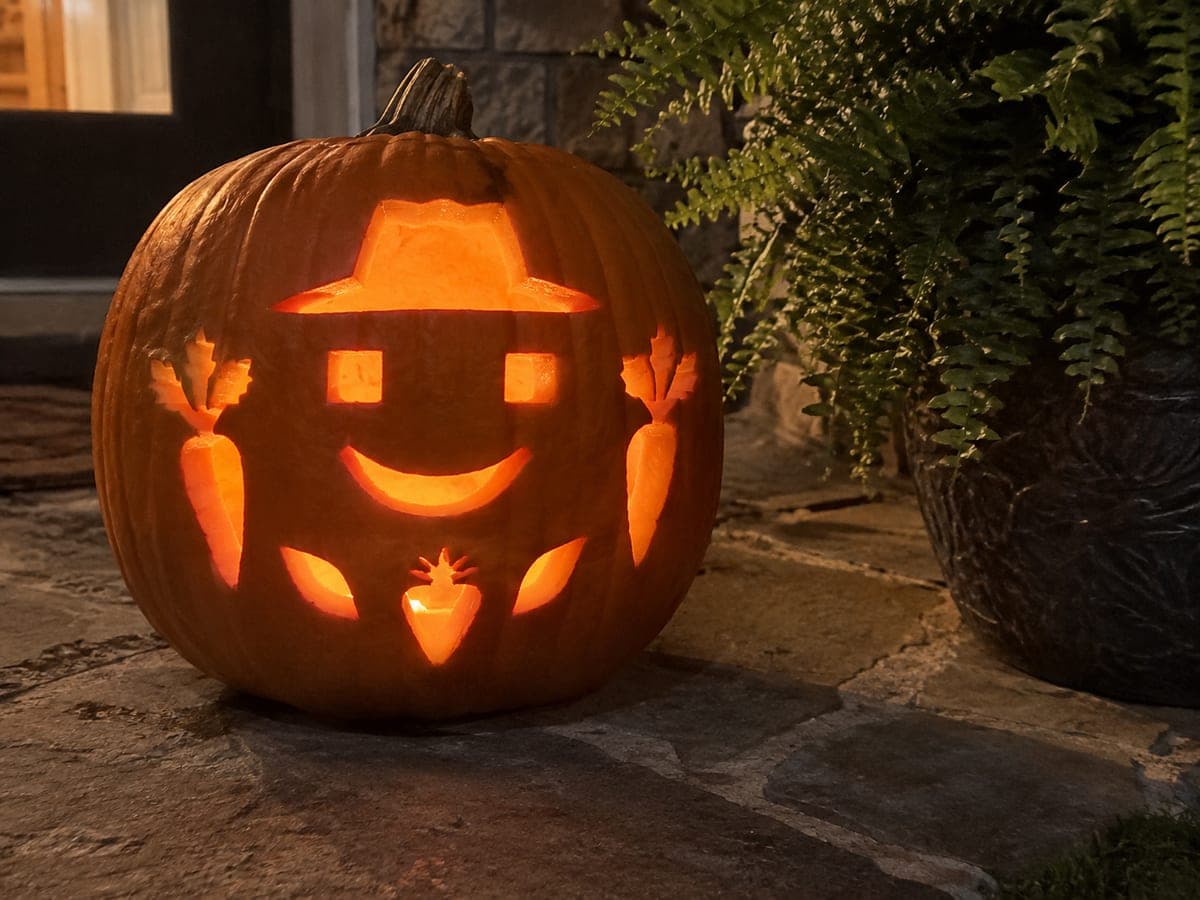
Grow a Garden Farmer PumpkinAI
0

Report this carving

Tell us what is wrong. Reports are private.

Grow a Garden Farmer Pumpkin

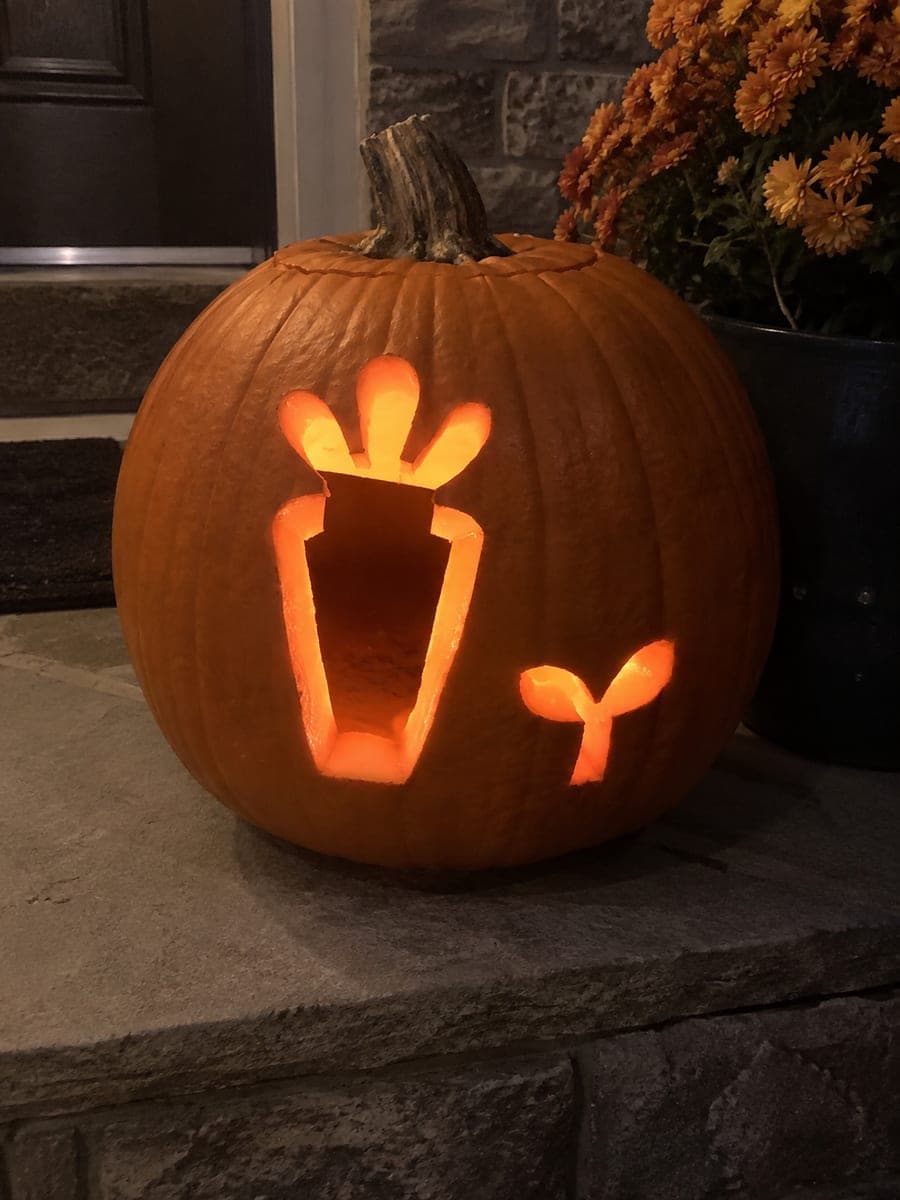
This hard grow a garden pumpkin carving opens a farmer hat, square eyes, a smile, a carrot, and leaf openings with broad intact shell between each, while the small lower berry carries shallow backed crown detail for a polished multi-element design. Work the hat opening first at the top of the pumpkin, then the face elements, and carve the carrot and leaf shapes last so you have control over the lower third. The backed berry crown catches transmitted candlelight for a subtle glowing crown detail.

No ratings yet · Sign in to rate
grow-a-gardenseasonalvideo-gamerobloxgardencutefarmer-hatcarrot

Save this design for carving night, then share a photo of your own jack-o'-lantern once it's glowing.

Roblox and all related characters, names, logos, and trademarks are the property of their respective owners. This is an unofficial fan carving shared by our community for inspiration only. PumpkinCarvingIdeas.com is not affiliated with, sponsored by, or endorsed by any rights holder or person depicted, and no such connection is implied.
Comments (0)

  • No comments yet. Be the first.

Our tips for carving a similar design

A farmer hat opening crowns the top, a square-eyed face sits in the middle, and a carrot with leaf shapes fills the lower zone, all separated by wide rind. The small lower berry adds a shallow backed crown detail that transmits light softly, providing a layered glow effect without requiring a full through-cut.

From pumpkin to porch

  1. Thin the interior carefully

    Scoop the front panel to about three-quarters of an inch, which is thin enough for the backed berry crown to glow through. Take extra care near the berry position so you thin that area evenly. Keep the walls slightly thicker in structural zones between motifs.

  2. Transfer the full layout

    Use carbon paper or a poked template to map all six elements: hat, square eyes, smile, carrot, leaf shapes, and berry. Confirm that every element has at least three-quarters of an inch of rind between it and its nearest neighbor before committing to the layout.

  3. Carve the hat opening at the top

    The hat opening sits near the rim and its upper edge may share space with the lid cut, so carve it before anything else. A straight-sided trapezoid hat brim is easier to cut cleanly than a complex silhouette. Use a straight-bladed saw for the horizontal brim line and a jab saw for the sides.

  4. Carve the face elements

    Cut the square eyes first since they anchor the face position, then open the curved smile below them. Square eyes are easier to cut than round ones because all four sides are straight cuts. Keep the smile arc broad and low for a friendly expression.

  5. Carve the carrot and leaf shapes

    Open the carrot silhouette with the fine jab saw, leaf lobes and body as one connected aperture. Cut the leaf shapes separately, using short arcs for their curves. Carving from the lower third last means the pumpkin is still firmly supported in your lap throughout the upper and middle cuts.

  6. Score the berry crown detail and light

    Use a linoleum cutter or small V-gouge to score the crown detail on the berry in shallow lines without cutting through. Brush away rind dust, then insert the LED and check all elements. The backed crown glows warmly while the cut-through apertures shine fully, creating the layered effect that makes this design stand out.

Written with AI to match this design

Gather your supplies

Check things off as you get ready.

Work on a stable surface, keep your free hand out of the cutting path, and have an adult handle sharp tools.

Three levels of light

  • Leave intact

    The wide rind bridges between all motifs and the outer rind surface stay completely dark.

  • Peel & shade

    The shallow backed berry crown lines glow dimly through the thinned rind.

  • Cut through

    The hat opening, both square eyes, the smile, carrot silhouette, and leaf shapes are cut through completely.

Learn the carving basics

Before you start cutting

How do I score the berry crown without cutting through the thin rind?

Work in shallow passes with a linoleum cutter rather than pressing in deeply at once. After each pass, check by shining a flashlight from inside the pumpkin to see if light bleeds through. Stop scoring before any bleed-through appears, since a thin glowing line reads better than an accidental through-cut.

The hat brim line needs to be perfectly horizontal. How do I mark it?

Wrap a strip of paper or masking tape horizontally around the pumpkin at the hat brim height to act as a level guide. Trace along the tape with a pencil, then remove the tape before sawing. This technique works even on pumpkins that are not perfectly round.

Can I add more vegetable motifs in the remaining rind space?

Only if the remaining rind is at least three-quarters of an inch thick and the new motif keeps the same minimum margin from all existing openings. Map any addition in pencil and verify from all angles before cutting. Overcrowding weakens the pumpkin wall and can cause sagging overnight.

Your take belongs here, too.

Changed a detail? Made it simpler? Share a photo of your version and tell the community what worked.

Share your pumpkin

Want more designs like this? Browse our full library of pumpkin carving ideas, or pick a free printable stencil. Every pattern and template in our own collection is free to print at home.

More pumpkins like this

You've reached the end · 8 pumpkins
The Patch Report

Fresh pumpkins, in your inbox.

The best new carvings, ideas worth stealing, and how-tos for carving season. Short, seasonal, and gone by November.

A short email during carving season. Unsubscribe anytime. See our privacy policy.