The 2026 contest winners are inGrand Prize, People's Choice and Most Creative, all crowned.
@ai_concepts
Sep 25, 2026
Dress to Impress Runway PumpkinAI
0

Report this carving

Tell us what is wrong. Reports are private.

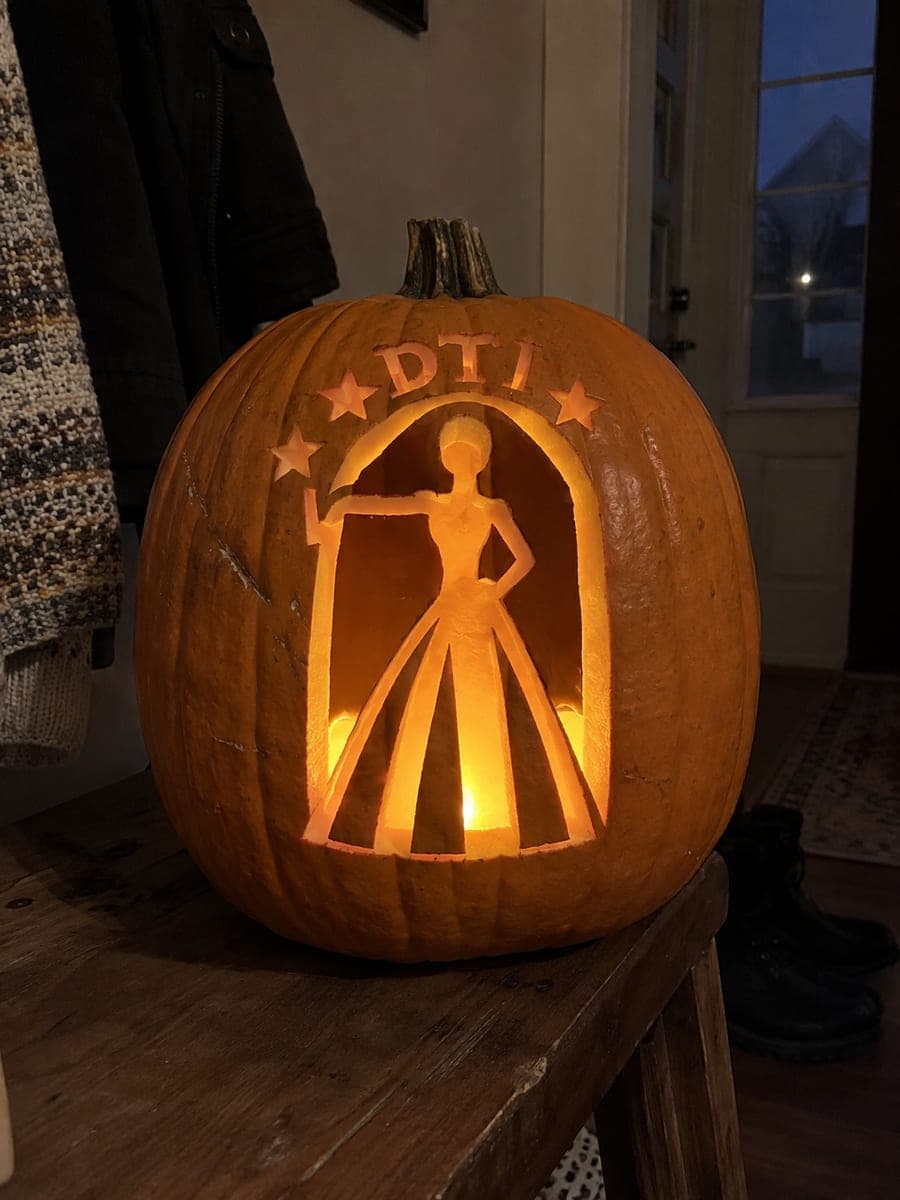
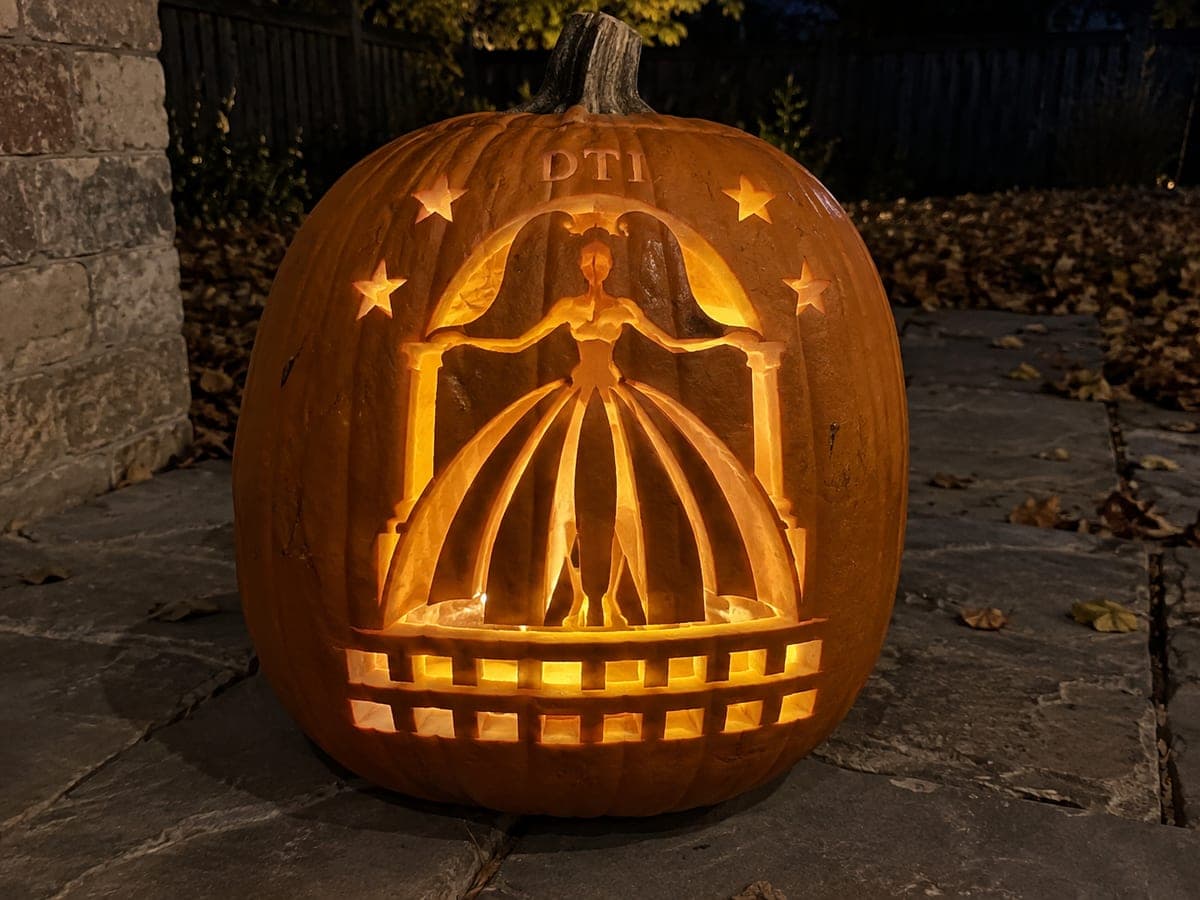
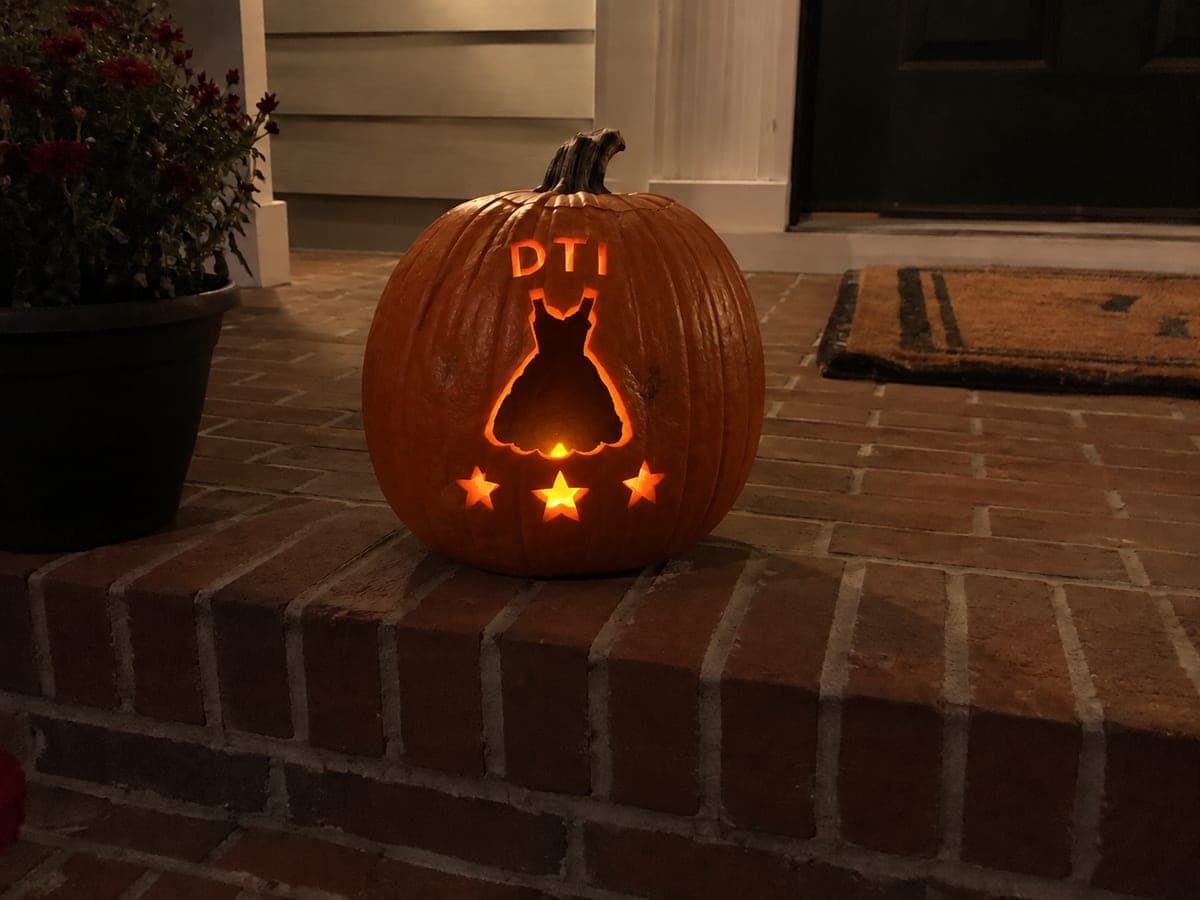
Dress to Impress Runway Pumpkin

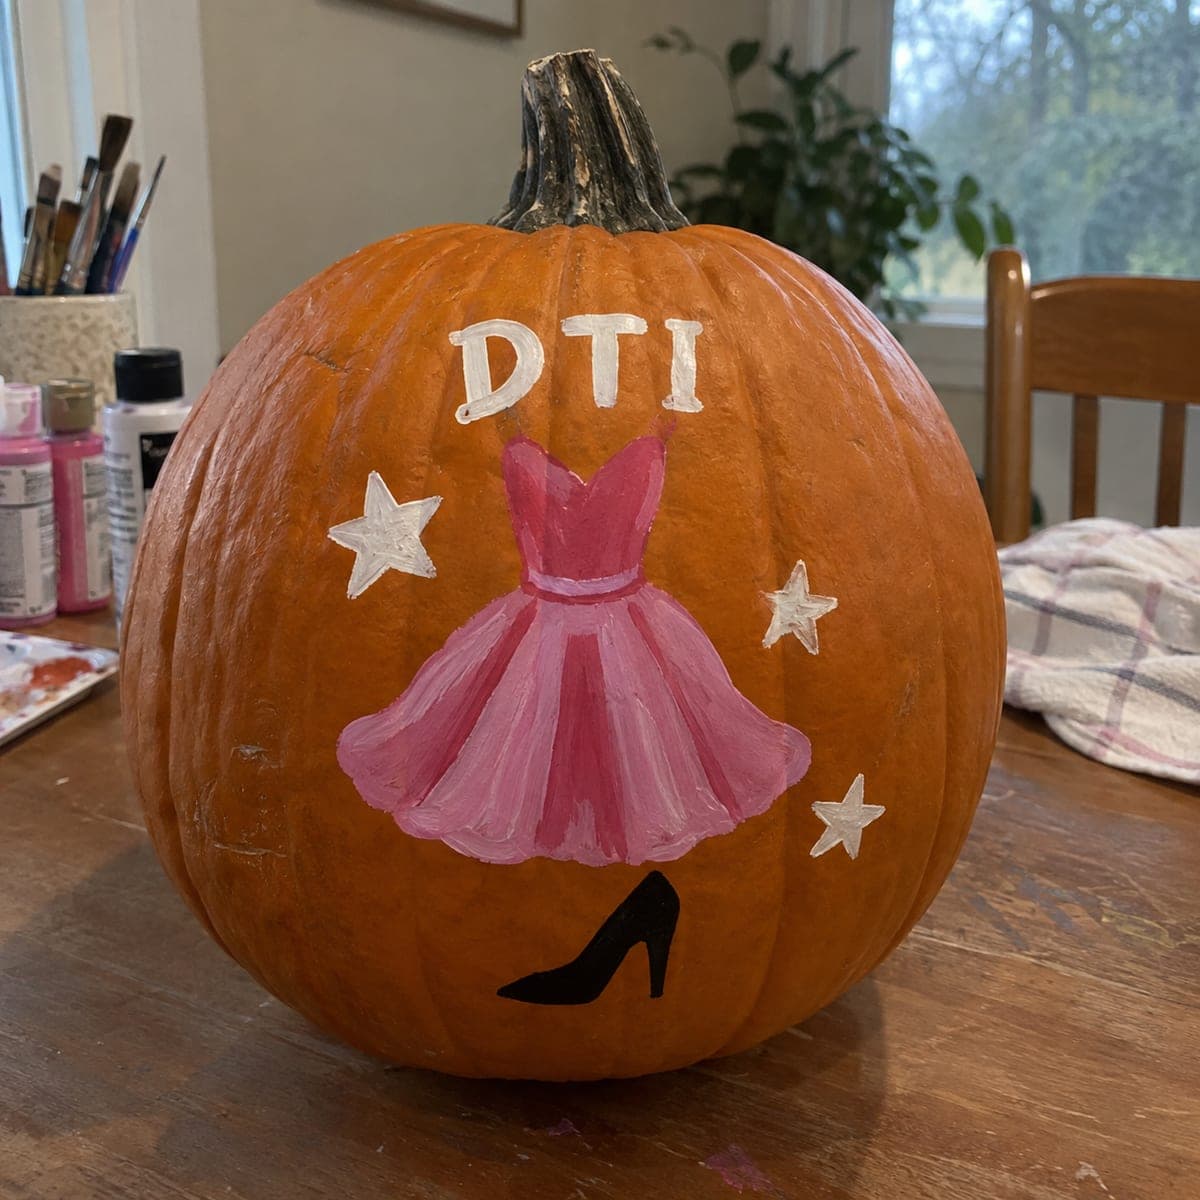
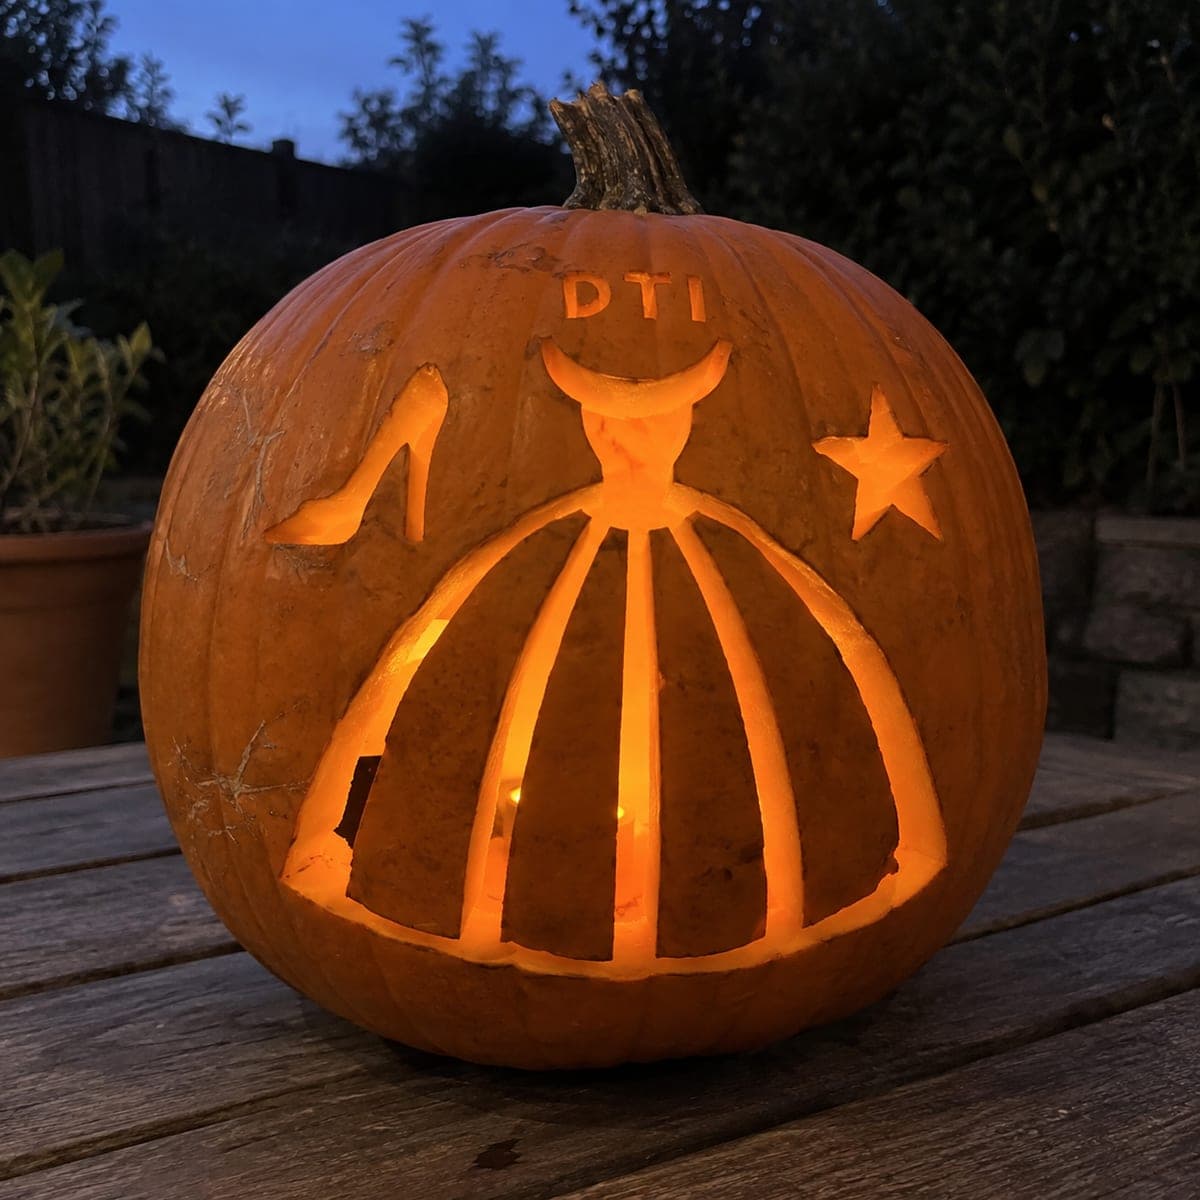
This hard Dress to Impress pumpkin carving cuts hollow arch and skirt panels fully through the natural rind while the figure stays attached at the head, left hand, and broad skirt base for stability, with lettering and stars shallow-backed into the surface. Cut the large arch opening first so you know how much rind remains before opening the skirt panels. The hollow skirt panels glow like a lit runway when a candle or LED is placed inside, making the fashion motif read clearly in the dark.

No ratings yet · Sign in to rate
HardFantasyCuteClassic Cutout
dress-to-impressfantasyvideo-gamerobloxfashioncutefigurearch

Save this design for carving night, then share a photo of your own jack-o'-lantern once it's glowing.

Roblox and all related characters, names, logos, and trademarks are the property of their respective owners. This is an unofficial fan carving shared by our community for inspiration only. PumpkinCarvingIdeas.com is not affiliated with, sponsored by, or endorsed by any rights holder or person depicted, and no such connection is implied.
Comments (0)

  • No comments yet. Be the first.

Our tips for carving a similar design

The hollow arch opening and the open skirt panels are the two primary light sources in this design, with the figure kept attached at the head, left hand, and a broad skirt base for structural stability. Cutting the large arch opening first tells you exactly how much rind remains before you commit to the skirt panels, which is the critical sequencing decision for this design. When lit from inside, the hollow skirt panels glow like a runway in a dark room.

From pumpkin to porch

  1. Prepare and map the pumpkin

    Cut the lid from the back and scoop walls to 2 cm. Mark the positions of the arch boundary, skirt panel edges, figure outline, and the three attachment points (head, left hand, broad skirt base) in pencil before transferring your stencil. A clear pre-map prevents confusion once your stencil paper is removed.

  2. Transfer your complete stencil

    Pin-transfer all elements, including the arch outer frame, figure silhouette, skirt panel positions, lettering, and star positions. Mark the three attachment points in bright pencil so they are visible throughout the cutting process.

  3. Cut the arch opening first

    Carve the large arch aperture as the first cut, removing the background rind inside the arch boundary. The arch opening will immediately show you how the interior light quality looks and confirms how much structural rind you have left for the figure and skirt panels. Work from the top of the arch down both sides to the base.

  4. Open the hollow skirt panels

    Cut each skirt panel as a through-cut, working from the panel edges inward and leaving the broad skirt base intact. Keep the base attachment at least 3 cm wide. The panels will glow through the same interior light source as the arch, but the skirt rind surrounding each panel will frame them as separate runway-light units.

  5. Confirm figure attachments and add shallow details

    Verify the head, left hand, and skirt base connections are all still solidly intact. Shallow-etch the title lettering and star accents into the rind around the figure using a gouge. Adults handle all cutting throughout. Do not cut any rind within 2 cm of any marked attachment point.

  6. Light and display in a dim room

    Place a candle-flame LED inside the pumpkin. In a dim or dark room, the hollow arch and skirt panels create two distinct light zones that read clearly as a runway from several meters away. The shallow-etched details glow softly at the periphery.

Written with AI to match this design

Gather your supplies

Check things off as you get ready.

Work on a stable surface, keep your free hand out of the cutting path, and have an adult handle sharp tools.

Three levels of light

  • Leave intact

    The figure body, arch frame rind, and skirt base attachment stay fully dark.

  • Peel & shade

    Title lettering and star accents are shallow-etched for soft secondary glow.

  • Cut through

    The large hollow arch aperture and all hollow skirt panel openings are cut fully through.

Learn the carving basics

Before you start cutting

Why cut the arch before the skirt panels rather than the other way around?

The arch is the largest opening and removing it first gives you a clear view of how much structural rind surrounds the figure. If the pumpkin walls are slightly thinner than expected, you can adjust the skirt panel sizes before you cut them. Starting with the skirt panels and then trying to cut the arch risks over-committing to the upper composition prematurely.

How wide should the broad skirt base attachment be?

At least 3 cm of solid uncut rind connecting the skirt hem to the lower pumpkin rind. This connection carries the weight of the entire figure section, so it is the most critical structural element in the design. Do not thin or etch this area.

Can I add a second color LED inside to change the skirt panel color?

Yes. A colored LED placed directly below the skirt area and a second warm LED higher up for the arch creates two distinct color zones. Red, pink, or violet LEDs in the lower position give the skirt panels a particularly striking runway quality.

Your take belongs here, too.

Changed a detail? Made it simpler? Share a photo of your version and tell the community what worked.

Share your pumpkin

Want more designs like this? Browse our full library of pumpkin carving ideas, or pick a free printable stencil. Every pattern and template in our own collection is free to print at home.

More pumpkins like this

You've reached the end · 8 pumpkins
The Patch Report

Fresh pumpkins, in your inbox.

The best new carvings, ideas worth stealing, and how-tos for carving season. Short, seasonal, and gone by November.

A short email during carving season. Unsubscribe anytime. See our privacy policy.