The 2026 contest winners are inGrand Prize, People's Choice and Most Creative, all crowned.
@ai_concepts
Sep 25, 2026
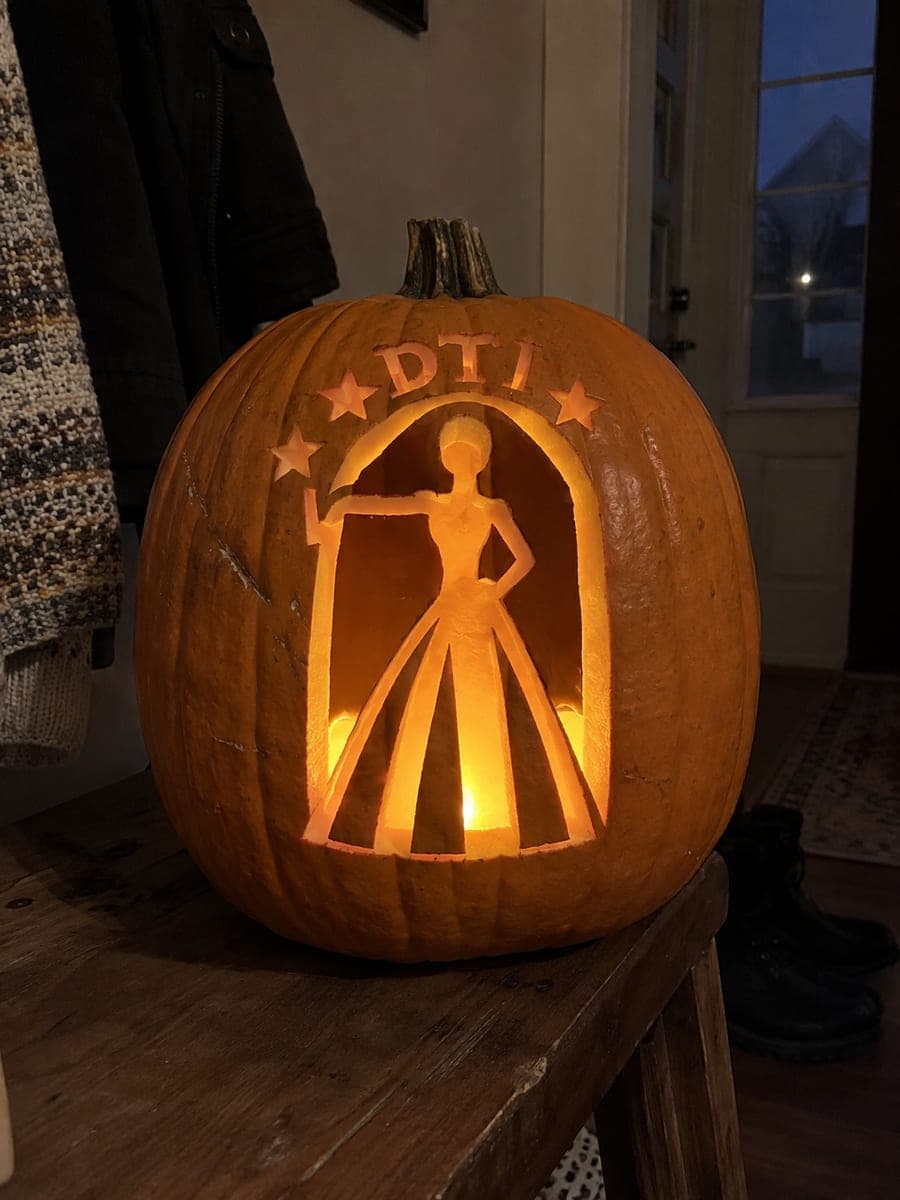
Dress to Impress Pleated Skirt PumpkinAI
0

Report this carving

Tell us what is wrong. Reports are private.

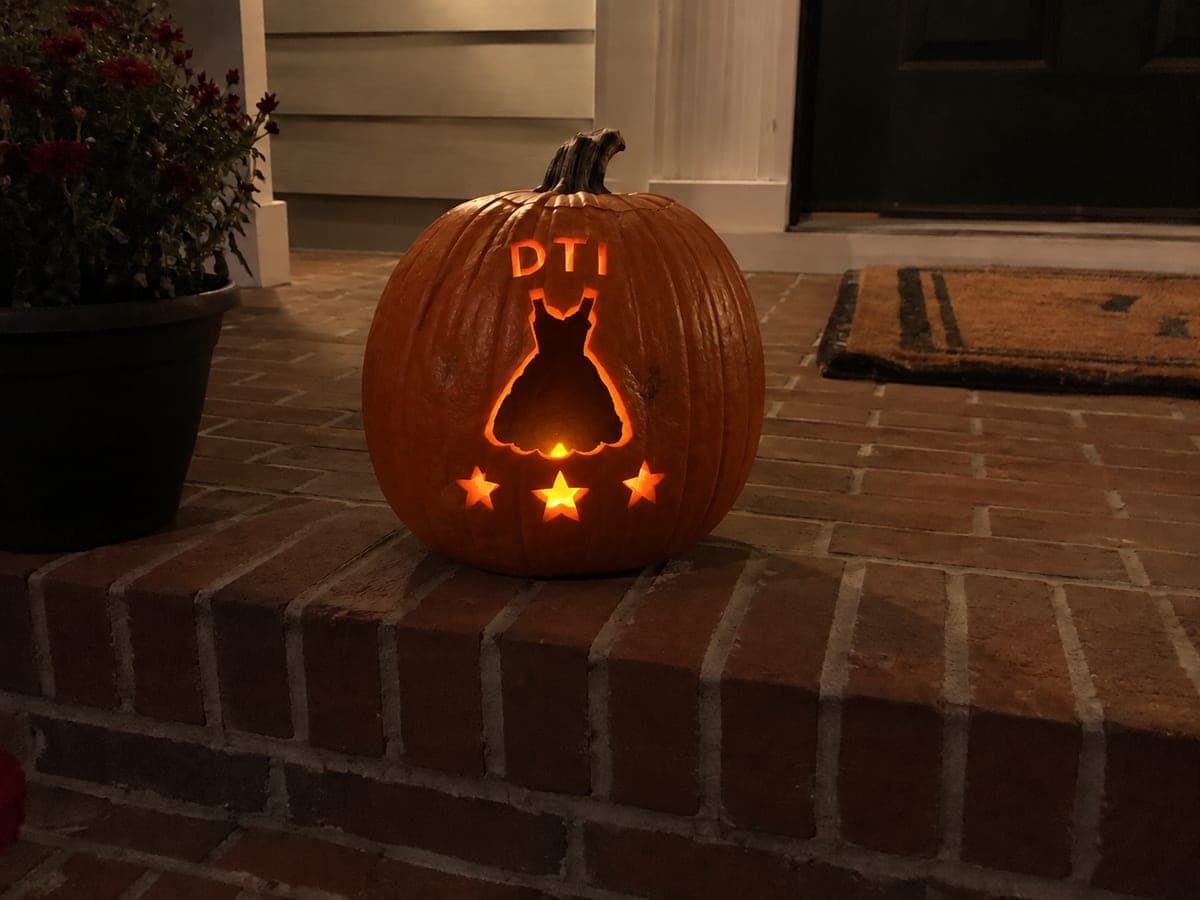
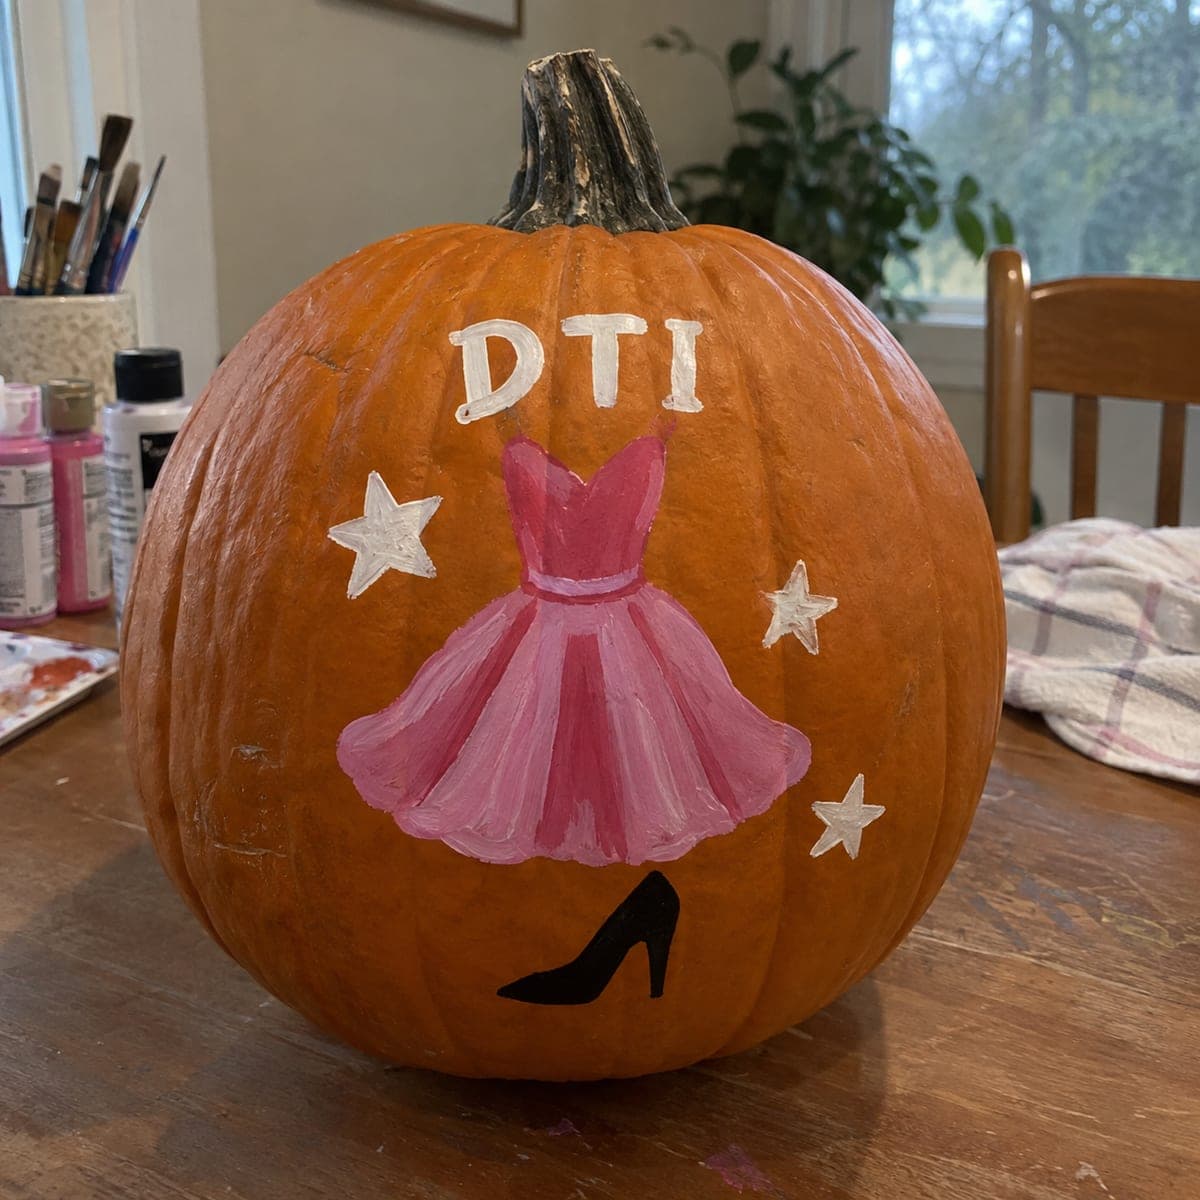
Dress to Impress Pleated Skirt Pumpkin

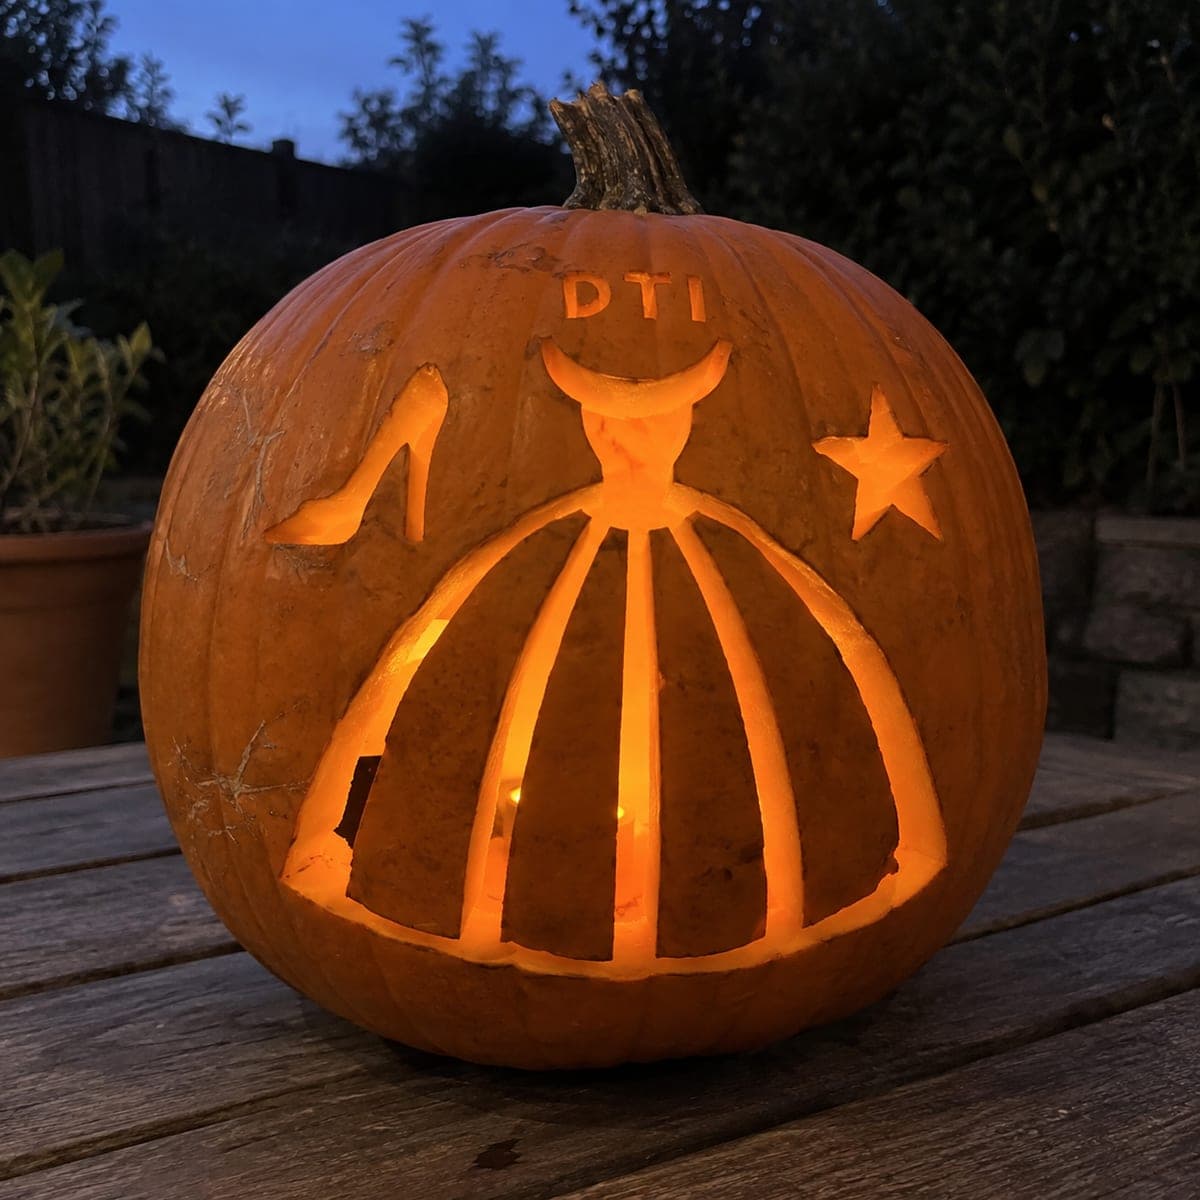
The intermediate dress to impress pumpkin carving opens skirt channels between broad retained pleat panels that root at the waist, with a neckline, heel detail, star, and lettering carried as shallow backed elements on the natural rind. Carve alternating pleat channels from the hem upward, leaving every other panel full-depth to maintain structural integrity. Displaying on a natural wood surface lets the unbleached rind's warm tone complement the fashion-forward subject.

No ratings yet · Sign in to rate
dress-to-impressfantasyvideo-gamerobloxfashioncutepleatskirt-channel

Save this design for carving night, then share a photo of your own jack-o'-lantern once it's glowing.

Roblox and all related characters, names, logos, and trademarks are the property of their respective owners. This is an unofficial fan carving shared by our community for inspiration only. PumpkinCarvingIdeas.com is not affiliated with, sponsored by, or endorsed by any rights holder or person depicted, and no such connection is implied.
Comments (0)

  • No comments yet. Be the first.

Our tips for carving a similar design

Open skirt channels alternate with broad retained pleat panels that all root at the waist, creating a pleated skirt that glows between each panel. Neckline, heel, star, and lettering details are carried as shallow-backed elements on the natural rind surface so the design has depth at multiple light levels. Carving alternate pleat channels from the hem upward, leaving every second panel at full depth, is the key structural move that prevents the skirt section from collapsing.

From pumpkin to porch

  1. Prepare a medium tall pumpkin

    Choose a pumpkin that is slightly taller than wide so the pleated skirt section has enough vertical space. Cut the lid from the back, scoop to a consistent 2 cm wall, and verify the lower half of the carving face is smooth where the skirt channels will be cut.

  2. Transfer your stencil

    Pin-transfer the full design including the pleat panel positions, neckline outline, heel detail, star position, and lettering. Mark the waist root line clearly so you know where each pleat panel must remain attached. Number the pleat panels left to right so you always know which is a cut channel and which is a retained panel.

  3. Etch the neckline and upper bodice details

    Use a small gouge to shallow-etch the neckline boundary and any upper bodice detail. Work these first while the rind is at full strength, since starting with the upper shallow work means you are handling a stable pumpkin when the detail requirements are highest.

  4. Carve alternating pleat channels from the hem

    Starting at the hem end of the first pleat channel, cut upward toward the waist root, stopping about 2 cm short of the root line. Repeat on every other channel, leaving the retained panels intact between each cut channel. Adults handle all cutting. Check that no retained panel has been accidentally cut before moving to the next channel.

  5. Add the heel and star accents

    Use a detail knife to shallow-etch the heel shape on the lower rind and the star shape in the sky area. These accents glow at the same soft level as the neckline, creating a consistent secondary glow around the main pleat channels.

  6. Etch the lettering and display on natural wood

    Shallow-etch the title lettering into the rind with a gouge. Place a warm LED inside and set the pumpkin on a natural wood surface, which complements the fashion-forward design with a warm earthy base. The alternating glow and shadow of the pleat channels is strongest when the room is otherwise dim.

Written with AI to match this design

Gather your supplies

Check things off as you get ready.

Work on a stable surface, keep your free hand out of the cutting path, and have an adult handle sharp tools.

Three levels of light

  • Leave intact

    The retained pleat panels, waist band rind, and surrounding body rind stay fully dark.

  • Peel & shade

    Neckline, heel detail, star accent, and lettering are all shallow-etched for a soft secondary glow.

  • Cut through

    Alternating skirt channels are cut fully through from hem to waist for bright interior light.

Learn the carving basics

Before you start cutting

How do I keep all the pleat channels the same width when cutting them?

Your stencil lines guide the channel width, but after your stencil is removed, use a ruler to spot-check that each retained panel is the same width before you start cutting. Adjusting a pencil line costs nothing; adjusting a cut costs rind.

What happens if I accidentally cut through a retained pleat panel?

If the cut is shallow, fill it with a small amount of pumpkin flesh pressed from behind and let it sit; in cool conditions it can adhere temporarily. If the panel is cut through completely and separates, you now have two adjacent open channels instead of one. The design still works visually, but apply a thin craft glue bridge behind the cut to stabilize the panel edges.

Does the waist root need to be a continuous line or can it be broken?

The waist root should be a continuous horizontal band of uncut rind at least 1.5 cm tall where it connects to the bodice area. Each pleat channel terminates at this band. If even one channel cuts through the waist band entirely, the pleat panel above and below it loses its anchor.

Your take belongs here, too.

Changed a detail? Made it simpler? Share a photo of your version and tell the community what worked.

Share your pumpkin

Want more designs like this? Browse our full library of pumpkin carving ideas, or pick a free printable stencil. Every pattern and template in our own collection is free to print at home.

More pumpkins like this

You've reached the end · 8 pumpkins
The Patch Report

Fresh pumpkins, in your inbox.

The best new carvings, ideas worth stealing, and how-tos for carving season. Short, seasonal, and gone by November.

A short email during carving season. Unsubscribe anytime. See our privacy policy.