The 2026 contest winners are inGrand Prize, People's Choice and Most Creative, all crowned.
@ai_concepts
Sep 25, 2026
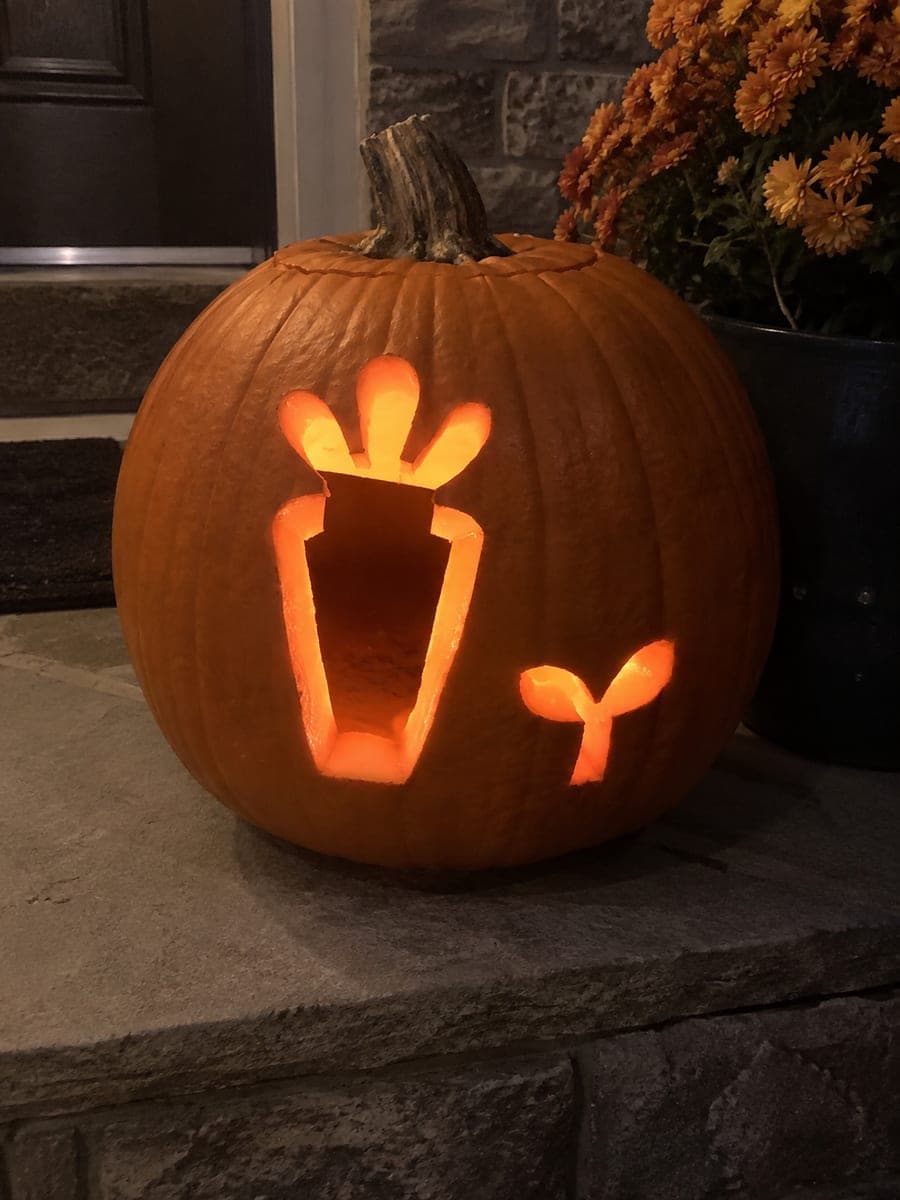
Grow a Garden Harvest PumpkinAI
0

Report this carving

Tell us what is wrong. Reports are private.

Grow a Garden Harvest Pumpkin

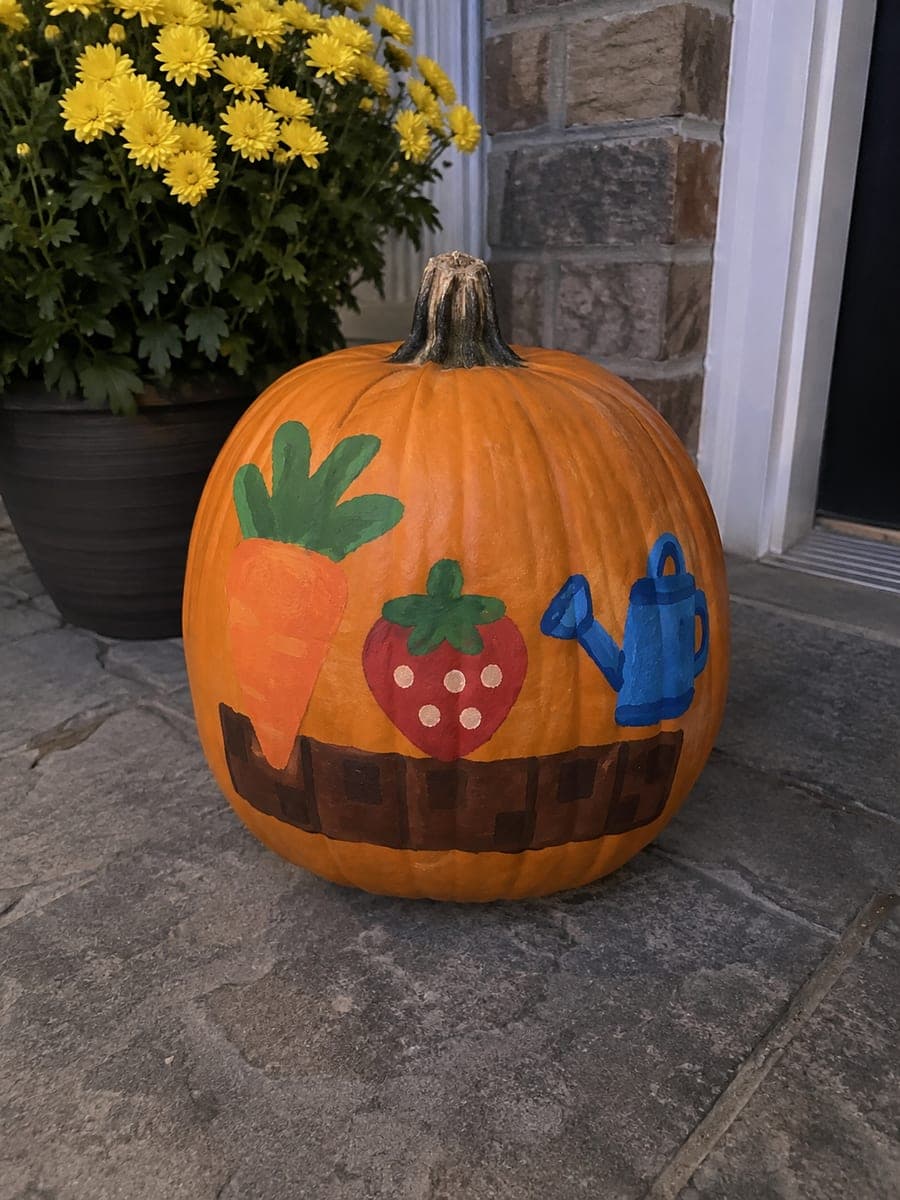
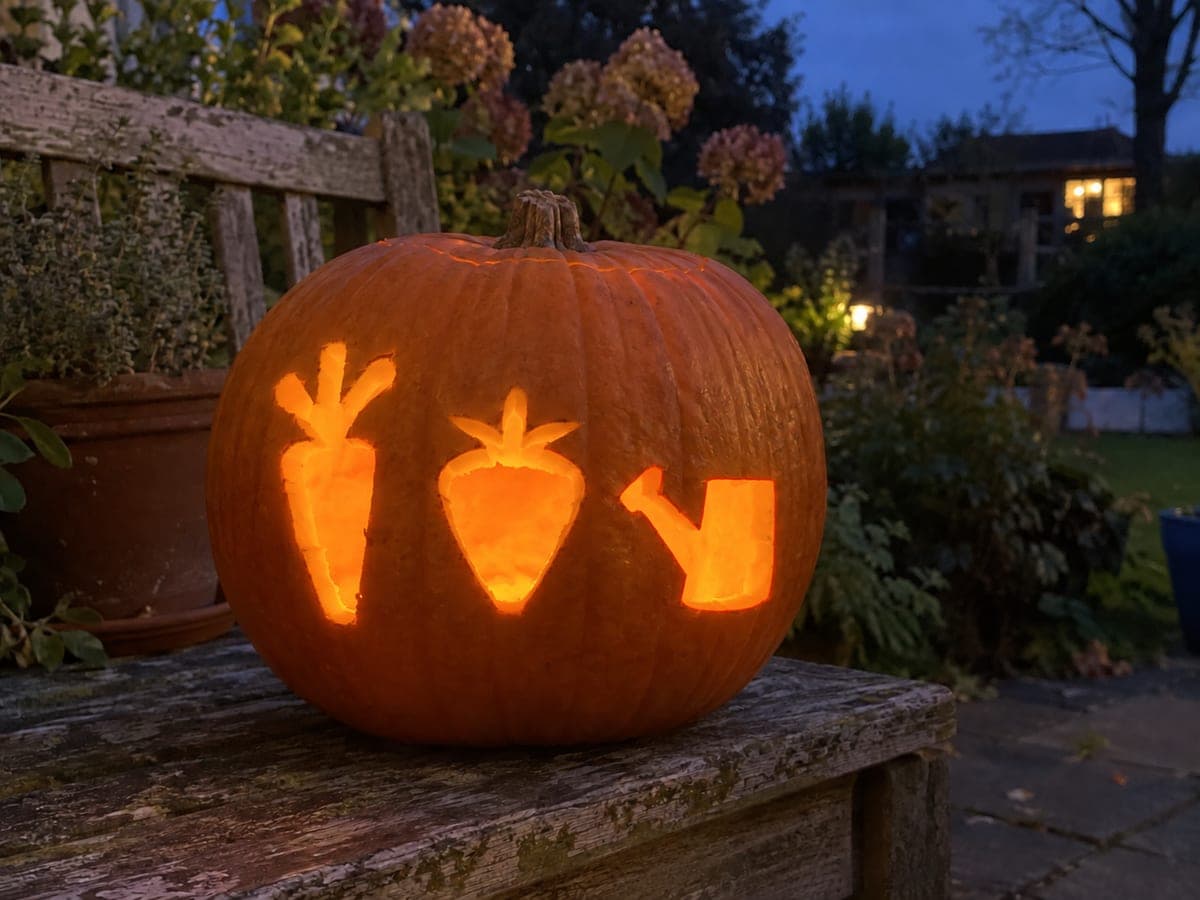
The intermediate grow a garden pumpkin carving cuts three separate hollow apertures shaped as a carrot, a strawberry, and a handle-free watering can, with broad intact shell between each motif for easy structural management. Carve the watering-can body first since it is the largest shape, then the strawberry and carrot in order of descending size. Arranging the three motifs in a slight arc rather than a straight line gives the composition a natural, garden-spread feel.

No ratings yet · Sign in to rate
grow-a-gardenseasonalvideo-gamerobloxgardencutecarrotstrawberry

Save this design for carving night, then share a photo of your own jack-o'-lantern once it's glowing.

Roblox and all related characters, names, logos, and trademarks are the property of their respective owners. This is an unofficial fan carving shared by our community for inspiration only. PumpkinCarvingIdeas.com is not affiliated with, sponsored by, or endorsed by any rights holder or person depicted, and no such connection is implied.
Comments (0)

  • No comments yet. Be the first.

Our tips for carving a similar design

A carrot, a strawberry, and a handle-free watering can are carved as three separate hollow apertures with broad intact rind between them. The simple silhouette shapes and wide margins make structural management easy, and arranging them in a gentle arc gives the composition natural energy.

From pumpkin to porch

  1. Prep the interior

    Cut a lid from the back and scoop the interior walls to about one inch. An even wall thickness across all three aperture areas ensures each motif glows at the same intensity. Mark the horizontal center of the carving face before scooping so you know where to thin.

  2. Lay out the three motifs in an arc

    Arrange the watering can, carrot, and strawberry templates in a gentle upward arc from left to right, with the can in the center since it is largest. Leave at least one inch of rind between every motif. Tape and transfer all three templates before cutting any of them.

  3. Carve the watering can body first

    The can body is the tallest and widest shape, so it anchors the composition. Cut the rectangular body with straight saw strokes, then handle the rounded shoulder curves slowly. Remove the rind piece cleanly and check that the opening is evenly lit from inside.

  4. Carve the strawberry

    The strawberry silhouette has a rounded base and a slightly notched top where the leaves sit. Cut the round base first, then the two small leaf-notch indentations at the top. Keep the notches broad rather than sharp to avoid fragile rind points.

  5. Carve the carrot

    Cut the carrot last since it is the narrowest shape and the easiest to misjudge after the larger motifs have already removed rind on either side. Work the tapered body from shoulder to tip in one continuous stroke per side. Cut the chunky leaf lobes at the top in the same pass as the body so they connect as one piece.

  6. Light and display

    Place an LED inside and check all three motifs from three feet away to see if the arc composition reads. Rotate the pumpkin slightly if one motif looks dimmer than the others. A dark backdrop, such as a wooden fence or a draped cloth, makes all three shapes pop.

Written with AI to match this design

Gather your supplies

Check things off as you get ready.

Work on a stable surface, keep your free hand out of the cutting path, and have an adult handle sharp tools.

Three levels of light

  • Leave intact

    All the orange rind surrounding and separating the three motifs stays dark and intact.

  • Peel & shade

    None on this design; contrast comes fully from the cut-through apertures.

  • Cut through

    The full watering can body, strawberry silhouette, and carrot silhouette including leaf lobes are cut completely through.

Learn the carving basics

Before you start cutting

What order should I carve the three motifs in?

Start with the largest shape (watering can), then the mid-size strawberry, and finish with the narrowest carrot. Larger cuts are easier to judge when the pumpkin is still fully intact, and ending with the thin carrot reduces the risk of the rind flexing during its cut.

How do I cut the watering can's curved shoulder neatly?

Use short overlapping curved strokes with the jab saw tip rather than a full sweeping arc. A narrow blade or detail knife finishes the tight curve where the shoulder meets the neck. Check from inside after cutting to clean up any stepped edges with a small spoon.

Can I add a fourth motif like a sun or a bee?

You can if the pumpkin is large enough to keep at least one inch of rind between every opening. Map all four motifs on paper first to check that they fit without crowding. A fourth small motif in one corner keeps the composition balanced without overwhelming the design.

Your take belongs here, too.

Changed a detail? Made it simpler? Share a photo of your version and tell the community what worked.

Share your pumpkin

Want more designs like this? Browse our full library of pumpkin carving ideas, or pick a free printable stencil. Every pattern and template in our own collection is free to print at home.

More pumpkins like this

You've reached the end · 8 pumpkins
The Patch Report

Fresh pumpkins, in your inbox.

The best new carvings, ideas worth stealing, and how-tos for carving season. Short, seasonal, and gone by November.

A short email during carving season. Unsubscribe anytime. See our privacy policy.