Halloween Pumpkin Carving Contest · Starts October 1st · $500 in prizes
← Back to ideas
@ai_concepts
Aug 10, 2026
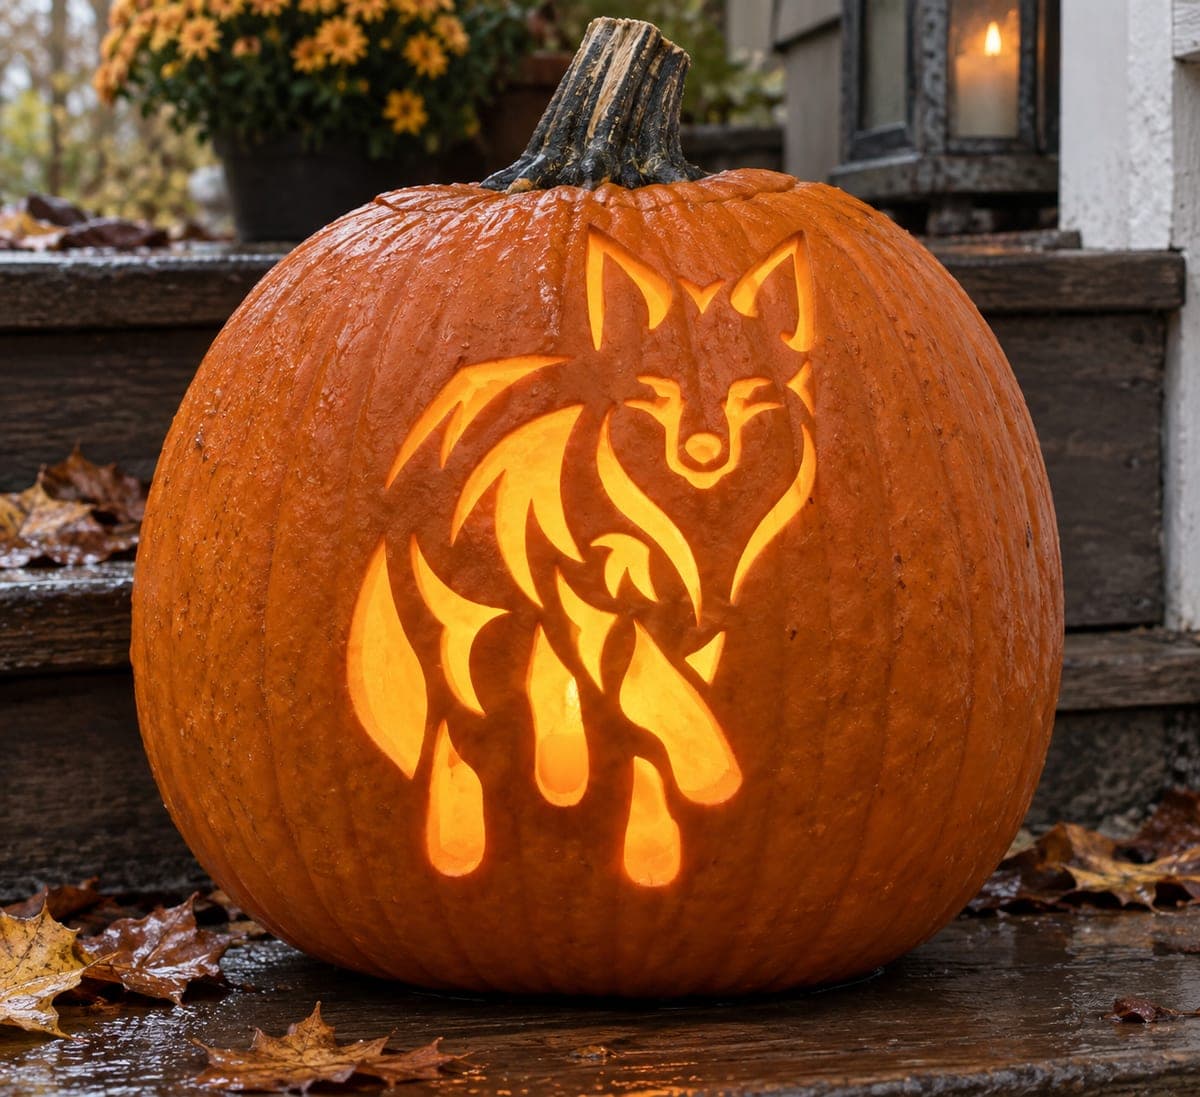
Howling Wolf Cutout Pumpkin for the Front PorchAI
0

Howling Wolf Cutout Pumpkin for the Front Porch

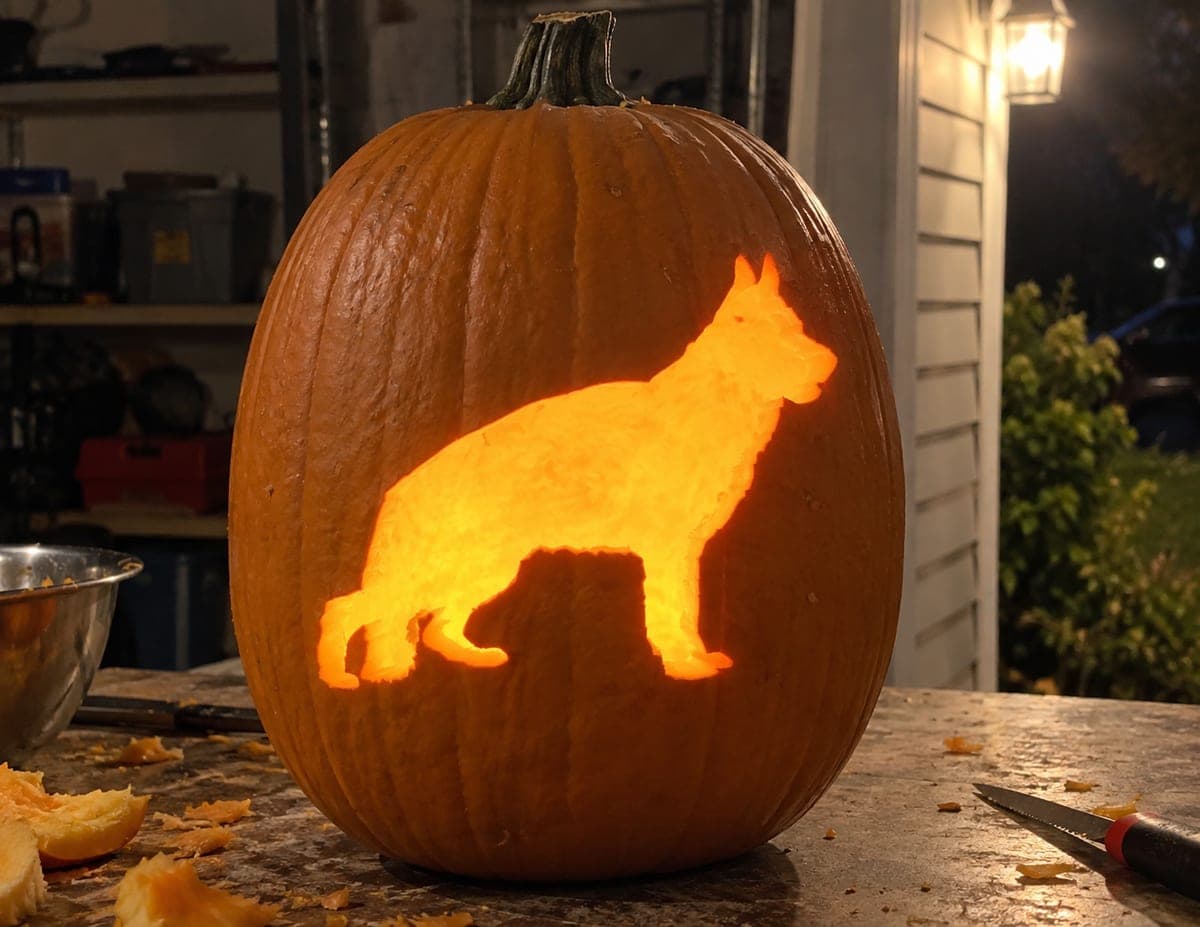
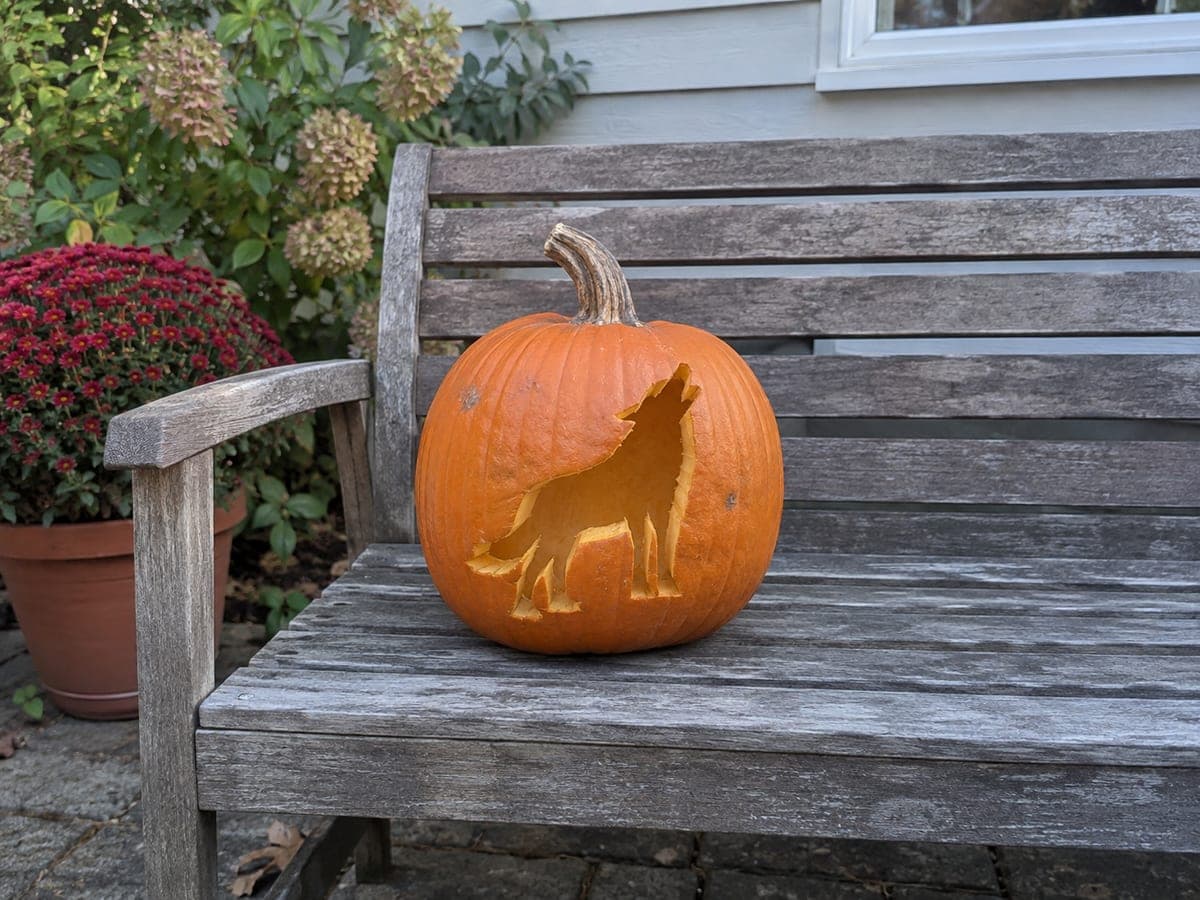
A howling wolf stands in profile, cut cleanly through the pumpkin wall so the shape glows from within after dark. The whole design is one connected opening, which makes it a forgiving pumpkin carving idea for beginners. Tape a printed wolf outline to the pumpkin, poke transfer holes along the edge, then saw slowly around the legs and muzzle where the shape narrows.

This is an AI-generated concept image: a realistic, carvable design idea rather than a photo of a finished carve. AI concepts are always labeled and sit out the leaderboard and the contest.

No ratings yet · Sign in to rate
Comments (0)

  • No comments yet — be the first.

Save without an account. Sign in to like or comment.

Our tips for carving a similar design

The whole design is one connected silhouette cut cleanly through the pumpkin wall, so light pours out in the exact shape of a howling wolf. Because everything stays joined into a single opening, there are no fragile floating pieces to snap, which makes it a forgiving project. The main challenge is steady sawing around the narrow legs and the raised muzzle, so slow, patient cuts do most of the work here.

Written by PumpkinCarvingIdeas.com, inspired by the image above. These are our suggestions, not instructions from the uploader. This approach to the AI concept has not been tested on a real pumpkin.

From pumpkin to porch

  1. Pick and prep the pumpkin

    Choose a pumpkin with a smooth, fairly flat front panel so the wolf reads clearly from across the yard. Cut a lid from the back rather than the top so the front stays uninterrupted, then scoop out the seeds and pulp. Thin the inside wall behind the design to about one inch using a scraper or large spoon. A thinner wall is much easier to saw through cleanly.

  2. Transfer the wolf outline

    Print a howling wolf profile sized to fill the middle of the front. Tape it flat, snipping small darts in the paper so it hugs the curve without wrinkling. Poke transfer holes closely along the entire outline with a pin or awl, spacing them tighter around the legs and muzzle. Peel the paper and connect the dots with a washable marker so you can see one continuous line.

  3. Saw the tight spots first

    Start with the narrowest areas, the legs, the pointed muzzle, and the raised nose. Use a fine detail saw and let the blade do the cutting with light, steady pressure so you do not tear the thin sections. Keep the blade angled straight into the wall and turn the pumpkin, not the saw, as you follow curves. Rushing here is where slips happen, so take your time.

  4. Cut the long open runs

    Once the tight spots are done, saw the longer, more open edges like the back, tail, and belly line. Support the piece you are removing with your free hand so it does not drop and crack the surrounding shell. Work in short strokes and rejoin your cuts smoothly at each corner. When the last section is free, gently push the whole silhouette inward and lift it out.

  5. Clean and shape the edges

    Run your saw or a small knife back around the opening to smooth any rough spots and sharpen the points of the ears and muzzle. Bevel the inside edge slightly so more light escapes and the outline looks crisp. Wipe the cut faces and check the shape reads as a wolf from a few steps back. Small clean cuts now make a big difference in how sharp the glow looks.

  6. Light it and set it out

    Drop in a battery LED light or a short string of LEDs, never a candle, since the deep single opening throws plenty of glow. Set the pumpkin on the porch at dusk and check the silhouette from the street. Rotate the light or add a second one if the far corners look dim. A coating of petroleum jelly on the cut edges helps it last a few extra days.

Gather your supplies

Check things off as you get ready.

Work on a stable surface, keep your free hand out of the cutting path, and have an adult handle sharp tools.

Three levels of light

  • Leave intact

    The untouched orange skin around the wolf stays dark and frames the shape.

  • Peel & shade

    Optional shallow skin peeling just inside the outline can add a soft halo, though this design works fine without it.

  • Cut through

    The entire wolf silhouette is cut through, so the full shape glows brightest.

Learn the carving basics

Before you start cutting

How thin should the legs be cut without breaking?

Since the wolf is one connected opening, the legs stay attached to the body and the ground line, so they are stronger than they look. Keep each leg at least a finger-width wide and saw slowly. If a stencil shows hair-thin legs, widen them slightly on your marker line before cutting.

Where should I put the light so the whole shape glows evenly?

Because this is a tall silhouette with a raised muzzle, a single light at the bottom can leave the head dim. Set one LED low and, if needed, clip a second small light higher inside the cavity. Aim them toward the front wall so the light bounces out through the opening.

Can I carve this without a printed stencil?

Yes, a wolf profile is simple enough to sketch freehand with a washable marker if you are comfortable with the shape. Draw the raised head and open muzzle first, then the back, legs, and tail as one connected line. Step back and check the outline before you start sawing, and erase and redraw as needed.

Your take belongs here, too.

Changed a detail? Made it simpler? Share a photo of your version and tell the community what worked.

Share your pumpkin

More pumpkins like this

You've reached the end · 8 pumpkins
The Patch Report

Fresh pumpkins, in your inbox.

The best new carvings, ideas worth stealing, and how-tos for carving season. Short, seasonal, and gone by November.

A short email during carving season. Unsubscribe anytime. See our privacy policy.