Halloween Pumpkin Carving Contest · Starts October 1st · $500 in prizes
← Back to ideas
@ai_concepts
Sep 14, 2026
Simple Standing Wolf PumpkinAI
0

Simple Standing Wolf Pumpkin

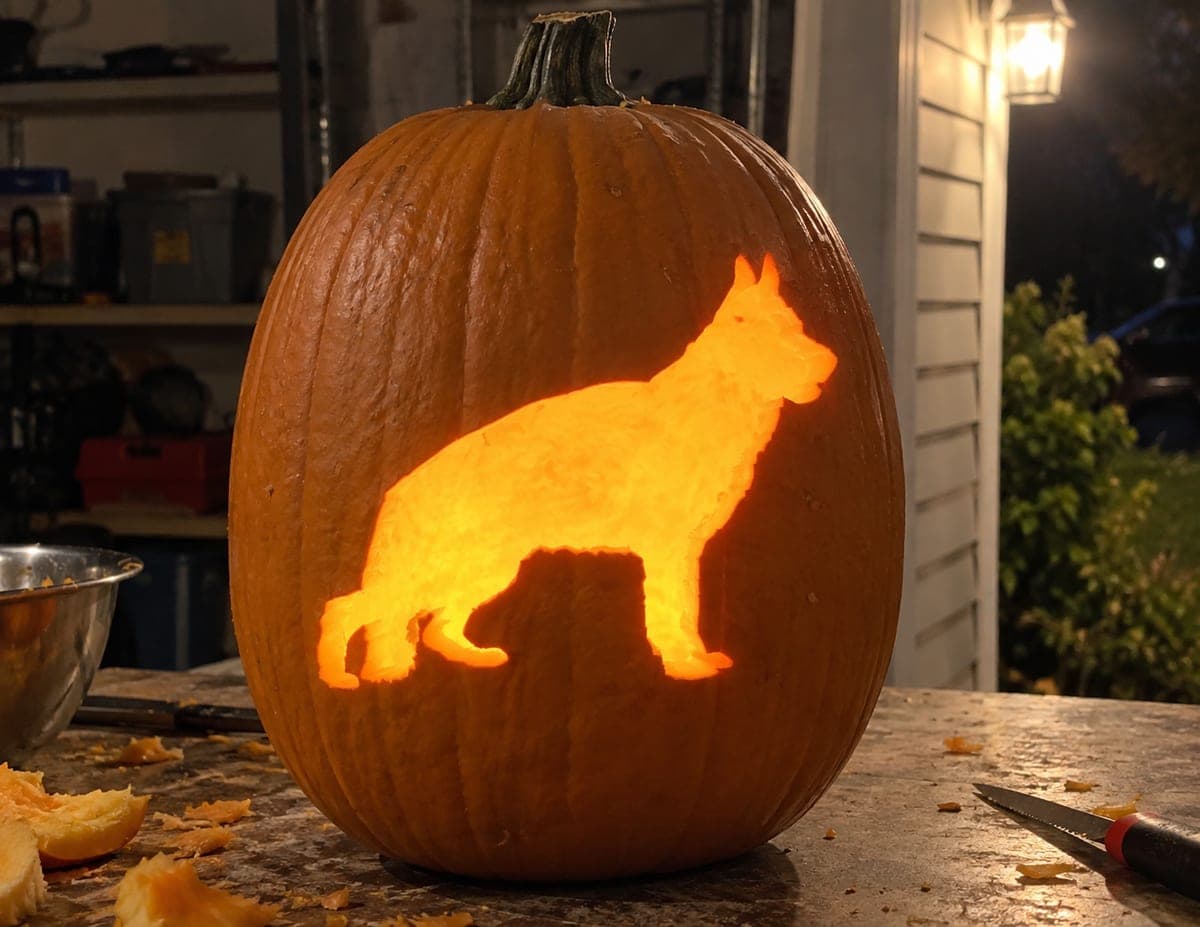
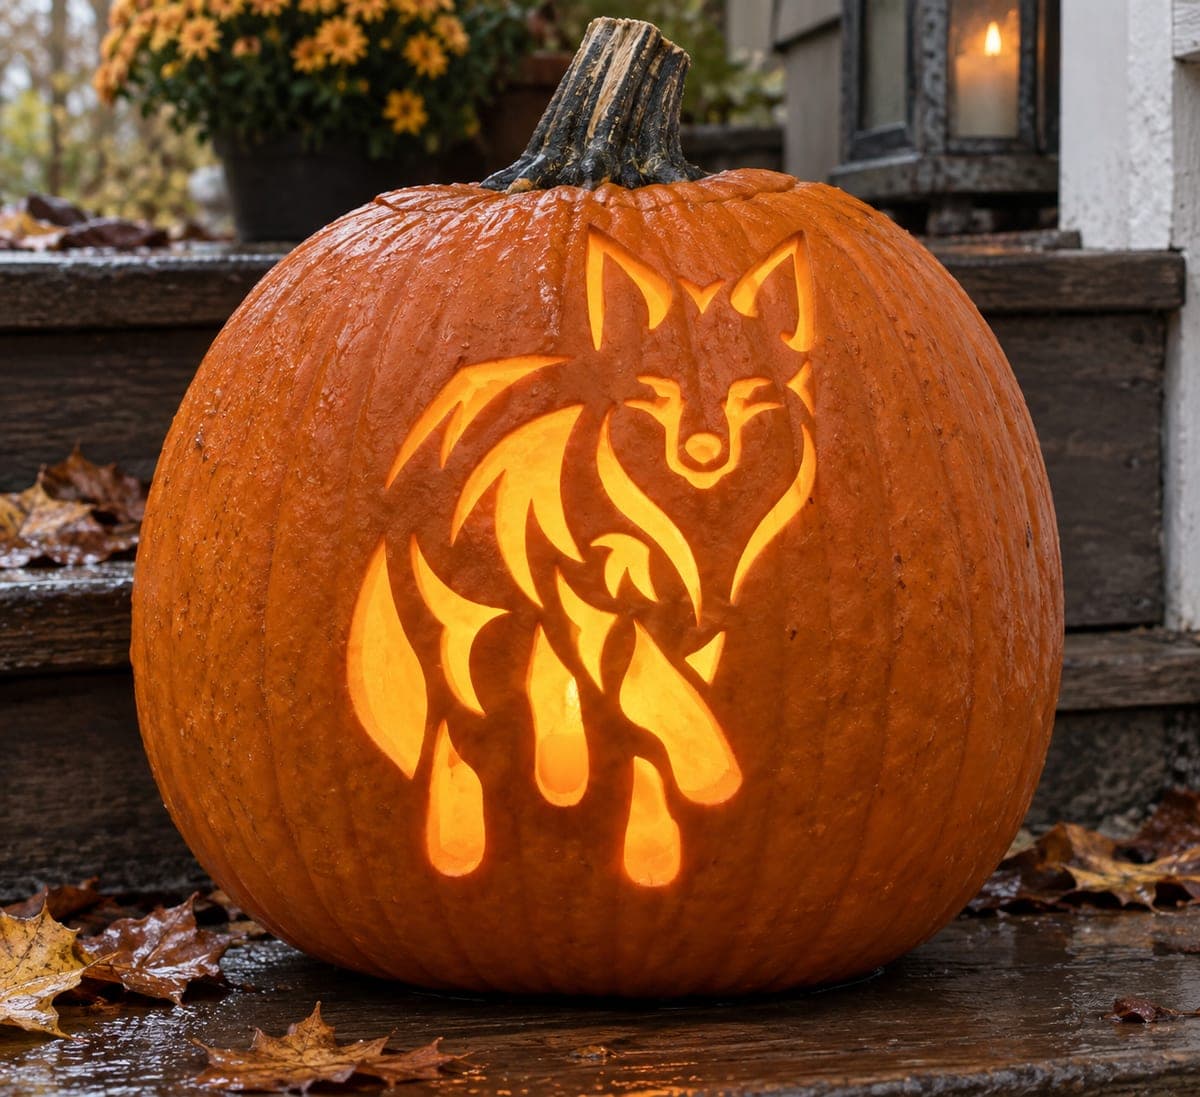
A large pointed-eared dog stands sideways in full body profile with an alert posture and a low-hanging tail, the entire shape cut through to glow as a single silhouette. The breed shown has erect triangular ears and a sloping back more consistent with a German Shepherd than a wolf. For this kind of full-body silhouette pumpkin carving idea, choose a wide smooth pumpkin face to avoid deep ribs distorting the shoulder and haunch outline.

This is an AI-generated concept image: a realistic, carvable design idea rather than a photo of a finished carve. AI concepts are always labeled and sit out the leaderboard and the contest.

No ratings yet · Sign in to rate
Comments (0)

  • No comments yet — be the first.

Save without an account. Sign in to like or comment.

Our tips for carving a similar design

The whole trick here is that the design is one connected silhouette, so all the light comes through a single cutout of a standing dog in profile. There are no interior details to fuss over, which keeps it forgiving for newer carvers. Pick a wide, smooth pumpkin face so deep ribs do not warp the shoulder and haunch lines, and let the shape do all the work.

Written by PumpkinCarvingIdeas.com, inspired by the image above. These are our suggestions, not instructions from the uploader. This approach to the AI concept has not been tested on a real pumpkin.

From pumpkin to porch

  1. Pick and prep a smooth-faced pumpkin

    Choose a large pumpkin with one broad, even side and shallow ribbing so the outline stays true. Cut a lid from the bottom or back rather than the top, which keeps the front face clean and makes it easy to set over an LED later. Scoop the inside until the carving wall is about one inch thick. A thinner wall on the design side cuts more easily and glows brighter.

  2. Size and transfer the stencil

    Print the standing dog profile so it fills most of the flat face without crowding the edges. Tape it snugly and poke a dotted outline through the paper with a pin or a poking tool, following the ears, back, legs, and hanging tail. Space the dots close together around the pointed ears and paws so those slim areas stay accurate. Peel the paper and connect the dots by eye if any gaps look unclear.

  3. Start the cut at the simple edges

    Use a small serrated pumpkin saw and begin along the long, gentle lines like the back and belly. Keep the blade straight in and out, letting the saw do the work instead of forcing it. Saw slowly through the tight curves at the ears and between the front and back legs. Adults should handle all the sharp tools, and always cut away from your holding hand.

  4. Free the silhouette last

    Save the largest inner sections of pumpkin flesh for the final cuts so the wall stays supported while you work. Once the outline is fully traced, gently push the piece inward or out and ease it free. If the tips of the ears feel fragile, cut those with extra care and support them from behind with a finger. Clean up any ragged edges with the tip of the saw for a crisp profile.

  5. Bevel the edges for a brighter glow

    Angle your saw slightly so the cut edge is wider on the inside than the outside. This lets more light spill through the opening and makes the silhouette pop. Run a finger around the inside rim to smooth stray bits. Wipe the face clean of pulp so no strings hang into the light.

  6. Light it and photograph

    Set a battery LED puck or string inside, never a candle, since the single big opening loves a strong steady light. Place it low and slightly behind so the whole body lights evenly from ears to paws. Test it in a dark spot and rotate the light until the outline reads sharply. Snap your photo at dusk when the porch is dim but the sky still holds a little color.

Gather your supplies

Check things off as you get ready.

Work on a stable surface, keep your free hand out of the cutting path, and have an adult handle sharp tools.

Three levels of light

  • Leave intact

    The entire outer pumpkin skin stays untouched and dark, framing the shape.

  • Peel & shade

    Optionally shave a thin halo just outside the outline for a soft dim glow around the dog.

  • Cut through

    The full body of the standing dog is cut clean through for the brightest single silhouette.

Learn the carving basics

Before you start cutting

Should I cut from the top or somewhere else?

For a full-body silhouette, cut your access hole in the bottom or the back instead of the top. This keeps the front face uninterrupted so the outline stays clean. It also lets you set the lit pumpkin down over the LED like a cap.

How do I keep the pointed ears from breaking?

The ears are the thinnest part of this design, so poke your guide dots close together there and cut slowly. Support the ear tips from behind with a finger as you free the piece. Since the ears are part of the solid connected outline, they stay attached to the pumpkin wall and hold up well.

My pumpkin has deep ribs, will that ruin the shape?

Deep ribs can distort the shoulder and haunch lines and make the dog look lumpy. Try to choose a pumpkin with a wide, smooth panel on one side. If you already have a ribbed one, center the design on the flattest area and keep the legs off the deepest grooves.

Your take belongs here, too.

Changed a detail? Made it simpler? Share a photo of your version and tell the community what worked.

Share your pumpkin

More pumpkins like this

You've reached the end · 8 pumpkins
The Patch Report

Fresh pumpkins, in your inbox.

The best new carvings, ideas worth stealing, and how-tos for carving season. Short, seasonal, and gone by November.

A short email during carving season. Unsubscribe anytime. See our privacy policy.