The 2026 contest winners are inGrand Prize, People's Choice and Most Creative, all crowned.
@ai_concepts
Sep 25, 2026
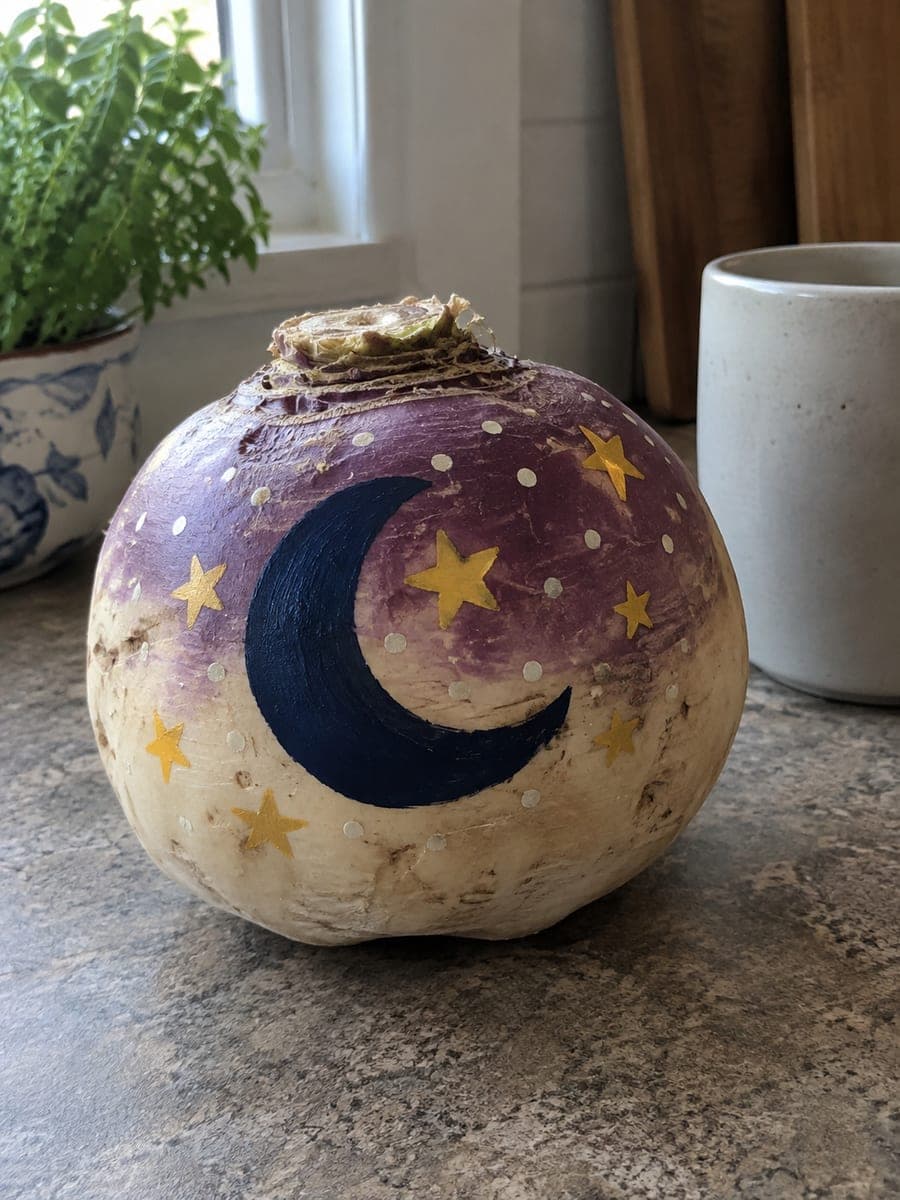
Moon and Star Painted Faux PumpkinAI
0

Report this carving

Tell us what is wrong. Reports are private.

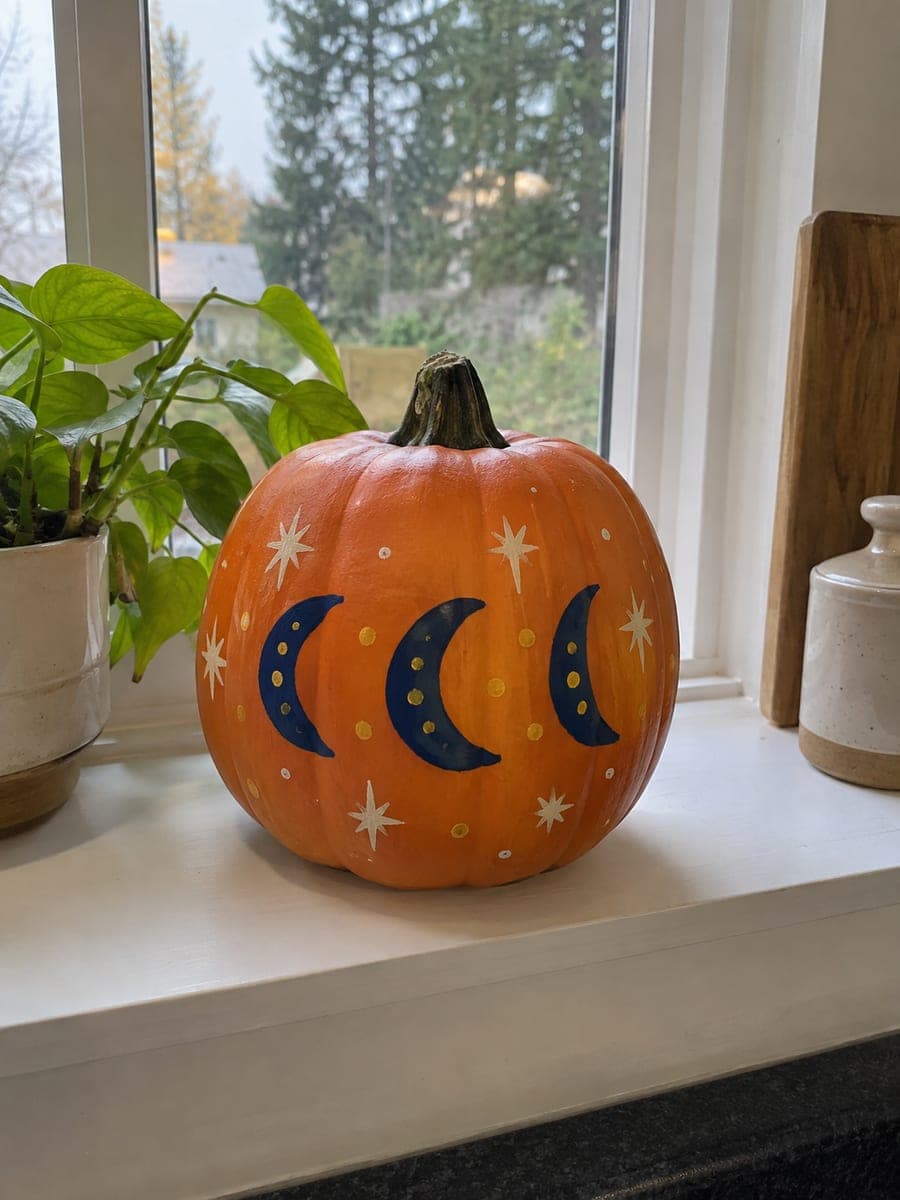
Moon and Star Painted Faux Pumpkin

Three navy crescent moons with mustard dots and simple cream stars are painted on a hollow synthetic craft pumpkin using opaque brush-painted craft acrylic, the smooth uniform surface accepting each color cleanly. Apply the navy crescents first to anchor the composition, then add mustard dots while the first layer is still slightly tacky so they key into the base coat. Displayed on a kitchen windowsill in soft daylight, the celestial motifs give the pumpkin a quiet autumnal elegance without any cutting.

No ratings yet · Sign in to rate
EasyFacesClassicNo-Carve
faceno-carvepaintedfakefauxclassiceasycrescent-moon

Save this design for carving night, then share a photo of your own jack-o'-lantern once it's glowing.
Comments (0)

  • No comments yet. Be the first.

Our tips for carving a similar design

Three navy crescent moons with mustard dots and simple cream stars are painted on a hollow synthetic craft pumpkin using opaque brush-painted craft acrylic, with the smooth uniform surface accepting each color cleanly. The crescents go on first to anchor the composition, then mustard dots are added while the base coat is slightly tacky so they key into the surface. The result is a quiet, autumnal piece perfect for a kitchen windowsill.

From pumpkin to porch

  1. Prepare the surface

    Wipe the synthetic pumpkin with a cloth lightly dampened with rubbing alcohol to remove any surface oils or dust. Let it dry completely before touching the surface with paint. The alcohol wipe is especially helpful on synthetic foam because the glossy finish can otherwise resist the first paint coat.

  2. Sketch the crescent moon positions

    Use a white chalk pencil to sketch three crescent shapes around the pumpkin at roughly equal spacing, each crescent facing the same direction for visual consistency. Crescent shapes do not need to be identical but should be close in size.

  3. Paint the navy crescent moons

    Load a medium round brush with undiluted navy acrylic and fill each crescent shape in smooth confident strokes. Apply two coats, letting each dry fully, so the orange synthetic shell does not show through the navy.

  4. Add mustard dots while tacky

    While the second navy coat is still slightly tacky but not fully wet, dip a pencil eraser or dotting tool into mustard acrylic and press dots around each crescent. The slight tackiness helps the dots bond to the surface without spreading.

  5. Paint cream stars

    Once the navy and mustard are fully dry, use a fine-tip brush and cream acrylic to paint simple four-point stars between and around the crescents. Keep the stars small and restrained so they read as distant celestial points rather than oversized shapes.

  6. Seal and display

    Apply a light coat of clear matte acrylic sealer over the entire painted surface once all layers are dry. Display on a kitchen windowsill in soft daylight where the navy and mustard contrast beautifully against the orange background.

Written with AI to match this design

Gather your supplies

Check things off as you get ready.

Work on a stable surface, keep your free hand out of the cutting path, and have an adult handle sharp tools.

Three levels of light

  • Leave intact

    The orange synthetic shell between the painted motifs and the molded ribs show as the background throughout.

  • Peel & shade

    None. This is a painted no-carve design and the shell stays intact.

  • Cut through

    None. Use soft natural window daylight or a nearby lamp to illuminate the painted celestial design.

Learn the carving basics

Before you start cutting

Why does my navy paint look streaky over the orange synthetic shell?

Navy on orange requires two full opaque coats for solid coverage. Thin the paint as little as possible and use a brush with enough paint on it that you are filling rather than scraping. If streaks remain after two coats, a third thin coat will solve it.

How do I add mustard dots that look neat and round?

A flat eraser tip, a wooden skewer end, or a dedicated dotting tool all produce rounder dots than a brush. Dip into the mustard paint and press straight down without dragging. Reload the tool for each dot to keep them all the same size.

Can I skip the rubbing alcohol wipe on the synthetic pumpkin?

You can, but the alcohol wipe removes manufacturing oils that can cause the first paint layer to bead up or peel. Skipping it sometimes leads to adhesion problems, especially near the molded ribs where surface tension concentrates. The wipe takes less than a minute and is worth it.

Your take belongs here, too.

Changed a detail? Made it simpler? Share a photo of your version and tell the community what worked.

Share your pumpkin

Want more designs like this? Browse our full library of pumpkin carving ideas, or pick a free printable stencil. Every pattern and template in our own collection is free to print at home.

More pumpkins like this

You've reached the end · 8 pumpkins
The Patch Report

Fresh pumpkins, in your inbox.

The best new carvings, ideas worth stealing, and how-tos for carving season. Short, seasonal, and gone by November.

A short email during carving season. Unsubscribe anytime. See our privacy policy.