Halloween Pumpkin Carving Contest Β· Starts October 1st Β· $500 in prizes
← Back to ideas
@ai_concepts
Sep 25, 2026

Daisy Cluster Painted No-Carve Plastic PumpkinAI
0

Report this carving

Tell us what is wrong. Reports are private.

Daisy Cluster Painted No-Carve Plastic Pumpkin

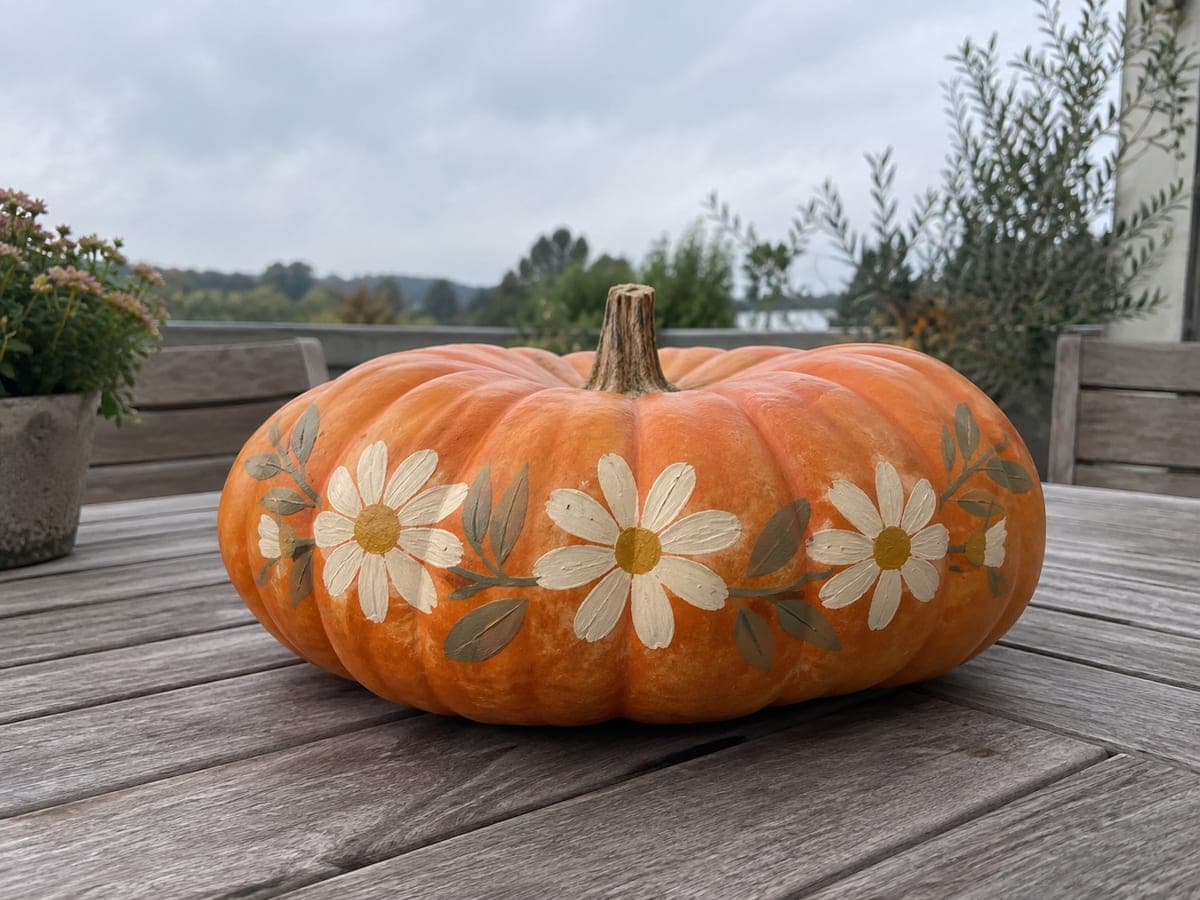
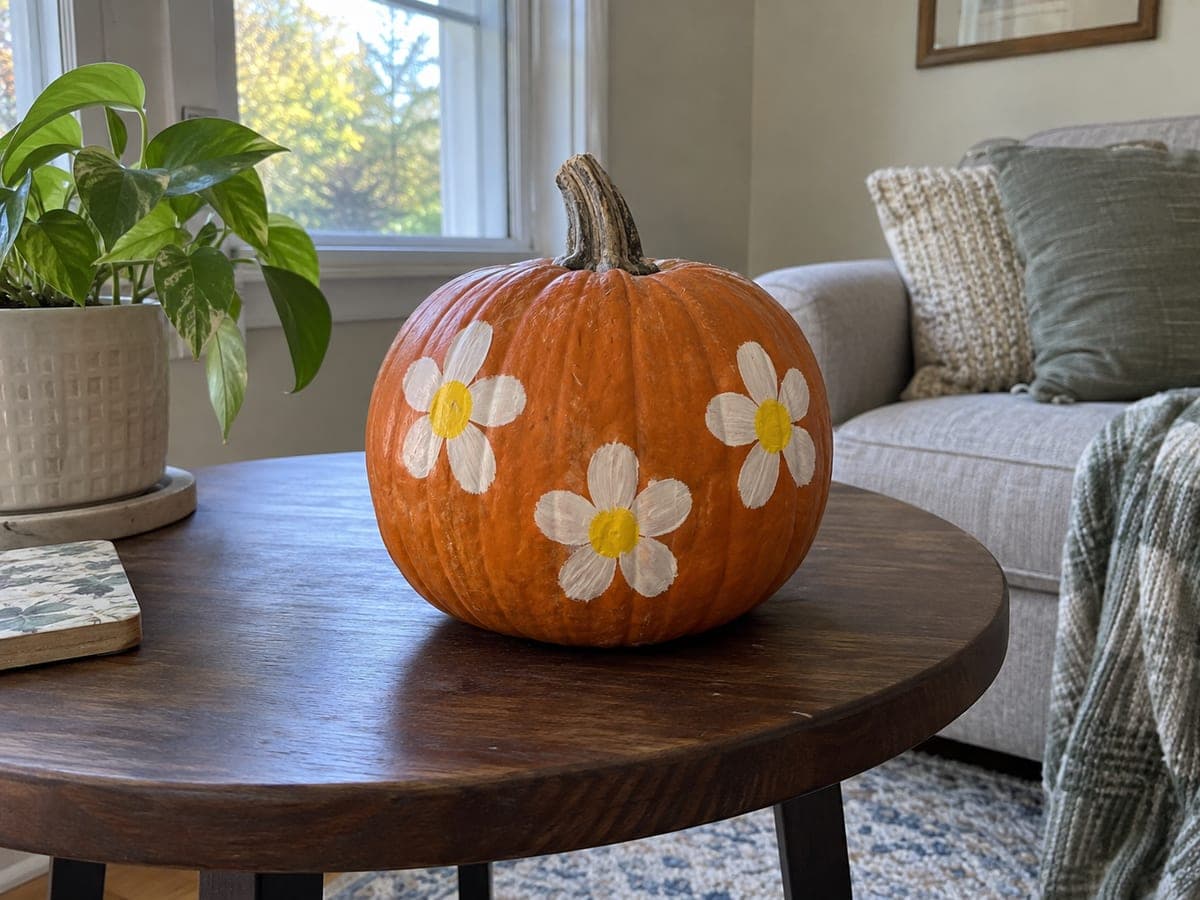
A cluster of three cream daisies with mustard centers and sage leaves is brush-painted across a rigid plastic craft pumpkin with slight visible strokes that give the flat surface a handmade texture. Acrylic adheres to carvable plastic without primer as long as the surface is clean and dry, so wipe the pumpkin with rubbing alcohol before you begin. On a covered patio table in overcast daylight the soft botanical palette photographs cleanly against the orange shell.

No ratings yet Β· Sign in to rate

Comments (0)

  • No comments yet β€” be the first.

Save without an account. Sign in to like or comment.

Our tips for carving a similar design

A cluster of three cream daisies with mustard centers and sage leaves is brush-painted across a rigid plastic pumpkin, with slight visible strokes giving the surface a handmade quality. Acrylic adheres to carvable plastic without primer as long as the surface is wiped clean with rubbing alcohol first. Overcast daylight on a covered patio makes the soft botanical palette photograph beautifully against the orange shell.

From pumpkin to porch

  1. Clean the plastic surface

    Wipe the entire pumpkin with a cloth dampened with rubbing alcohol to remove any surface oils or dust. Let it dry completely. This step is particularly important on plastic because the slightly glossy shell can resist paint adhesion without a clean surface.

  2. Sketch the daisy cluster

    Use a white chalk pencil to lightly sketch three daisy positions and their surrounding leaves. Group the three flowers close together so they read as a single botanical cluster rather than three isolated shapes. Sketch a few sage leaf strokes between and below the flowers.

  3. Paint the cream daisy petals

    Load a medium round brush with undiluted cream acrylic and paint each petal as a short oval stroke radiating from the flower center. Apply two coats for full opacity, letting the first dry before adding the second. Keep slight brush strokes visible for the handmade texture the design calls for.

  4. Paint the mustard centers

    Once the cream petals are fully dry, fill each flower center with a neat circle of mustard acrylic. A small round brush or a pencil eraser dipped in paint both produce tidy, circular centers.

  5. Add sage leaves and stems

    Use a small flat brush loaded with sage green acrylic to add leaf strokes below and between the daisies. A single confident stroke per leaf, slightly tapered at each end, gives the most natural look. Add a thin green stem connecting each flower to the leaf cluster.

  6. Seal and display outdoors

    Once all paint is fully dry, apply a coat of clear matte acrylic sealer to protect the design from moisture outdoors. Display on a covered patio table in overcast daylight where the cream and sage palette reads most clearly against the orange background.

Written with AI to match this design

Gather your supplies

Check things off as you get ready.

Work on a stable surface, keep your free hand out of the cutting path, and have an adult handle sharp tools.

Three levels of light

  • Leave intact

    The orange plastic shell between and behind the daisy cluster serves as the warm background throughout.

  • Peel & shade

    None. This is a painted no-carve design and the shell stays intact.

  • Cut through

    None. Display in natural daylight or under a soft porch light to illuminate the botanical design.

Learn the carving basics

Before you start cutting

Why does my cream paint look thin and orangey on the plastic shell?

Cream on orange needs at least two full-opacity coats. Use undiluted paint and apply it generously rather than in thin washes. If the orange still shows through after two coats, let the second coat dry overnight and apply a third.

How do I get even-sized petals around each daisy center?

Count your petals before painting the first one and mark their tip positions lightly with chalk around the flower center. Eight petals on a medium flower look balanced and are easy to space evenly. Marking the tip positions first prevents uneven spacing that is difficult to fix later.

Can I display this painted pumpkin outdoors even in light rain?

Once sealed with clear acrylic sealer, the painted design handles brief light rain reasonably well. Avoid prolonged soaking and bring the pumpkin inside during heavy rain. The plastic shell itself is fully weatherproof, but the paint layer can soften if left wet for extended periods.

Your take belongs here, too.

Changed a detail? Made it simpler? Share a photo of your version and tell the community what worked.

Share your pumpkin

More pumpkins like this

You've reached the end Β· 8 pumpkins
The Patch Report

Fresh pumpkins, in your inbox.

The best new carvings, ideas worth stealing, and how-tos for carving season. Short, seasonal, and gone by November.

A short email during carving season. Unsubscribe anytime. See our privacy policy.