Halloween Pumpkin Carving Contest · Starts October 1st · $500 in prizes
← Back to ideas
@ai_concepts
Sep 14, 2026
Ohio State Outline PumpkinAI
0

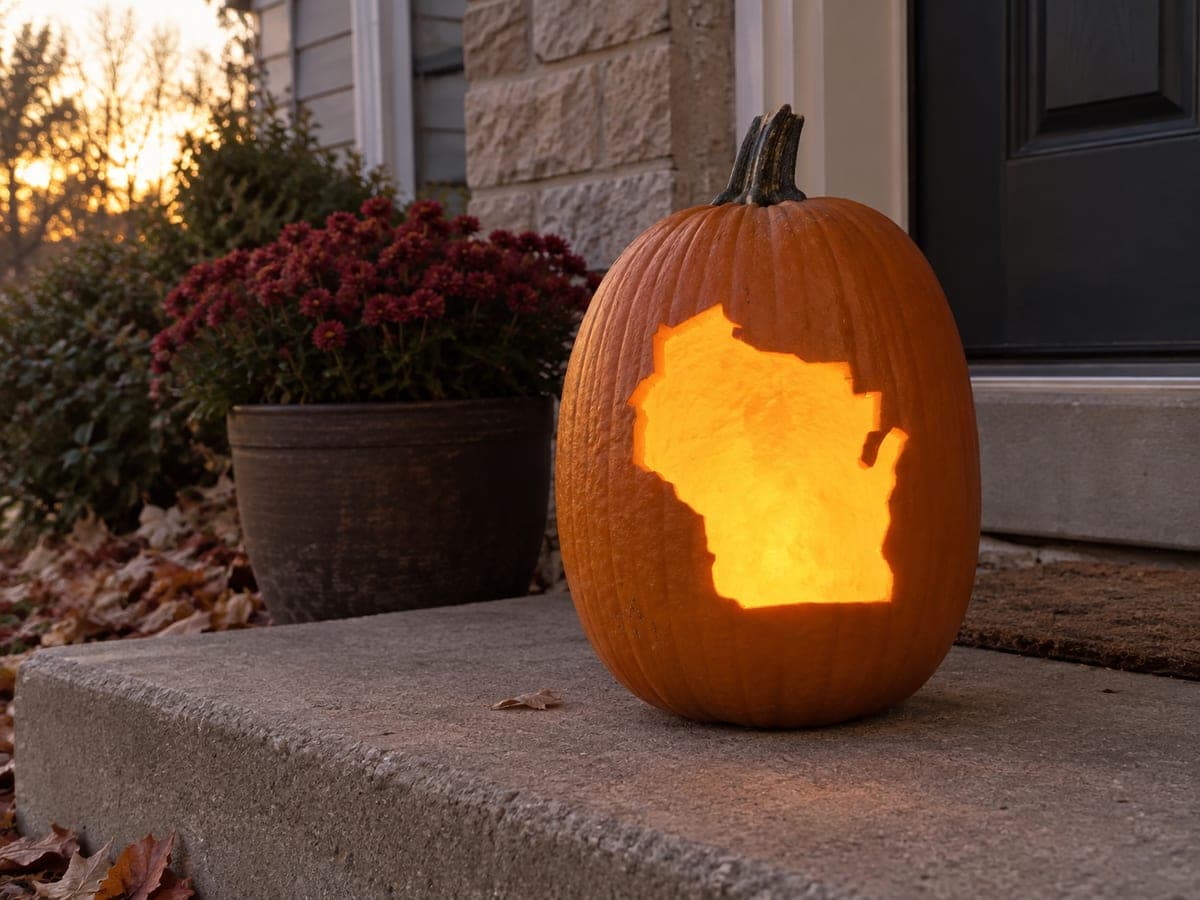
Ohio State Outline Pumpkin

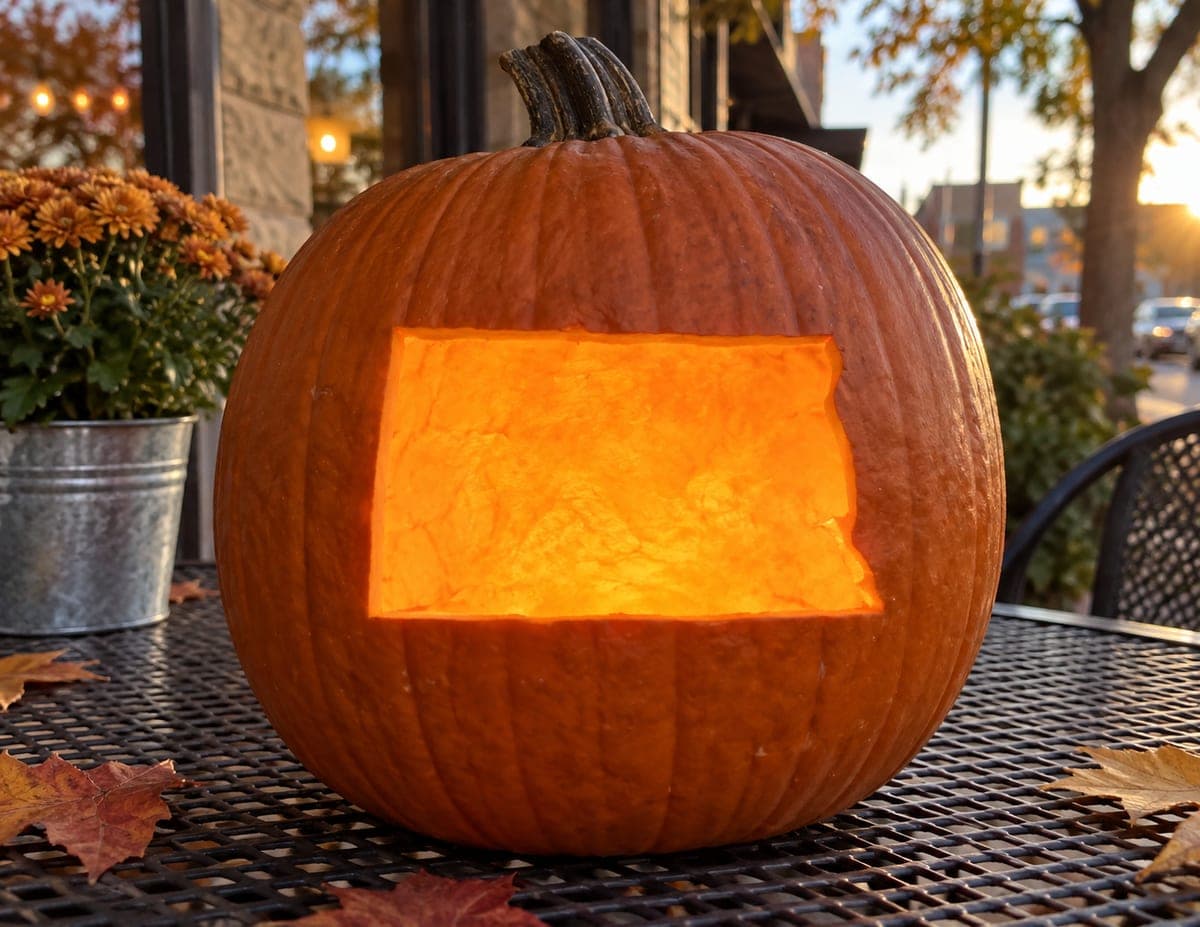
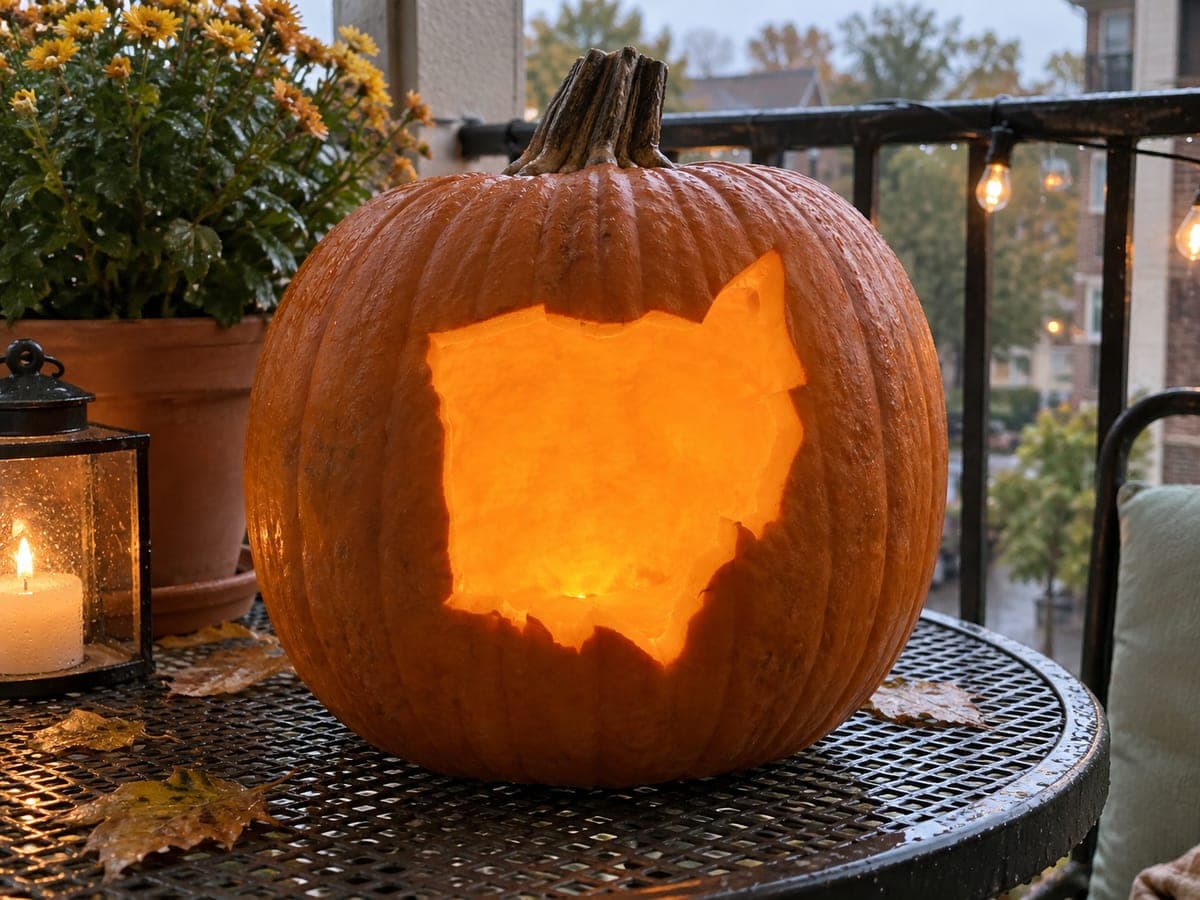
Ohio's compact outline is pierced through in one glowing piece, its flat northern edge, squared western border, and notched southeastern corner all recognizable against the dark rind. Position the state shape on the flattest section of your pumpkin so the deep vertical ribs do not distort the straight western side. Carving the tricky southeastern notch last lets you preserve wall thickness while keeping the overall ohio jack-o-lantern silhouette intact.

This is an AI-generated concept image: a realistic, carvable design idea rather than a photo of a finished carve. AI concepts are always labeled and sit out the leaderboard and the contest.

No ratings yet · Sign in to rate
Comments (0)

  • No comments yet — be the first.

Save without an account. Sign in to like or comment.

Our tips for carving a similar design

The core trick here is treating Ohio as one clean silhouette punched through the rind, so all the light comes from a single opening rather than fine detail. Plan it on the flattest face of the pumpkin so the straight western edge and flat northern top read clearly, and save the notched southeastern corner for last. Keep your lines simple and let the shape do the work.

Written by PumpkinCarvingIdeas.com, inspired by the image above. These are our suggestions, not instructions from the uploader. This approach to the AI concept has not been tested on a real pumpkin.

From pumpkin to porch

  1. Pick the flattest face and open the pumpkin

    Turn the pumpkin until you find the smoothest, flattest panel with the fewest deep ribs, since straight state borders distort across vertical grooves. Cut a lid from the top or, better, a wide access hole in the back so the front face stays uninterrupted. Have an adult handle the large knife for this opening cut. Angle the cut inward so the lid or plug does not fall through.

  2. Scoop and thin the carving wall

    Scrape out the seeds and pulp with a sturdy scoop or ice cream scoop. Keep working the inside of your chosen face until the wall is about one inch thick and even. A thinner, uniform wall makes the outline far easier to cut and lets more light through. Smooth away lumps so the flat state edges will come out crisp.

  3. Transfer the Ohio outline

    Print or draw the state at the size you want, centered on the flat face. Tape it down and poke closely spaced holes along the border with a pushpin or a poking tool. Pay special attention to marking the flat northern edge, the squared western side, and the southeastern notch so those landmarks stay recognizable. Peel the paper and connect the dots lightly with a pencil.

  4. Cut the simple borders first

    Using a small carving saw, start on the straight western and northern edges where the lines are easiest to control. Cut with gentle, steady strokes and keep the blade perpendicular to the surface. Work the long clean runs before any curves so you build a solid frame for the shape. Leave the tricky southeastern corner uncut for now.

  5. Finish the southeastern notch and free the piece

    Carve the notched southeastern corner last, taking short careful cuts so you do not overrun the angle or crack the surrounding wall. Once the whole outline is scored through, push the state-shaped piece gently outward from inside. Clean up any ragged edges with the saw tip so the silhouette stays sharp against the dark rind.

  6. Light it and photograph

    Drop a battery LED puck or string light inside and set it low so the glow fills the whole opening evenly. Skip real candles, especially outdoors on a breezy balcony. Photograph at dusk with the surrounding lights soft so the bright Ohio shape pops. Coat the cut edges with a little petroleum jelly to slow drying if you want it to last.

Gather your supplies

Check things off as you get ready.

Work on a stable surface, keep your free hand out of the cutting path, and have an adult handle sharp tools.

Three levels of light

  • Leave intact

    The entire outer rind around the state stays untouched and dark, framing the shape.

  • Peel & shade

    Optionally skin-peel a thin border just outside the outline for a faint halo glow.

  • Cut through

    The full Ohio silhouette is cut clear through for the brightest single glowing shape.

Learn the carving basics

Before you start cutting

How do I keep the straight western border from looking wavy?

Choose the flattest panel on the pumpkin and avoid running the edge across a deep rib. Thin the inside wall evenly first so your saw tracks straight. Cut in short controlled strokes rather than one long pull.

Why carve the southeastern notch last?

That corner has the tightest angles and the most fragile short segments. Cutting it after the long borders are done means the surrounding wall is still fully supported. It reduces the chance of cracking or overrunning the line.

Do I need the state to be perfectly accurate?

No. Aim for the three recognizable landmarks: the flat northern top, the squared western side, and the notched southeastern corner. Get those right and the silhouette reads as Ohio even if the smaller wiggles are simplified.

Your take belongs here, too.

Changed a detail? Made it simpler? Share a photo of your version and tell the community what worked.

Share your pumpkin

More pumpkins like this

You've reached the end · 8 pumpkins
The Patch Report

Fresh pumpkins, in your inbox.

The best new carvings, ideas worth stealing, and how-tos for carving season. Short, seasonal, and gone by November.

A short email during carving season. Unsubscribe anytime. See our privacy policy.