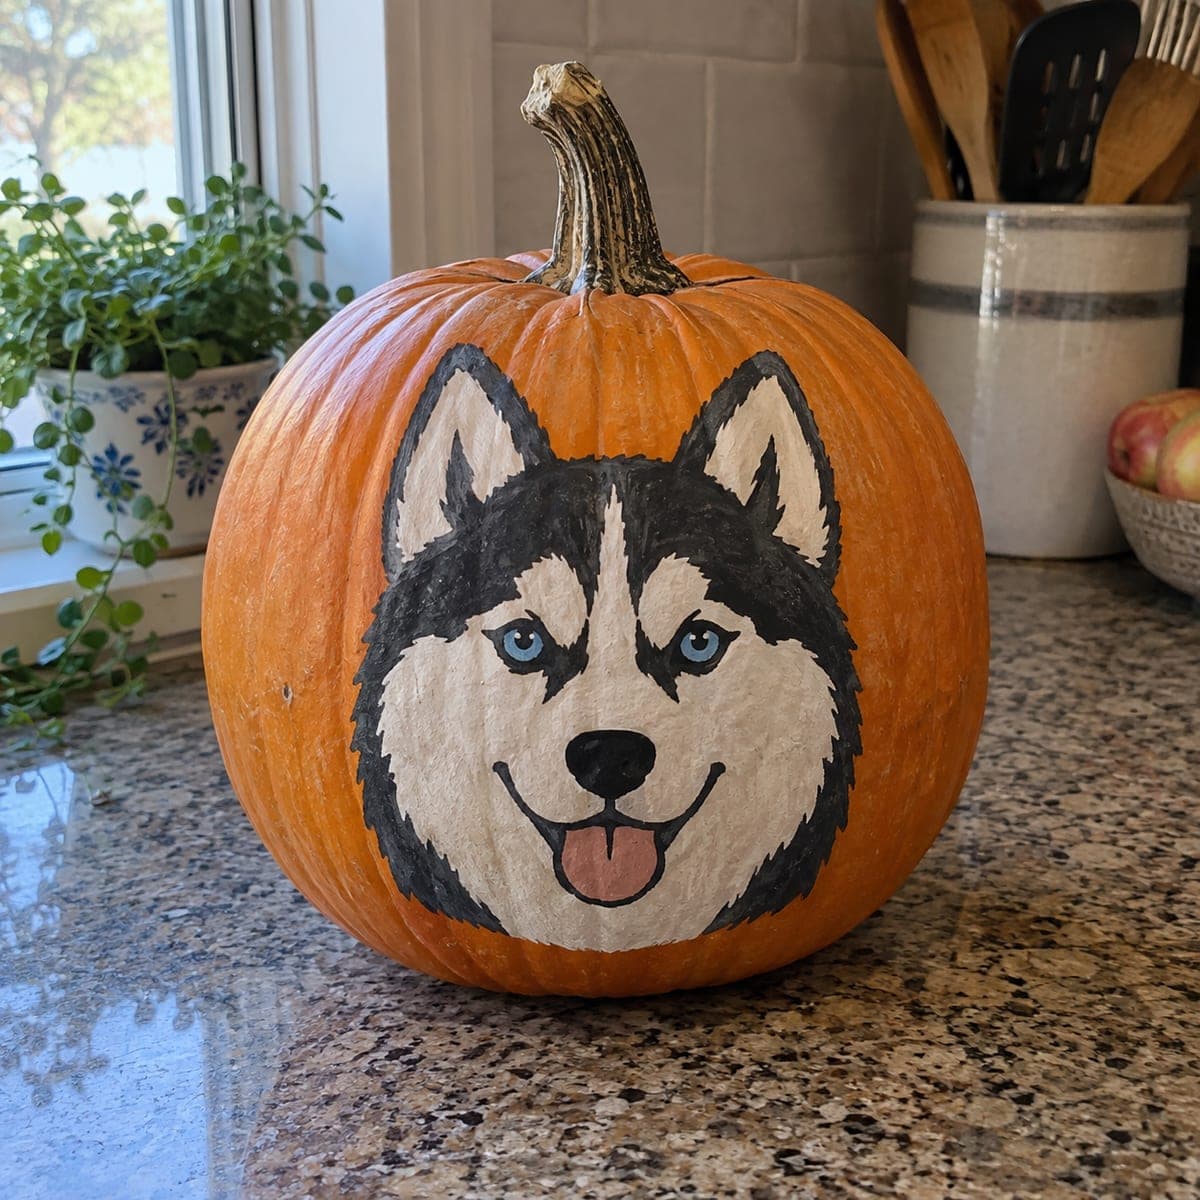
A smiling Siberian husky with bright blue eyes and a happy pink tongue is painted across the front of this no-carve pumpkin. The black and white mask pattern is forgiving to paint: block in the white face first, add the black outer coat, then finish with the eyes, nose, and tongue once the base layers dry. Seal it with a clear acrylic spray and this dog pumpkin will decorate a kitchen or entryway all season.
This is an AI-generated concept image: a realistic, carvable design idea rather than a photo of a finished carve. AI concepts are always labeled and sit out the leaderboard and the contest.
The trick here is the husky's black and white mask, which reads clearly because each color sits in its own crisp shape. Paint it in layers from light to dark: block the white face first, wrap the black outer coat around it, then drop in the blue eyes, black nose, and pink tongue once the base is dry. Because it is a no-carve design, nothing structural is at risk, so you can take your time and touch up mistakes.
Written by PumpkinCarvingIdeas.com, inspired by the image above. These are our suggestions, not instructions from the uploader. This approach to the AI concept has not been tested on a real pumpkin.
From pumpkin to porch
1
Prep and sketch the mask
Wipe the pumpkin clean and dry so paint grips well. Lightly pencil the outline of the face: a rounded white center, two upright ears, and the ragged edge where the black coat meets the orange skin. Keep the eyes and nose roughly centered so the face looks balanced. Step back and check proportions before any paint goes down.
2
Block in the white face
Paint the large white areas first: the center of the face, the muzzle, the inner ears, and the fluffy cheeks. Use two thin coats rather than one thick one so it dries even and bright. Let each coat dry fully before adding the next. Leave a little orange showing at the very outer edge if you want the coat to feel framed.
3
Add the black outer coat
Once the white is dry, paint the black mask around it: the top of the head, the outer ears, and the dark cheeks that frame the face. Feather the border between black and white with small tapered strokes so it looks like fur instead of a hard line. Pull those strokes outward at the jaw for the shaggy chin. Two coats of black will keep it deep and opaque.
4
Paint the eyes, nose, and tongue
With the base dry, add the signature blue eyes, keeping them slightly almond shaped and level with each other. Paint the black nose as a rounded triangle, then a curved smiling mouth line down to the pink tongue. A tiny white dot in each eye and a soft highlight on the nose bring the face to life. Work with a fine brush and steady the pumpkin against your body.
5
Seal and display
Let everything cure for a few hours, then take it outside and mist it with a clear acrylic spray in light passes. This protects the paint from smudges and light rain. Once dry, set it on a kitchen counter or entryway. For a night glow, tuck a battery LED puck beside it rather than inside, since this pumpkin is not hollowed out.
Gather your supplies
Check things off as you get ready.
Work on a stable surface, keep your free hand out of the cutting path, and have an adult handle sharp tools.
Three levels of light
Leave intact
The orange pumpkin skin around the head stays bare for a warm background that frames the dog.
Peel & shade
If you want subtle depth, lightly scuff the skin under the white muzzle so a soft glow reads there when lit from the side.
Cut through
This is a no-carve design, so skip openings; add brightness with an external LED instead of cutting through the shell.
Correct, this is a painted design, so the pumpkin stays whole and lasts much longer than a carved one. You only need paint, brushes, and a sealer. If you still want a glow, set a battery light next to it rather than hollowing it out.
How do I keep the black and white edges from looking messy?
Let each color dry completely before painting the one next to it, which stops colors from bleeding together. Use short tapered brush strokes along the border so the seam looks like fur, not a smudge. A fine brush and a light hand make touch-ups easy.
Will the paint survive outdoors all season?
Acrylic holds up well once it is fully dry and sealed. Give it a few coats of clear acrylic spray and keep it out of standing water or direct heavy rain. On a covered porch or indoor counter it can look fresh for weeks.
Your take belongs here, too.
Changed a detail? Made it simpler? Share a photo of your version and tell the community what worked.
 AI
AI





Comments (0)