Halloween Pumpkin Carving Contest · Starts October 1st · $500 in prizes
← Back to ideas
@ai_concepts
Sep 25, 2026
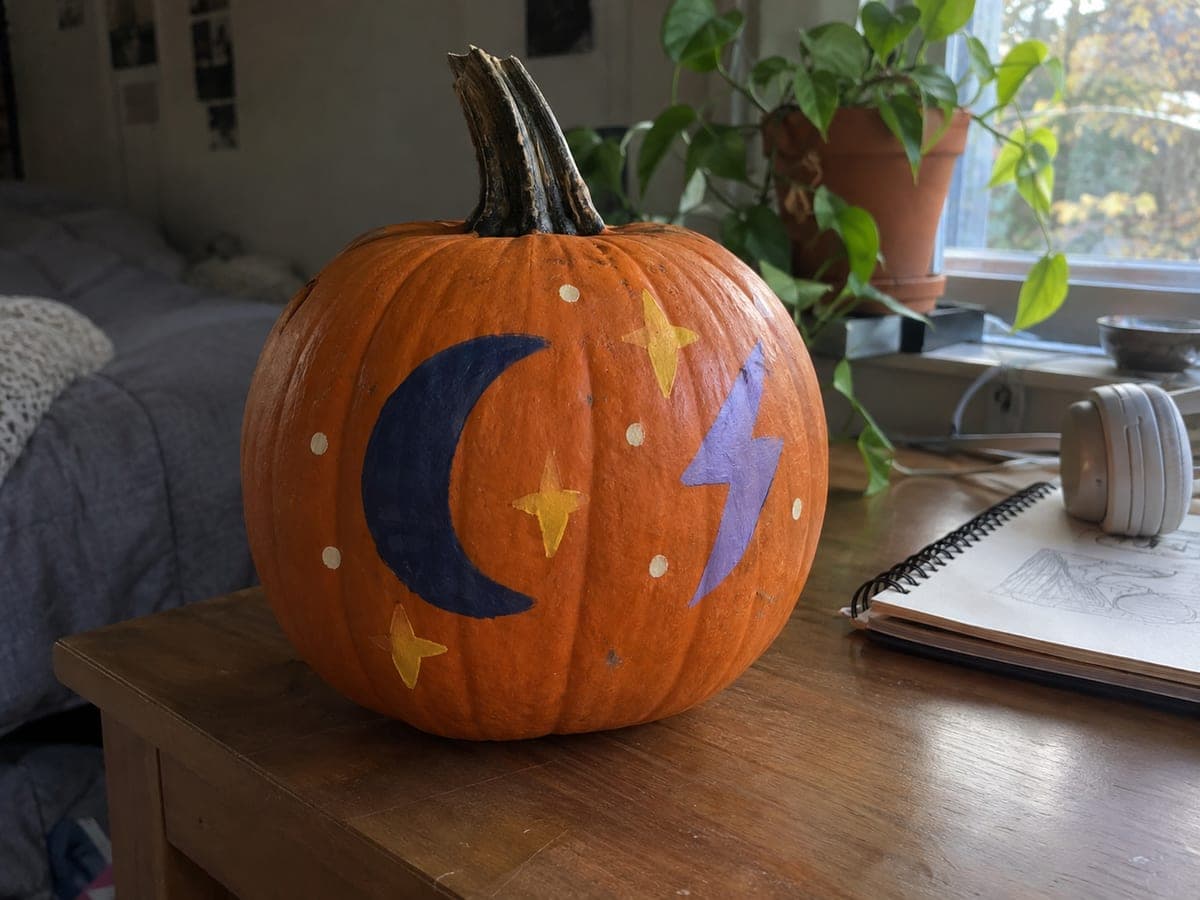
Painted No-Carve Teen Pumpkin with Flat Shape DesignAI
0

Report this carving

Tell us what is wrong. Reports are private.

Painted No-Carve Teen Pumpkin with Flat Shape Design

Simple flat-paint shapes applied directly to an intact pumpkin make this no-carve teen pumpkin idea a quick project that can be customized to any aesthetic, from celestial to abstract. Teens can sketch their own design in marker first and fill it in with acrylic paint, choosing colors that reflect their personal style rather than a fixed template. Work in thin layers to avoid cracking, and keep each color within its outline for a clean finished look. Matte spray sealer applied over dry paint helps the finished pumpkin survive weeks of outdoor display without fading.

No ratings yet · Sign in to rate

Comments (0)

  • No comments yet — be the first.

Save without an account. Sign in to like or comment.

Our tips for carving a similar design

This is an open-canvas no-carve project where the teen sketches their own design in marker before painting it with acrylics. The approach is the same regardless of the specific design they choose: thin paint layers, each fully dry before the next is added, and a matte sealer coat at the end. Encouraging personal design ownership makes this project more engaging than following a fixed template.

From pumpkin to porch

  1. Clean and dry the pumpkin

    Wipe the pumpkin with a damp cloth and let it air-dry completely. Check the rind for rough patches or deep ridges that might break up brushstrokes and plan the design around any major bumps. Choose the flattest face for the main design area.

  2. Sketch the design

    Use a marker or soft pencil to sketch the chosen design directly on the rind. Celestial shapes, abstract patterns, portraits, and geometric motifs all work well at this scale. Sketch lightly so lines can be adjusted before committing to paint. The teen should make all composition decisions themselves.

  3. Apply base color coats

    Fill in the largest color areas first using a flat brush and craft acrylic. Apply two thin coats rather than one thick coat to avoid drips and cracking. Let the first coat dry fully before applying the second. Do not paint detail areas yet.

  4. Build detail layers

    Once base colors are dry, add finer details with a smaller brush. Work from the largest details to the smallest: main shapes first, then outlines and highlights last. Each color layer must dry before adding the next to prevent muddying.

  5. Add highlights and finishing marks

    Use a fine brush with white or metallic paint to add light highlights and any small finishing marks like dot accents or thin outline strokes. These final touches are what give a painted pumpkin a professional finished look.

  6. Seal for outdoor durability

    Spray a matte clear acrylic sealer over the completely dry finished design. Matte finish prevents inconsistent sheen across different paint brands and finishes. Allow the sealer to dry fully indoors before moving the pumpkin to its display location.

Written with AI to match this design

Gather your supplies

Check things off as you get ready.

Work on a stable surface, keep your free hand out of the cutting path, and have an adult handle sharp tools.

Three levels of light

  • Leave intact

    All bare orange rind areas that are not painted stay visible as part of the overall color composition.

  • Peel & shade

    None. The shell remains fully intact.

  • Cut through

    None. Use a lamp or spotlight in front to illuminate the painted design for evening display.

Learn the carving basics

Before you start cutting

How do I keep the paint from cracking as the pumpkin dries out over weeks?

Craft acrylic paint is flexible when dry and resists cracking much better than house paint or tempera. Apply thin layers so no single coat is brittle. Keep the pumpkin away from heat sources and direct sunlight, which accelerate rind shrinkage and cause any paint layer to crack along the rind creases.

What if the teen wants a dark background over the orange rind?

Apply a base coat of black or dark acrylic over the entire face of the pumpkin first and let it dry before sketching or painting the main design on top. A dark background makes lighter colors like white, gold, or neon pop dramatically and gives the finished pumpkin a very different look than working on orange rind.

Can this no-carve approach be combined with some light carving later?

Yes, but paint the entire design first and let it cure fully, at least a day, before making any cuts. Cutting into a freshly painted pumpkin can chip the paint around cut edges. If you plan to combine techniques, keep the carved area away from heavily painted sections to avoid cracking at the cut boundary.

Your take belongs here, too.

Changed a detail? Made it simpler? Share a photo of your version and tell the community what worked.

Share your pumpkin

More pumpkins like this

You've reached the end · 8 pumpkins
The Patch Report

Fresh pumpkins, in your inbox.

The best new carvings, ideas worth stealing, and how-tos for carving season. Short, seasonal, and gone by November.

A short email during carving season. Unsubscribe anytime. See our privacy policy.