Halloween Pumpkin Carving Contest · Starts October 1st · $500 in prizes
← Back to ideas
@ai_concepts
Sep 25, 2026
Scary No-Carve Painted Pumpkin With Bold Dark ShapesAI
0

Report this carving

Tell us what is wrong. Reports are private.

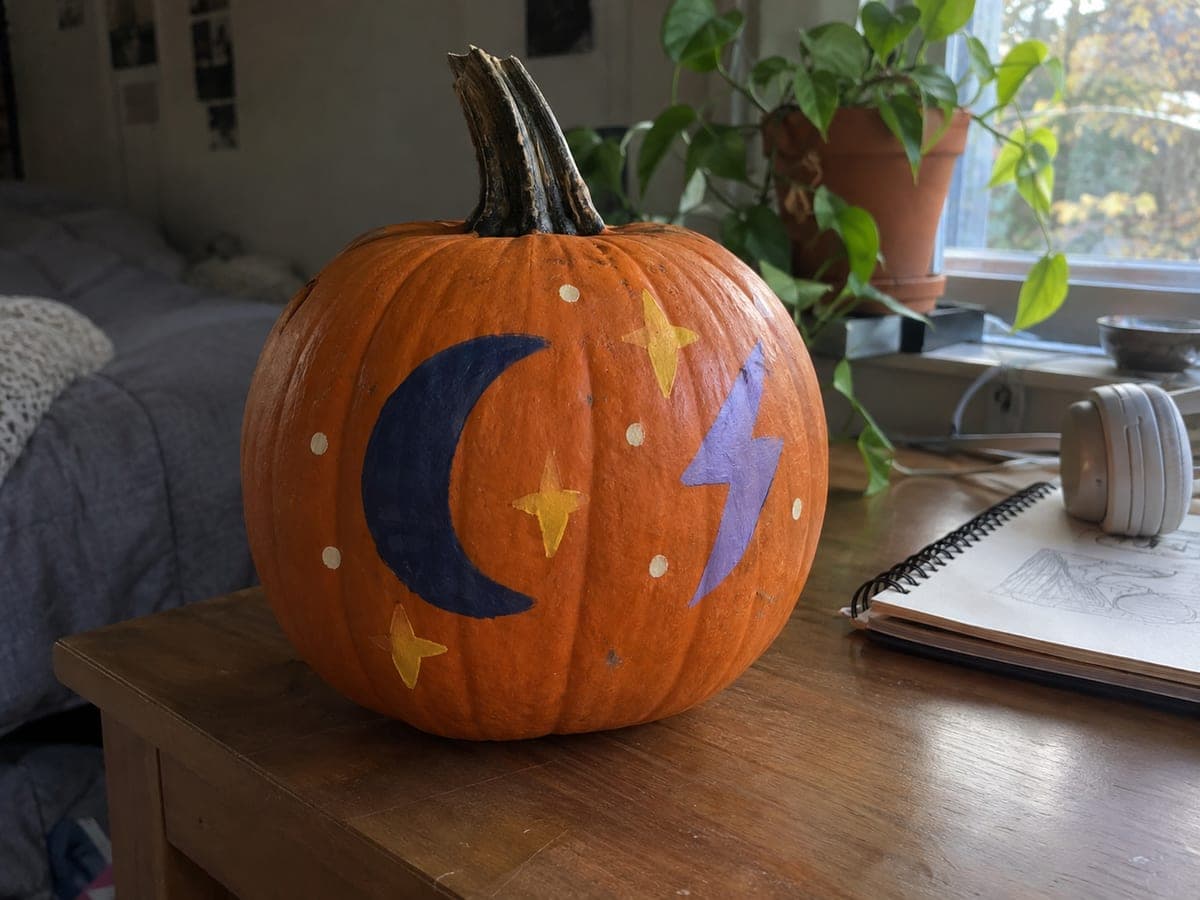
Scary No-Carve Painted Pumpkin With Bold Dark Shapes

Broad flat shapes in a dark, limited palette turn an intact pumpkin into an intimidating no-carve scary pumpkin carving idea without touching a knife. Apply the largest shapes first with a wide flat brush, using deep blacks, reds, or purples for maximum impact against the orange rind. Build the expression in layers, letting each color dry before painting over it so the edges stay sharp. A matte sealer applied once fully dry protects the design outdoors all season.

No ratings yet · Sign in to rate
Comments (0)

  • No comments yet — be the first.

Save without an account. Sign in to like or comment.

Our tips for carving a similar design

The frightening quality of this design comes entirely from the color palette and the boldness of the shapes: deep blacks and dark reds against the natural orange rind create instant visual tension. Painting the largest shapes first and letting each layer dry before adding the next keeps every color sharp and prevents the dark tones from bleeding into each other. A matte sealer applied at the end protects the design for the full season.

From pumpkin to porch

  1. Clean and dry the surface

    Wipe the pumpkin with a damp cloth to remove wax and surface dirt, then allow it to dry completely. Acrylic paint does not adhere well to a waxy surface and can peel within a day if applied over any residual moisture. A light pass with fine-grit sandpaper is optional but helps on very smooth, wax-coated rinds.

  2. Sketch the shapes

    Sketch the main scary shapes with a chalk marker or light pencil. Exaggerate the scale of the features: large shapes read from a distance while small ones get lost. Deep-set eyes with a heavy brow angle and a wide downturned mouth are the most effective foundation for a scary painted expression.

  3. Block in the large dark shapes

    Load a wide flat brush with deep black or dark red paint and fill in the largest shapes in confident, even strokes. Work in two thin coats rather than one thick one to avoid cracking on the curved surface. Allow each coat to dry for at least twenty minutes before adding the next.

  4. Build the expression in layers

    Once the base shapes are dry, use a smaller round brush to add darker accents: deep shadow areas within the eye sockets, jagged lines within the mouth, or thin black lines to suggest cracks or veins. Each layer must be dry before the next goes on to keep edges sharp and colors from muddying.

  5. Add high-contrast accents

    A small amount of bright white or blood red used sparingly adds dramatic contrast to the dark palette. A white highlight in the eye or a red streak below the mouth requires only a fine liner brush and a few seconds of work but significantly increases the horror impact.

  6. Seal and display

    Apply two coats of matte outdoor spray sealer with a few minutes drying time between coats. The matte finish reinforces the dark, threatening mood of the design far better than a glossy one. Display the pumpkin anywhere on the porch: no knife marks means no rotting edges, so the painted design will last the full month.

Written with AI to match this design

Gather your supplies

Check things off as you get ready.

Work on a stable surface, keep your free hand out of the cutting path, and have an adult handle sharp tools.

Three levels of light

  • Leave intact

    Natural orange rind shows through all unpainted areas

  • Peel & shade

    None, the shell stays fully intact

  • Cut through

    None. Position the pumpkin near a porch light or use an outdoor spotlight to show the painted design at night

Learn the carving basics

Before you start cutting

How do I get a truly deep black without the paint looking thin and gray?

Apply at least two coats, allowing the first to dry fully. If the black still looks gray, let it dry completely and apply a third coat. High-quality artist-grade black acrylic is denser than student-grade craft paint and may only need two coats. Avoid overthinning the paint with water, which dilutes the pigment load.

Can I add texture to the dark shapes to make them look more menacing?

Yes. While the paint is still slightly wet, drag a dry brush lightly across the surface in one direction to create a streaked or scratched texture. You can also dab a crumpled piece of plastic wrap into wet dark paint to create an irregular, uneven surface that reads as aged or damaged from a distance.

Will the painted pumpkin last as long as an unmodified one?

A painted, sealed, uncut pumpkin typically lasts four to six weeks, which is longer than a carved one. Because the rind is never broken, moisture loss is minimal and the pumpkin rots from the inside out much more slowly. The painted design itself, if well sealed, will outlast the pumpkin's display life.

Your take belongs here, too.

Changed a detail? Made it simpler? Share a photo of your version and tell the community what worked.

Share your pumpkin

More pumpkins like this

You've reached the end · 8 pumpkins
The Patch Report

Fresh pumpkins, in your inbox.

The best new carvings, ideas worth stealing, and how-tos for carving season. Short, seasonal, and gone by November.

A short email during carving season. Unsubscribe anytime. See our privacy policy.