@PumpkinKing
Sep 5, 2026
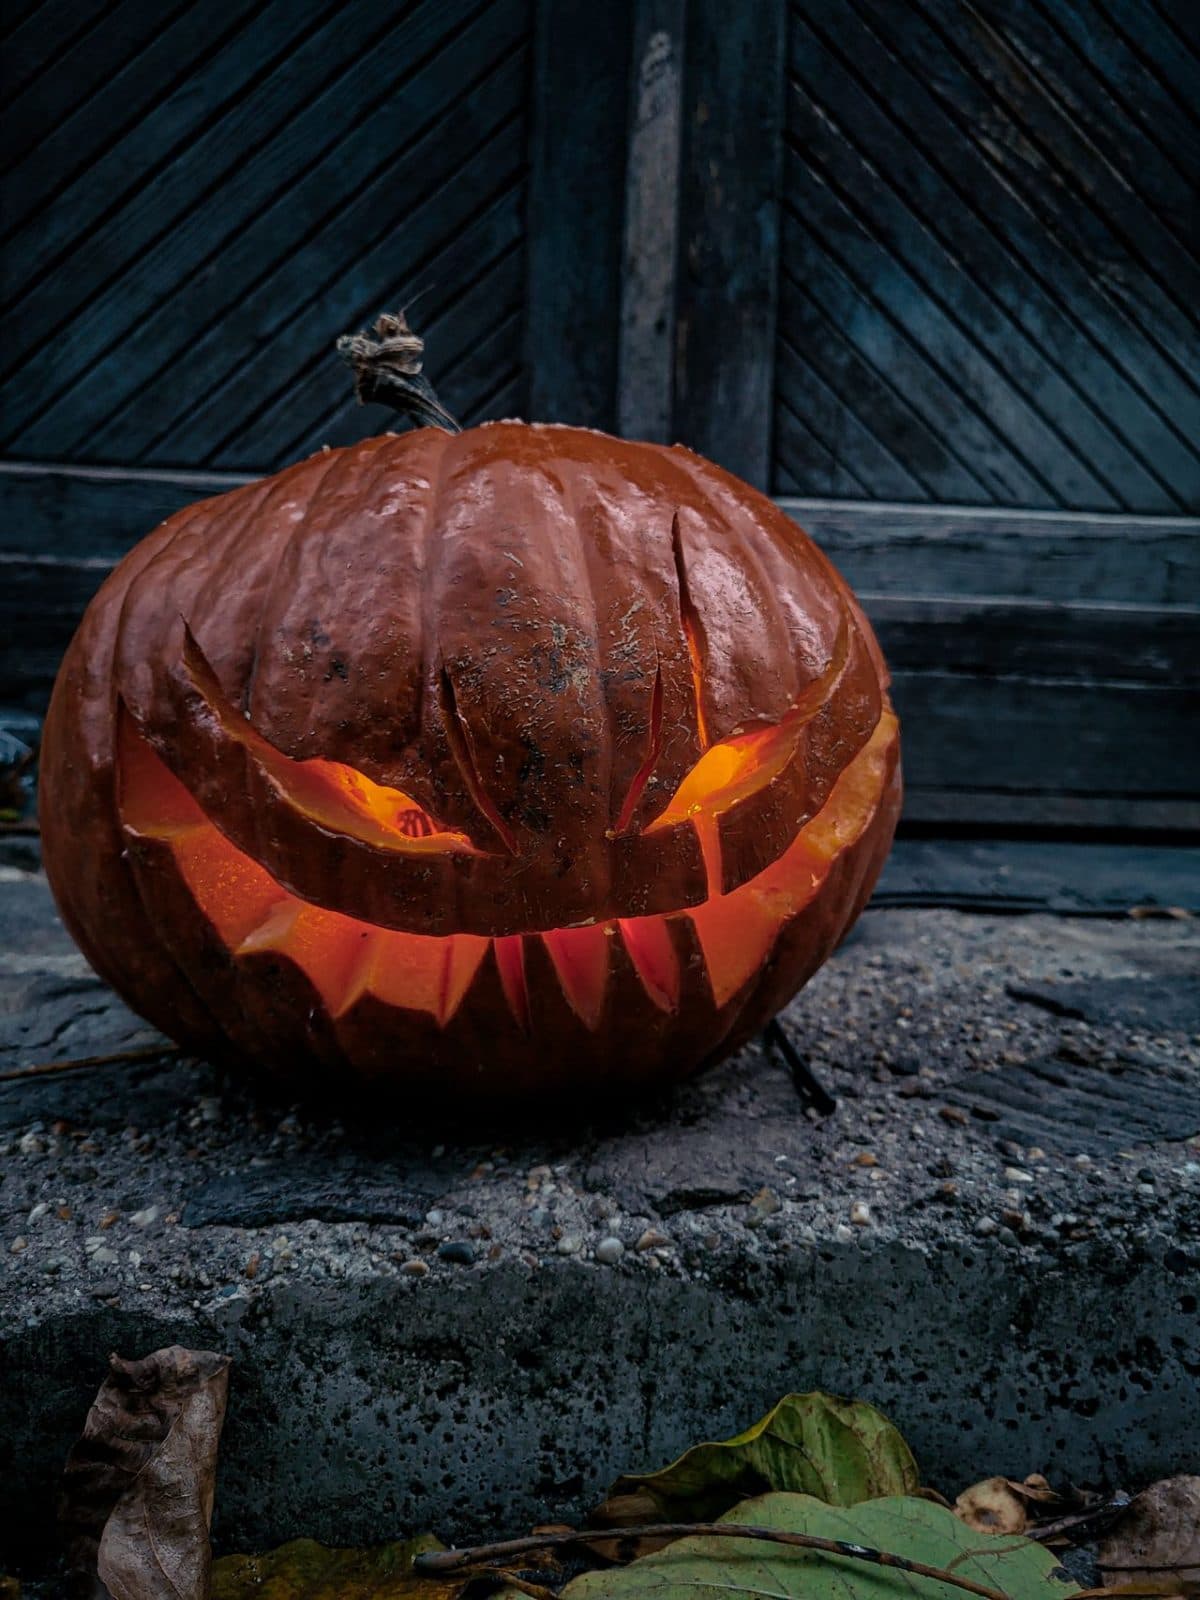
The core trick here is a jagged, toothy grin paired with slanted, angry eyes cut through for a hot glow, while the rest of the face stays as untouched skin. Keep the mouth as a series of connected triangular teeth so the row holds together as one strong shape. Plan your eyes as narrow slits that widen at the inner corners for that menacing look.
Written by PumpkinCarvingIdeas.com, inspired by @PumpkinKing's photo above. These are our suggestions, not instructions from the uploader, and this approach hasn't been tested on their exact carve.
Pick a rounded pumpkin with a smooth front face and a sturdy stem. Cut a lid from the bottom or the back instead of the top so the stem stays intact for looks. Scoop the inside until the front wall is about one inch thick. A thinner wall carves cleaner and lets more light through.
Draw or tape on your design with two slanted eyes, a small nose slit, and a wide jagged grin. Poke the outline with a pin or a poker tool along the lines. Space your tooth points evenly so the smile reads clearly from a distance. Step back and check the angles before you cut anything.
Start with the smaller shapes while the pumpkin is still strong. Use a fine carving saw and cut the slanted eye slits, keeping the inner corners a touch wider for that angry tilt. Add the little nose openings between and below the eyes. Cut slowly and let the saw do the work rather than forcing it.
Save the big mouth for last since it removes the most material. Carve the grin as one connected band, then shape the zigzag of teeth by leaving triangles of skin between the openings. Do not cut each tooth free, keep them attached top and bottom so the row stays strong. Take your time on the points so they look sharp and clean.
For the fine lines running down the face, use a shallow gouge or a lino tool to peel just the skin without going all the way through. These skin-peeled lines will glow a soft dim orange and give the face those weathered stress cracks. Keep them thin and follow the natural ridges of the pumpkin.
Drop in an LED tea light or a small battery puck, never a real candle. Set the pumpkin on a step or stone against a dark background to make the glow pop. Shoot at dusk for that moody contrast between the warm face and the shadows. A little petroleum jelly on the cut edges slows drying if you want it to last.
Check things off as you get ready.
Work on a stable surface, keep your free hand out of the cutting path, and have an adult handle sharp tools.
The smooth cheeks, forehead, and rounded top of the pumpkin stay as untouched dark skin.
The thin vertical stress lines and crack details get skin-peeled for a dim orange glow.
The slanted eyes, nose slits, and jagged toothy grin are cut through for the brightest light.
Leave each tooth attached at both the top and bottom of the mouth rather than cutting them as loose spikes. The zigzag comes from the openings between the teeth, not from freeing them. This keeps the whole grin as one strong band that will not snap.
Always carve the smaller shapes like the eyes and nose first while the pumpkin wall is still rigid. The wide mouth removes a lot of material and weakens the front face, so save it for last. Working small to large keeps everything stable.
Use a shallow gouge to peel away only the outer skin without cutting through the wall. The exposed flesh glows a soft dim orange when lit, which reads as weathered cracks. Keep the lines thin and follow the pumpkin's natural ridges for a believable look.
Changed a detail? Made it simpler? Share a photo of your version and tell the community what worked.
The best new carvings, ideas worth stealing, and how-tos for carving season. Short, seasonal, and gone by November.






Comments (0)