Halloween Pumpkin Carving Contest · Starts October 1st · $500 in prizes
← Back to ideas
@ai_concepts
Sep 14, 2026
Wyoming Rectangle State PumpkinAI
0

Wyoming Rectangle State Pumpkin

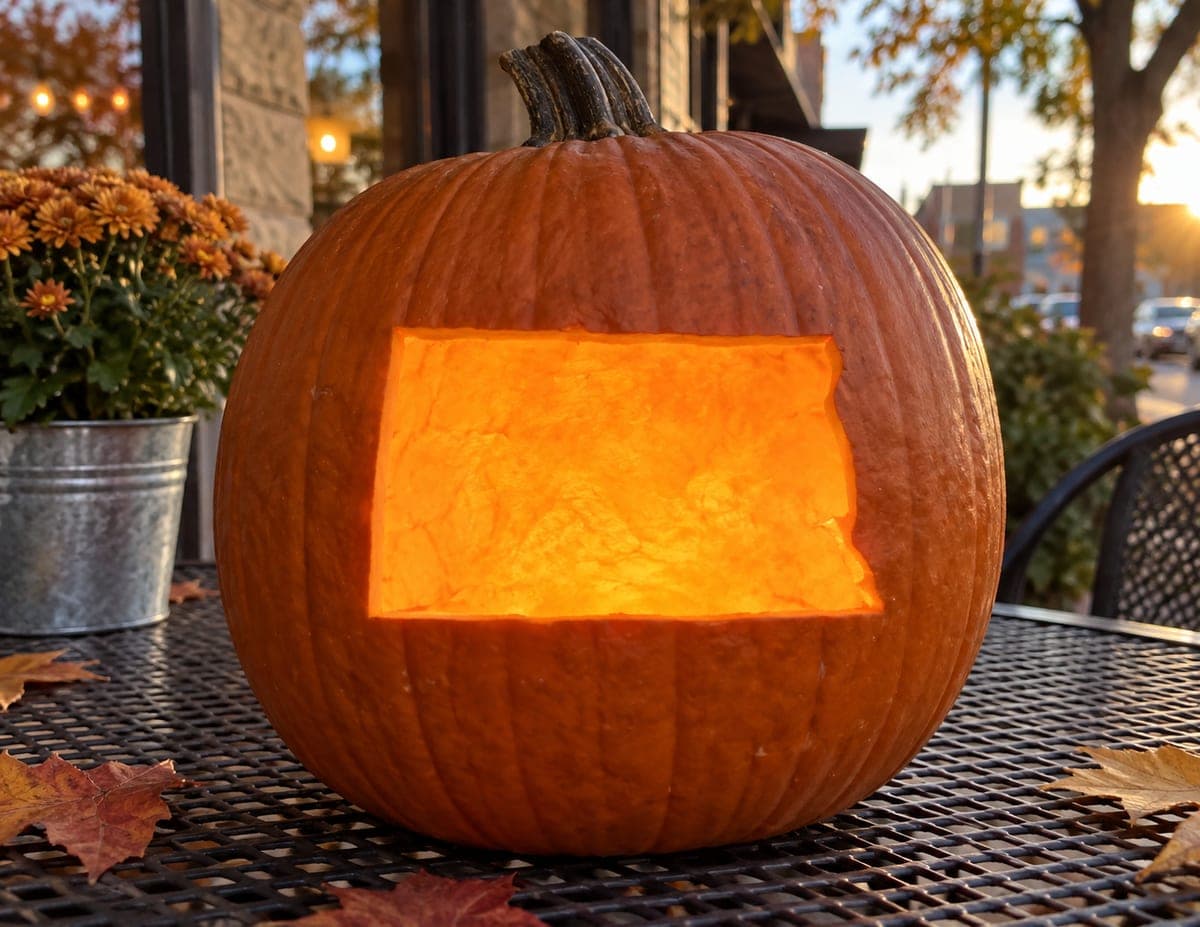
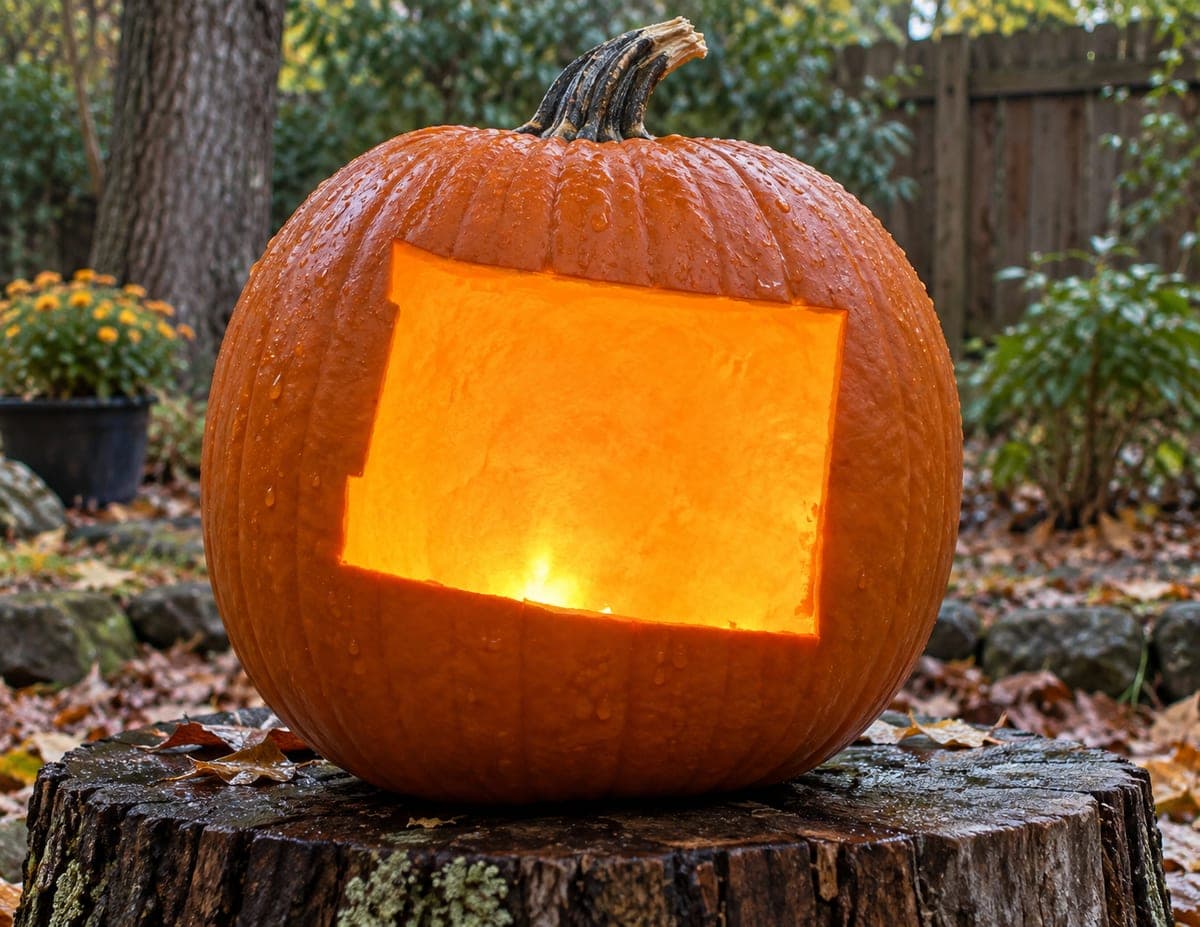
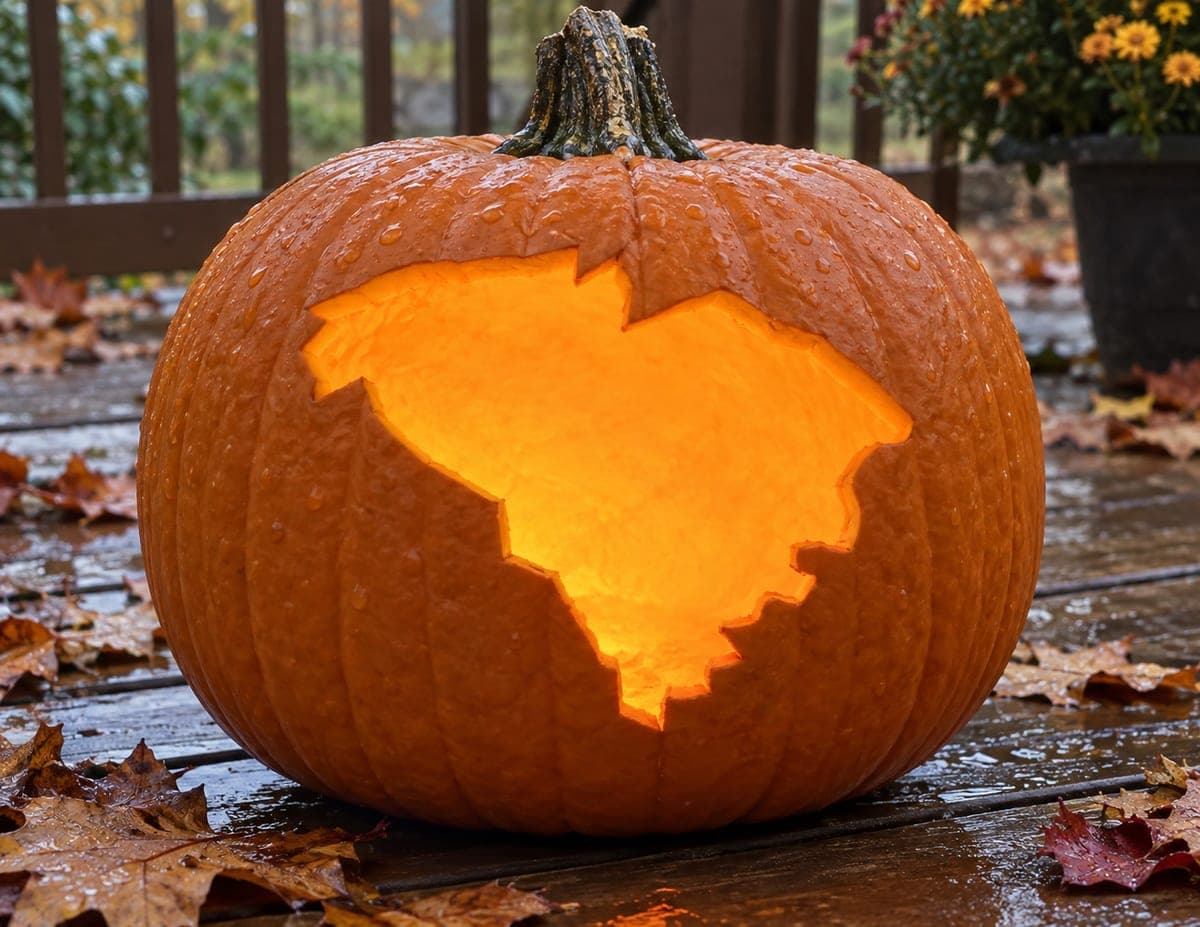
Wyoming's near-perfect rectangle is cut as a large, clean window through this backyard pumpkin, the four almost perfectly straight sides producing a bold, uncluttered glow and a bright candle flame visible at the base of the opening. The simplicity of the design makes it ideal for first-time state pumpkin carving attempts, but keeping all four sides truly straight requires scoring each line with a pin tool and a ruler before picking up the saw. Because the opening is so large relative to the pumpkin, thin the interior walls to about a half inch before cutting so the glow reaches the far corners of the rectangle.

This is an AI-generated concept image: a realistic, carvable design idea rather than a photo of a finished carve. AI concepts are always labeled and sit out the leaderboard and the contest.
No ratings yet · Sign in to rate

Comments (0)

  • No comments yet — be the first.

Save without an account. Sign in to like or comment.

Our tips for carving a similar design

The whole trick here is a single large rectangular window with four dead-straight sides, standing in for Wyoming's near-perfect rectangle shape. Because the opening is big relative to the pumpkin, the plan is to thin the front wall first so the glow reaches every corner, score all four lines with a ruler before cutting, then remove the panel last. Keep it clean and uncluttered and the light does all the work.

Written by PumpkinCarvingIdeas.com, inspired by the image above. These are our suggestions, not instructions from the uploader. This approach to the AI concept has not been tested on a real pumpkin.

From pumpkin to porch

  1. Pick the pumpkin and open the back

    Choose a rounded pumpkin with a smooth, flat area on the front big enough for your rectangle. Have an adult cut a lid or a hatch in the back, not the front, so the front face stays uninterrupted. Angle the cut inward so the lid rests without falling in. Scoop the seeds and pulp with a sturdy scraper.

  2. Thin the front wall

    Scrape the inside of the front face down to about half an inch thick where the rectangle will sit. A thinner wall lets light pass more evenly and reaches the far corners of the opening. Work slowly and check thickness by pressing gently from both sides. Stop before you break through so you still have clean skin to score.

  3. Score straight guide lines

    Draw the rectangle on the front with a washable marker, using a ruler to keep all four sides straight. Then trace each line firmly with a pin tool or the point of a poker so the outline is pressed into the skin. Straight scoring now is what separates a crisp state shape from a wobbly box. Step back and check the rectangle looks level before you pick up a blade.

  4. Cut the window last

    With the scored lines as your track, have an adult saw slowly along each side using a small carving saw. Keep the blade perpendicular and let the tool do the work instead of forcing it. Cut all four sides before pushing the panel out, and support the piece with your free hand so it releases cleanly rather than tearing a corner.

  5. Clean the edges

    Run your saw or a small knife back along each cut to square up the corners and shave off any ragged bits. A crisp, sharp edge reads much better than a fuzzy one on such a simple design. Wipe the inside walls smooth so no stray pulp casts shadows across the glow.

  6. Light it and photograph

    Set a battery LED puck or a string of warm LEDs inside, resting one near the base so the brightest point sits at the bottom of the opening. Skip real candles since the large opening and thin wall dry out fast. Photograph at dusk against a dark background so the rectangle floats as a bold panel of light. Prop the lid loosely to let heat escape.

Gather your supplies

Check things off as you get ready.

Work on a stable surface, keep your free hand out of the cutting path, and have an adult handle sharp tools.

Three levels of light

  • Leave intact

    The entire outer skin of the pumpkin stays untouched and dark, framing the shape.

  • Peel & shade

    Optional: lightly skin a thin border just outside the rectangle for a soft halo, though the classic look keeps this minimal.

  • Cut through

    The full rectangle is cut clean through for the bold, bright window of light.

Learn the carving basics

Before you start cutting

How do I keep all four sides truly straight?

Draw and score every line against a ruler before you cut, then follow the scored groove with the saw. The pressed line acts as a track that keeps the blade honest. Check the rectangle is level with your eye before cutting so it does not tilt.

The opening is so big. Will the pumpkin still hold its shape?

A single clean rectangle is structurally fine as long as you leave a generous margin of skin all the way around. Do not cut the window right up to the edges of the pumpkin. Keeping the back lid intact also helps the walls stay firm.

Why thin the wall before cutting instead of after?

Thinning the front to about half an inch first lets the glow spread evenly to the far corners of the opening. It is also much easier to scrape a solid wall than to reach around a fragile edge later. Do the thinning while the face is still whole, then score and cut.

Your take belongs here, too.

Changed a detail? Made it simpler? Share a photo of your version and tell the community what worked.

Share your pumpkin

More pumpkins like this

You've reached the end · 8 pumpkins
The Patch Report

Fresh pumpkins, in your inbox.

The best new carvings, ideas worth stealing, and how-tos for carving season. Short, seasonal, and gone by November.

A short email during carving season. Unsubscribe anytime. See our privacy policy.