Similar to This
View all stencils →About this stencil
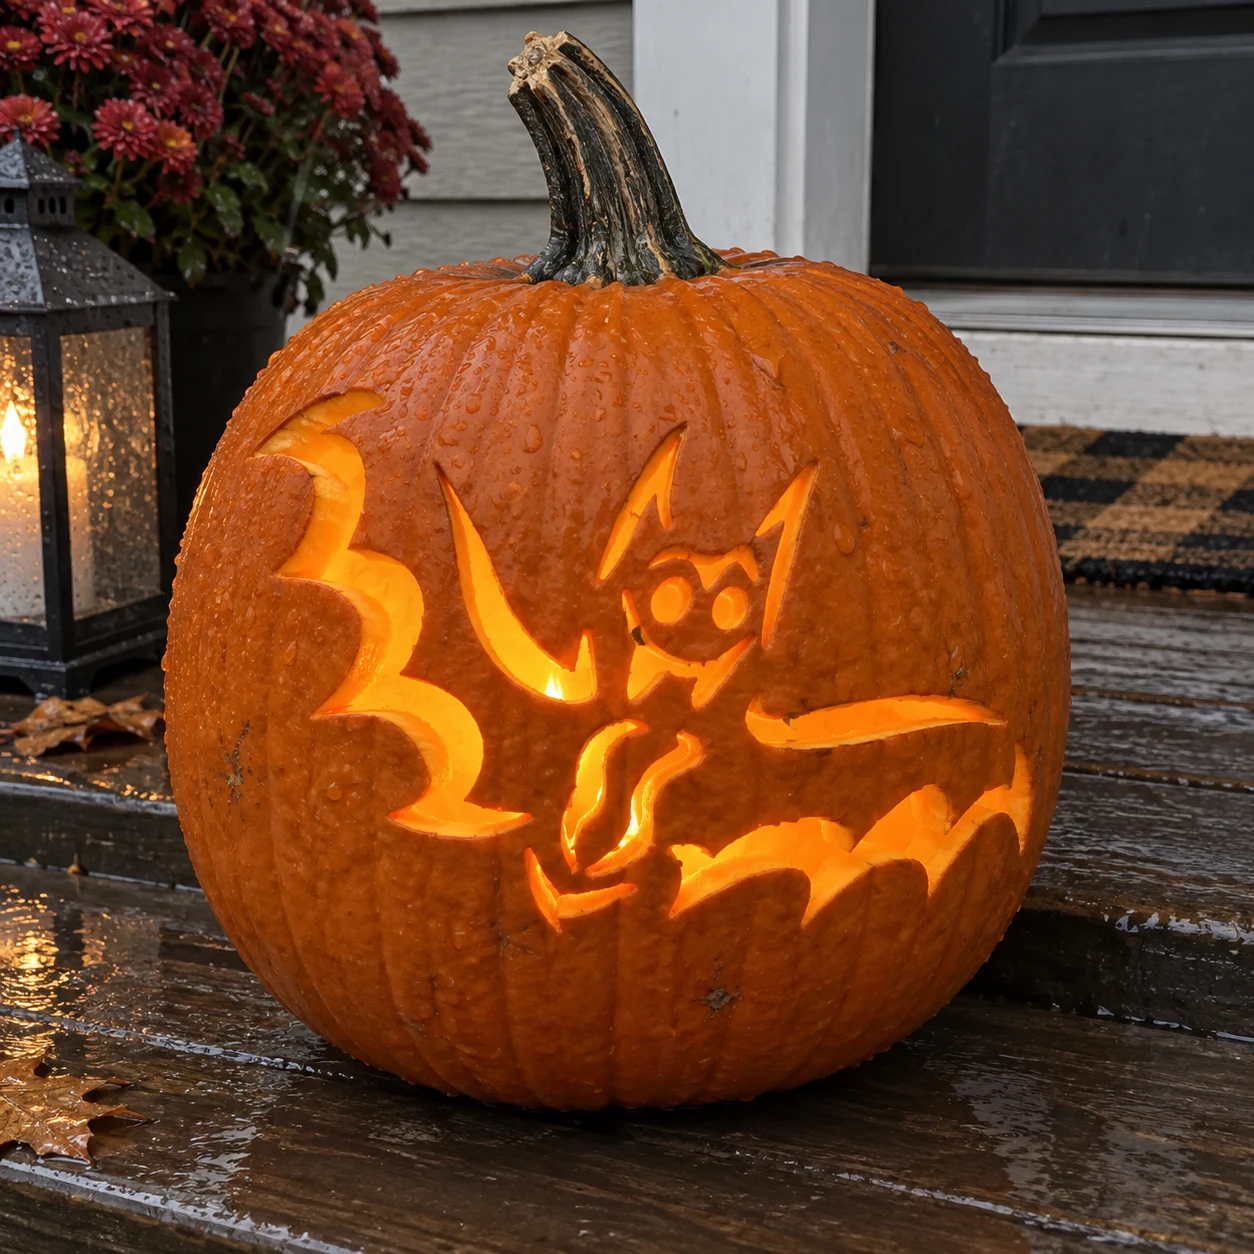
A cartoon bat with a round face, large round eyes, tiny fangs, and dramatically swept wings stretched wide is caught in mid-flight on this easy bat pumpkin stencil. The wing spans reach almost to the pumpkin's edges and are cut through as large open areas, while the small round face with its eye circles and a smile-line grin stays solid at the center. Cut the big left wing first, then the right, before tackling the face ring; this order keeps the face island stable until the very end. This design is rated Beginner-friendly and takes most carvers around 30 minutes from trace to glow. Great for kids and first-timers. Big shapes, short cuts.
Pumpkin size guide
- 🎃 Small (5–7") — print at 80%
- 🎃 Medium (7–10") — print at 100% (recommended)
- 🎃 Large (11–13") — print at 130%
- 🎃 Giant (14"+) — print at 150% on tabloid paper
Frequently asked questions
Can I resize this stencil?▾
Yes. The PDF is vector so it scales cleanly. Print at 100% for a 7–10 inch pumpkin, 130% for 11–13 inch, or 150% for a giant. Use your printer's "Fit to page" or "Custom scale" setting.
What kind of paper works best?▾
Standard 20 lb letter or A4 printer paper is fine. Heavier paper is harder to bend around the pumpkin curve. If your printer supports it, set the quality to 'best' so the lines are crisp.
How long will the carved pumpkin last?▾
Usually 5–10 days. Coat all cut surfaces with petroleum jelly and store the pumpkin somewhere cool overnight. Avoid direct sun. Battery tea lights produce no heat and double the lifespan.
Can I sell pumpkins carved with this stencil?▾
Yes, the carved pumpkin you make is yours. The license covers personal and small-scale commercial carving (selling carved pumpkins, photographing them, posting on social). You may not resell the PDF file itself.
What if my printer doesn't print the whole stencil?▾
Set 'Page scaling' to 'Fit' in the print dialog and uncheck 'Auto-rotate'. If it still cuts off, the design includes 0.25" of safe-area margin so a small crop won't ruin it.
How to carve this stencil
- 1Print it
Download the PDF and print at 100% scale on letter or A4 paper.
- 2Prep the pumpkin
Cut the lid at an angle, scoop the guts, thin the wall to ~1 inch.
- 3Tape it on
Snip darts in the paper so it lies flat against the curve.
- 4Transfer the design
Poke along every line — about one dot every 1/8 inch.
- 5Carve it
Connect the dots with short straight cuts. Center first, work outward.
- 6Light it up
Drop in a battery tea light and you're done.
Tools you'll need
For a beginner-friendly carve like this you'll want a paring knife, spoon / scoop, marker, and tea light. Here's the kit we reach for — start with whatever you already own.

Elmchee Pumpkin Carving Kit
13-piece kit with carrying case
Saws for the larger cutouts, plus a scoop for hollowing. Covers both jobs in one kit.
View on Amazon ↗
Speedball 4131 Lino Cutter Set
Handle + 5 interchangeable cutters
Interchangeable cutters for peeling and shading the face. Useful for the finer details.
View on Amazon ↗
Homemory LED Tea Lights
24-pack of battery-operated lights
Battery-operated, flickering lights for a candle-like glow inside your finished pumpkin.
View on Amazon ↗
Community Pumpkin Carving Ideas
Carving ideas that use stencils like this one.
Related stencils
Carvers who liked this one also downloaded these.
- Beginner-friendly
Snarling Bat Pumpkin Stencil
A wide-winged bat stretches nearly edge to edge in this easy bat pumpkin stencil, its wing panels divided by bold vein lines and a snarling cartoon face centered in the body. The wings are the large pierced areas that glow brightest, while the vein lines and the face details remain as solid orange strips inside the cutout. Carve the small pointed fangs in the face before tackling the big wing panels, so the blade has firm pumpkin wall support when making those fine cuts.
- Advanced
Flying Bats Pumpkin Stencil
Five bats in mid-flight are scattered across the pumpkin face in this hard pumpkin stencil, ranging from a large swooping bat in the upper left down to a small one at the lower right, each drawn with jagged, pointed wing edges and tiny body details. All five bats are cut through as separate open shapes, so candlelight spills through each one individually and the pumpkin reads as a night sky full of swooping shadows. Cut the smallest bottom-right bat first while the pumpkin surface is fully rigid, then work upward to the largest.
- Advanced
Jolly Roger Pumpkin Stencil
A classic Jolly Roger composition fills this hard pumpkin stencil: a large tricorn pirate hat at the top with an X emblem on its band, a grinning skull face below with oval eyes and a row of small separated teeth, and two crossed cutlass swords extending diagonally from behind the skull. The swords are cut as wide open shapes that frame the face, while the skull's eye sockets and the gaps between each tooth are the smallest, most fragile details. Carve the broad sword shapes first to release the large areas of pumpkin skin, then work inward to the fine tooth gaps using a narrow pointed blade.
- Advanced
Three Bats Pumpkin Stencil
Three snarling bats in different sizes swoop across this bats pumpkin stencil: one large bat dominates the lower center with wide jagged wings and a gnashing face, a medium bat flies mid-right, and a small bat trails upper-left, all fully pierced through. The graduated scale creates depth on the jack-o-lantern face, and because the large bat's wing tips are long and thin, cut those points last after the broad wing voids are already removed to avoid snapping them during the heavy cutting.
- Beginner-friendly
Cute Bat Pumpkin Stencil
A chubby cartoon bat with pointed ears, large round hollow eyes, a small open mouth with two fangs, and wide jagged wings spread in a V-shape makes up this friendly easy bat pumpkin stencil. The wings, eyes, and mouth are all pierced through, leaving the round body as a solid center island held by the wing-edge bridges. To keep the central body from drooping inward once the wings are cut, carve each wing in two halves and leave a thin skin tab at the wingtip notches until the very last cut.