Similar to This
View all stencils →About this stencil
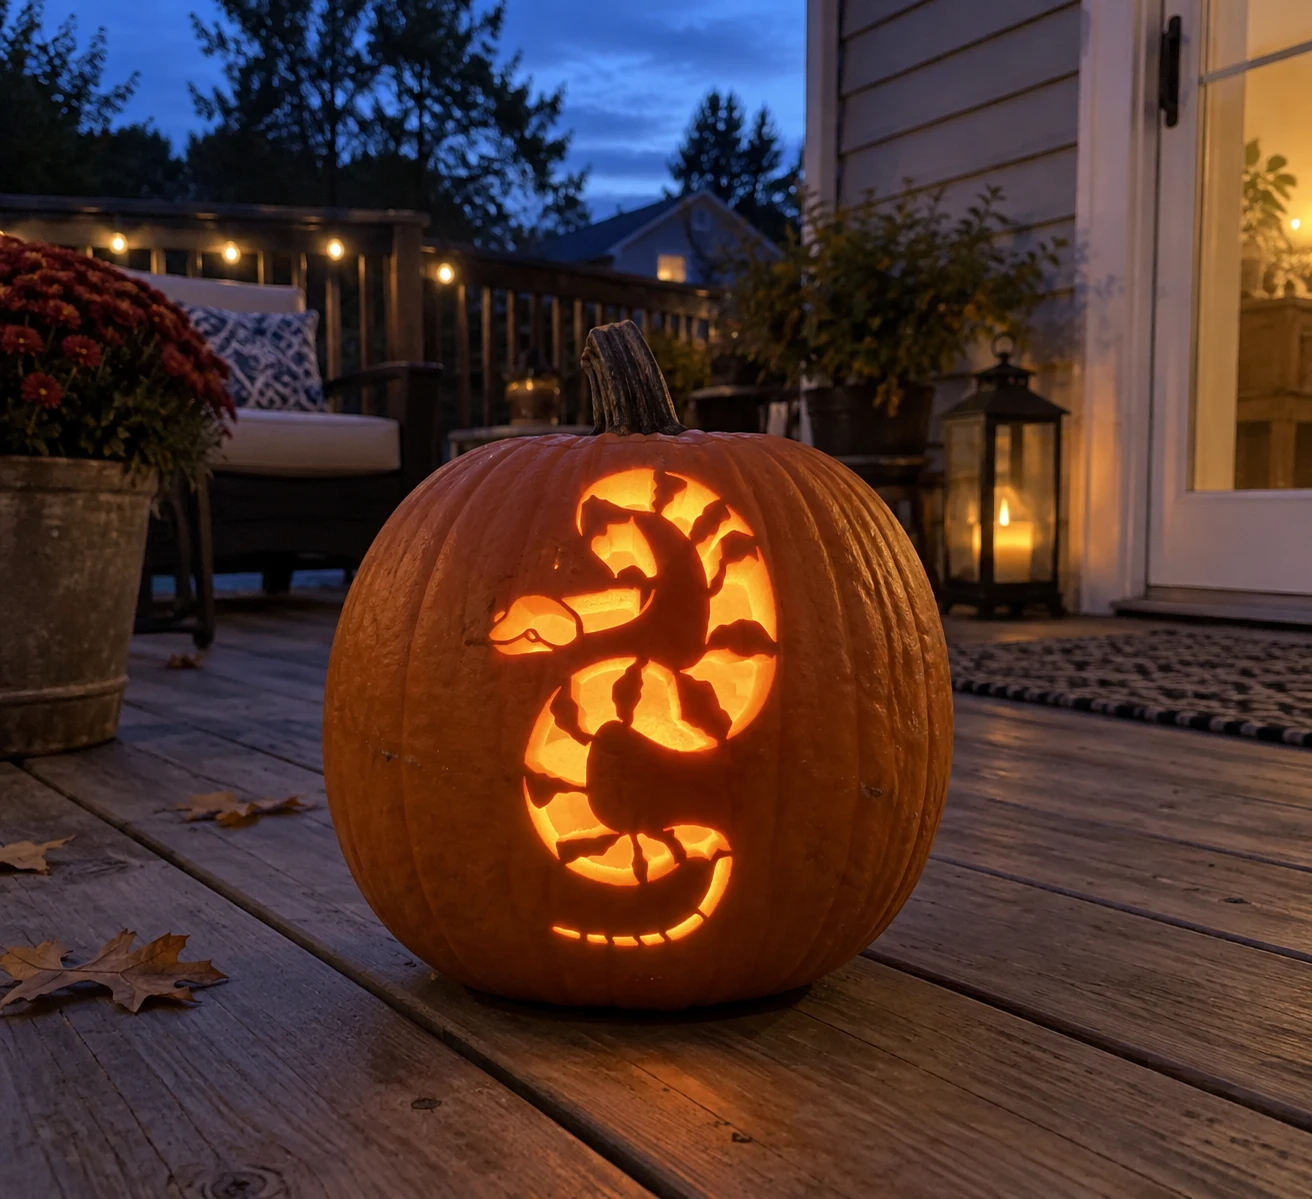
A coiled snake in an S-curve fills this hard pumpkin stencil, its body broken into roughly twenty irregularly shaped scale-pattern segments separated by thin cut lines, with a small triangular head visible at the upper left and the tail tapering to a narrow point at the bottom. When lit, the gaps between scale segments glow white-hot against the orange pumpkin bridges, making the snake's banded pattern pop. Start cutting at the tail tip, where the segments are smallest and most fragile, then work up the body toward the larger mid-coil pieces. This design is rated Advanced and takes most carvers around 150 minutes from trace to glow. Multi-layer cuts with skin-peel shading. Plan your cuts first.
Pumpkin size guide
- 🎃 Small (5–7") — print at 80%
- 🎃 Medium (7–10") — print at 100% (recommended)
- 🎃 Large (11–13") — print at 130%
- 🎃 Giant (14"+) — print at 150% on tabloid paper
Frequently asked questions
Can I resize this stencil?▾
Yes. The PDF is vector so it scales cleanly. Print at 100% for a 7–10 inch pumpkin, 130% for 11–13 inch, or 150% for a giant. Use your printer's "Fit to page" or "Custom scale" setting.
What kind of paper works best?▾
Standard 20 lb letter or A4 printer paper is fine. Heavier paper is harder to bend around the pumpkin curve. If your printer supports it, set the quality to 'best' so the lines are crisp.
How long will the carved pumpkin last?▾
Usually 5–10 days. Coat all cut surfaces with petroleum jelly and store the pumpkin somewhere cool overnight. Avoid direct sun. Battery tea lights produce no heat and double the lifespan.
Can I sell pumpkins carved with this stencil?▾
Yes, the carved pumpkin you make is yours. The license covers personal and small-scale commercial carving (selling carved pumpkins, photographing them, posting on social). You may not resell the PDF file itself.
What if my printer doesn't print the whole stencil?▾
Set 'Page scaling' to 'Fit' in the print dialog and uncheck 'Auto-rotate'. If it still cuts off, the design includes 0.25" of safe-area margin so a small crop won't ruin it.
How to carve this stencil
- Scoop pumpkin walls to 3/4 inch throughout to handle the many narrow scale cuts.
- Transfer all segment outlines carefully with a poking tool, paying attention to the tail tip.
- Cut the narrow tail-tip segments first; they are the smallest and most likely to tear if left unsupported.
- Work up the lower coil, cutting each scale piece individually and leaving the surrounding bridges intact.
- Carve the upper body and the small head last; the head has the finest detail and benefits from a fully stable pumpkin at that stage.
- A narrow-blade detail knife works better than a standard carving saw for the tight gaps between scale segments.
Tools you'll need
For a advanced carve like this you'll want a linoleum cutter set, x-acto knife, peel tool, and pin transfer wheel. Here's the kit we reach for — start with whatever you already own.

Elmchee Pumpkin Carving Kit
13-piece kit with carrying case
Saws for the larger cutouts, plus a scoop for hollowing. Covers both jobs in one kit.
View on Amazon ↗
Speedball 4131 Lino Cutter Set
Handle + 5 interchangeable cutters
Interchangeable cutters for peeling and shading the face. Useful for the finer details.
View on Amazon ↗
Homemory LED Tea Lights
24-pack of battery-operated lights
Battery-operated, flickering lights for a candle-like glow inside your finished pumpkin.
View on Amazon ↗
Community Pumpkin Carving Ideas
Carving ideas that use stencils like this one.
Related stencils
Carvers who liked this one also downloaded these.
- Advanced
Snarling Wolf Face Pumpkin Stencil
A wolf face stares straight forward in this hard pumpkin stencil, its large triangular ears open and pierced, its almond-shaped eyes cut through, and its muzzle parted to reveal a fanged open mouth. The fur around the face is rendered as jagged zigzag edges, and the nose bridge and cheek ruff details are a mix of solid and cut sections that read as fur texture when lit. Carve the two thin lightning-bolt-shaped brow marks above the eyes before removing the larger eye cutouts, as they are the most fragile narrow strips in the design.
- Beginner-friendly
Turtle Pumpkin Stencil
A side-view turtle with a segmented shell is the subject of this easy pumpkin stencil: the domed carapace is divided into roughly twelve polygonal scute cutouts separated by thin pumpkin-skin ridges, the head extends forward on a curved neck with a small circular eye detail, and four stubby legs and a short tail complete the silhouette. When lit, the shell glows as a mosaic of separate panels. Cut the smaller head and eye section before tackling the large shell scutes, since the head area has less surrounding support once the shell pieces are removed.
- Advanced
Sea Turtle Pumpkin Stencil
A sea turtle viewed from above fills this pumpkin stencil, with four swept-back flippers and a dome-shaped shell covered in roughly twenty interlocking polygonal plates, each plate a separate cut piece separated by thin lines of uncut pumpkin. The resulting jack-o-lantern glows through every shell segment individually, mapping out the turtle's scute pattern in orange-framed light. Cut the smallest outer-edge shell plates first since they have the least surrounding support, then work inward toward the larger central scutes.
- Expert / Pro
Lion Head Pumpkin Stencil
A majestic lion's head fills this pumpkin stencil from edge to edge, its full flowing mane rendered in sweeping curved cuts that radiate outward like flames, with the face centered and features defined by pierced nostrils, brow lines, and an open lower jaw. Lit from inside, the solid orange pumpkin forms the mane and facial structure while the cut gaps create the dramatic shading between mane locks. Begin carving in the outermost mane tips, where cuts are shortest, and work inward toward the face so the central wall remains stable while you navigate the most intricate facial detail cuts.
- Beginner-friendly
Rat Pumpkin Stencil
A rat stands upright on its hind legs in profile, nose tilted upward and thin whiskers radiating from its snout, with a long curved tail sweeping forward along the base. The entire silhouette is cut away as a single open shape, so candlelight throws a clean, solid rat shadow on surrounding surfaces. Because the tail curls close to the body at one point, make sure to cut that gap all the way through without nicking the connecting pumpkin flesh above it.
- Advanced
Great White Shark Pumpkin Stencil
A great white shark lunges in profile across this animal pumpkin stencil, jaws open to reveal a row of serrated teeth, a round dot eye, a prominent dorsal fin, a pair of pectoral fins mid-body, and a forked tail sweeping back to the right. The body interior is cut away in a large open section while the teeth, fins, and eye detail stay as solid bridges of pumpkin skin, letting candlelight define the shark's menacing outline from within. Cut the mouth and individual tooth points before opening the large body cavity so the head stays anchored while you work the fine detail.